


1 相关技术
- 后端:Spring Boot + Mybatis-Plus
- 核心依赖:web3j
- 智能合约:solidity
- 私链环境:ganache-cli
2 环境搭建
2.1 安装 Node.js 和 npm
用于管理依赖。
2.2 安装 Ganache
// 安装 Ganache
npm install -g ganache-cli
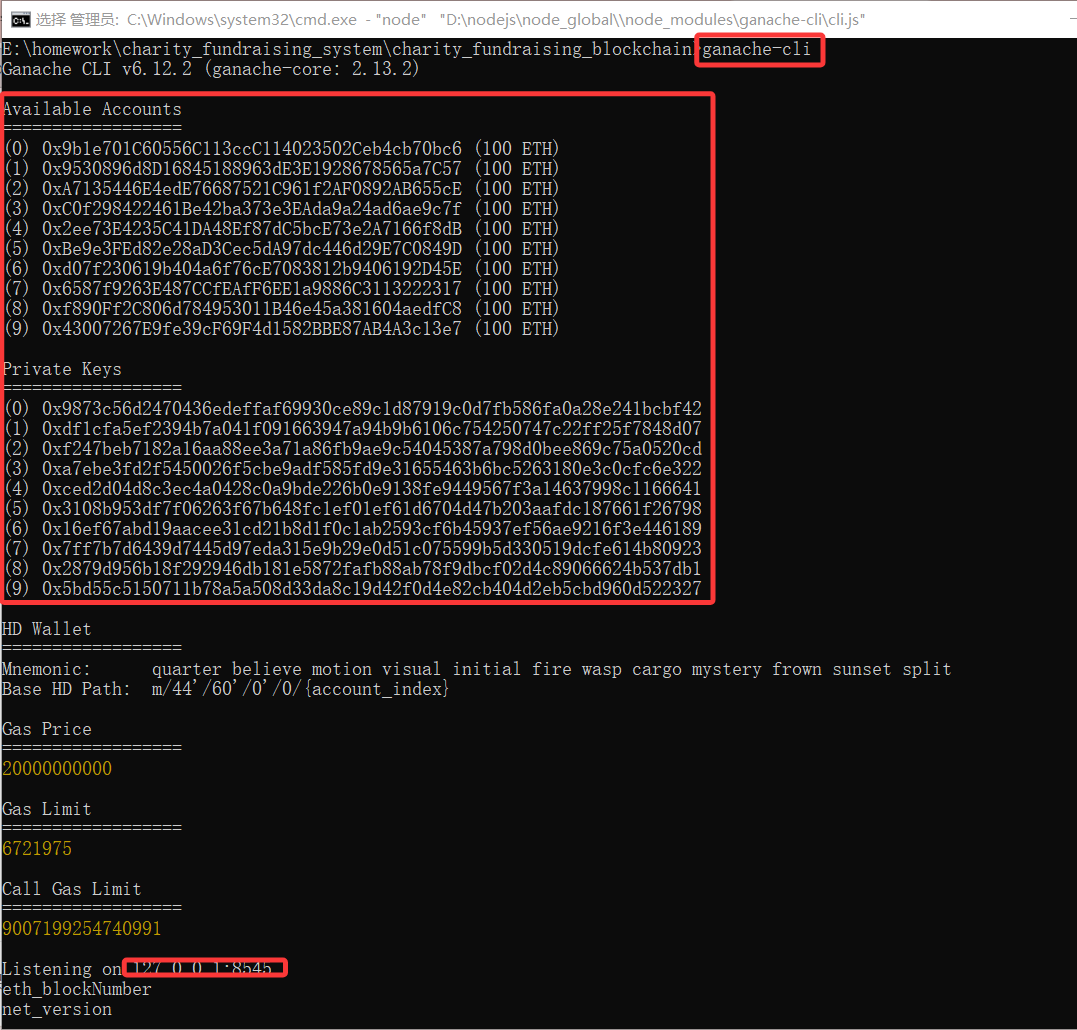
// 启动 Ganache 私链环境
ganache-cli启动成功后会出现本地以太坊网络的模拟环境,以及多个预置的账户和私钥,如下图:
2.3 安装 Truffle 和初始化项目
// 安装 Truffle
npm install -g truffle
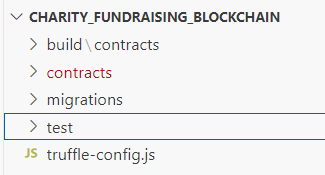
// 创建 Truffle 项目
truffle init会在当前目录下生成一个标准的Truffle项目结构,包括 contracts、migrations 和 text 等文件夹,如下图:
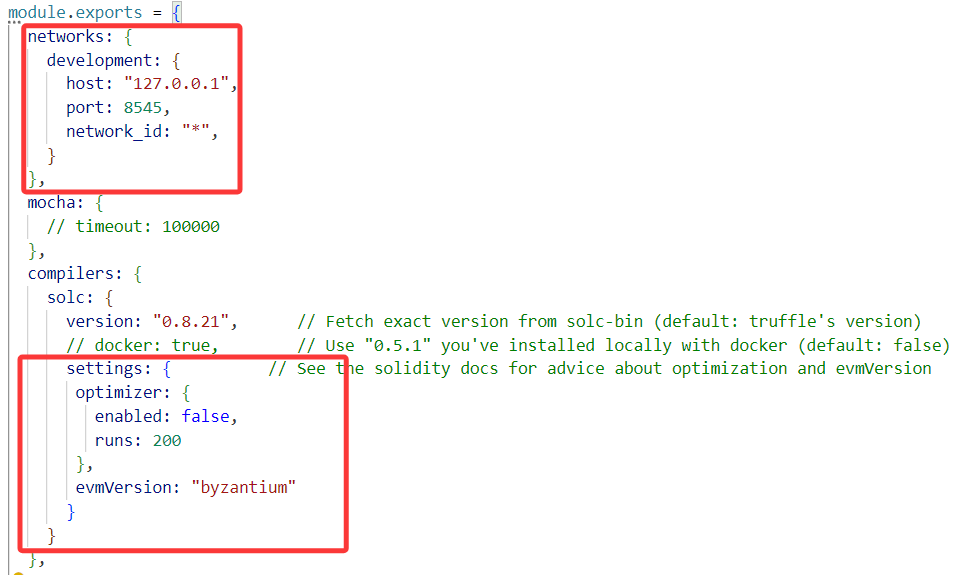
接着在 truffle-config.js 配置刚刚的私链环境等
2.4 编写、部署智能合约
在 contracts 文件夹下,建立一个 HelloWorld.sol 文件,并编写如下内容:
// SPDX-License-Identifier: MIT
pragma solidity ^0.8.21;

contract HelloWorld {
    string private message;

    // 构造函数,初始化消息
    constructor(string memory _message) {
        message = _message;
    }

    // 获取当前消息
    function getMessage() public view returns (string memory) {
        return message;
    }

    // 更新消息
    function setMessage(string memory _message) public {
        message = _message;
    }
}
在 migrations 文件夹下,创建一个 2_deploy_contracts.js 文件,并编写如下内容:
const HelloWorld = artifacts.require("HelloWorld");

module.exports = function (deployer) {
    const message = "Hello, Blockchain!";
    deployer.deploy(HelloWorld, message);
};
在命令行输入以下命令来部署合约:
// 编译所有智能合约
truffle compile
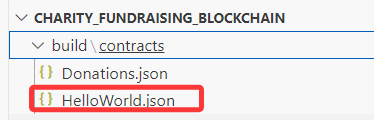
// 将智能合约部署到指定的区块链网络
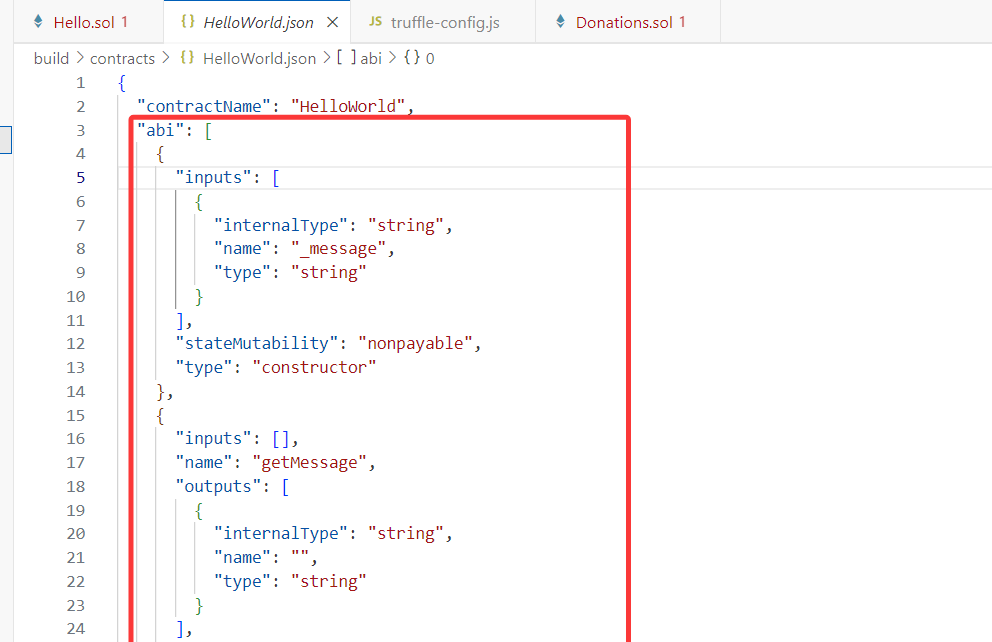
truffle migrate操作完后会发现 bulid.contracts 文件夹下会生成一个 HelloWorld.json 文件:
2.5 在 Spring Boot 中与智能合约交互
建立完 Spring Boot 项目后,在 pom.xml 文件中,配置 web3j 依赖和插件
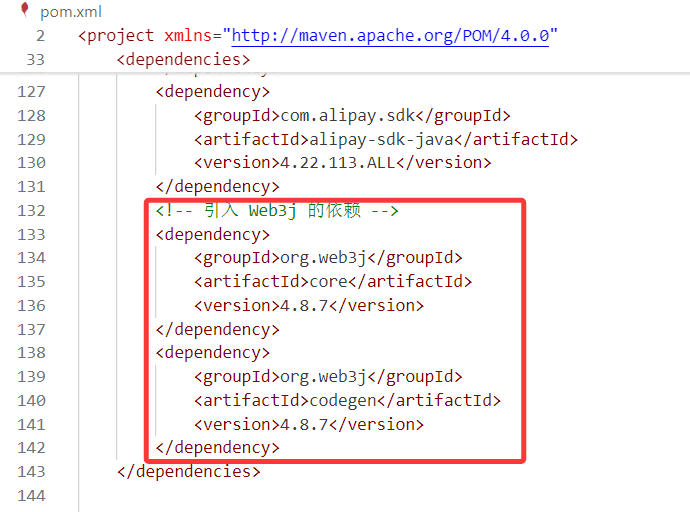
<!-- 引入 Web3j 的依赖 -->
<dependency>
<groupId>org.web3j</groupId>
<artifactId>core</artifactId>
<version>4.8.7</version>
</dependency>
<dependency>
<groupId>org.web3j</groupId>
<artifactId>codegen</artifactId>
<version>4.8.7</version>
</dependency>
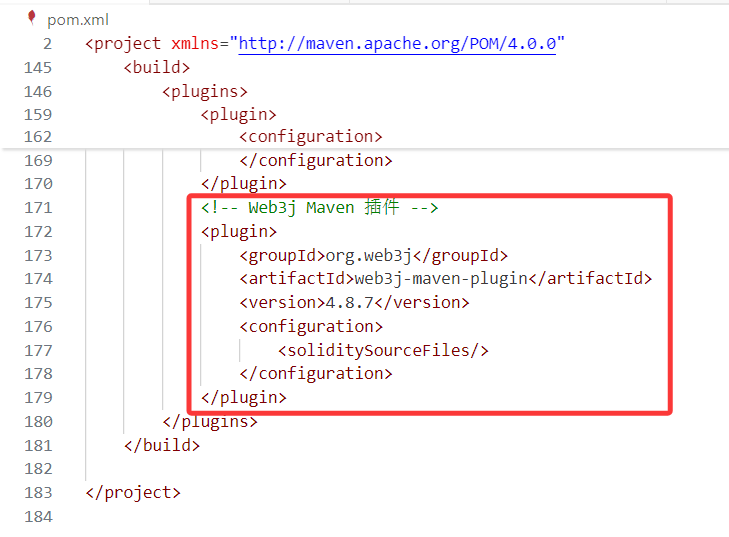
<!-- Web3j Maven 插件 -->
<plugin>
<groupId>org.web3j</groupId>
<artifactId>web3j-maven-plugin</artifactId>
<version>4.8.7</version>
<configuration>
<soliditySourceFiles/>
</configuration>
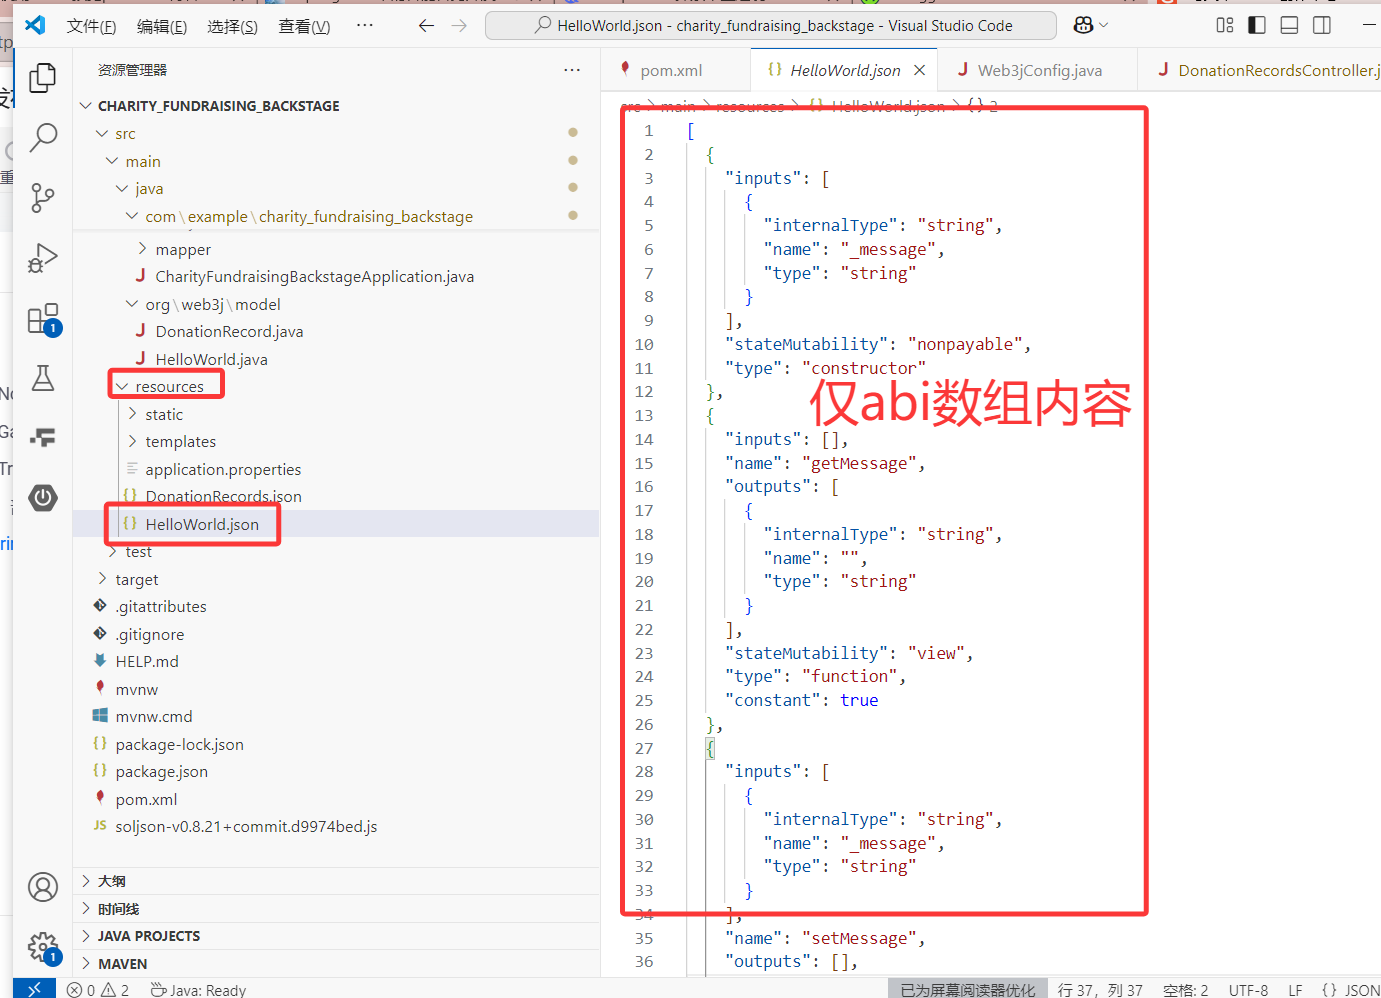
</plugin>将刚刚智能合约生成的 json 文件中的 abi 部分复制下来,并在 SpringBoot 项目的 resources 文件下创建一个 HelloWorld.json 文件,将内容粘贴进去:
在命令行输入命令,会在 src.main.java.org.web3j.model 路径下生成 Java 包装类:
mvnw web3j:generate-sources
或者
mvn web3j:generate-sources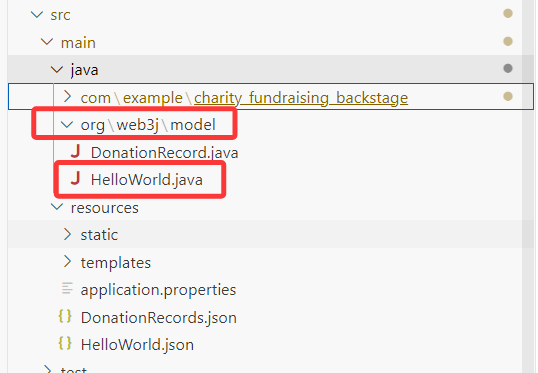
在 Spring Boot 项目的 config 文件夹下初始化 web3j 实例,用于与以太坊节点进行交互:
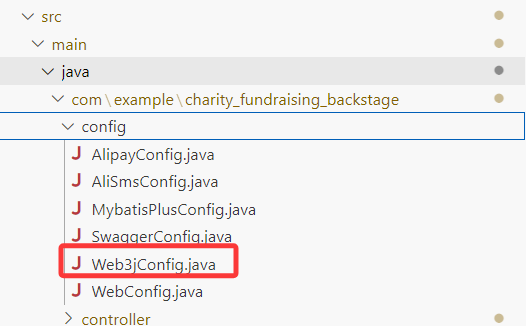
package com.example.charity_fundraising_backstage.config;

import org.springframework.context.annotation.Bean;
import org.springframework.context.annotation.Configuration;
import org.web3j.protocol.Web3j;
import org.web3j.protocol.http.HttpService;

@Configuration
public class Web3jConfig {
    @Bean
    public Web3j web3j() {
        return Web3j.build(new HttpService("http://127.0.0.1:8545")); // 就是刚刚 ganache-cli的私链地址
    }
}
然后在控制器 controller 文件中使用智能合约即可,需要实例化如下对象:
@Autowired
private Web3j web3j;
private static final BigInteger GAS_PRICE = BigInteger.valueOf(2000000000L); // 执行智能合约 gas 价格
private static final BigInteger GAS_LIMIT = BigInteger.valueOf(4000000L); // 执行智能合约 gas 限制
然后在方法内部,编写如下内容:
// 以太坊账户凭证,即前面在命令行开启私链环境后生成的十个对应的 Available Accounts 之一
Credentials credentials = Credentials.create("0x......cb");
// 创建 Gas 提供者
ContractGasProvider gasProvider = new StaticGasProvider(GAS_PRICE, GAS_LIMIT);
// 实例化合约
DonationRecord donationRecordsContract = DonationRecord.load(
    "0x......52", // Available Accounts 对应的 Private Keys
    web3j,
    credentials,
    gasProvider
);
// 调用智能合约的方法
RemoteFunctionCall<TransactionReceipt> transactionReceiptRemoteFunctionCall = donationRecordsContract.donate(
    // 我这里是智能合约接收了三个参数,我传过去
    // 需要根据自己的智能合约进行变通
    donationRecords.getDonationRecordsId(),
    donationRecords.getDonatorId(),
    BigInteger.valueOf(donationRecords.getDonationAmount())
);
TransactionReceipt transactionReceipt = transactionReceiptRemoteFunctionCall.send();


 438
438

 被折叠的 条评论
为什么被折叠?
被折叠的 条评论
为什么被折叠?
 到【灌水乐园】发言


