


1.查看虚拟环境
conda env list
2.创建虚拟环境
conda create -n your_env_name python==3.9其中your_env_name为你命名的新环境名,python版本可自行挑选。
3.激活虚拟环境
conda activate your_env_name环境激活后才能使用pip install 或者conda install 将相应的库安装到该环境中。
4.退出虚拟环境
conda deactivate your_env_name5.删除虚拟环境
conda remove -n your_env_name --all6.将虚拟环境提供给jupyter使用
先进入base环境(anaconda安装时自带的基环境):
conda activate base在base环境中安装名为nb_conda_kernels的第三方库,安装了这个第三方库后,其他安装了ipykernel的虚拟环境可以被自动的打包成jupyter可使用的kernel(内核):
pip install nb_conda_kernels进入your_env_name(你需要提供给jupyter使用的环境):
conda activate your_env_name在your_env_name环境安装名为ipykernel的第三方库:
pip install ipykernel这时打开jupyter notebook:
jupyter notebook注意:安装anaconda时一般已经安装过jupyter notebook了,所以不要在其他虚拟环境安装jupyter notebook,这样在任何环境下打开jupyter notebook打开的都是anaconda的jupyter。
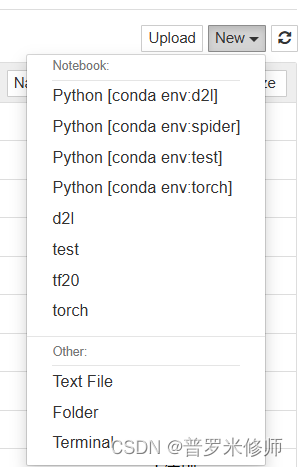
打开后会跳出一个连接在本地上的网页,这就是jupyter notebook,在右侧新建文件可以看到Notebook一栏显示了你可以使用的虚拟环境,其中上面4个环境就是nb_conda_kernels库自动管理添加的,下面4个环境是使用其他方式添加的,不如nb_conda_kernels简单。点击这8个环境中的任意一个,就会创建一个新的ipynb后缀的文件。


 208
208

 被折叠的 条评论
为什么被折叠?
被折叠的 条评论
为什么被折叠?
 到【灌水乐园】发言


