


SpringSecurity简介:
Spring Security是一个高度自定义的安全框架。利用Spring IoC/DI和AOP功能,为系统提供了声明式安全访问控制功能,减少了为系统安全而编写大量重复代码的工作。正如你可能知道的关于安全方面的两个主要区域是“认证”和“授权”(或者访问控制)。这两点也是Spring Security重要核心功能。“认证”,是建立一个他声明的主体的过程(一个“主体”一般是指用户,设备或一些可以在你的应用程序中执行动作的其他系统),通俗点说就是系统认为用户是否能登录。“授权”指确定一个主体是否允许在你的应用程序执行一个动作的过程。通俗点讲就是系统判断用户是否有权限去做某些事情。
准备阶段
需要的依赖:
        <dependency>
            <groupId>org.springframework.boot</groupId>
            <artifactId>spring-boot-starter-web</artifactId>
        </dependency>
        <!--lombk-->
        <dependency>
            <groupId>org.projectlombok</groupId>
            <artifactId>lombok</artifactId>
            <optional>true</optional>
        </dependency>
        <!--junit-->
        <dependency>
            <groupId>org.springframework.boot</groupId>
            <artifactId>spring-boot-starter-test</artifactId>
        </dependency>
        <dependency>
            <groupId>org.springframework.boot</groupId>
            <artifactId>spring-boot-starter-security</artifactId>
        </dependency>
        <!--redis依赖-->
        <dependency>
            <groupId>org.springframework.boot</groupId>
            <artifactId>spring-boot-starter-data-redis</artifactId>
        </dependency>
        <!--fastjson依赖-->
        <dependency>
            <groupId>com.alibaba</groupId>
            <artifactId>fastjson</artifactId>
        </dependency>
        <!--jwt依赖-->
        <dependency>
            <groupId>io.jsonwebtoken</groupId>
            <artifactId>jjwt</artifactId>
        </dependency>
        <!--mybatisPlus依赖-->
        <dependency>
            <groupId>com.baomidou</groupId>
            <artifactId>mybatis-plus-boot-starter</artifactId>
        </dependency>
        <!--mysql数据库驱动-->
        <dependency>
            <groupId>mysql</groupId>
            <artifactId>mysql-connector-java</artifactId>
        </dependency>
application.yml中的配置(填写自己的配置):
server:
  #  端口
  port: 7777
spring:
  datasource:
    #    数据库
    url: ///
    username: root
    password: password
    driver-class-name: com.mysql.cj.jdbc.Driver
mybatis-plus:
  configuration:
    # 日志
    log-impl: org.apache.ibatis.logging.stdout.StdOutImpl
  global-config:
    db-config:
      logic-delete-field: delFlag
      logic-delete-value: 1
      logic-not-delete-value: 0
      id-type: auto
还需要自己连接数据库(Mysql): 表中要有登陆时的信(Username,Password)
1.准备好控制类
@RestController
public class LoginController {
    @Autowired
    private LoginService loginService;
    @PostMapping("/login")
    public ResponseResult login(@RequestBody User user){
        return loginService.login();
    }
}
Service接口和实现类:
public interface UserService extends IService<User> {

}
@Service
public class LoginServiceImpl implements LoginService {
    //需要注入authenticationManager(但是默认是没有 authenticationManager的,我们需要在配置类中暴露)
    @Autowired
    private AuthenticationManager authenticationManager;
    @Override
    public ResponseResult login(User user) {
        return null;
    }
}
同时我们需要写一个SpringSecurityConfig类
@Configuration
public class SecurityConfig extends WebSecurityConfigurerAdapter {
    //暴露ProvideManger方法
    @Override
    @Bean
    public AuthenticationManager authenticationManagerBean() throws Exception {
        return super.authenticationManagerBean();
    }
    @Bean
    public PasswordEncoder passwordEncoder(){
        return new BCryptPasswordEncoder();
    }
    @Override
    protected void configure(HttpSecurity http) throws Exception {
        http
                //关闭csrf
                .csrf().disable()
                //不通过Session获取SecurityContext
                .sessionManagement().sessionCreationPolicy(SessionCreationPolicy.STATELESS)
                .and()
                .authorizeRequests()
                // 对于登录接口 允许匿名访问
                .antMatchers("/login").anonymous()
                //以下接口都需要携带token访问
//                .antMatchers("/logout").authenticated()
                // 除上面外的所有请求全部不需要认证即可访问
                .anyRequest().permitAll();
        //允许跨域
        http.cors();
    }
}
因为我们是要从数据库中去查询,因此我们需要重新创建1个UserDetailsServiceImpl
//最终我们的用户名和密码会传到UserDetailsServiceImpl中
public class UserDetailsServiceImpl implements UserDetailsService {
    @Autowired
    private UserMapper userMapper;
    @Override
    public UserDetails loadUserByUsername(String username) throws UsernameNotFoundException {
        //根据用户名查询用户信息
        //写条件
        LambdaQueryWrapper<User> lambdaQueryWrapper = new LambdaQueryWrapper();
        lambdaQueryWrapper.eq(User::getUserName,username );
        User user = userMapper.selectOne(lambdaQueryWrapper);
        //判断是否查到用户,抛出异常
        if(Objects.isNull(user)){
            throw new RuntimeException("用户不存在");
        }
        //返回用户(返回的是UserDetails类型的,因此我们需要写一个类LoginUser去实现UserDetails)
        return new LoginUser(user);
    }
}
返回的是UserDetails类型的,因此我们需要写一个类LoginUser去实现UserDetails
@Data
@AllArgsConstructor
@NoArgsConstructor
public class LoginUser implements UserDetails {
    @Autowired
    private User user;
    @Override
    public Collection<? extends GrantedAuthority> getAuthorities() {
        return null;
    }

    @Override
    public String getPassword() {
        return user.getPassword();
    }

    @Override
    public String getUsername() {
        return user.getUserName();
    }

    @Override
    public boolean isAccountNonExpired() {
        return true;
    }

    @Override
    public boolean isAccountNonLocked() {
        return true;
    }

    @Override
    public boolean isCredentialsNonExpired() {
        return true;
    }

    @Override
    public boolean isEnabled() {
        return true;
    }
}
最终LoginServiceImpl的代码
@Service
public class LoginServiceImpl implements LoginService {
    //需要注入authenticationManager(但是默认是没有authenticationManager的,我们需要在配置类中暴露)
    @Autowired
    private AuthenticationManager authenticationManager;
    @Autowired
    private RedisCache redisCache;
    @Override
    public ResponseResult login(User user) {
        //帮助我们进行认证
        //当处于没认证状态下,传的两个参数是用户名和密码
        UsernamePasswordAuthenticationToken usernamePasswordAuthenticationToken = new UsernamePasswordAuthenticationToken(user.getUserName(),user.getPassword());
        Authentication authenticate = authenticationManager.authenticate(usernamePasswordAuthenticationToken);
        //因为我们是要从数据库中去查询,因此我们需要重新创建1个UserDetailsServiceImpl
        //如果authenticate为Null就说明不存在该用户
        if(Objects.isNull(authenticate)){
            throw new RuntimeException("用户名或者密码错误");
        }
        //获取用户Id
        LoginUser loginUser = (LoginUser) authenticate.getPrincipal();
        String userid = loginUser.getUser().getId().toString();
        //生成JWT
        String jwt = JwtUtil.createJWT(userid);
        //将用户信息存入redis中
        redisCache.setCacheObject("LoginUser:"+userid,loginUser);
        //把token和信息封装响应
        UserDetailsVo userDetailsVo = BeanCopyUtils.copyBean(loginUser.getUser(), UserDetailsVo.class);
        UserVo userVo = new UserVo(jwt,userDetailsVo);
        return ResponseResult.okResult(userVo);
    }
}
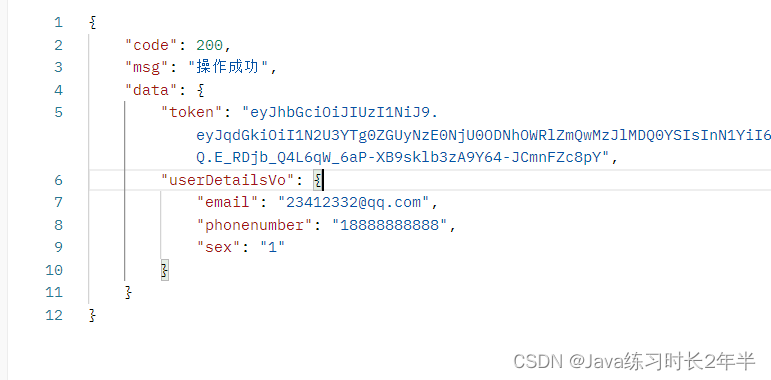
用Postman进行测试
工具类
1.Bean拷贝工具类(将一个对象的属性拷贝到对应的Vo对象中)
/**
 * Bean拷贝工具类
 */
public class BeanCopyUtils {
    private BeanCopyUtils() {
    }

    public static <V> V copyBean(Object source,Class<V> clazz) {
        //创建目标对象
        V result = null;
        try {
            result = clazz.newInstance();
            //实现属性copy
            BeanUtils.copyProperties(source, result);
        } catch (Exception e) {
            e.printStackTrace();
        }
        //返回结果
        return result;
    }
    public static <O,V> List<V> copyBeanList(List<O> list, Class<V> clazz){
        return list.stream()
                .map(o -> copyBean(o, clazz))
                .collect(Collectors.toList());
    }
}
2.Jwt工具类(生成Jwt,解析Jwt)
/**
 * JWT工具类
 */
public class JwtUtil {

    //有效期为60 * 60 *1000  一个小时
    public static final Long JWT_TTL = 24*60 * 60 *1000L;
    //设置秘钥明文
    public static final String JWT_KEY = "lty";

    public static String getUUID(){
        String token = UUID.randomUUID().toString().replaceAll("-", "");
        return token;
    }

    /**
     * 生成jtw
     * @param subject token中要存放的数据(json格式)
     * @return
     */
    public static String createJWT(String subject) {
        JwtBuilder builder = getJwtBuilder(subject, null, getUUID());// 设置过期时间
        return builder.compact();
    }

    /**
     * 生成jtw
     * @param subject token中要存放的数据(json格式)
     * @param ttlMillis token超时时间
     * @return
     */
    public static String createJWT(String subject, Long ttlMillis) {
        JwtBuilder builder = getJwtBuilder(subject, ttlMillis, getUUID());// 设置过期时间
        return builder.compact();
    }

    private static JwtBuilder getJwtBuilder(String subject, Long ttlMillis, String uuid) {
        SignatureAlgorithm signatureAlgorithm = SignatureAlgorithm.HS256;
        SecretKey secretKey = generalKey();
        long nowMillis = System.currentTimeMillis();
        Date now = new Date(nowMillis);
        if(ttlMillis==null){
            ttlMillis=JwtUtil.JWT_TTL;
        }
        long expMillis = nowMillis + ttlMillis;
        Date expDate = new Date(expMillis);
        return Jwts.builder()
                .setId(uuid)           //唯一的ID
                .setSubject(subject)   // 主题  可以是JSON数据
                .setIssuer("Lty")     // 签发者
                .setIssuedAt(now)      // 签发时间
                .signWith(signatureAlgorithm, secretKey) //使用HS256对称加密算法签名, 第二个参数为秘钥
                .setExpiration(expDate);
    }
    /**
     * 创建token
     * @param id
     * @param subject
     * @param ttlMillis
     * @return
     */
    public static String createJWT(String id, String subject, Long ttlMillis) {
        JwtBuilder builder = getJwtBuilder(subject, ttlMillis, id);// 设置过期时间
        return builder.compact();
    }
    /**
     * 生成加密后的秘钥 secretKey
     * @return
     */
    public static SecretKey generalKey() {
        byte[] encodedKey = Base64.getDecoder().decode(JwtUtil.JWT_KEY);
        SecretKey key = new SecretKeySpec(encodedKey, 0, encodedKey.length, "AES");
        return key;
    }

    /**
     * 解析
     *
     * @param jwt
     * @return
     * @throws Exception
     */
    public static Claims parseJWT(String jwt) throws Exception {
        SecretKey secretKey = generalKey();
        return Jwts.parser()
                .setSigningKey(secretKey)
                .parseClaimsJws(jwt)
                .getBody();
    }
}
3.RedisCache工具
@Component
public class RedisCache
{
    @Autowired
    public RedisTemplate redisTemplate;

    /**
     * 缓存基本的对象,Integer、String、实体类等
     *
     * @param key 缓存的键值
     * @param value 缓存的值
     */
    public <T> void setCacheObject(final String key, final T value)
    {
        redisTemplate.opsForValue().set(key, value);
    }

    /**
     * 缓存基本的对象,Integer、String、实体类等
     *
     * @param key 缓存的键值
     * @param value 缓存的值
     * @param timeout 时间
     * @param timeUnit 时间颗粒度
     */
    public <T> void setCacheObject(final String key, final T value, final Integer timeout, final TimeUnit timeUnit)
    {
        redisTemplate.opsForValue().set(key, value, timeout, timeUnit);
    }

    /**
     * 设置有效时间
     *
     * @param key Redis键
     * @param timeout 超时时间
     * @return true=设置成功;false=设置失败
     */
    public boolean expire(final String key, final long timeout)
    {
        return expire(key, timeout, TimeUnit.SECONDS);
    }

    /**
     * 设置有效时间
     *
     * @param key Redis键
     * @param timeout 超时时间
     * @param unit 时间单位
     * @return true=设置成功;false=设置失败
     */
    public boolean expire(final String key, final long timeout, final TimeUnit unit)
    {
        return redisTemplate.expire(key, timeout, unit);
    }

    /**
     * 获得缓存的基本对象。
     *
     * @param key 缓存键值
     * @return 缓存键值对应的数据
     */
    public <T> T getCacheObject(final String key)
    {
        ValueOperations<String, T> operation = redisTemplate.opsForValue();
        return operation.get(key);
    }

    /**
     * 删除单个对象
     *
     * @param key
     */
    public boolean deleteObject(final String key)
    {
        return redisTemplate.delete(key);
    }

    /**
     * 删除集合对象
     *
     * @param collection 多个对象
     * @return
     */
    public long deleteObject(final Collection collection)
    {
        return redisTemplate.delete(collection);
    }

    /**
     * 缓存List数据
     *
     * @param key 缓存的键值
     * @param dataList 待缓存的List数据
     * @return 缓存的对象
     */
    public <T> long setCacheList(final String key, final List<T> dataList)
    {
        Long count = redisTemplate.opsForList().rightPushAll(key, dataList);
        return count == null ? 0 : count;
    }

    /**
     * 获得缓存的list对象
     *
     * @param key 缓存的键值
     * @return 缓存键值对应的数据
     */
    public <T> List<T> getCacheList(final String key)
    {
        return redisTemplate.opsForList().range(key, 0, -1);
    }

    /**
     * 缓存Set
     *
     * @param key 缓存键值
     * @param dataSet 缓存的数据
     * @return 缓存数据的对象
     */
    public <T> BoundSetOperations<String, T> setCacheSet(final String key, final Set<T> dataSet)
    {
        BoundSetOperations<String, T> setOperation = redisTemplate.boundSetOps(key);
        Iterator<T> it = dataSet.iterator();
        while (it.hasNext())
        {
            setOperation.add(it.next());
        }
        return setOperation;
    }

    /**
     * 获得缓存的set
     *
     * @param key
     * @return
     */
    public <T> Set<T> getCacheSet(final String key)
    {
        return redisTemplate.opsForSet().members(key);
    }

    /**
     * 缓存Map
     *
     * @param key
     * @param dataMap
     */
    public <T> void setCacheMap(final String key, final Map<String, T> dataMap)
    {
        if (dataMap != null) {
            redisTemplate.opsForHash().putAll(key, dataMap);
        }
    }

    /**
     * 获得缓存的Map
     *
     * @param key
     * @return
     */
    public <T> Map<String, T> getCacheMap(final String key)
    {
        return redisTemplate.opsForHash().entries(key);
    }

    /**
     * 往Hash中存入数据
     *
     * @param key Redis键
     * @param hKey Hash键
     * @param value 值
     */
    public <T> void setCacheMapValue(final String key, final String hKey, final T value)
    {
        redisTemplate.opsForHash().put(key, hKey, value);
    }

    /**
     * 获取Hash中的数据
     *
     * @param key Redis键
     * @param hKey Hash键
     * @return Hash中的对象
     */
    public <T> T getCacheMapValue(final String key, final String hKey)
    {
        HashOperations<String, String, T> opsForHash = redisTemplate.opsForHash();
        return opsForHash.get(key, hKey);
    }

    /**
     * 删除Hash中的数据
     *
     * @param key
     * @param hkey
     */
    public void delCacheMapValue(final String key, final String hkey)
    {
        HashOperations hashOperations = redisTemplate.opsForHash();
        hashOperations.delete(key, hkey);
    }

    /**
     * 获取多个Hash中的数据
     *
     * @param key Redis键
     * @param hKeys Hash键集合
     * @return Hash对象集合
     */
    public <T> List<T> getMultiCacheMapValue(final String key, final Collection<Object> hKeys)
    {
        return redisTemplate.opsForHash().multiGet(key, hKeys);
    }

    /**
     * 获得缓存的基本对象列表
     *
     * @param pattern 字符串前缀
     * @return 对象列表
     */
    public Collection<String> keys(final String pattern)
    {
        return redisTemplate.keys(pattern);
    }
    public void incrementCacheMapValue(String key,String hKey,long v){
        redisTemplate.boundHashOps(key).increment(hKey, v);
    }
}


 4682
4682


 被折叠的 条评论
为什么被折叠?
被折叠的 条评论
为什么被折叠?
 到【灌水乐园】发言


