


 本文介绍了如何在SpringBoot项目中使用Springfox和Swagger创建API文档,自定义配置类来管理接口路径和元数据,以及如何通过Swagger进行接口测试和可视化展示。
目录
一、引入依赖
     <dependency>
            <groupId>io.springfox</groupId>
            <artifactId>springfox-swagger-ui</artifactId>
            <version>2.9.2</version>
        </dependency>
        <dependency>
            <groupId>io.springfox</groupId>
            <artifactId>springfox-swagger2</artifactId>
            <version>2.9.2</version>
        </dependency>
二、自定义配置类
package com.beiyou.config;

import org.springframework.context.annotation.Bean;
import org.springframework.context.annotation.Configuration;
import org.springframework.core.env.Environment;
import springfox.documentation.builders.PathSelectors;
import springfox.documentation.builders.RequestHandlerSelectors;
import springfox.documentation.service.ApiInfo;
import springfox.documentation.spi.DocumentationType;
import springfox.documentation.spring.web.plugins.Docket;
import springfox.documentation.swagger2.annotations.EnableSwagger2;

import java.util.ArrayList;

@Configuration
@EnableSwagger2
public class SwaggerConfig {

 @Bean
    public Docket docket(Environment environment){

        return new Docket(DocumentationType.SWAGGER_2)
                .apiInfo(apiInfo())
                .enable(true)//关闭swagger,默认是true
                .select()
                //RequestHandlerSelectors:配置要扫描的方式,有basePackage("路径")、any():扫描全部,none():全部不扫描
                //RequestHandlerSelectors.withMethodAnnotation():扫描方法上的注解
                //.withClassAnnotation():扫描类上的注解
                .apis(RequestHandlerSelectors.basePackage("com.beiyou"))//指定扫描的包
                .paths(PathSelectors.ant("/**"))//设置请求路径,这里是带有hello的请求路径
                .build() ;
    }

    private ApiInfo apiInfo(){
      //  Contact contact = new Contact("黑米", "https://blog.csdn.net", "xxx@qq.com");
        return new ApiInfo(
                "商品组的Api",
                "请老大检阅",
                "v2.0",
                "https://www.baidu.com",
                null,
                "Apache 2.0",
                "http://www.apache.org/licenses/LICENSE-2.0",
                new ArrayList()
        );
    }

}
三、写一个测试的controller
/*
 * Copyright (c) 2020, 2024, webrx.cn All rights reserved.
 *
 */
package com.beiyou.controller;

import org.springframework.web.bind.annotation.*;

@RestController
@RequestMapping("/api/product")
public class TestController {
    @GetMapping
    public String test() {
        return "查询商品成功";
    }
    @PostMapping
    public String test2() {
        return "添加商品成功";
    }
    @PutMapping
    public String test3() {
        return "修改商品成功";
    }
    @DeleteMapping
    public String test4() {
        return "删除商品成功";
    }
}
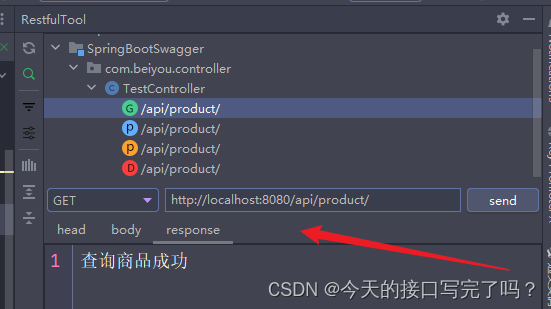
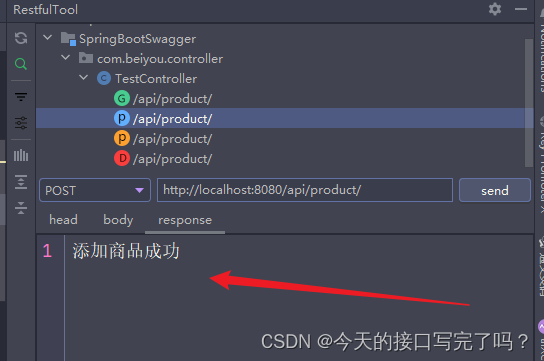
四、正常使用接口测试工具测试
四个接口增删改查功能都能实现
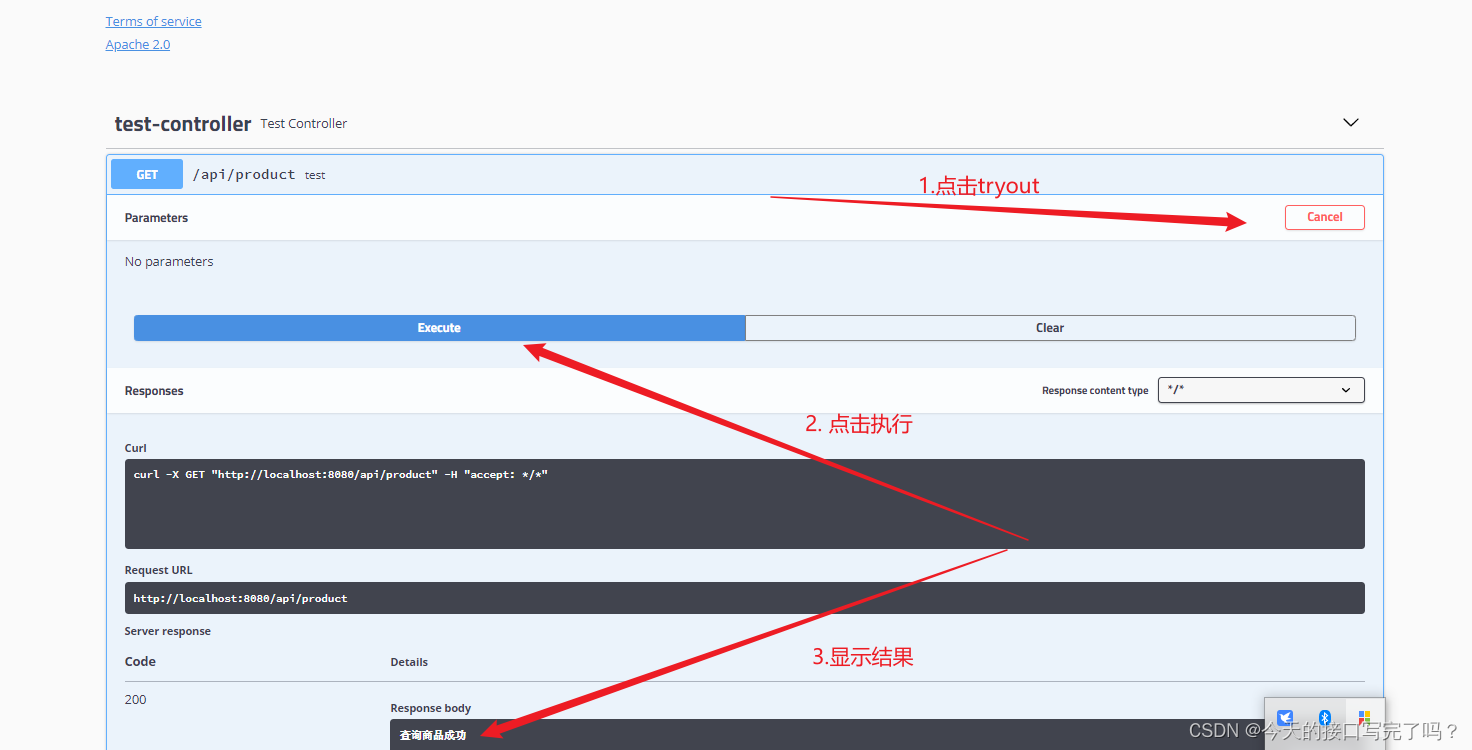
五、使用 Swagger 访问接口
使用Swagger访问接口可以有图形化界面展示,更加的方便。
访问的时候具体端口号根据自己的项目而定。

访问查询商品接口


 505
505


 被折叠的 条评论
为什么被折叠?
被折叠的 条评论
为什么被折叠?
 到【灌水乐园】发言


