Centos7下部署nginx
yum安装
配置nginx源
依次输入以下命令
- [root@localhost ~]# rpm -ivh http://nginx.org/packages/centos/7/noarch/RPMS/nginx-release-centos-7-0.el7.ngx.noarch.rpm
- [root@localhost ~]# cd /etc/yum.repos.d/
- [root@localhost yum.repos.d]# ls
具体运行情况如下
[root@localhost ~]# rpm -ivh http://nginx.org/packages/centos/7/noarch/RPMS/nginx-release-centos-7-0.el7.ngx.noarch.rpm
获取http://nginx.org/packages/centos/7/noarch/RPMS/nginx-release-centos-7-0.el7.ngx.noarch.rpm
警告:/var/tmp/rpm-tmp.TOoRsU: 头V4 RSA/SHA1 Signature, 密钥 ID 7bd9bf62: NOKEY
准备中...                          ################################# [100%]
正在升级/安装...
   1:nginx-release-centos-7-0.el7.ngx ################################# [100%]
[root@localhost ~]# cd /etc/yum.repos.d/
[root@localhost yum.repos.d]# ls
CentOS-Base.repo  CentOS-CR.repo  CentOS-Debuginfo.repo  CentOS-fasttrack.repo  CentOS-Media.repo  CentOS-Sources.repo  CentOS-Vault.repo  CentOS-x86_64-kernel.repo  nginx.repo
执行以下命令开始安装yum
- [root@localhost yum.repos.d]# yum install -y nginx
具体运行情况如下(注:三点表示省略)
[root@localhost yum.repos.d]# yum install -y nginx
已加载插件:fastestmirror
Determining fastest mirrors
 * base: mirrors.bfsu.edu.cn
 * extras: mirrors.bfsu.edu.cn
 * updates: mirrors.bfsu.edu.cn
base
。。。
  验证中      : pcre2-10.23-2.el7.x86_64                                                                                                                                          1/2
  验证中      : 1:nginx-1.24.0-1.el7.ngx.x86_64                                                                                                                                   2/2

已安装:
  nginx.x86_64 1:1.24.0-1.el7.ngx

作为依赖被安装:
  pcre2.x86_64 0:10.23-2.el7

完毕!
源码编译安装
上传至虚拟机
进入官网下载:nginx: download

然后将压缩包上传至虚拟机(需要下载Xsell和Xftp,Xsell-输入命令,Xftp-上传文件到虚拟机)
需要上面两个安装包可以私信我,也可以通过其他途径下载
- [root@localhost yum.repos.d]# nginx(没有报错,则启动成功)
- [root@localhost yum.repos.d]# mkdir -p /usr/local/nginx(新建一个目录用来存放nginx 相关文件)
- [root@localhost yum.repos.d]# cd /usr/local/nginx(切换盘符)
- [root@localhost yum.repos.d]# ll
- [root@localhost nginx]# tar -zxvf nginx-1.22.1.tar.gz(解压)
具体运行情况如下(注:三点表示省略)
[root@localhost yum.repos.d]# nginx
[root@localhost yum.repos.d]# mkdir -p /usr/local/nginx
[root@localhost yum.repos.d]# cd /usr/local/nginx
[root@localhost nginx]# ll
总用量 1052
-rw-r--r--. 1 root root 1073948 4月  19 10:23 nginx-1.22.1.tar.gz
[root@localhost nginx]# tar -zxvf nginx-1.22.1.tar.gz
。。。
安装编译环境
- [root@localhost nginx]# yum -y install gcc-c++(安装gcc,源码编译依赖 gcc 环境)
- [root@localhost nginx]# yum install -y pcre pcre-devel(安装pcre,pcre是一个perl库,包括perl兼容的正则表达式库,nginx的http模块使用pcre来解析正则表达式,所以需要安装pcre库)
- [root@localhost nginx]# yum install -y zlib zlib-devel(安装zlib,zlib 库提供了很多种压缩和解压缩的方式,nginx 使用 zlib 对 http 包的内容进行 gzip)
- [root@localhost nginx]# yum install -y openssl openssl-devel(安装OpenSSL库)
- [root@localhost nginx]# ls
- [root@localhost nginx]# cd nginx-1.22.1
- [root@localhost nginx-1.22.1]# ll
- [root@localhost nginx-1.22.1]# ./configure
- [root@localhost nginx-1.22.1]# make
- [root@localhost nginx-1.22.1]# make install
以上运行内容过多,就不展示运行结果了
启动nginx
- [root@localhost nginx-1.22.1]# whereis nginx(检查是否安装成功,如果出现路径则安装成功,如nginx: /usr/local/nginx)
- [root@localhost nginx-1.22.1]# cd /usr/local/nginx/
- [root@localhost nginx]# ls(运行显示:conf html logs nginx-1.22.1 nginx-1.22.1.tar.gz sbin)
- [root@localhost nginx]# ps -ef | grep nginx
- [root@localhost nginx]# cd /usr/local/nginx/sbin
- [root@localhost nginx]# systemctl stop firewalld
- [root@localhost sbin]# ./nginx
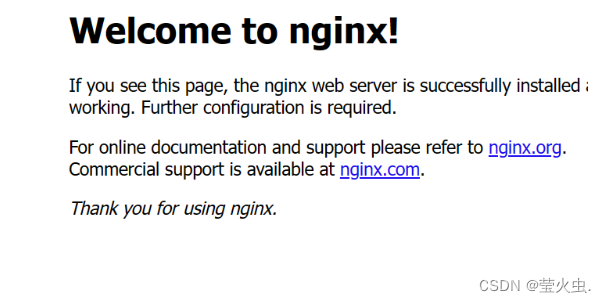
在浏览器中输入虚拟机端口号出现以下页面,则部署成功


部署前端项目
VSCode操作
切换终端

打包(依次输入以下命令)
- pnpm install
- pnpm run build


打包完成后会出现dist文件名

虚拟机操作
将dist文件上传至虚拟机

修改路径
[root@localhost sbin]# vi /usr/local/nginx/nginx-1.22.1/conf/nginx.conf
点击i进行编辑,修改路径为dist在虚拟机上所在的位置,修改完成后按ECS,输入:wq即可退出(:wq保存修改并退出,:q!不保存并退出)

启动前端项目
[root@localhost sbin]# ./nginx -c /usr/local/nginx/nginx-1.22.1/conf/nginx.conf(出现以下内容,则还不可以)

[root@localhost sbin]# ps -ef | grep nginx(需要将第一个红色画框的内容全部“杀掉”才可以)
然后再依次输入以下命令(出现截图中的情况,则部署成功)
[root@localhost sbin]# ps -ef | grep nginx
[root@localhost sbin]# ./nginx -c /usr/local/nginx/nginx-1.22.1/conf/nginx.conf

刷新浏览器出现前端项目


 1万+
1万+


 被折叠的 条评论
为什么被折叠?


