


Linux中部署zabbix
| 主机 | IP |
|---|---|
| zabbix服务器 | 192.168.226.129 |
zabbix介绍
zabbix是一个监控软件,其可以监控各种网络参数,保证企业服务架构安全运营,同时支持灵活的告警机制,可以使得运维人员快速定位故障、解决问题。zabbix支持分布式功能,支持复杂架构下的监控解决方案,也支持web页面,为主机监控提供了良好直观的展现。
部署zabbix服务端
虚机连网,切换阿里源
#切换阿里源,如果有阿里源可以跳过此操作进行下一步
cd /etc/yum.repos.d
rm *	#删除本目录下所有文件
wget https://mirrors.aliyun.com/repo/Centos-8.repo
yum repolist
yum clean all
yum makecache
yum list
#有阿里源直接从这里开始
cd /etc/yum.repos.d/
vim Centos-8.repo
#把以下内容添加进去
[mariadb]
name = MariaDB
baseurl = https://mirrors.aliyun.com/mariadb/mariadb-10.6.16/yum/centos8-amd64/
module_hotfixes=1
enabled=1
#gpgkey=https://mirror.yongbok.net/mariadb/yum/RPM-GPG-KEY-MariaDB
gpgcheck=0
安装zabbix6.0储存库(二进制安装方式)
rpm -Uvh https://repo.zabbix.com/zabbix/6.0/rhel/8/x86_64/zabbix-release-6.0-4.el8.noarch.rpm

vim zabbix.repo
#把里面的内容全部删了替换为以下内容
[zabbix]
name=Zabbix Official Repository - $basearch
#baseurl=https://repo.zabbix.com/zabbix/6.0/rhel/8/$basearch/
baseurl=https://mirrors.aliyun.com/zabbix/zabbix/6.0/rhel/8/$basearch/
enabled=1
gpgcheck=0
gpgkey=file:///etc/pki/rpm-gpg/RPM-GPG-KEY-ZABBIX-A14FE591

[zabbix-non-supported]
name=Zabbix Official Repository (non-supported) - $basearch
#baseurl=https://repo.zabbix.com/non-supported/rhel/8/$basearch/
baseurl=https://mirrors.aliyun.com/zabbix/non-supported/rhel/8/$basearch/
enabled=1
gpgkey=file:///etc/pki/rpm-gpg/RPM-GPG-KEY-ZABBIX
gpgcheck=0

[zabbix-unstable]
name=Zabbix Official Repository (unstable) - $basearch
baseurl=https://repo.zabbix.com/zabbix/5.5/rhel/8/$basearch/
enabled=0
gpgcheck=0
gpgkey=file:///etc/pki/rpm-gpg/RPM-GPG-KEY-ZABBIX-A14FE591
vim zabbix-agent2-plugins.repo
#把里面的内容全部删了替换为以下内容
[zabbix-agent2-plugins]
name=Zabbix Official Repository (Agent2 Plugins) - $basearch
#baseurl=https://repo.zabbix.com/zabbix-agent2-plugins/1/rhel/8/$basearch/
baseurl=https://mirrors.aliyun.com/zabbix/zabbix-agent2-plugins/1/rhel/8/$basearch/
enabled=1
gpgkey=file:///etc/pki/rpm-gpg/RPM-GPG-KEY-ZABBIX
gpgcheck=0
关闭防火墙和SELINUX
systemctl stop firewalld.service
systemctl disable firewalld.service
setenforce 0
sed -i "s/SELINUX=enforcing/SELINUX=disabled/g" /etc/selinux/config
#可以自行检查防火墙和SELINUX的状态
systemctl status firewalld
systemctl status selinux-autorelabel
安装数据库,注意数据库版本,zabbix6.0必须mariadb10.5以上
dnf install mariadb mariadb-server
dnf install httpd httpd-tools php php-cli php-json php-gd php-mbstring php-pdo php-xml php-mysqlnd php-pecl-zip wget
dnf module switch-to php:7.4   #切换模块,zabbix6.0实际要求7.2.5

systemctl start mariadb
systemctl enable mariadb
初始化数据库
mariadb-secure-installation
#这个修改要改成Switch to unix_socket authentication [Y/n] n
mysql -u root -p
create database zabbix character set utf8 collate utf8_bin;
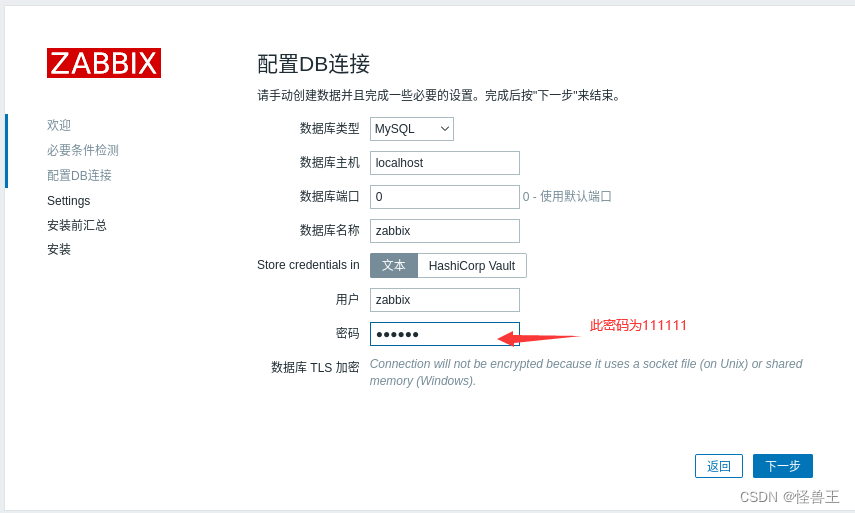
grant all on zabbix.* to zabbix@'localhost' identified by '111111';
flush privileges;
quit
安装zabbix前端软件包
dnf install zabbix-server-mysql zabbix-web-mysql zabbix-apache-conf zabbix-sql-scripts zabbix-selinux-policy zabbix-agent2

zcat /usr/share/zabbix-sql-scripts/mysql/server.sql.gz | mysql -u zabbix -p zabbix

vim /etc/zabbix/zabbix_server.conf  #把129的#删除,并修改为 DBPassword=111111

systemctl restart zabbix-server zabbix-agent2 httpd php-fpm
systemctl enable zabbix-server zabbix-agent2 httpd php-fpm
进入浏览器
http://127.0.0.1/zabbix

用户名:Admin
密码:zabbix

安装客户端
虚机连网,切换阿里源
#切换阿里源,如果有阿里源可以跳过此操作进行下一步
cd /etc/yum.repos.d
rm *	#删除本目录下所有文件
wget https://mirrors.aliyun.com/repo/Centos-8.repo
yum repolist
yum clean all
yum makecache
yum list
安装客户端agent2
rpm -Uvh https://repo.zabbix.com/zabbix/6.0/rhel/8/x86_64/zabbix-release-6.0-4.el8.noarch.rpm

dnf install zabbix-agent2

vim /etc/zabbix/zabbix_agent2.conf
#对下面几处做修改
Server=192.168.226.129   ##这里修改为zabbix服务端地址
ServerActive=192.168.226.129    ##这里修改为zabbix服务端地址
Hostname=samba              ##设置主机名

#启动服务
systemctl start zabbix-agent2
systemctl enable zabbix-agent2


 910
910

 被折叠的 条评论
为什么被折叠?
被折叠的 条评论
为什么被折叠?
 到【灌水乐园】发言


