


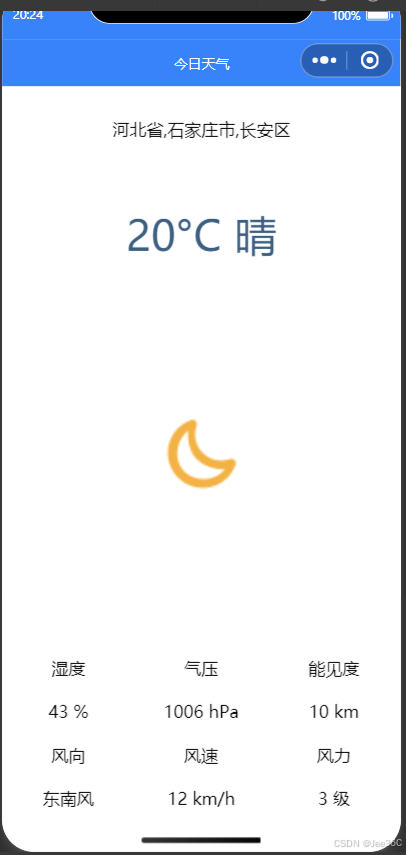
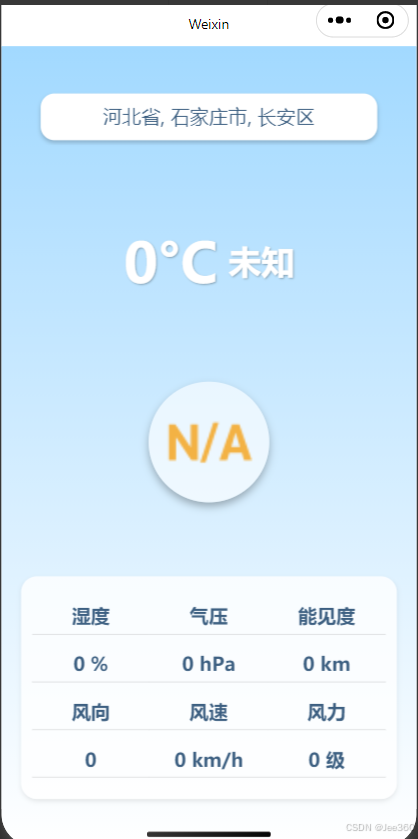
效果图如下
页面加载和地区更新
生命周期函数onLoad中,调用了getWeather函数来加载初始天气数据:
onLoad: function(options) {
  this.getWeather(); // 页面加载时获取天气
}
通过地区选择器组件触发的regionChange事件处理器更新地区选择并重新获取天气数据:
regionChange: function(e) {
  this.setData({ region: e.detail.value });
  this.getWeather(); // 更新城市后获取天气信息
}
天气数据的获取和更新
getWeather函数是获取天气信息的核心,分为两个主要步骤:
a. 获取城市编号
使用和风天气的地理位置API来根据用户的地区选择查询城市编号:
wx.request({
  url: 'https://geoapi.qweather.com/v2/city/lookup',
  data: {
    location: that.data.region[1], // 使用用户选择的城市名称
    key: 'API_KEY'
  },
  success: function(res) {
    if (res.data && res.data.code === "200") {
      var cityId = res.data.location[0].id; // 获取第一个匹配的城市编号
      // 接着获取天气数据
    } else {
      console.error("城市编号获取失败:", res.data.code);
    }
  },
  fail: function(error) {
    console.error("地理位置搜索失败:", error);
  }
});
b. 查询天气数据
得到城市编号后,进行第二次API请求来获取具体的天气信息:
wx.request({
  url: 'https://devapi.qweather.com/v7/weather/now',
  data: {
    location: cityId,
    key: 'API_KEY'
  },
  success: function(res) {
    that.setData({ now: res.data.now });  // 更新天气数据到页面
  },
  fail: function(error) {
    console.error("获取天气信息失败:", error);
  }
});
成功获取数据后,setData方法用于更新页面上显示的天气信息,包括温度、天气状况、图标等。
以下是完整代码:
导航栏界面
Page({
  data: {
    region: ['陕西省', '西安市', '柞水县'],
    now: {
      temp: 0,
      text: '未知',
      icon: '999',
      humidity: 0,
      pressure: 0,
      vis: 0,
      windDir: 0,
      windSpeed: 0,
      windScale: 0
    }
  },

  onLoad: function(options) {
    this.getWeather();
  },

  regionChange: function(e) {
    this.setData({ region: e.detail.value });
    this.getWeather();
  },

  getWeather: function() {
    var that = this;

    wx.request({
      url: 'https://geoapi.qweather.com/v2/city/lookup',
      data: {
        location: that.data.region[1],
        key: '8ed2b89756654fafb7f53598b88936df'
      },
      success: function(res) {
        if (res.data && res.data.code === "200") {
          var cityId = res.data.location[0].id;

          wx.request({
            url: 'https://devapi.qweather.com/v7/weather/now',
            data: {
              location: cityId,
              key: '8ed2b89756654fafb7f53598b88936df'
            },
            success: function(res) {
              console.log("icon value:", res.data.now.icon);
              that.setData({ now: res.data.now });
            },
            fail: function(error) {
              console.error("获取天气信息失败:", error);
            }
          });
        } else {
          console.error("城市编号获取失败:", res.data.code);
        }
      },
      fail: function(error) {
        console.error("地理位置搜索失败:", error);
      }
    });
  }
});
布局排版
<view class='container'>
  <picker mode='region' bindchange='regionChange'>
    <view>{{region}}</view>
  </picker>

  <text>{{now.temp}}°C {{now.text}}</text>

  <image wx:if="{{now.icon}}" src='../../images/weather_icon/{{now.icon}}.png' mode='aspectFit'></image>

  <view class='detail'>
    <view class='bar'>
      <view class='box'>湿度</view>
      <view class='box'>气压</view>
      <view class='box'>能见度</view>
    </view>
    <view class='bar'>
      <view class='box'>{{now.humidity}} %</view>
      <view class='box'>{{now.pressure}} hPa</view>
      <view class='box'>{{now.vis}} km</view>
    </view>
    <view class='bar'>
      <view class='box'>风向</view>
      <view class='box'>风速</view>
      <view class='box'>风力</view>
    </view>
    <view class='bar'>
      <view class='box'>{{now.windDir}}</view>
      <view class='box'>{{now.windSpeed}} km/h</view>
      <view class='box'>{{now.windScale}} 级</view>
    </view>
  </view>
</view>
样式编辑
.container {
  height: 100vh;
  display: flex;
  flex-direction: column;
  align-items: center;
  justify-content: space-around;
}

text {
  font-size: 80rpx;
  color: #3C5F81;
}

image {
  width: 220rpx;
}

.detail {
  width: 100%;
  display: flex;
  flex-direction: column;
}

.bar {
  display: flex;
  flex-direction: row;
  margin: 20rpx 0;
}

.box {
  width: 33.3%;
  text-align: center;
}
此为迭代版本


 1851
1851

 被折叠的 条评论
为什么被折叠?
被折叠的 条评论
为什么被折叠?
 到【灌水乐园】发言


