


首先我们进入 商品列表页面List.js 里面
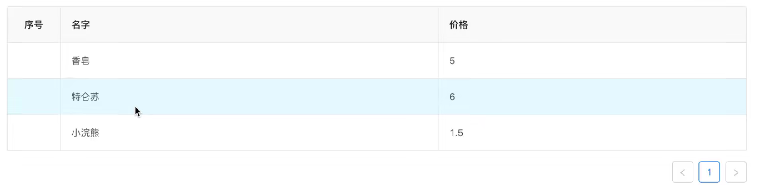
这里我们使用了 antd 最终的列表页面效果如下,
根据这个展示情况进行组件的添加

先绑定表格的数据 和列
columns 是一个数组,每一个列都有一个标题
columns = [
{
title:‘序号’,
key:‘id’,
width:80,
align:‘center’
},{
title:‘名字’,
dataIndex:‘name’//表示名字对应的一个数据里面的,某一个属性名对应的
}]
table 的显示边框属性 bordered
接着有一个dataSource 表示商品的数据
const dataSourcr = [
{
id:1,
name:‘香皂’,
price:5
}]
<Table  columns={columns}  dataSource={dataSource}
             />
这时序号部分没有生成
序号可以为每一列进行自定义
这里我们写一个方法叫做
render:(txt,record,index)=>index + 1
接着我们对table 还有操作 ,接着添加
 {
            title: "操作",
            render: (txt, record, index) => {
                return (
                    <div>
                        <Button
                            type="primary"
                            size="small"  > 修改</Button>
                        <Popconfirm
                            title="确定删除此项?"
                            onCancel={() => console.log("用户取消删除")}
                            onConfirm={() => { console.log("用户确认删除"); }}
                        >
                            <Button style={{ margin: "0 1rem" }} type="danger" size="small">
                                删除
                            </Button>
                        </Popconfirm>

                    </div>
                )
            }
        }
效果图 包括一个是否确认删除的组件 popconfirm

接着做跳转操作 ,当我们点击新增按钮时,想跳转到表单页面 ,新增和编辑唯一的区别就是/edit/:id 就是id 有没有, 这时我们可以选择id为可选的参数 /edit/:id?
开始操作,当我点击新增之后,添加一个方法
<Button type='primary' size='small' onClick={() => props.history.push("/admin/products/edit")} >
                    新增
                </Button>
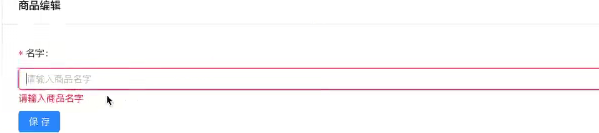
然后在编辑页面Edit.js 进行页面布局
添加表单 ,使用card布局

如果表单要使用验证的,这时候需要使用
getFieldDecorator ,需要在组件导出的时候使用
Form.Create()
在导出表单的时候需要使用到 Form.Create({name:‘productEdit’})(Edit)
需要截取props 里面的一个属性 叫做:
const {getFieldDecorator} = props.form
在Form.Item 中需要加
 {getFieldDecorator('name',{
 reles:[{
	required:true,
	message:'请输入商品名字'
}]
})(<Input placeholder= '请输入商品名字'>)
}
在保存按钮里添加一个 htmlType = "submit,表示一个表单是可以提交的,提交之后就会触发Form 表单的 onSubmit 事件,接着在事件里面添加内容
onSubmit = {(e)=>handleSubmit(e)}
const handleSubmit = e=>{
  console.log(e);
  e.preventDefault();//阻止默认事件
 props.form.validateFieldsAndScroll((err, values) => {// 当前表单是否验证通过
      if (!err) {  //通过
      console.log("提交")
}else{
	message.error("请输入正确的内容")
}
});
}
接着添加一项商品价格
 <Form.Item label="价格">
          {getFieldDecorator('price', {
            rules: [{
              required: true,
              message: '请输入商品价格'
            }]
          })(<Input placeholder='请输入商品价格' />)
          }
          </Form.Item>
在添加一些验证规则 ,查看 async-validator 高级用法,写一些字体的验证规则比如要自定义的,以及最大输入和最小输入
{validator : priceValidate}
定义一个priceValidate方法
//接收几个参数
const priceValidate =(rule,value,callback)  =>{
	if(value*1>100){//价格转成数字,如果价格大于100,验证失败
	callback('价格不能大于100')
	}else{
	callback();//也就是说这个自定义验证,我们只需要在callback里面做验证就可以了,callback 里面有返回值说明我们验证失败,否则验证成功
	}
 }
接着我们查看效果 ,如果我们价格输入123

这里演示的是关于表单的验证
表单验证成功那么在 这里会调用Api接口
if (!err) {  //通过
      console.log(values)
      console.log("提交")
      //调用Api接口
}


 245
245


 被折叠的 条评论
为什么被折叠?
被折叠的 条评论
为什么被折叠?
 到【灌水乐园】发言


