


本篇文章只是基于Spring MVC框架,不集成Hibernate等其它组件。所用Spring版本为spring-framework-3.2.2.RELEASE-dist。
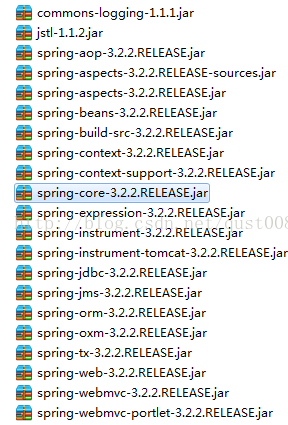
首先把需要的包复制到lib文件夹,为了简单,把Spring3.2.2中libs文件中的包都复制过去,但还需要加入其它的一些必须包才能正常运行,具体如下图
然后,修改web.xml文件,具体如下
<?xml version="1.0" encoding="UTF-8"?>
<web-app xmlns:xsi="http://www.w3.org/2001/XMLSchema-instance" xmlns="http://java.sun.com/xml/ns/javaee" xmlns:web="http://java.sun.com/xml/ns/javaee/web-app_2_5.xsd" xsi:schemaLocation="http://java.sun.com/xml/ns/javaee http://java.sun.com/xml/ns/javaee/web-app_3_0.xsd" id="WebApp_ID" version="3.0">
  <display-name>SpringMVC</display-name>

  <servlet>
  	<servlet-name>springMvc</servlet-name>
  	<servlet-class>org.springframework.web.servlet.DispatcherServlet</servlet-class>
  	<load-on-startup>1</load-on-startup>
  </servlet>

  <servlet-mapping>
  	<servlet-name>springMvc</servlet-name>
  	<url-pattern>/</url-pattern>
  </servlet-mapping>

  <welcome-file-list>
    <welcome-file>index.html</welcome-file>
    <welcome-file>index.jsp</welcome-file>
  </welcome-file-list>
</web-app>
默认情况下,Spring MVC会到WEB-INF下去搜索以 ‘-servlet.xml’结尾的文件,然后解析他们。
本文创建名为springMvc-servlet.xml的xml文件具体如下
<?xml version="1.0" encoding="UTF-8"?>
<!--看到下面的beans这个元素标签没有,必须有标签的声明 -->
<beans xmlns="http://www.springframework.org/schema/beans"
	xmlns:xsi="http://www.w3.org/2001/XMLSchema-instance"
	xmlns:context="http://www.springframework.org/schema/context"
	xmlns:mvc="http://www.springframework.org/schema/mvc"
	xsi:schemaLocation="http://www.springframework.org/schema/beans
        http://www.springframework.org/schema/beans/spring-beans.xsd
		http://www.springframework.org/schema/context
    	http://www.springframework.org/schema/context/spring-context.xsd
    	http://www.springframework.org/schema/mvc
        http://www.springframework.org/schema/mvc/spring-mvc.xsd">

	<!-- 对web包中的所有类进行扫描,以完成Bean创建和自动依赖注入的功能 -->
	<context:component-scan base-package="qust.thb.*" />
	<!-- 支持spring3.0新的mvc注解 -->
	<mvc:annotation-driven />
 	<!-- 启动Spring MVC的注解功能,完成请求和注解POJO的映射 -->
    <bean class="org.springframework.web.servlet.mvc.annotation.AnnotationMethodHandlerAdapter"/>

	<!-- ViewResolver -->
	<bean
		class="org.springframework.web.servlet.view.InternalResourceViewResolver">
		<property name="viewClass"
			value="org.springframework.web.servlet.view.JstlView" />
		<property name="prefix" value="/WEB-INF/" />
		<property name="suffix" value=".jsp" />
	</bean>
</beans>package qust.thb.usermanage.controller;
import org.springframework.stereotype.Controller;
import org.springframework.web.bind.annotation.RequestMapping;
import org.springframework.web.bind.annotation.RequestMethod;
import org.springframework.web.servlet.ModelAndView;
@Controller
@RequestMapping("/user")
public class UserController {
@RequestMapping(value = "/getUser.do", method = RequestMethod.GET)
public ModelAndView getUser() {
ModelAndView mv = new ModelAndView();
mv.addObject("message", "Hello World!!!");
mv.setViewName("/view/hello");
return mv;
}
}
<body>
${message}
</body>
输入地址http://localhost:8080/SpringMVC/user/getUser.do,就可以看到结果了
注:
如果你想使用@Autowired注解,那么就必须事先在 Spring 容器中声明 AutowiredAnnotationBeanPostProcessor Bean。传统声明方式如下:
<bean class="org.springframework.beans.factory.annotation. AutowiredAnnotationBeanPostProcessor "/>
<context:component-scan base-package="qust.thb.*" />


 1654
1654

 被折叠的 条评论
为什么被折叠?
被折叠的 条评论
为什么被折叠?
 到【灌水乐园】发言


