


自定义属性配置
1.用properties文件

2.用yml文件
- 格式相对于properties文件更简便。
- 关键词:空格+值

3用注入方式配置变量
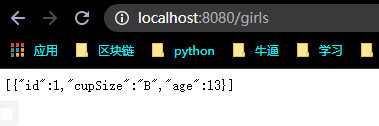
- 在注入时定义变量类型,配置时不用定义。例如图中的cupSize,并不是在配置文件中定义的类型,而是在Controller类引入时定义的,private String cupSize
- 也可以在配置文件中,再使用配置。

4.配置文件的分组配置使用
- 配置文件的属性分组
- 创建属性类,加入注解@Component,@ConfigurationProperties(prefix = "girl")
- Controller类,@Autowired注解引用属性类对象,注意给引用的类加上@Component注解,这里是GirlProperties类
@Component
@ConfigurationProperties(prefix="girl")
public class GirlProperties {
    private String cupSize;

    private Integer age;

    //get和set
}
@RestController
public class HelloController {
@Autowired
private GirlProperties girlProperties;
@RequestMapping(value="/hi",method = RequestMethod.GET)
public String say(){
return girlProperties.getCupSize();
}
}5.不同环境下不同配置的用法。

不同的启动方式
- 命令行启动prod环境
- 项目目录下输入mvn install,等待maven编译完成
- 输入java -jar target/girl-0.0.1-SHAPSHOT.jar --spring.profiles.active=prod,项目启动
- IDE中启动dev环境
- 分别访问 http://127.0.0.1:8080/hello,http://127.0.0.1:8081/hello,得到2个环境下的结果。
Controller的使用
- @Controller:处理http请求
- @RestController:Spring4之后新加的注解,原来返回json需要@ResponseBody配合@Controller
- @RequestMapping:配置url映射
1.Controller
- 使用模板,类似于jsp页面,pom文件中加入模板引擎thymeleaf依赖。
<!--spring官方的模板,因为用模板会影响性能,所以不建议使用,改用前后端分离Restful-->
<dependency>
	<groupId>org.springframework.boot</groupId>
	<artifactId>spring-boot-starter-thymeleaf</artifactId>
</dependency>- resources目录下,加入文件夹templates,加入index.html页面。
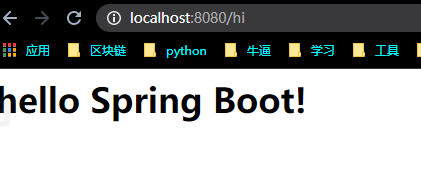
<h1>hello Spring Boot!</h1>- Controller类中。方法返回值为return "index";
@Controller
public class HelloController {
    //使用模板 返回index.html
    @RequestMapping(value = "{"/hi","/hello"}",method = RequestMethod.GET)
    public String say() {
        return "index";
    }
}
访问 http://127.0.0.1:8080/hello,得到index.html显示的结果。
2.RestController=Controller+ResponseBody
3.RequestMapping
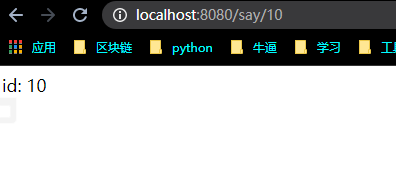
- @PathVariable获取url中的数据,请求地址:/http/say/10
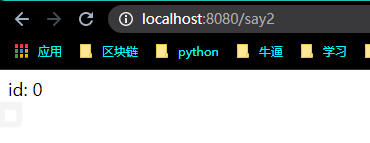
- @RequestParam获取请求参数的值,请求地址:/http/say?id=10
- @GetMapping组合注解,@RequestMapping(value = "{"/say"}",method = RequestMethod.GET)简写为@GetMapping(value = "/say")
@RestController
public class HelloController {
    @GetMapping(value = "/say/{id}")
    //@GetMapping(value = "/{id}/say")
    //请求地址:/http/say/10
    public String say(@PathVariable("id") Integer myId) {
        return "id: " + myId;
    }

    @RequestMapping(value = "/say2",method = RequestMethod.GET)
    //请求地址:/http/say2?id=10,required是否必传,defaultValue默认值,不能是int,需要是字符"0"
    public String say2(@RequestParam(value="id",required=false,defaultValue="0") Integer myId) {
        return "id: " + myId;
    }
}
数据库操作Spring-data-jpa
jpa定义了一系列对象持久化的标准,可以看做是spring对hibernate的整合。
1 RESTful API设计

2 添加依赖和配置文件
- pom.xml文件,加入jpa依赖
<!--spring data jpa-->
        <dependency>
            <groupId>org.springframework.boot</groupId>
            <artifactId>spring-boot-starter-data-jpa</artifactId>
        </dependency>
        <dependency>
            <groupId>mysql</groupId>
            <artifactId>mysql-connector-java</artifactId>
</dependency>- application.yml文件,加入datasource和jpa配置
- ddl-auto的参数,常用的有create,update
spring:
  datasource:
    driver-class-name: com.mysql.jdbc.Driver
    url: jdbc:mysql://localhost:3306/dbgirl?useUnicode=true&characterEncoding=utf8&serverTimezone=UTC
    username: root
    password: root
  jpa:
    hibernate:
      ddl-auto: create
    show-sql: true
ddl-auto:create----每次运行该程序,没有表格会新建表格,表内有数据会清空
ddl-auto:create-drop----每次程序结束的时候会清空表
ddl-auto:update----每次运行程序,没有表格会新建表格,表内有数据不会清空,只会更新
ddl-auto:validate----运行程序会校验数据与数据库的字段类型是否相同,不同会报错
3 创建实体类
- 新建Girl类,并加上@Entity,类中的属性值对应数据库表中的字段。
- @GeneratedValue注释为自增长,
- @Id表示id字段,
- 必须要有空参数的构造方法。
package com.imooc.myspringboot.controller;


import javax.persistence.Entity;
import javax.persistence.GeneratedValue;
import javax.persistence.Id;

@Entity
public class Girl {
    @Id
    @GeneratedValue //自增长注解
    private Integer id;


    private String cupSize;


    private Integer age;

    public Girl(){

    }
    //get set
}
4 Controller类中写处理方法
- 创建Controller类,根据RESTful API,创建增删改查方法。
- 创建Repository接口,继承
JpaRepository<Girl, Integer>。括号里是我们的类类型和id类型。 - 如果JpaRepository中的方法不够用,就在自己的Repository接口中扩展新的方法。
public List<Girl> findByAge(Integer age)
//其中第二个参数为Id类型
public interface GirlRep extends JpaRepository<Girl,Integer> {
    public List<Girl> findByAge(Integer age);
}
package com.imooc.myspringboot.controller;
import org.springframework.beans.factory.annotation.Autowired;
import org.springframework.web.bind.annotation.*;
import java.util.List;
@RestController
public class GirlController {
@Autowired
private GirlRep girlRep;
//查询所有女生,get方式
@GetMapping(value = "/girls")
public List<Girl> girlList(){
return girlRep.findAll();
}
//添加一个女生,post方法
@PostMapping(value = "/girls")
public Girl girlAdd(@RequestParam("cupSize") String cupSize,
@RequestParam("age") Integer age){
Girl girl = new Girl();
girl.setCupSize(cupSize);
girl.setAge(age);
return girlRep.save(girl);
}
//更新
@PutMapping(value="/girls/{id}")
public Girl girlUpdate(@PathVariable("id") Integer id,
@RequestParam("cupSize") String cupSize,
@RequestParam("age") Integer age){
Girl girl = new Girl();
girl.setId(id);
girl.setCupSize(cupSize);
girl.setAge(age);
return girlRep.save(girl);
}
//删除
@DeleteMapping(value="/girls/{id}")
public void girlDelete(@PathVariable("id") Integer id){
Girl girl = new Girl();
girl.setId(id);
girlRep.delete(girl);
}
//通过年龄查询出列表
@GetMapping(value="/girls/age/{age}")
public List<Girl> girlListByAge(@PathVariable("age") Integer age){
return girlRep.findByAge(age);
}
}
运行

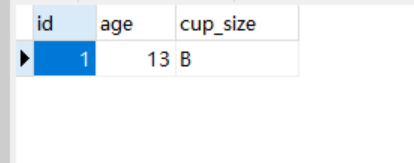
数据库增加了一条数据
put方式,需要选择x-www-form-urlencoded,不能选择form-data,multipart/form-data与x-www-form-urlencoded区别:
- multipart/form-data:既可以上传文件等二进制数据,也可以上传表单键值对,只是最后会转化为一条信息;
- x-www-form-urlencoded:只能上传键值对,并且键值对都是间隔分开的。
事务管理
- 给自己的业务方法加上@Transactional,一般只有查询的时候不用加事务。
- 数据库中cupSize字段,改成1个字符长度。插入girlB数据就不成功了。
@Service
public class GirlService {
    @Autowired
    private GirlRep girlRep;

    @Transactional
    public void insertTwo() {
        Girl girlA = new Girl();
        girlA.setCupSize("A");
        girlA.setAge(18);
        girlRep.save(girlA);

        Girl girlB = new Girl();
        girlB.setCupSize("BBBB");
        girlB.setAge(19);
        girlRep.save(girlB);
    }

}
GirlController
    @Autowired
    private GirlService girlService;

    //事务管理也无方法
    @PostMapping(value = "/girls/two")
    public void girlTwo(){
        girlService.insertTwo();
    }
结果是失败


 3万+
3万+


 被折叠的 条评论
为什么被折叠?
被折叠的 条评论
为什么被折叠?
 到【灌水乐园】发言


