


上篇关于Feign的官方资料进行了翻译和学习。小编将带你简单实现几个demo来实践Feign的学习。
这篇我们介绍如何在项目中添加Feign
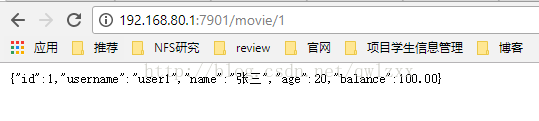
一、测一个get请求
1、基于之前的项目进行更改,将之前的消费微服务microservice-consumer-movie换成microservice-consumer-movie-feign。
2、添加feign的jar包依赖
<dependency>
	<groupId>org.springframework.cloud</groupId>
	<artifactId>spring-cloud-starter-feign</artifactId>
</dependency>
3、添加@EnableFeignClients注解
ConsumerMoveiFeignApplication.java
package com.itmuch.cloud;

import org.springframework.boot.SpringApplication;
import org.springframework.boot.autoconfigure.SpringBootApplication;
import org.springframework.cloud.netflix.eureka.EnableEurekaClient;
import org.springframework.cloud.netflix.feign.EnableFeignClients;
import org.springframework.context.annotation.Bean;
import org.springframework.web.client.RestTemplate;

@SpringBootApplication
@EnableEurekaClient
@EnableFeignClients
public class ConsumerMovieFeignApplication {

	public static void main(String[] args) {
		SpringApplication.run(ConsumerMovieFeignApplication.class, args);
	}
}
package com.itmuch.cloud.feign;

import org.springframework.cloud.netflix.feign.FeignClient;
import org.springframework.web.bind.annotation.PathVariable;
import org.springframework.web.bind.annotation.RequestMapping;
import org.springframework.web.bind.annotation.RequestMethod;

import com.itmuch.cloud.entity.User;

@FeignClient("microservice-provider-user")
public interface UserFeignClient {

	@RequestMapping(value="/simple/{id}",method= RequestMethod.GET)
	public User findById(@PathVariable("id") Long id);}
在这里,我们避免了硬编码,直接用@FeignClient注解,将用户微服务名称进行绑定。
而且这里在@FeignClient注解下,只能用@RequestMapping注解而不能用@GetMapping,且获取参数必须写完整@PathVariable("id")
5、使用接口
package com.itmuch.cloud.controller;

import org.springframework.beans.factory.annotation.Autowired;
import org.springframework.web.bind.annotation.GetMapping;
import org.springframework.web.bind.annotation.PathVariable;
import org.springframework.web.bind.annotation.RestController;

import com.itmuch.cloud.entity.User;
import com.itmuch.cloud.feign.UserFeignClient;

@RestController
public class MovieController {
	@Autowired
	private UserFeignClient userFeignClient;

	@GetMapping("/movie/{id}")
	private User findById(@PathVariable Long id) {
		return this.userFeignClient.findById(id);
	}}
二、测post请求
以上是get请求,我们再来测一个post请求
1、MovieController.java中添加内容
@PostMapping("/test")
public User testPost(User user)
{
	return this.userFeignClient.postUser(user);
}
2、UserFeignClient.java中添加内容
@RequestMapping(value="/user",method =RequestMethod.POST)
public User postUser(@RequestBody User user);
3、用户微服务UserController.java中添加内容 :
@PostMapping("/user")
public User postUser(@RequestBody User user){
	return user;
}

小结
九层之台起于垒土,学习是一个循序渐进的过程。后面将继续介绍覆写Feign的默认配置的demo,敬请期待。。。


 229
229

 被折叠的 条评论
为什么被折叠?
被折叠的 条评论
为什么被折叠?
 到【灌水乐园】发言


