服务器是debian8.4(jessie), x86_64bit, 需要对某些页面进行auth保护, 要求用公司提供的LDAP server.
这里实验我用docker来安装debian8.4和nginx 1.10.0, 下面是Dockerfile
FROM debian:8.4
MAINTAINER rainysia "rainysia#gmail.com"

# Define some variables.
ENV NGINX_VERSION release-1.10.0

# Install needed packages, compile and install.
# Remove unused packages and cleanup some directories.
RUN \
    apt-get update && \
    DEBIAN_FRONTEND=noninteractive apt-get install -y \
        ca-certificates \
        git \
        gcc \
        make \
        libpcre3-dev \
        zlib1g-dev \
        libldap2-dev \
        libssl-dev \
        wget \
        vim \
        python-pip  \
        ldap-utils \
        openssh-client && \
    pip install ldap3 && \
    mkdir /var/log/nginx && \
    mkdir /etc/nginx && \
    cd /tmp && \
    git clone https://github.com/kvspb/nginx-auth-ldap.git && \
    git clone https://github.com/nginx/nginx.git && \
    cd /tmp/nginx && \
    git checkout tags/${NGINX_VERSION} && \
    ./auto/configure \
        --add-module=/tmp/nginx-auth-ldap \
        --with-http_ssl_module \
        --with-http_gzip_static_module \
        --with-pcre \
        --with-debug \
        --conf-path=/etc/nginx/nginx.conf \
        --sbin-path=/usr/sbin/nginx \
        --pid-path=/var/log/nginx/nginx.pid \
        --error-log-path=/var/log/nginx/error.log \
        --http-log-path=/var/log/nginx/access.log && \
    make install && \
    apt-get purge -y \
        git \
        gcc \
        make \
        libpcre3-dev \
        zlib1g-dev \
        libldap2-dev \
        libssl-dev \
        wget && \
    apt-get autoremove -y && \
    apt-get -y clean && \
    rm -rf /var/lib/apt/lists/* && \
    rm -rf /usr/src/* && \
    rm -rf /tmp/* && \
    rm -rf /usr/share/doc/* && \
    rm -rf /usr/share/man/* && \
    rm -rf /usr/share/locale/*

ADD nginx.conf /etc/nginx/nginx.conf
# Expose ports.
EXPOSE 80 443
CMD ["nginx", "-g", "daemon off;"]
nginx.conf文件如下
#user  nobody;
worker_processes  1;

#error_log  logs/error.log;
#error_log  logs/error.log  notice;
#error_log  logs/error.log  info;
#pid        logs/nginx.pid;

events {
    worker_connections  1024;
}

http {
    include       mime.types;
    default_type  application/octet-stream;

    auth_ldap_cache_enabled on;
    auth_ldap_cache_expiration_time 10000;
    auth_ldap_cache_size 1000;

    ldap_server LDAP1 {
          url "ldap://cdccc03.domain.org:3268/dc=domain,dc=org?sAMAccountName?sub?";
          binddn "domain_account@domain.org";
          binddn_passwd "domain_account_passwd";
          connect_timeout 5s;
          bind_timeout 5s;
          request_timeout 5s;
          satisfy any;
          group_attribute member;
          group_attribute_is_dn on;
          #require group "OU=people,DC=domain,DC=org";
          require valid_user;
    }

    gzip                 on;
    sendfile             on;
    tcp_nopush           on;
    tcp_nodelay          on;
    keepalive_timeout    65;
    types_hash_max_size  2048;
    client_max_body_size 2000m;

    access_log /var/log/access.log;
    error_log /var/log/error.log;

    server {
        listen      80;
        server_name localhost;
        charset     utf-8;
        auth_ldap "Please enter your domain username";
        auth_ldap_servers LDAP1;

        index index.html index.htm index.php;
        root /var/www;

        location / {
            autoindex on;
            autoindex_exact_size on;
            autoindex_localtime on;
            index index.html index.htm index.php;
            try_files $uri $uri/ /index.php?$args;
        }
    }
}
解释下, 上面的nginx.conf里面, 公司的LDAP server 其中一台LDAP server是cdccc03.domain.org, 端口是3268, dc是domain和org
binddn这里填写一个公司的用户帐号, 比如tester@domain.org,
binddn_passwd 这里填写密码,
然后运行docker
docker run -tid --name nginx8089 -p 8089:80  \
  -v /docker-config/nginx_ldap.conf:/etc/nginx/conf.d/default.conf \
  -v /docker-config/index.html:/var/www/index.html \ cdkdc.domain.org:5000/nginx_ldap:latest
这里我把容器的80端口映射到宿主机的8089端口, 并且把nginx_ldap.conf挂载进容器.
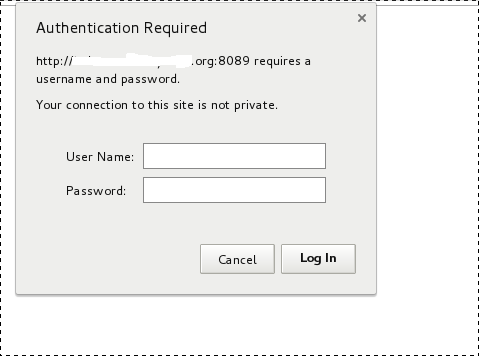
访问后, 弹出需要授权, 输入帐号,密码后成功显示页面.
可以通过docker exec -ti nginx8089 cat /var/log/nginx/error.log 来查看授权失败的日志


 1213
1213

 被折叠的 条评论
为什么被折叠?


