


上一篇文章中,获取查询语句对象时,
执行sql还是采用
List<Student> users = sqlSession.selectList("ren.selectAll")
ren.selectAll依旧是硬编码的方式,本次使用mapper代理进行升级
大致改动流程:
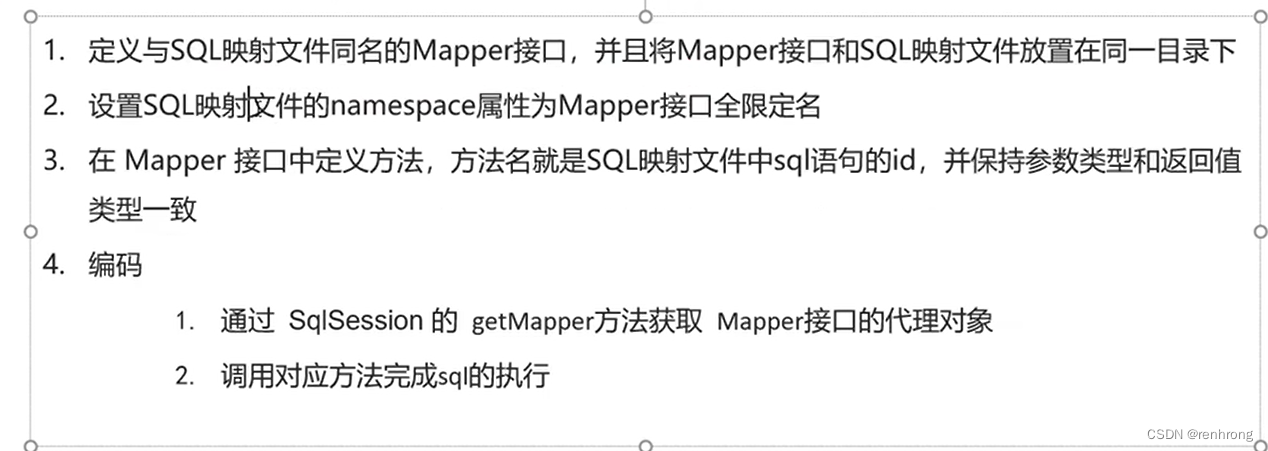
1.首先,我们依然以数据库school中的student表为例,要操作student表,我们对应的xml文件(sql映射文件
)肯定是StudentMapper.xml;那么Mapper接口定义为StudentMapper.
并且放入同一目录下:
studentMapper接口的路径为:(字迹设定,两者保持一致即可)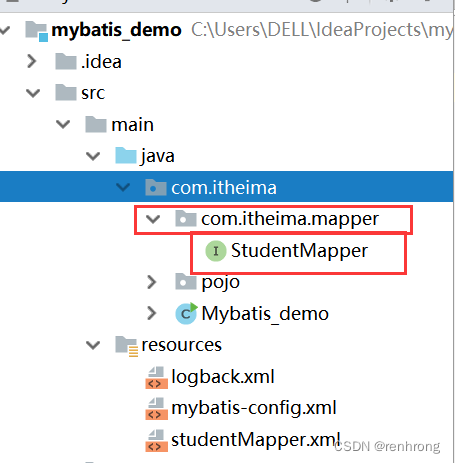
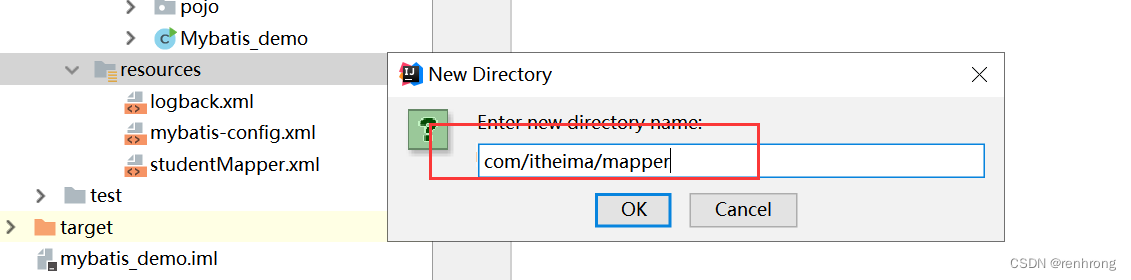
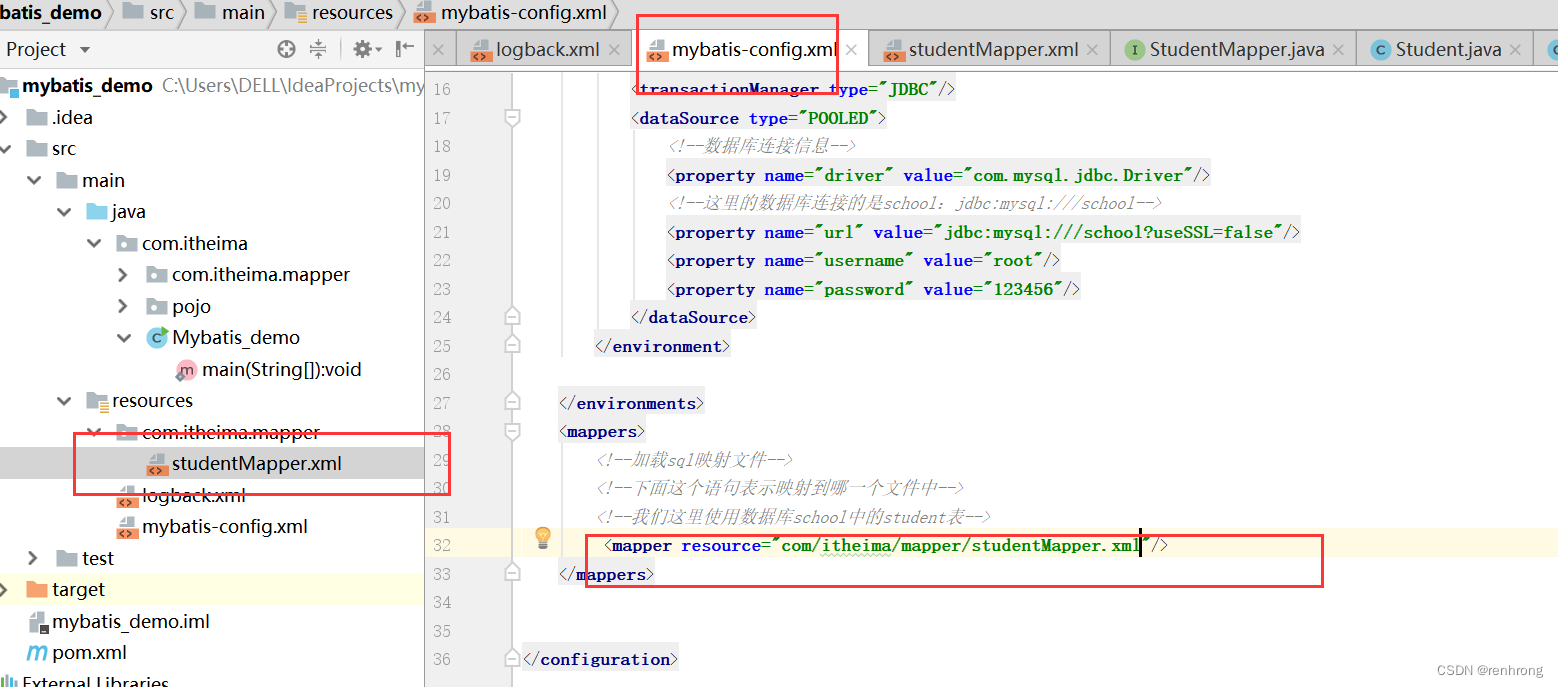
那么resources下面StudentMapper.xml的路径也要与接口保持一致
;resource下新建文件目录
最终两者在一个目录下
2.设置sql映射文件中的namespace
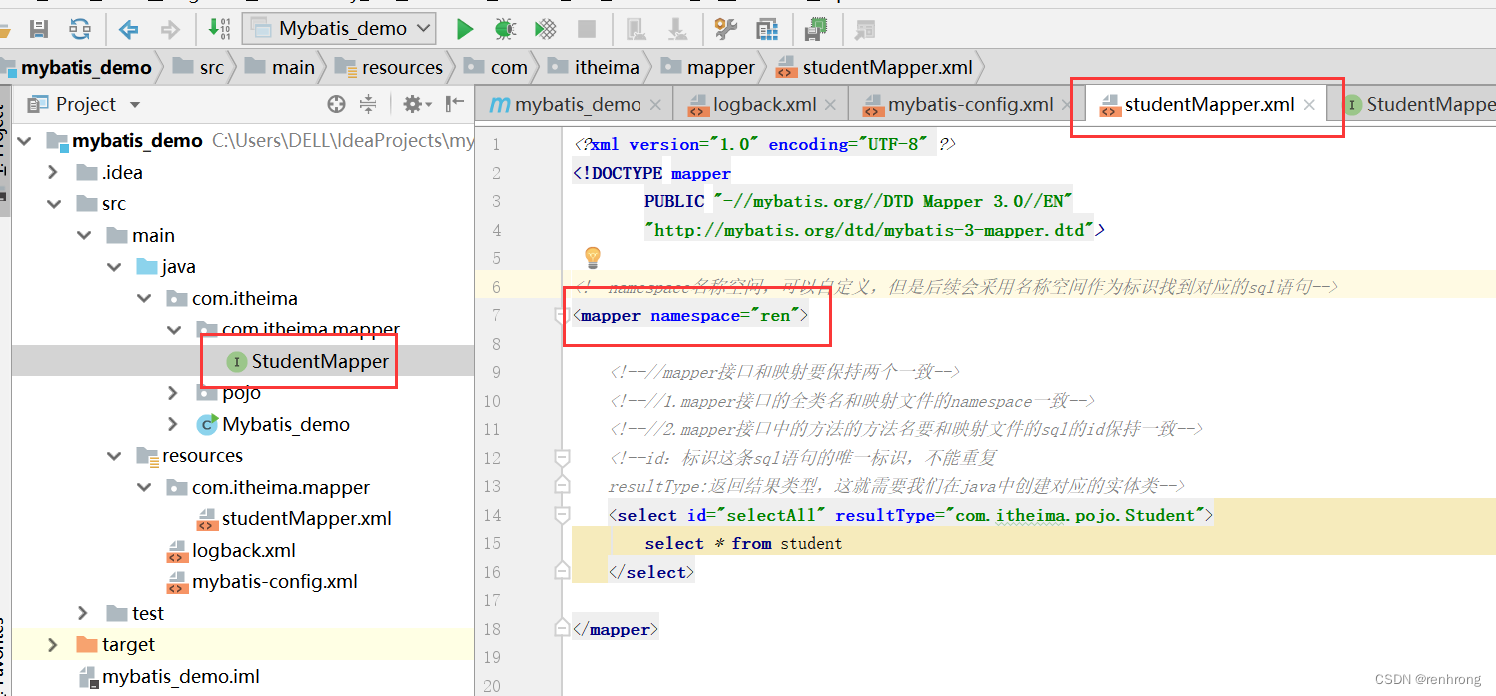
把namespace写为接口的全路径名
mapper namespace="com.itheima.mapper.StudentMapper">
3.Mapper接口中定义方法
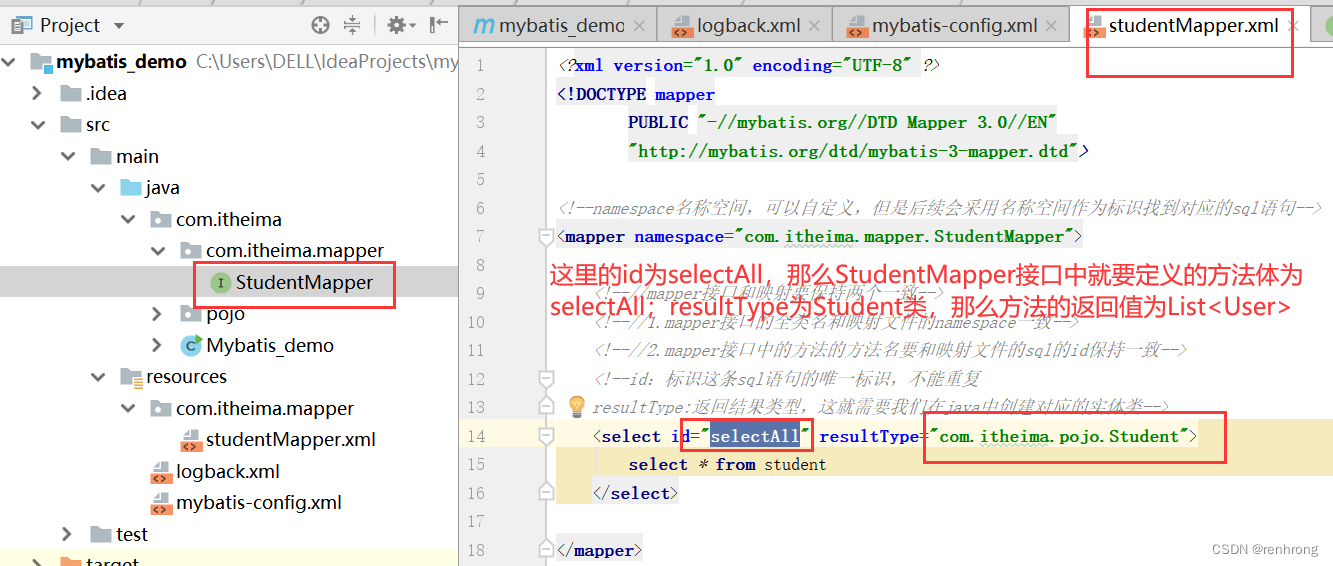
studentMapper中的内容
package com.itheima.com.itheima.mapper;

import com.itheima.pojo.Student;

import java.util.List;

public interface StudentMapper {
    List<Student> selectAll();
}
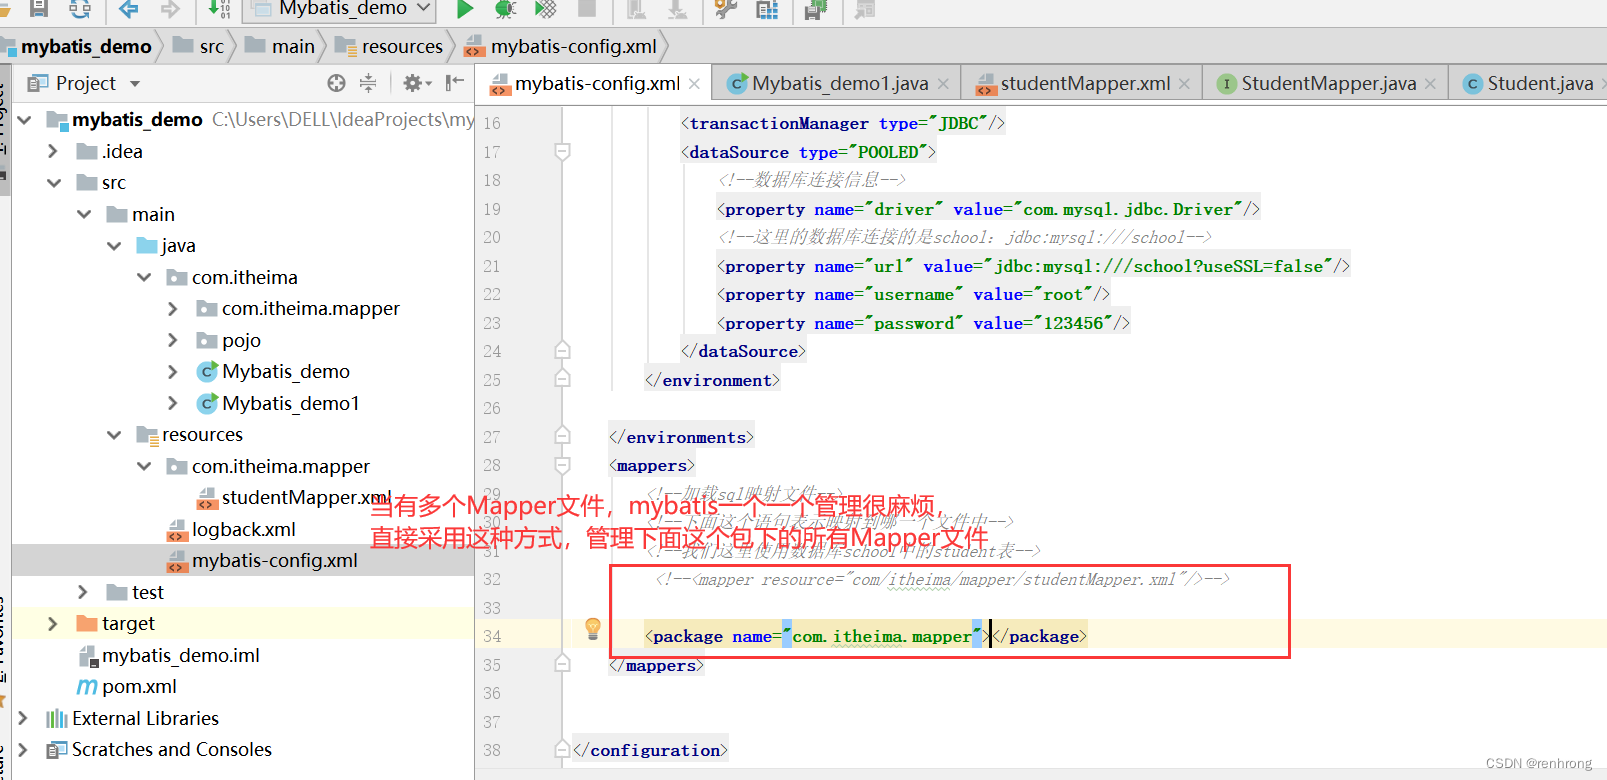
4.编码启动
public class Mybatis_demo1 {
    public static void main(String[] args) throws IOException {
        //1.加载mybatis的核心配置文件,获取sqlSessionFactory
        //1. 加载mybatis的核心配置文件,获取 SqlSessionFactory
        String resource = "mybatis-config.xml";//前面写过的mybatis-config.xml文件
        InputStream inputStream = Resources.getResourceAsStream(resource);
        SqlSessionFactory sqlSessionFactory = new SqlSessionFactoryBuilder().build(inputStream);

        //2. 获取SqlSession对象,用它来执行sql
        SqlSession sqlSession = sqlSessionFactory.openSession();
//        //3. 执行sql
//        List<Student> users = sqlSession.selectList("ren.selectAll");
        //3.采用mapper代理z执行sql
        StudentMapper mapper = sqlSession.getMapper(StudentMapper.class);
        List<Student> users = mapper.selectAll();

        System.out.println(users);
        //4. 释放资源
        sqlSession.close();
    }
}
5.注意事项
注意:studentMapper.xml文件要在mybatis-config.xml
文件中配置好


 7
7


 被折叠的 条评论
为什么被折叠?
被折叠的 条评论
为什么被折叠?
 到【灌水乐园】发言


