


起初想找一个在vue3中使用的富文本编辑器,百度了下找到了vue-quill-editor,没想到遇到了这么多坑。
一些有关vue-quill-editor的网站,好像配置都是差不多的。
配置项(Configuration) - Quill中文文档
格式化(formatting) · Quill官方中文文档 · 看云
首先在终端中下载安装,一定要安装到对应的前端文件夹中。
npm install @vueup/vue-quill@alpha --save
其次,在main.js文件中注册为全局组件,或者在对应的 vue 文件中注册为局部组件也可以。
import { createApp } from 'vue'
// 引入组件
import { QuillEditor } from '@vueup/vue-quill'
// 引入对应的样式文件,我这里只用到了 snow 的主题
import '@vueup/vue-quill/dist/vue-quill.snow.css';

// 还有其他的两个主题样式
// import '@vueup/vue-quill/dist/vue-quill.core.css';
// import '@vueup/vue-quill/dist/vue-quill.bubble.css';

// 引入 element-plus 组件库中 message 的 css 样式,对应页面的 message 才会正常显示
import 'element-plus/theme-chalk/el-message.css'
const app=createApp(App)
// 挂载为全局组件,也可以在对应的 vue 文件中注册为局部组件
app.component('QuillEditor', QuillEditor).use(router).mount('#app')
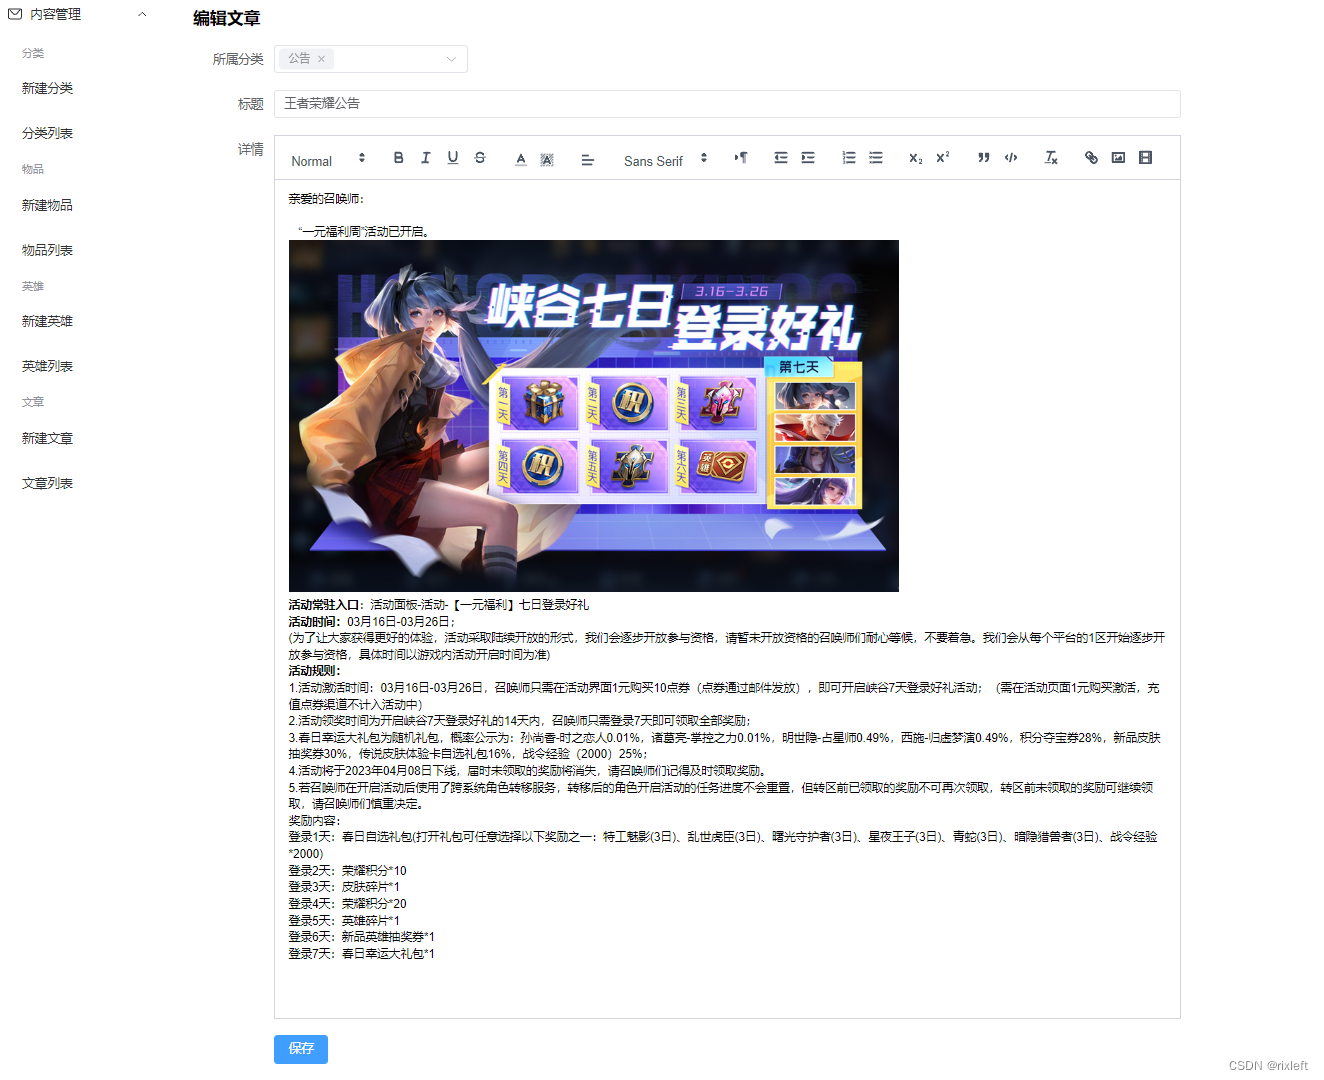
注册为全局组件之后就可以在对应的文件夹使用了,全局会多了一个 ` quill-editor ` 的标签。可以直接在 vue 文件中使用。我不想弄得太复杂,大家只需要看对应的代码就好。这里最重要的就是使用 ref 获得 quill-editor 标签的原生 dom 元素,使用quillRef.value.setHTML(data.content)方法,将后端返回的数据设置到quill-editor标签的原生 dom 上。
我也不知道为什么,fetch方法里console.log(ruleForm.content,data.content)得到的数据确实是从后端得到的数据,但是 :content=“ruleForm.content” 并没有生效,所以试了好久,现在只知道用setHTML方法才成功,有兄弟有其他方法请评论区告诉我一声,谢谢。
<template>
   <quill-editor
              ref="quillRef"
              content-type="html"
              style="width: 1008px"
              theme="snow"
              class="editor"
              :content='ruleForm.content'
              :options='option'>
 </quill-editor>

   <el-button type="primary" style="margin-top:50px" @click="submitForm()">保存</el-button>

</template>

<script setup>
import {reactive, toRaw,ref} from "vue";
import {useRouter} from 'vue-router'
import {ElMessage} from 'element-plus'
const router = useRouter()

// 获得 quill-editor 标签的原生 dom 标签。
let quillRef=ref(null)

let ruleForm = reactive({
  title: '',
  categories: [],
  content:''
})

// option是配置项
const option=reactive({
    modules: {
      toolbar: [
        [{ header: [1, 2, 3, 4, 5, 6, false] }], // 标题
        ['bold', 'italic', 'underline', 'strike'], // 加粗 斜体 下划线 删除线
        [{ color: [] }, { background: [] }], // 字体颜色、字体背景颜色
        [{ align: [] }], // 对齐方式
        [{ font: [] }], // 字体种类
        [{ direction: 'rtl' }], // 文本方向
        [{ indent: '-1' }, { indent: '+1' }], // 缩进
        [{ list: 'ordered' }, { list: 'bullet' }], // 有序、无序列表
        [{ script: 'sub' }, { script: 'super' }], // 上标/下标
        ['blockquote', 'code-block'], // 引用  代码块
        ['clean'], // 清除文本格式
        ['link', 'image', 'video'] // 链接、图片、视频
        ]
    }
  })

// 这里的逻辑是如果有id这个属性,那就编辑文章,向后端发送请求,根据对应的id,将ruleForm中编辑
//好的文章标题,分类和内容用 toRaw 转为普通对象发送给后端,后端保存在数据库中。如果没有id字段,
//则会新建文章,只需要将 ruleForm转为普通对象传给后端即可。最后路由导航到list页面,并弹出消息
//成功的提醒
const submitForm = async () => {
  let res
  if (props.id) {
    res = await changeArticle(props.id, toRaw(ruleForm))
  } else {
    res = await submitArticle(toRaw(ruleForm))
  }
  router.push('/articles/list')
  ElMessage({
    message: '保存成功',
    type: 'success',
  })
}

// 代码的意思为有 id 则调用fetch方法,向后端请求得到分类,标题和内容,再将他们赋值给ruleForm对
//象中对应的属性,最重要的是 quillRef.value.setHTML(data.content) 调用该方法,将content的内
//容设置为从后端得到的数据。
props.id && fetch()
const fetch = async () => {
  const {data} = await getArticleClassify(props.id)
  ruleForm.title = data.title
  ruleForm.content =data.content
  ruleForm.categories = data.categories
  quillRef.value.setHTML(data.content)

}

</script>

<style scoped>

</style>
options,theme,content-type,content等都是配置项,options 表示你要加入那些功能,theme为主题,content-type为以什么格式显示,content是文本内容,具体信息可以鼠标左键加ctrl点击该属性,进入对应的文件中查看。
import Delta from 'quill-delta';
import { PropType } from 'vue';
import Quill from 'quill';
import { QuillOptionsStatic } from 'quill';
export { Delta }
export { Quill }

export declare const QuillEditor: import("vue").DefineComponent<{
    content: {
        type: PropType<string | Delta>;
        default: {};
    };
    contentType: {
        type: PropType<"delta" | "html" | "text">;
        default: string;
        validator: (value: string) => boolean;
    };
    enable: {
        type: BooleanConstructor;
        default: boolean;
    };
    readOnly: {
        type: BooleanConstructor;
        default: boolean;
    };
    placeholder: {
        type: StringConstructor;
        required: false;
    };
    theme: {
        type: PropType<"" | "snow" | "bubble">;
        default: string;
        validator: (value: string) => boolean;
    };
    toolbar: {
        type: (StringConstructor | ObjectConstructor | ArrayConstructor)[];
        required: false;
        validator: (value: string | unknown) => boolean;
    };
    options: {
        type: PropType<QuillOptionsStatic>;
        required: false;
    };
    globalOptions: {
        type: PropType<QuillOptionsStatic>;
        required: false;
    };
}, {
    editor: import("vue").Ref<Element | undefined>;
    getEditor: () => Element;
    getToolbar: () => Element;
    getQuill: () => Quill;
    getContents: () => string | Delta | undefined;
    setContents: (content: string | Delta) => void;
    getHTML: () => string;
    setHTML: (html: string) => void;
    getText: () => string;
    setText: (text: string) => void;
    reinit: () => void;
}, unknown, {}, {}, import("vue").ComponentOptionsMixin, import("vue").ComponentOptionsMixin, ("textChange" | "selectionChange" | "editorChange" | "update:content" | "focus" | "blur" | "ready")[], "textChange" | "selectionChange" | "editorChange" | "update:content" | "focus" | "blur" | "ready", import("vue").VNodeProps & import("vue").AllowedComponentProps & import("vue").ComponentCustomProps, Readonly<{
    content: string | Delta;
    contentType: "delta" | "html" | "text";
    enable: boolean;
    readOnly: boolean;
    theme: "" | "snow" | "bubble";
} & {
    placeholder?: string | undefined;
    toolbar?: unknown;
    options?: QuillOptionsStatic | undefined;
    globalOptions?: QuillOptionsStatic | undefined;
}>, {
    content: string | Delta;
    contentType: "delta" | "html" | "text";
    enable: boolean;
    readOnly: boolean;
    theme: "" | "snow" | "bubble";
}>;

export { }
options配置的对象在下图详情的右边显示的那些图标就是了,可以在这个网址试试配置对象怎么写。Interactive Playground - Quill Rich Text Editor
ruleForm转为的普通对象如下图


 4448
4448


 被折叠的 条评论
为什么被折叠?
被折叠的 条评论
为什么被折叠?
 到【灌水乐园】发言


