1、远程连接工具:Xshell,ftp连接:Xftp,mysql远程连接:Navicat premium
2、安装rzsz。
yum update -y
yum list lrzsz*
yum install rzsz* -y
3、安装JDK。
yum list java*
yum install java-1.7.0-openjdk* -y
4、安装mysql。
yum list mysql*
yum install mysql-server* -y
#启动mysql
/ect/init.d/mysqld start
#重新启动mysql
/ect/init.d/mysqld start
#设置mysql开机自动启动
chkconfig mysqld on
#远程连接mysql
刚开始是连不上的,需要进入mysql更改user表里root用户的host字段,具体操作如下:
#进入mysql命令
mysql -u root
select host,user from user;
#更改root用户对应的host为“%”
update user set host = '%' where user = 'root' and host='localhost';
重新启动mysql即可通过naivicat premium进行远程连接。
5、安装tomcat
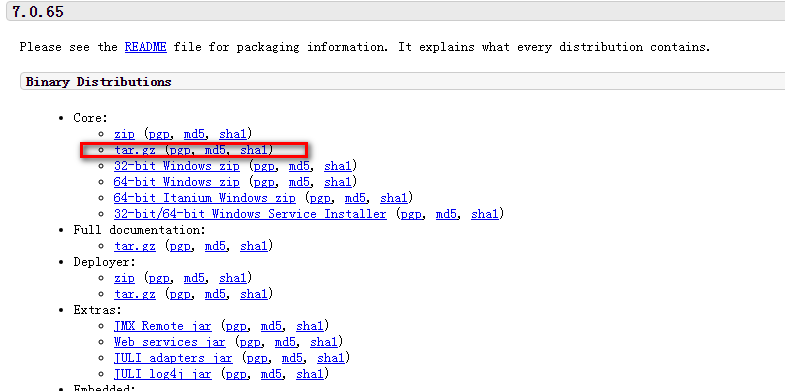
首先从官网下载tomcat linux版本的软件包
下载完之后重命名为tomcat通过ftp软件上传到 /usr/local目录下,通过命令进入local目录
#解压软件包
tar zvxf tomcat.tar.gz
5.1修改配置文件
vim server.xml
- <Service name="Catalina">
- lt;Executor name="tomcatThreadPool" namePrefix="catalina-exec-"
- maxThreads="250" minSpareThreads="20"/>
- <Connector port="80" protocol="HTTP/1.1"
- connectionTimeout="20000"
- redirectPort="8443"
- compression="on"
- compressionMinSize="2048"
- noCompressionUserAgents="gozilla,traviata"
- compressableMimeType="text/html,text/xml,text/javascript,text/css,text/plain,application/json,application/javascript,application/x-javascript"
- />
- <Connector port="8009" protocol="AJP/1.3" redirectPort="8443" executor="tomcatThreadPool"/>
- <Engine name="Catalina" defaultHost="www.renfufei.com">
- <Realm className="org.apache.catalina.realm.UserDatabaseRealm"
- resourceName="UserDatabase"/>
- <Host name="www.renfufei.com" appBase="webapps"
- unpackWARs="true" autoDeploy="true"
- xmlValidation="false" xmlNamespaceAware="false">
- <Alias>localhost</Alias>
- <Alias>renfufei.com</Alias>
- <Alias>renfufei.cn</Alias>
- <Alias>www.renfufei.cn</Alias>
- <Context docBase="/renfufei/upload" path="/upload" />
- <Context docBase="/renfufei/myapp" path="" />
- </Host>
- </Engine>
- </Service>
#设置tomcat自动启动
修改 /etc/rc.d/rc.local 文件:
- vim /etc/rc.d/rc.local
- [root@xxx bin]# cat /etc/rc.d/rc.local
- #!/bin/sh
- #
- # This script will be executed *after* all the other init scripts.
- # You can put your own initialization stuff in here if you don't
- # want to do the full Sys V style init stuff.
- touch /var/lock/subsys/local
- # start tomcat
- /usr/local/tomcat/bin/startup.sh
#启动tomcat
./startup.sh
#关闭tomcat
./startup.sh
启动tomcat之后,我们可以通过服务器ip访问,测试是否配置成功。


 625
625

 被折叠的 条评论
为什么被折叠?


