


版权声明:此文章如需转载请联系听云College团队成员阮小乙,邮箱:ruanqy#tingyun.com
无web.xml搭建web工程就是要将一般用web.xml配置的类及参数用编程的方式实现。用Annotation的方式可实现无xml化,或是减少一些xml配置。这里只是一个java web工程一般的配置,简单的可启用的web工程。给大家做个参考,大家要是有更复杂的需求可以在些基础上做添加。
工程是用maven建立的,我用的是apache-maven-3.0.5先看一眼pom.xml
<?xml version="1.0"?>
<project xsi:schemaLocation="http://maven.apache.org/POM/4.0.0 http://maven.apache.org/maven-v4_0_0.xsd" xmlns:xsi="http://www.w3.org/2001/XMLSchema-instance" xmlns="http://maven.apache.org/POM/4.0.0">
<modelVersion>4.0.0</modelVersion>
<groupId>demo</groupId>
<artifactId>demo</artifactId>
<packaging>war</packaging>
<version>0.0.1-SNAPSHOT</version>
<name>demo Maven Webapp</name>
<url>http://maven.apache.org</url>
<build>
<finalName>demo</finalName>
</build>
<properties>
<project.build.sourceEncoding>UTF-8</project.build.sourceEncoding>
<project.reporting.outputEncoding>UTF-8</project.reporting.outputEncoding>
</properties>
<dependencies>
<dependency>
<groupId>org.springframework</groupId>
<artifactId>spring-aspects</artifactId>
<version>4.2.4.RELEASE</version>
</dependency>
<dependency>
<groupId>org.springframework</groupId>
<artifactId>spring-context</artifactId>
<version>4.2.1.RELEASE</version>
</dependency>
<dependency>
<groupId>org.springframework</groupId>
<artifactId>spring-web</artifactId>
<version>4.2.1.RELEASE</version>
</dependency>
<dependency>
<groupId>org.springframework</groupId>
<artifactId>spring-webmvc</artifactId>
<version>4.2.1.RELEASE</version>
</dependency>
<dependency>
<groupId>org.springframework</groupId>
<artifactId>spring-context-support</artifactId>
<version>4.2.1.RELEASE</version>
</dependency>
<dependency>
<groupId>log4j</groupId>
<artifactId>log4j</artifactId>
<version>1.2.17</version>
</dependency>
<dependency>
<groupId>javax.servlet.jsp</groupId>
<artifactId>javax.servlet.jsp-api</artifactId>
<version>2.3.2-b02</version>
</dependency>
<dependency>
<groupId>javax.servlet</groupId>
<artifactId>jstl</artifactId>
<version>1.2</version>
</dependency>
<dependency>
<groupId>javax.servlet</groupId>
<artifactId>javax.servlet-api</artifactId>
<version>3.1.0</version>
</dependency>
</dependencies>
<profiles>
<profile>
<id>jdk-1.8</id>
<activation>
<activeByDefault>true</activeByDefault>
<jdk>1.8</jdk>
</activation>
<properties>
<maven.compiler.source>1.8</maven.compiler.source>
<maven.compiler.target>1.8</maven.compiler.target>
<maven.compiler.compilerVersion>1.8</maven.compiler.compilerVersion>
</properties>
</profile>
</profiles>
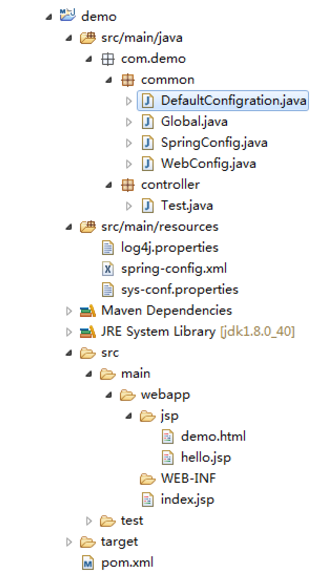
</project>工程目录结构如下:
DefaultConfigration.java 为工程起动类。
要实现org.springframework.web.
WebApplicationInitializer接口的onStartup 方法。
内容如下:
package com.demo.common;

import java.util.EnumSet;

import javax.servlet.DispatcherType;
import javax.servlet.FilterRegistration;
import javax.servlet.ServletContext;
import javax.servlet.ServletException;
import javax.servlet.ServletRegistration;

import org.springframework.web.WebApplicationInitializer;
import org.springframework.web.context.ContextLoaderListener;
import org.springframework.web.context.support.AnnotationConfigWebApplicationContext;
import org.springframework.web.filter.CharacterEncodingFilter;
import org.springframework.web.servlet.DispatcherServlet;

public class DefaultConfigration implements WebApplicationInitializer {

    @Override
    public void onStartup(ServletContext context) throws ServletException {
        //以annotation的方式装来加载配置
        AnnotationConfigWebApplicationContext rootContext = new AnnotationConfigWebApplicationContext();
        //扫描spring的配置类。
        rootContext.scan("com.demo.common");
        context.addListener(new ContextLoaderListener(rootContext));

        //添加DispatcherServlet
        ServletRegistration.Dynamic dispatcher = context.addServlet("dispatcher", new DispatcherServlet(rootContext));
        dispatcher.setLoadOnStartup(1);
        //设置servlet mapping
        dispatcher.addMapping("/");
        // Set whether this servlet should dispatch an HTTP OPTIONS request to the #doService method.
        dispatcher.setInitParameter("dispatchOptionsRequest", "true");
        // Set whether this servlet should dispatch an HTTP TRACE request to the #doService method.
        dispatcher.setInitParameter("dispatchTraceRequest", "true");
        dispatcher.setAsyncSupported(true);

        // 设置编码
        CharacterEncodingFilter encodingfilter = new CharacterEncodingFilter();
        encodingfilter.setEncoding("UTF-8");
        encodingfilter.setForceEncoding(true);
        FilterRegistration.Dynamic encodingfilterDynamic = context.addFilter("encodingfilter", encodingfilter);
        encodingfilterDynamic.addMappingForServletNames(EnumSet.of(DispatcherType.REQUEST), true, "dispatcher");

        // 加载国际化消息
        context.setInitParameter("javax.servlet.jsp.jstl.fmt.localizationContext", "message");
    }
}
SpringConfig.java,自己定义的类,主要用以bean的方式加载spring的配置。
内容如下:
package com.demo.common;

import org.springframework.beans.factory.annotation.Autowired;
import org.springframework.beans.factory.config.PropertyPlaceholderConfigurer;
import org.springframework.context.annotation.Bean;
import org.springframework.context.annotation.ComponentScan;
import org.springframework.context.annotation.Configuration;
import org.springframework.context.annotation.ImportResource;
import org.springframework.context.annotation.PropertySource;
import org.springframework.core.env.Environment;
import org.springframework.core.io.ClassPathResource;
import org.springframework.web.servlet.config.annotation.EnableWebMvc;
import org.springframework.web.servlet.view.InternalResourceViewResolver;

//声明spring要加载类中的以@bean标注的bean
@Configuration
// 支持mvc
@EnableWebMvc
// 相当于<context:component-scan>
@ComponentScan(basePackages = "com.demo")
// 加载.properties配置文件
@PropertySource("classpath:sys-conf.properties")
// 加载.xml如果没有使用到额外的.xml配置文件,则无需加载
@ImportResource({ "classpath:spring-config.xml" })
public class SpringConfig {
    @Autowired
    Environment env;

    @Bean
    // 设置 InternalResourceViewResolver. 为跳转页面自动加上前缀及后缀
    public InternalResourceViewResolver jspViewResolver() {
        InternalResourceViewResolver jspViewResolver = new InternalResourceViewResolver();
        // 前缀
        jspViewResolver.setPrefix("/jsp/");
        // 后缀
        jspViewResolver.setSuffix(".jsp");
        return jspViewResolver;
    }

    @Bean
    // 加载配置文件,加载之后,可以在 @ImportResource({ "classpath:*.xml" })导入的文中使用占位符${}
    public PropertyPlaceholderConfigurer placeholderConfigurer() {
        PropertyPlaceholderConfigurer placeholderConfigurer = new PropertyPlaceholderConfigurer();
        placeholderConfigurer.setFileEncoding("UTF-8");
        // 用ClassPathResource的方式加载
        placeholderConfigurer.setLocations(new ClassPathResource("sys-conf.properties"));
        return placeholderConfigurer;
    }
};
package com.demo.common;
import org.springframework.beans.factory.annotation.Autowired;
import org.springframework.beans.factory.config.PropertyPlaceholderConfigurer;
import org.springframework.context.annotation.Bean;
import org.springframework.context.annotation.ComponentScan;
import org.springframework.context.annotation.Configuration;
import org.springframework.context.annotation.ImportResource;
import org.springframework.context.annotation.PropertySource;
import org.springframework.core.env.Environment;
import org.springframework.core.io.ClassPathResource;
import org.springframework.web.servlet.config.annotation.EnableWebMvc;
import org.springframework.web.servlet.view.InternalResourceViewResolver;
//声明spring要加载类中的以@bean标注的bean
@Configuration
// 支持mvc
@EnableWebMvc
// 相当于
@ComponentScan(basePackages = “com.demo”)
// 加载.properties配置文件
@PropertySource(“classpath:sys-conf.properties”)
// 加载.xml如果没有使用到额外的.xml配置文件,则无需加载
@ImportResource({ “classpath:spring-config.xml” })
public class SpringConfig {
@Autowired
Environment env;
@Bean
// 设置 InternalResourceViewResolver. 为跳转页面自动加上前缀及后缀
public InternalResourceViewResolver jspViewResolver() {
    InternalResourceViewResolver jspViewResolver = new InternalResourceViewResolver();
    // 前缀
    jspViewResolver.setPrefix("/jsp/");
    // 后缀
    jspViewResolver.setSuffix(".jsp");
    return jspViewResolver;
}

@Bean
// 加载配置文件,加载之后,可以在 @ImportResource({ "classpath:*.xml" })导入的文中使用占位符${}
public PropertyPlaceholderConfigurer placeholderConfigurer() {
    PropertyPlaceholderConfigurer placeholderConfigurer = new PropertyPlaceholderConfigurer();
    placeholderConfigurer.setFileEncoding("UTF-8");
    // 用ClassPathResource的方式加载
    placeholderConfigurer.setLocations(new ClassPathResource("sys-conf.properties"));
    return placeholderConfigurer;
}
}
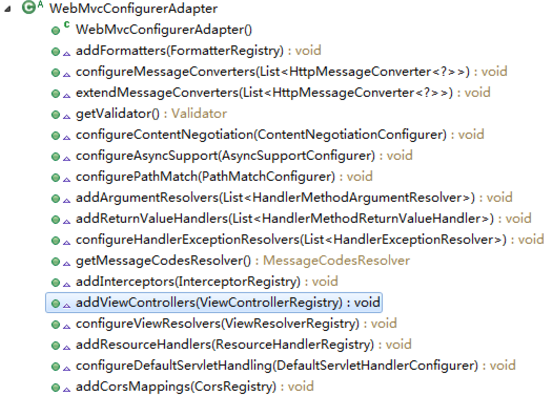
WebConfig.java实现
org.springframework.web.servlet.config.
annotation.WebMvcConfigurerAdapter
用来自定义一些sprngmvc关于web的配置。如需配置,可直接重写其相关的方法。
Global.java主要是用做存放全局变量。在这里只演示如何加载*.properties中的值
内容如下:
package com.demo.common;

import java.util.HashMap;

import javax.annotation.PostConstruct;

import org.springframework.beans.factory.annotation.Autowired;
import org.springframework.core.env.Environment;
import org.springframework.stereotype.Component;

//@Component会自动导入SpringConfig.java中已经加载过的*.properties文件内容到 Environment中。
@Component
public class Global {

    @Autowired
    Environment env;

    public static int KEY_PAGE_ROWS = 12;

    // 定义允许上传的文件扩展名
    public static final HashMap<String, String> uploadExtMap = new HashMap<String, String>();

    @PostConstruct
    public void init() {
        KEY_PAGE_ROWS = Integer.parseInt(env.getProperty("page.rows", "12"));
    }
}
TestController.java用来做测试的Controller,内容如下:
package com.demo.controller;

import java.io.IOException;

import javax.servlet.http.HttpServletRequest;

import org.springframework.stereotype.Controller;
import org.springframework.ui.Model;
import org.springframework.web.bind.annotation.RequestMapping;

@Controller
public class TestController {
    @RequestMapping(value = "/hw")
    public String hello(HttpServletRequest request, Model model) throws IOException {
        model.addAttribute("hello", "Hello World!");
        return "hello";
    }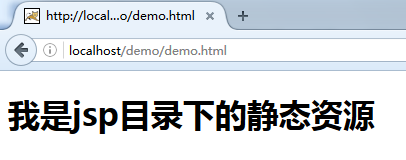
}工程启动后可访问:http://localhost/demo/demo.html
http://localhost/demo/hw.do
想阅读更多技术文章,请访问听云技术博客,访问听云官方网站感受更多应用性能优化魔力。


 1162
1162

 被折叠的 条评论
为什么被折叠?
被折叠的 条评论
为什么被折叠?
 到【灌水乐园】发言


