


 当尝试启动基于Intel Atom的Android模拟器时,出现错误提示:HAXM未正确安装。解决方法是确认并安装Android SDK中的extrasintelHardware_Accelerated_Execution_Manager目录下的intelhaxm.exe。Android模拟器使用AVD配置运行,通过AVD管理器创建和管理虚拟设备,模拟硬件特性如CPU、LCD显示、键盘等,并支持多种硬件功能。启动和停止模拟器可以通过命令行或Eclipse进行,多个模拟器实例可同时运行。硬件加速能提升模拟器性能,但请注意该功能为实验性质,可能存在不兼容性。
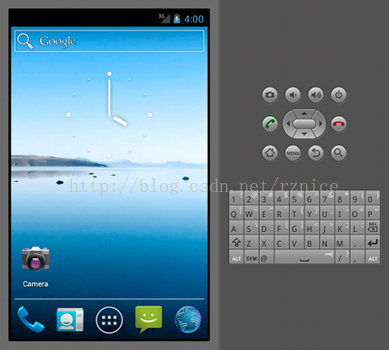
用Inter Atom模式的Android模拟器启动报一下错误:
Starting emulator for AVD 'new'
emulator: ERROR: x86 emulation currently requires hardware acceleration!
Please ensure Intel HAXM is properly installed and usable.
CPU acceleration status: HAX kernel module is not installed!
解决方案。
根据提示可以知道。该电脑上没有安装Intel HAXM
找到Android sdk所在的目录。其下有extras\intel\Hardware_Accelerated_Execution_Manager
把该目录下的intelhaxm.exe安装一下,就解决以上问题了。
可以参考:http://developer.android.com/tools/devices/emulator.html
由于以上地址被墙。贴出原帖内容:
Using the Emulator
The Android SDK includes a virtual mobile device emulator that runs on your computer. The emulator lets you prototype, develop and test Android applications without using a physical device.
The Android emulator mimics all of the hardware and software features of a typical mobile device, except that it cannot place actual phone calls. It provides a variety of navigation and control keys, which you can "press" using your mouse or keyboard to generate events for your application. It also provides a screen in which your application is displayed, together with any other active Android applications.
To let you model and test your application more easily, the emulator utilizes Android Virtual Device (AVD) configurations. AVDs let you define certain hardware aspects of your emulated phone and allow you to create many configurations to test many Android platforms and hardware permutations. Once your application is running on the emulator, it can use the services of the Android platform to invoke other applications, access the network, play audio and video, store and retrieve data, notify the user, and render graphical transitions and themes.
The emulator also includes a variety of debug capabilities, such as a console from which you can log kernel output, simulate application interrupts (such as arriving SMS messages or phone calls), and simulate latency effects and dropouts on the data network.
Overview
The Android emulator is an application that provides a virtual mobile device on which you can run your Android applications. It runs a full Android system stack, down to the kernel level, that includes a set of preinstalled applications (such as the dialer) that you can access from your applications. You can choose what version of the Android system you want to run in the emulator by configuring AVDs, and you can also customize the mobile device skin and key mappings. When launching the emulator and at runtime, you can use a variety of commands and options to control its behavior.
The Android system images available through the Android SDK Manager contain code for the Android Linux kernel, the native libraries, the Dalvik VM, and the various Android packages (such as the Android framework and preinstalled applications). The emulator provides dynamic binary translation of device machine code to the OS and processor architecture of your development machine.
The Android emulator supports many hardware features likely to be found on mobile devices, including:
An ARMv5 CPU and the corresponding memory-management unit (MMU)
A 16-bit LCD display
One or more keyboards (a Qwerty-based keyboard and associated Dpad/Phone buttons)
A sound chip with output and input capabilities
Flash memory partitions (emulated through disk image files on the development machine)
A GSM modem, including a simulated SIM Card
A camera, using a webcam connected to your development computer.
Sensors like an accelerometer, using data from a USB-connected Android device.
The following sections describe the emulator and its use for development of Android applications in more detail.
Android Virtual Devices and the Emulator
To use the emulator, you first must create one or more AVD configurations. In each configuration, you specify an Android platform to run in the emulator and the set of hardware options and emulator skin you want to use. Then, when you launch the emulator, you specify the AVD configuration that you want to load.
Each AVD functions as an independent device, with its own private storage for user data, SD card, and so on. When you launch the emulator with an AVD configuration, it automatically loads the user data and SD card data from the AVD directory. By default, the emulator stores the user data, SD card data, and cache in the AVD directory.
To create and manage AVDs you use the AVD Manager UI or the android tool that is included in the SDK. For complete information about how to set up AVDs, see Managing Virtual Devices.
Starting and Stopping the Emulator
During development and testing of your application, you install and run your application in the Android emulator. You can launch the emulator as a standalone application from a command line, or you can run it from within your Eclipse development environment. In either case, you specify the AVD configuration to load and any startup options you want to use, as described in this document.
You can run your application on a single instance of the emulator or, depending on your needs, you can start multiple emulator instances and run your application in more than one emulated device. You can use the emulator's built-in commands to simulate GSM phone calling or SMS between emulator instances, and you can set up network redirection that allows emulators to send data to one another. For more information, see Telephony Emulation, SMS Emulation, and Emulator Networking
To start an instance of the emulator from the command line, navigate to the tools/ folder of the SDK. Enter emulator command like this:
emulator -avd <avd_name> [<options>]
This initializes the emulator, loads an AVD configuration and displays the emulator window. For more information about command line options for the emulator, see the Android Emulator tool reference.
Note: You can run multiple instances of the emulator concurrently, each with its own AVD configuration and storage area for user data, SD card, and so on.
If you are working in Eclipse, the ADT plugin for Eclipse installs your application and starts the emulator automatically, when you run or debug the application. You can specify emulator startup options in the Run/Debug dialog, in the Target tab. When the emulator is running, you can issue console commands as described later in this document.
If you are not working in Eclipse, see Installing Applications on the Emulator for information about how to install your application.
To stop an emulator instance, just close the emulator's window.
For a reference of the emulator's startup commands and keyboard mapping, see the Android Emulator tool reference.
Installing Applications on the Emulator
If you don't have access to Eclipse or the ADT Plugin, you can install your application on the emulator using the adb utility. Before installing the application, you need to build and package it into an .apk as described in Building and Running Apps. Once the application is installed, you can start the emulator from the command line as described previously, using any startup options necessary. When the emulator is running, you can also connect to the emulator instance's console to issue commands as needed.
As you update your code, you periodically package and install it on the emulator. The emulator preserves the application and its state data across restarts, in a user-data disk partition. To ensure that the application runs properly as you update it, you may need to delete the emulator's user-data partition. To do so, start the emulator with the -wipe-data option. For more information about the user-data partition and other emulator storage, see Working with Emulator Disk Images.
Using Hardware Acceleration
In order to make the Android emulator run faster and be more responsive, you can configure it to take advantage of hardware acceleration, using a combination of configuration options, specific Android system images and hardware drivers.
Configuring Graphics Acceleration
Caution: As of SDK Tools Revision 17, the graphics acceleration feature for the emulator is experimental; be alert for incompatibilities and errors when using this feature.
Graphics acceleration for the emulator takes advantage of your development computer's graphics hardware, specifically its graphics processing unit (GPU), to make screen drawing faster. To use the graphics acceleration feature, you must have the following versions of the Android development tools installed:
Android SDK Tools, Revision 17 or higher
Android SDK Platform API 15, Revision 3 or higher
Use the Android SDK Manager to install these components:
Note: Not all applications are compatible with graphics hardware acceleration. In particular, the Browser application and applications using the WebView component are not compatible with graphics acceleration.
To configure an AVD to use graphics acceleration:
Make sure you have the required SDK components installed (listed above).
Start the AVD Manager and create a new AVD with the Target value of Android 4.0.3 (API Level 15), revision 3 or higher.
If you want to have graphics acceleration enabled by default for this AVD, in the Hardware section, click New, select GPU emulation and set the value to Yes.
Note: You can also enable graphics acceleration when you start an emulator using command line options as describe in the next section.
Name the AVD instance and select any other configuration options.
Caution: Do not select the Snapshot: Enabled option. Snapshots are not supported for emulators with graphics acceleration enabled.
Click Create AVD to save the emulator configuration.
If you set GPU emulation to Yes for your AVD, then graphics acceleration is automatically enabled when you run it. If you did not enable GPU emulation when you created the AVD, you can still enable it at runtime.
To enable graphics acceleration at runtime for an AVD:
If you are running the emulator from the command line, just include the -gpu on option:
emulator -avd <avd_name> -gpu on
Note: You must specify an AVD configuration that uses Android 4.0.3 (API Level 15, revision 3) or higher system image target. Graphics acceleration is not available for earlier system images.
If you are running the emulator from Eclipse, run your Android application using an AVD with the -gpu on option enabled:
In Eclipse, click your Android project folder and then select Run > Run Configura
 最低0.47元/天 解锁文章


 3万+
3万+

 被折叠的 条评论
为什么被折叠?
被折叠的 条评论
为什么被折叠?
 到【灌水乐园】发言


