一、简介
很久之前写了一篇 《.Net Core 2.0+ InfluxDB+Grafana+App Metrics 实现跨平台的实时性能监控》关于NetCore性能监控的文章,使用Influxdb+AppMetrics进行项目性能监控,由于技术有限,在正式环境使用一段时间后,莫名的AppMetrics就没办法往influxdb中插入数据了,后来我也在App Metrics作者的github上留言了,并且作者也根据我阐述的情况做了测试,没有复现我的问题,最后这个问题就不了了知了,然后项目性能监控这个事搁置了一段时间,直到2018年参加上海.net线下技术沙龙,在会场首次听到skywalking,那时候skywalking正在做NetCore的支持,会后回到公司便开始关注skywalking,知道skywalking支持NetCore后,第一时间在公司的项目中运用了skywalking。
二、安装环境
要想使用skywalking,首先得安装相关环境。本文以windows为例。
1、安装java sdk(如果不会配置java环境的话,请参考百度百科:https://jingyan.baidu.com/article/08b6a591bdb18314a80922a0.html)
2、java环境安装完成后,下载Elasticsearch进行安装 https://www.elastic.co/downloads/elasticsearch (本文使用skywalking 6.x版本,6.x版本对应使用ES 6.x版本,请自行下载对应版本)
3、下载完Elasticsearch 后将Elasticsearch解压到安装位置,以我电脑为例,我安装在D:\Program Files
4、修改ES配置,进入ES文件下的:\config,找到elasticsearch.yml,打开后修改如下配置:
# ======================== Elasticsearch Configuration =========================
#
# NOTE: Elasticsearch comes with reasonable defaults for most settings.
# Before you set out to tweak and tune the configuration, make sure you
# understand what are you trying to accomplish and the consequences.
#
# The primary way of configuring a node is via this file. This template lists
# the most important settings you may want to configure for a production cluster.
#
# Please consult the documentation for further information on configuration options:
# https://www.elastic.co/guide/en/elasticsearch/reference/index.html
#
# ---------------------------------- Cluster -----------------------------------
#
# Use a descriptive name for your cluster:
#
cluster.name: myskywalking
#
# ------------------------------------ Node ------------------------------------
#
# Use a descriptive name for the node:
#
node.name: node-1
#
# Add custom attributes to the node:
#
#node.attr.rack: r1
#
# ----------------------------------- Paths ------------------------------------
#
# Path to directory where to store the data (separate multiple locations by comma):
#
path.data: D:/Program Files/elasticsearch-6.6.2/path/to/data
#
# Path to log files:
#
path.logs: D:/Program Files/elasticsearch-6.6.2/path/to/logs
#
# ----------------------------------- Memory -----------------------------------
#
# Lock the memory on startup:
#
bootstrap.memory_lock: false
#
# Make sure that the heap size is set to about half the memory available
# on the system and that the owner of the process is allowed to use this
# limit.
#
# Elasticsearch performs poorly when the system is swapping the memory.
#
# ---------------------------------- Network -----------------------------------
#
# Set the bind address to a specific IP (IPv4 or IPv6):
#
network.host: 0.0.0.0
http.port: 9200
http.cors.enabled: true
http.cors.allow-origin: "*"
http.cors.allow-methods: OPTIONS,HEAD,GET,POST,PUT,DELETE
http.cors.allow-headers: "X-Requested-With, Content-Type, Content-Length, X-Users"
#
# For more information, consult the network module documentation.
#
# --------------------------------- Discovery ----------------------------------
#
# Pass an initial list of hosts to perform discovery when new node is started:
# The default list of hosts is ["127.0.0.1", "[::1]"]
#
#discovery.zen.ping.unicast.hosts: ["host1", "host2"]
#
# Prevent the "split brain" by configuring the majority of nodes (total number of master-eligible nodes / 2 + 1):
#
#discovery.zen.minimum_master_nodes:
#
# For more information, consult the zen discovery module documentation.
#
# ---------------------------------- Gateway -----------------------------------
#
# Block initial recovery after a full cluster restart until N nodes are started:
#
#gateway.recover_after_nodes: 3
#
# For more information, consult the gateway module documentation.
#
# ---------------------------------- Various -----------------------------------
#
# Require explicit names when deleting indices:
#
#action.destructive_requires_name: true
修改好elasticsearch.yml文件后,打开cmd命令,进入到D:\Program Files\elasticsearch-6.6.2\bin,bin文件夹下,输入如下命令: elasticsearch-service.bat install 将ES安装成windows,这样就可以方便系统重启后自动启动
然后将服务启动后即可
5、接下来下载skywalking,http://skywalking.apache.org/downloads/
选择版本为 :6.0.0-GA 的下载
三、配置和效果
1、在本地电脑中创建一个文件夹(注意:本人亲自躺过的坑,skywalking服务必须放在无空格的文件夹,比如:Program Files这个文件是绝对不能放的,不然服务运行的时候只会一闪而过,连log日志都不会生成,切记!切记!切记!)
我在D盘下创建了一个叫skyworkingService文件,路径如下:D:\skyworkingService
将下好的skywalking解压到该目录下,命名为skywalking-apm-GA,路径如下:D:\skyworkingService\skywalking-apm-GA
接着,打开config文件,找到application.yml文件,修改其配置如下:
# Licensed to the Apache Software Foundation (ASF) under one
# or more contributor license agreements. See the NOTICE file
# distributed with this work for additional information
# regarding copyright ownership. The ASF licenses this file
# to you under the Apache License, Version 2.0 (the
# "License"); you may not use this file except in compliance
# with the License. You may obtain a copy of the License at
#
# http://www.apache.org/licenses/LICENSE-2.0
#
# Unless required by applicable law or agreed to in writing, software
# distributed under the License is distributed on an "AS IS" BASIS,
# WITHOUT WARRANTIES OR CONDITIONS OF ANY KIND, either express or implied.
# See the License for the specific language governing permissions and
# limitations under the License.
cluster:
standalone:
# Please check your ZooKeeper is 3.5+, However, it is also compatible with ZooKeeper 3.4.x. Replace the ZooKeeper 3.5+
# library the oap-libs folder with your ZooKeeper 3.4.x library.
# zookeeper:
# nameSpace: ${SW_NAMESPACE:""}
# hostPort: ${SW_CLUSTER_ZK_HOST_PORT:localhost:2181}
# #Retry Policy
# baseSleepTimeMs: ${SW_CLUSTER_ZK_SLEEP_TIME:1000} # initial amount of time to wait between retries
# maxRetries: ${SW_CLUSTER_ZK_MAX_RETRIES:3} # max number of times to retry
# kubernetes:
# watchTimeoutSeconds: ${SW_CLUSTER_K8S_WATCH_TIMEOUT:60}
# namespace: ${SW_CLUSTER_K8S_NAMESPACE:default}
# labelSelector: ${SW_CLUSTER_K8S_LABEL:app=collector,release=skywalking}
# uidEnvName: ${SW_CLUSTER_K8S_UID:SKYWALKING_COLLECTOR_UID}
# consul:
# serviceName: ${SW_SERVICE_NAME:"SkyWalking_OAP_Cluster"}
# Consul cluster nodes, example: 10.0.0.1:8500,10.0.0.2:8500,10.0.0.3:8500
# hostPort: ${SW_CLUSTER_CONSUL_HOST_PORT:localhost:8500}
core:
default:
restHost: ${SW_CORE_REST_HOST:0.0.0.0}
restPort: ${SW_CORE_REST_PORT:12800}
restContextPath: ${SW_CORE_REST_CONTEXT_PATH:/}
gRPCHost: ${SW_CORE_GRPC_HOST:0.0.0.0}
gRPCPort: ${SW_CORE_GRPC_PORT:11800}
downsampling:
- Hour
- Day
- Month
# Set a timeout on metric data. After the timeout has expired, the metric data will automatically be deleted.
recordDataTTL: ${SW_CORE_RECORD_DATA_TTL:90} # Unit is minute
minuteMetricsDataTTL: ${SW_CORE_MINUTE_METRIC_DATA_TTL:90} # Unit is minute
hourMetricsDataTTL: ${SW_CORE_HOUR_METRIC_DATA_TTL:36} # Unit is hour
dayMetricsDataTTL: ${SW_CORE_DAY_METRIC_DATA_TTL:45} # Unit is day
monthMetricsDataTTL: ${SW_CORE_MONTH_METRIC_DATA_TTL:18} # Unit is month
storage:
# h2:
# driver: ${SW_STORAGE_H2_DRIVER:org.h2.jdbcx.JdbcDataSource}
# url: ${SW_STORAGE_H2_URL:jdbc:h2:mem:skywalking-oap-db}
# user: ${SW_STORAGE_H2_USER:sa}
elasticsearch:
nameSpace: ${SW_NAMESPACE:"myskywalking"}
clusterNodes: ${SW_STORAGE_ES_CLUSTER_NODES:localhost:9200}
indexShardsNumber: ${SW_STORAGE_ES_INDEX_SHARDS_NUMBER:2}
indexReplicasNumber: ${SW_STORAGE_ES_INDEX_REPLICAS_NUMBER:0}
# Batch process setting, refer to https://www.elastic.co/guide/en/elasticsearch/client/java-api/5.5/java-docs-bulk-processor.html
bulkActions: ${SW_STORAGE_ES_BULK_ACTIONS:2000} # Execute the bulk every 2000 requests
bulkSize: ${SW_STORAGE_ES_BULK_SIZE:20} # flush the bulk every 20mb
flushInterval: ${SW_STORAGE_ES_FLUSH_INTERVAL:10} # flush the bulk every 10 seconds whatever the number of requests
concurrentRequests: ${SW_STORAGE_ES_CONCURRENT_REQUESTS:2} # the number of concurrent requests
receiver-register:
default:
receiver-trace:
default:
bufferPath: ${SW_RECEIVER_BUFFER_PATH:../trace-buffer/} # Path to trace buffer files, suggest to use absolute path
bufferOffsetMaxFileSize: ${SW_RECEIVER_BUFFER_OFFSET_MAX_FILE_SIZE:100} # Unit is MB
bufferDataMaxFileSize: ${SW_RECEIVER_BUFFER_DATA_MAX_FILE_SIZE:500} # Unit is MB
bufferFileCleanWhenRestart: ${SW_RECEIVER_BUFFER_FILE_CLEAN_WHEN_RESTART:false}
sampleRate: ${SW_TRACE_SAMPLE_RATE:10000} # The sample rate precision is 1/10000. 10000 means 100% sample in default.
receiver-jvm:
default:
#service-mesh:
# default:
# bufferPath: ${SW_SERVICE_MESH_BUFFER_PATH:../mesh-buffer/} # Path to trace buffer files, suggest to use absolute path
# bufferOffsetMaxFileSize: ${SW_SERVICE_MESH_OFFSET_MAX_FILE_SIZE:100} # Unit is MB
# bufferDataMaxFileSize: ${SW_SERVICE_MESH_BUFFER_DATA_MAX_FILE_SIZE:500} # Unit is MB
# bufferFileCleanWhenRestart: ${SW_SERVICE_MESH_BUFFER_FILE_CLEAN_WHEN_RESTART:false}
#istio-telemetry:
# default:
#receiver_zipkin:
# default:
# host: ${SW_RECEIVER_ZIPKIN_HOST:0.0.0.0}
# port: ${SW_RECEIVER_ZIPKIN_PORT:9411}
# contextPath: ${SW_RECEIVER_ZIPKIN_CONTEXT_PATH:/}
query:
graphql:
path: ${SW_QUERY_GRAPHQL_PATH:/graphql}
alarm:
default:
telemetry:
none:
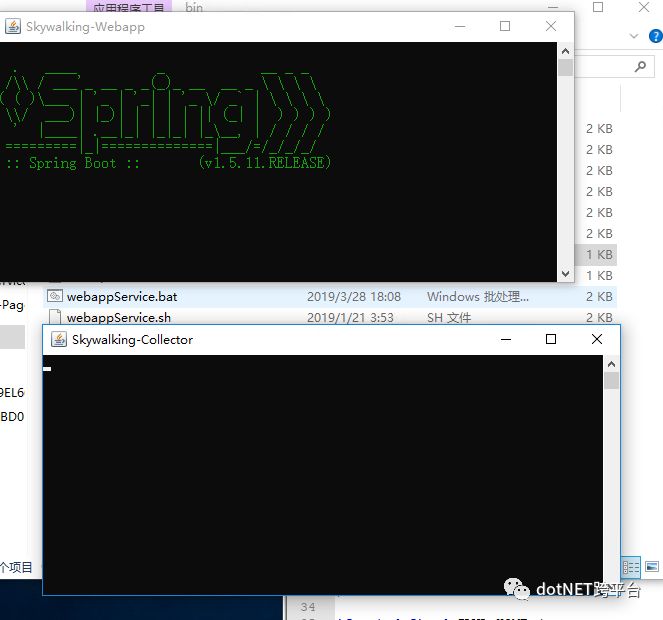
修改完成后,进入到bin文件中,右键单击startup.bat,以管理员权限运行,即可看到如下弹框

弹出这两个框说明服务已经启动了
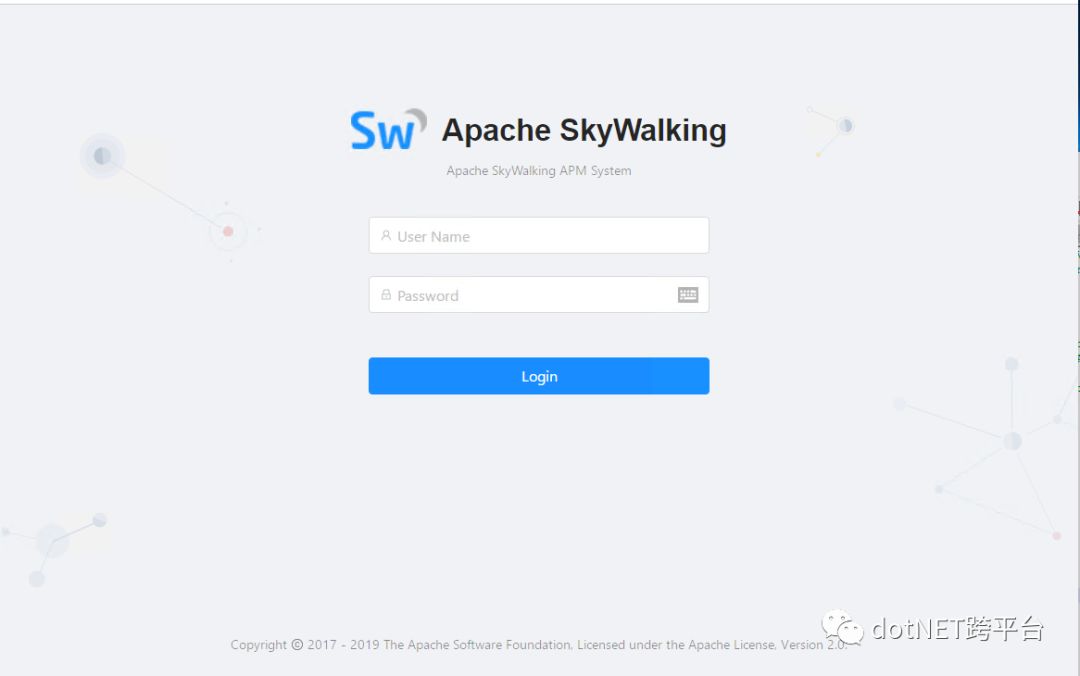
这个时候访问http://localhost:8080,即可看到如下界面:

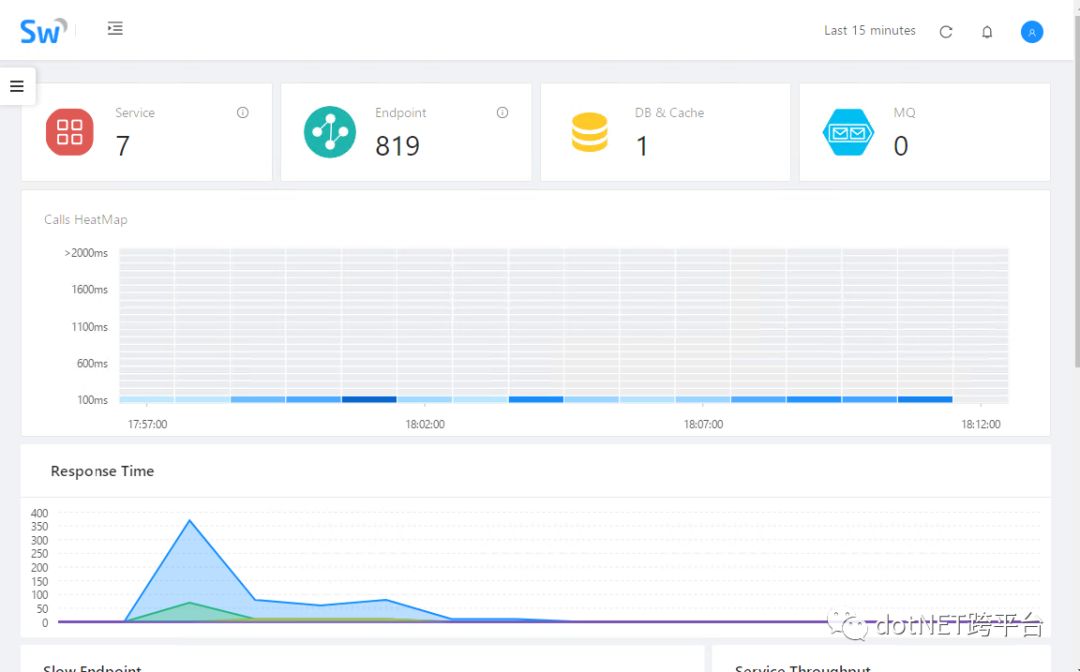
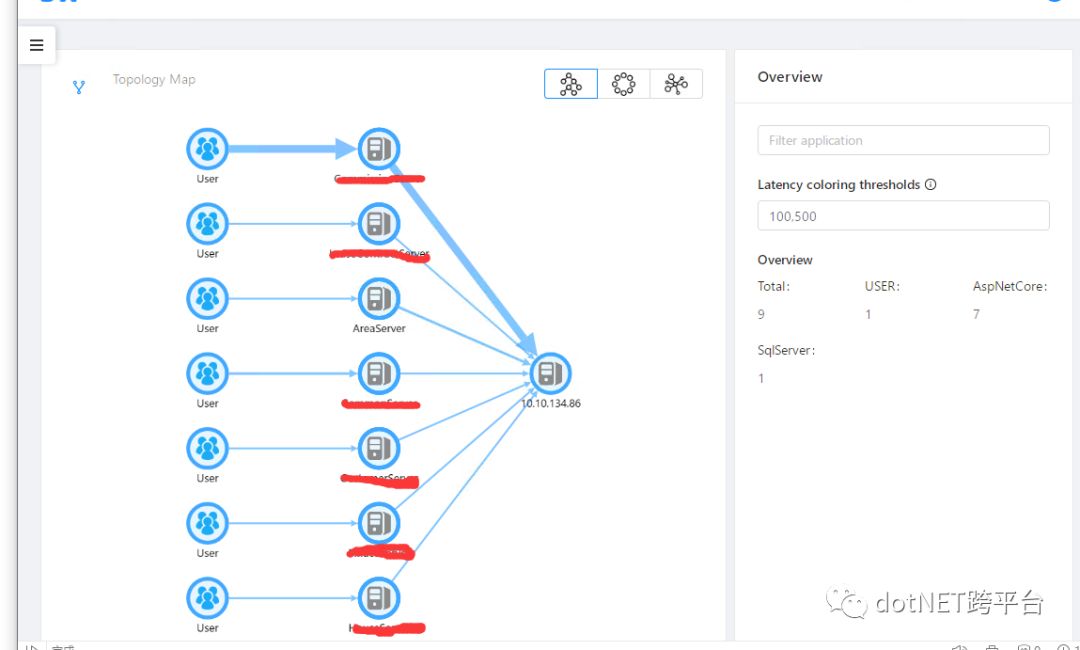
默认账号admin,密码admin,登录后看看到想要的监控数据和各服务直接的拓扑图,因为我的服务跑了一段时间,所以下面的界面是有数据的:


2、由于启动skywalking后会弹出两个命令窗口,所以如果运维人员不小心关了窗口的话服务自然就停掉了,所以为了避免这种问题,我们还可以将bin文件夹下的oapService.bat和webappService.bat进行配置,如下:
@REM
@REM Licensed to the Apache Software Foundation (ASF) under one or more
@REM contributor license agreements. See the NOTICE file distributed with
@REM this work for additional information regarding copyright ownership.
@REM The ASF licenses this file to You under the Apache License, Version 2.0
@REM (the "License"); you may not use this file except in compliance with
@REM the License. You may obtain a copy of the License at
@REM
@REM http://www.apache.org/licenses/LICENSE-2.0
@REM
@REM Unless required by applicable law or agreed to in writing, software
@REM distributed under the License is distributed on an "AS IS" BASIS,
@REM WITHOUT WARRANTIES OR CONDITIONS OF ANY KIND, either express or implied.
@REM See the License for the specific language governing permissions and
@REM limitations under the License.
@echo off
setlocal
set OAP_PROCESS_TITLE=Skywalking-Collector
set OAP_HOME=%~dp0%..
set OAP_OPTS="-Xms256M -Xmx512M -Doap.logDir=%OAP_HOME%\logs"
set CLASSPATH=%OAP_HOME%\config;.;
set CLASSPATH=%OAP_HOME%\oap-libs\*;%CLASSPATH%
if defined JAVA_HOME (
set _EXECJAVA="%JAVA_HOME%\bin\javaw"
)
if not defined JAVA_HOME (
echo "JAVA_HOME not set."
set _EXECJAVA=javaw
)
start "%OAP_PROCESS_TITLE%" %_EXECJAVA% "%OAP_OPTS%" -cp "%CLASSPATH%" org.apache.skywalking.oap.server.starter.OAPServerStartUp
endlocal
oapService.bat
@REM
@REM Licensed to the Apache Software Foundation (ASF) under one or more
@REM contributor license agreements. See the NOTICE file distributed with
@REM this work for additional information regarding copyright ownership.
@REM The ASF licenses this file to You under the Apache License, Version 2.0
@REM (the "License"); you may not use this file except in compliance with
@REM the License. You may obtain a copy of the License at
@REM
@REM http://www.apache.org/licenses/LICENSE-2.0
@REM
@REM Unless required by applicable law or agreed to in writing, software
@REM distributed under the License is distributed on an "AS IS" BASIS,
@REM WITHOUT WARRANTIES OR CONDITIONS OF ANY KIND, either express or implied.
@REM See the License for the specific language governing permissions and
@REM limitations under the License.
@echo off
setlocal
set WEBAPP_PROCESS_TITLE=Skywalking-Webapp
set WEBAPP_HOME=%~dp0%..
set JARPATH=%WEBAPP_HOME%\webapp
set WEBAPP_LOG_DIR=%WEBAPP_HOME%\logs
if exist "%WEBAPP_LOG_DIR%" (
mkdir "%WEBAPP_LOG_DIR%"
)
set LOG_FILE_LOCATION=%WEBAPP_LOG_DIR%\webapp.log
if defined JAVA_HOME (
set _EXECJAVA="%JAVA_HOME%\bin\javaw"
)
if not defined JAVA_HOME (
echo "JAVA_HOME not set."
set _EXECJAVA=javaw
)
start "%WEBAPP_PROCESS_TITLE%" %_EXECJAVA% -jar %JARPATH%/skywalking-webapp.jar --spring.config.location=%JARPATH%/webapp.yml --logging.file=%LOG_FILE_LOCATION%
endlocal
webappService.bat
其实只是将文件里的java改成了javaw,这样就可以在后台运行了,保存后再次运行startup.bat文件,这个时候界面上会有个cmd命令界面一闪而过,不要慌,我们打开资源管理器看看,会发现进程中多了两个名为“javaw.exe”的进程
这个时候访问:http://localhost:8080 一样可以看到上面的ui界面!
至此,skywalking的所有环境皆搭建完毕,接下来,在我们项目中添加skywalking的探针,方便skywalking收集我们项目中的数据
四、项目引用skywalking探针
新建一个NetCore的webapi,然后在引用中引用SkyWalking.AspNetCore,如图:

项目引用后,在Startup.cs中注入skywalking。
在头部引用:using SkyWalking.AspNetCore;
然后找到public void ConfigureServices(IServiceCollection services)下输入一下代码即可:
services.AddSkyWalking(option =>
{
       option.ApplicationCode = "AreaServer";
      option.DirectServers = 127.0.0.1:11800;
});
运行代码后,控制台内每隔几秒就会有以下信息输出

证明skywalking探针已经成功,接下来请求一下你的接口,然后进入skywalking的ui中看看你的成果吧!
原文地址:https://www.cnblogs.com/landonzeng/p/10616644.html
.NET社区新闻,深度好文,欢迎访问公众号文章汇总 http://www.csharpkit.com 


 1266
1266


 被折叠的 条评论
为什么被折叠?


