


node.js框架StrongLoop学习笔记(二)
创建新模型(model)
命令行方式
- 在项目目录下执行,slc loopback:model ;
- [?] Enter the model name:输入新模型名称;
- ? Select the data-source to attach XXXXX(XXXXX是你输入的模型名称) to: (Use arrow keys)
(no data-source)
❯ db (memory)
mysql (mysql)
选择一个数据源附加到模型上,下面会把之前我们为项目配置的数据库连接显示出来(用上下箭头键选择); - [?] Select model’s base class: (Use arrow keys)
Model (Loopback模型基类)
❯ PersistedModel (持久化模型,扩展了基本的查询和CRUD支持)
ACL (模型用于访问控制的元数据)
AccessToken (基于令牌的认证和访问控制)
Application (管理客户端应用程序,并组织他们的用户)
Change
Checkpoint
Email (Email模型)
Role (角色模型)
RoleMapping (角色映射列表)
Scope
User (内置的用户模型。扩展于PersistedModel模型。)
(custom)
(Move up and down to reveal more choices)
选择模型基类(用上下箭头键选择); - [?] Expose XXXXX via the REST API?(Y/n)是否使用REST API来公开该模型;
如果选择是,那么将多一步[?] Custom plural form (used to build REST URL): (自定义复数形式,用于构建REST URL); - Let’s add some XXXXX properties now.()
Enter an empty property name when done.(该向导会一直出现 直到你输入空 Model name: 为止 )
? Property name: 属性名称; - ? Property type: (Use arrow keys)
❯ string
number
boolean
object
array
date
buffer
(Move up and down to reveal more choices)
属性类型 - ? Required? (y/N)是否必须项
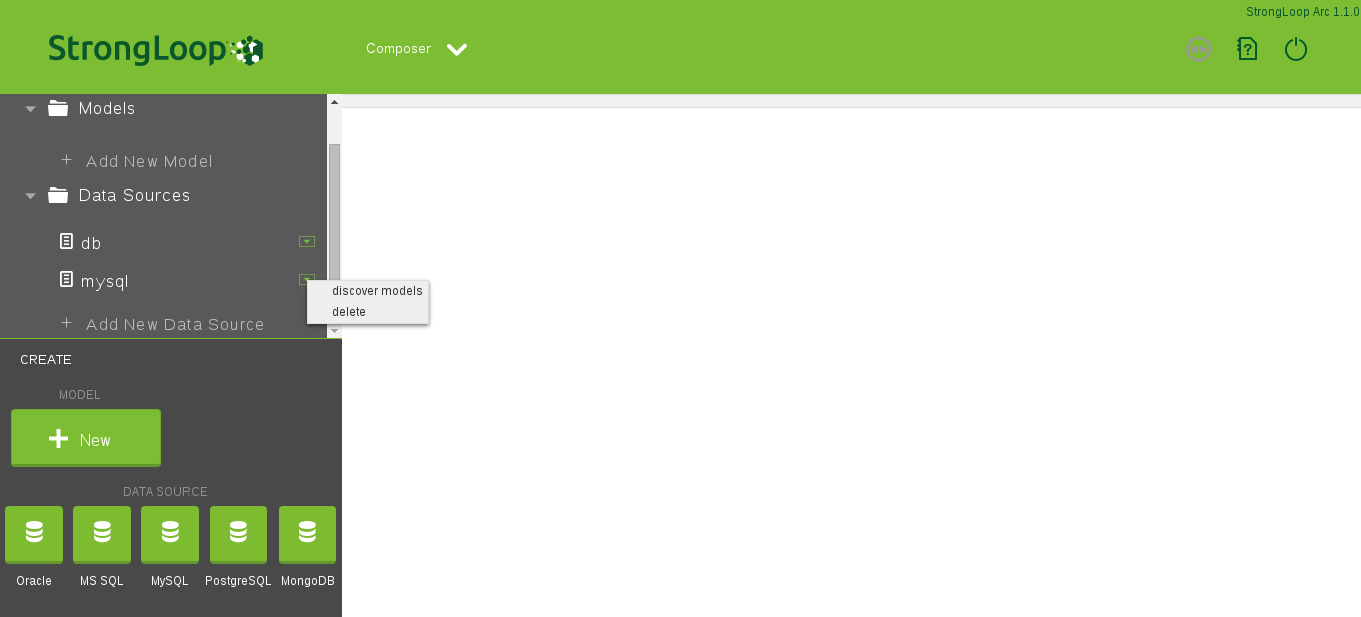
网页界面方式
在我们建立的数据源后方下拉菜单中选择discover models
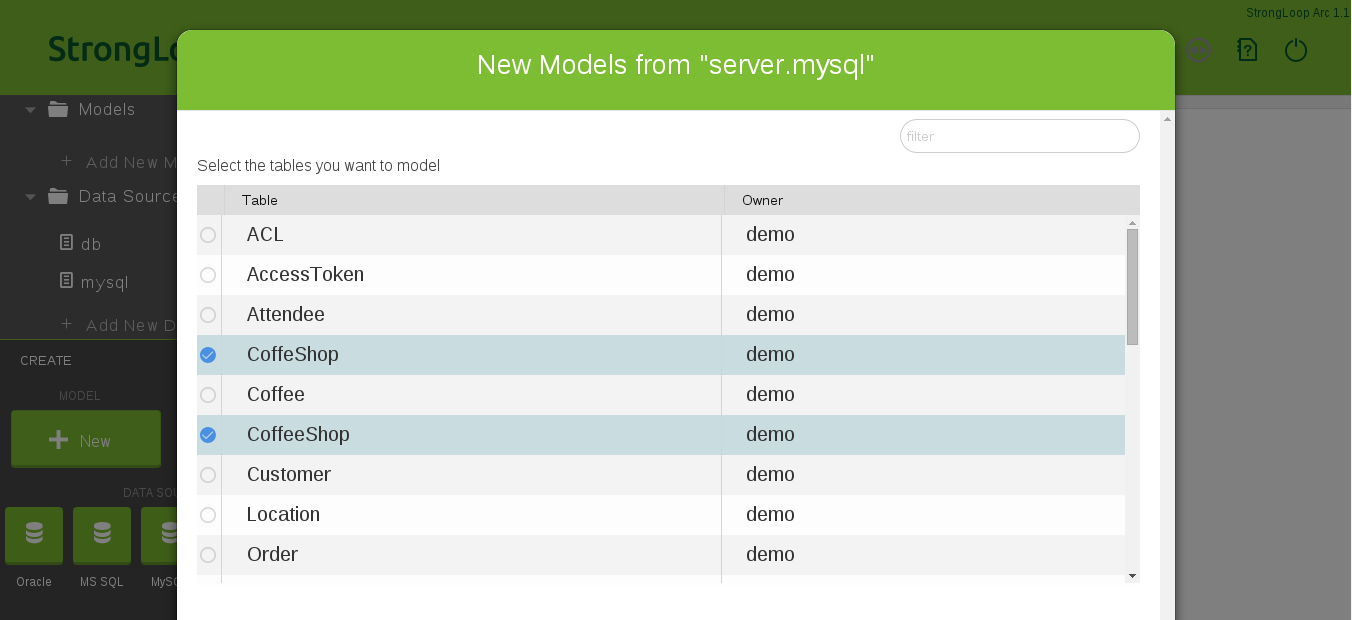
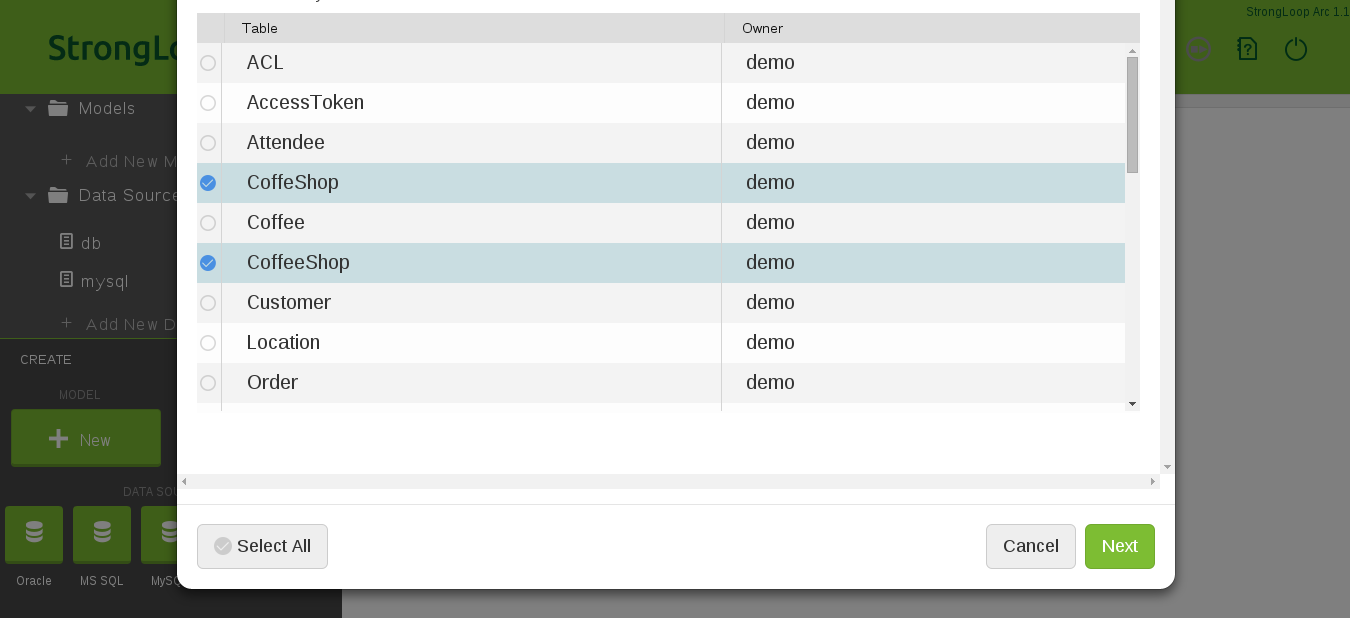
列出了数据源中所有表结构,我们选择我模型中用到的表,然后点击下一步
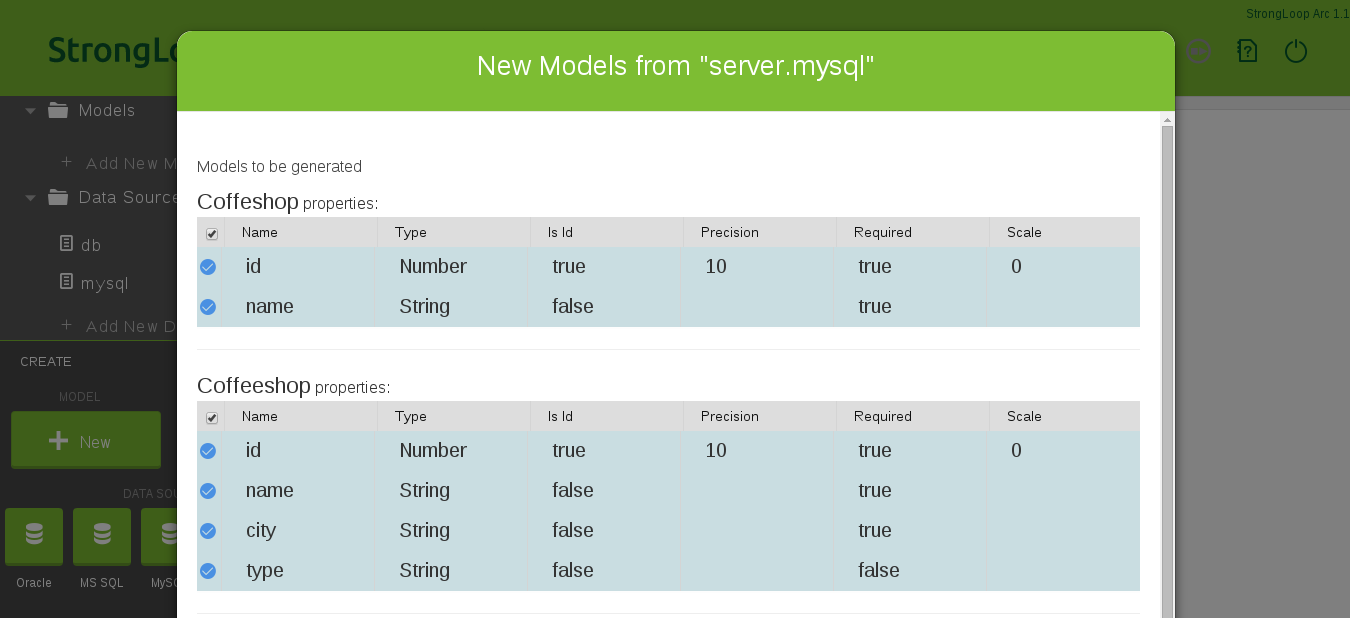
接着让我们选择模型中所应用到的属性(即表中字段)
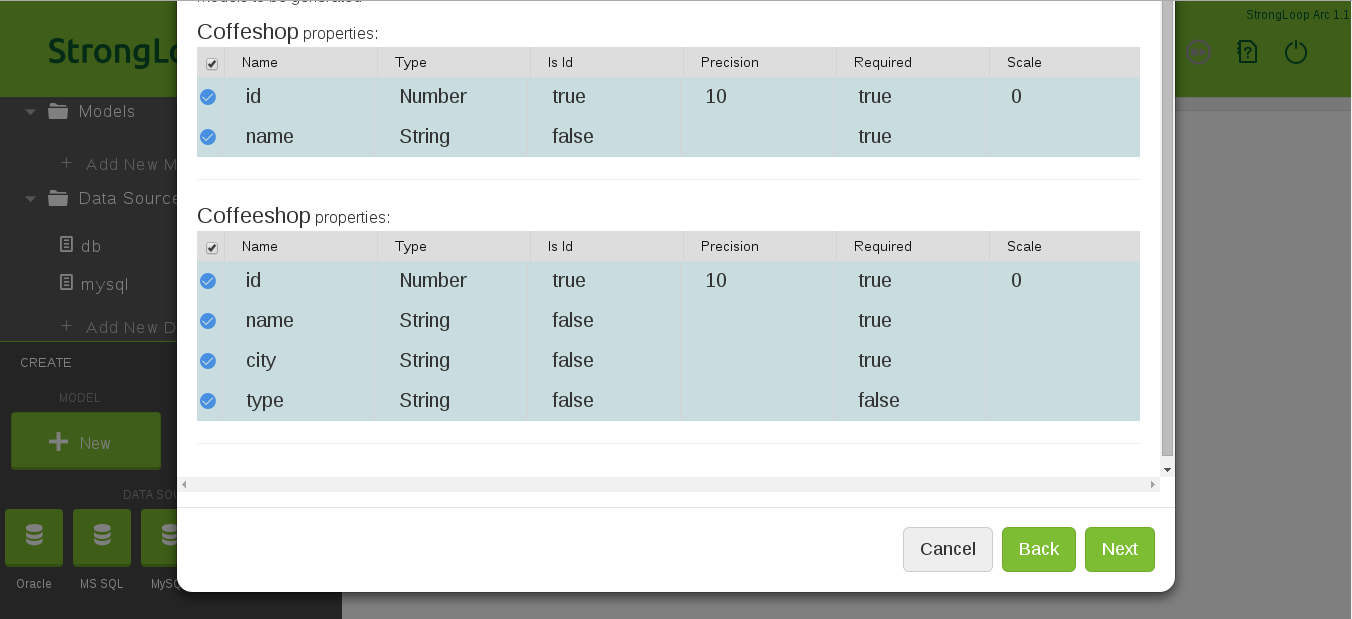
点击下一步,系统会在模型分支下添加出我们建立的模型。
添加新属性
命令行方式
- 在项目目录下执行,slc loopback:property;
- ? Select the model:
Change
Checkpoint
Coffeeshop
❯ Coffeshop
Email
Role
RoleMapping
(Move up and down to reveal more choices)
选择要添加属性的模型 - ? Enter the property name: 属性名称
- ? Property type: (Use arrow keys)
❯ string
number
boolean
object
array
date
buffer
(Move up and down to reveal more choices)
属性类型 - ? Required? (y/N)是否必须项
网页界面方式
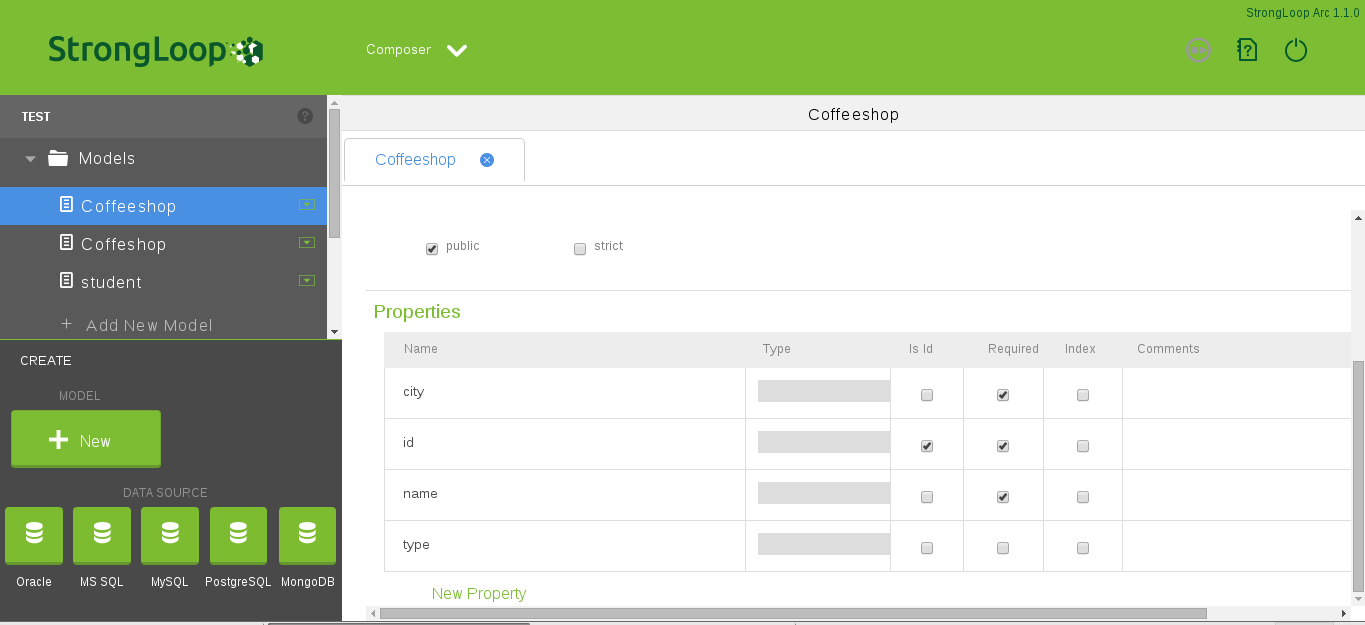
在Models分支中,选择要添加属性的模型,然后在右边操作界面中New Property,在新行中添加即可
今天就到这里,休息、休息!(对于模型操作这里还会有内容:P)


 340
340


 被折叠的 条评论
为什么被折叠?
被折叠的 条评论
为什么被折叠?
 到【灌水乐园】发言


