


terraform的安装:
官方下载:
浏览器打开terraform官方主页https://www.terraform.io/ 点击Download Terraform 跳转到程序下载页面:

找到自己对应的操作系统,按照操作系统选择安装terraform的方式:
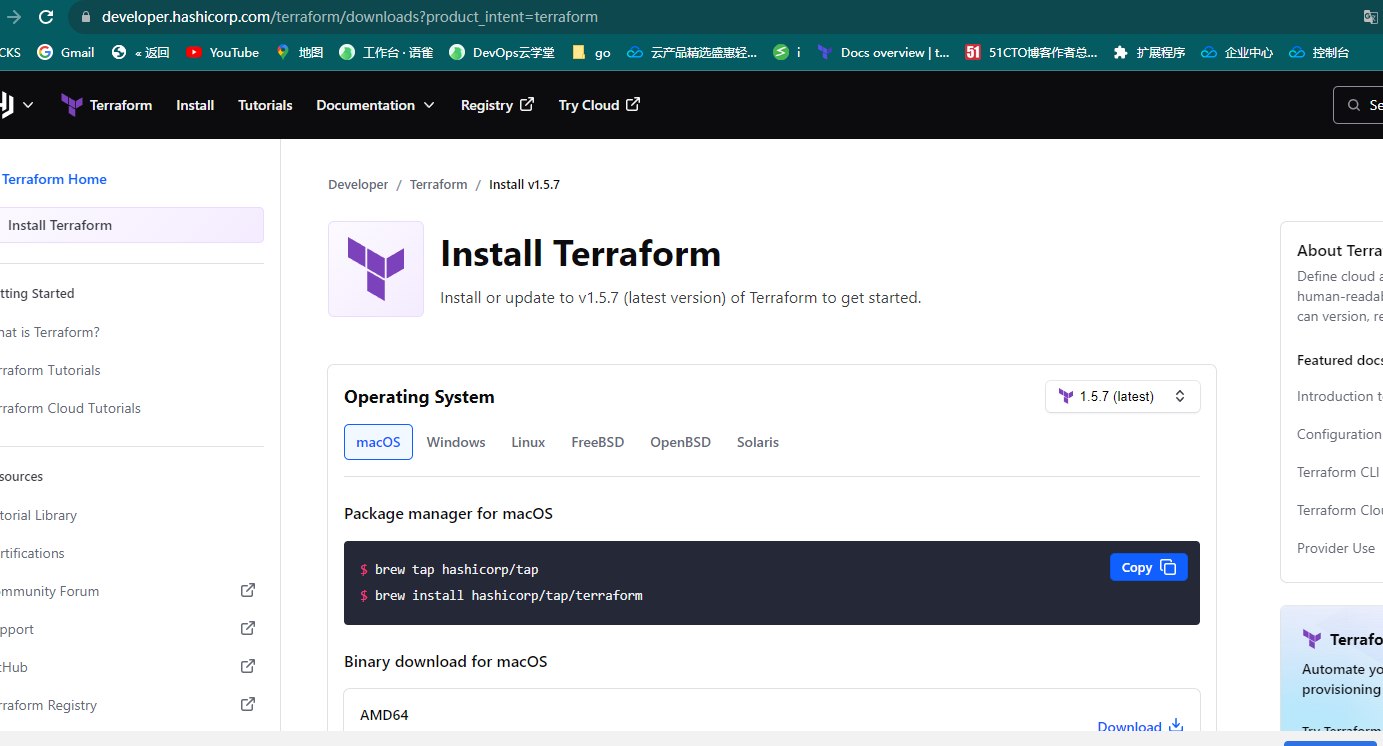
linux为例:
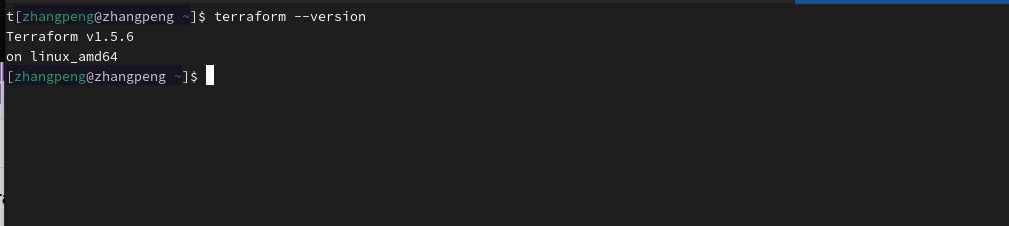
我有一台 rocky linux 工作主机也是直接参照官方文档安装的:

terraform --version
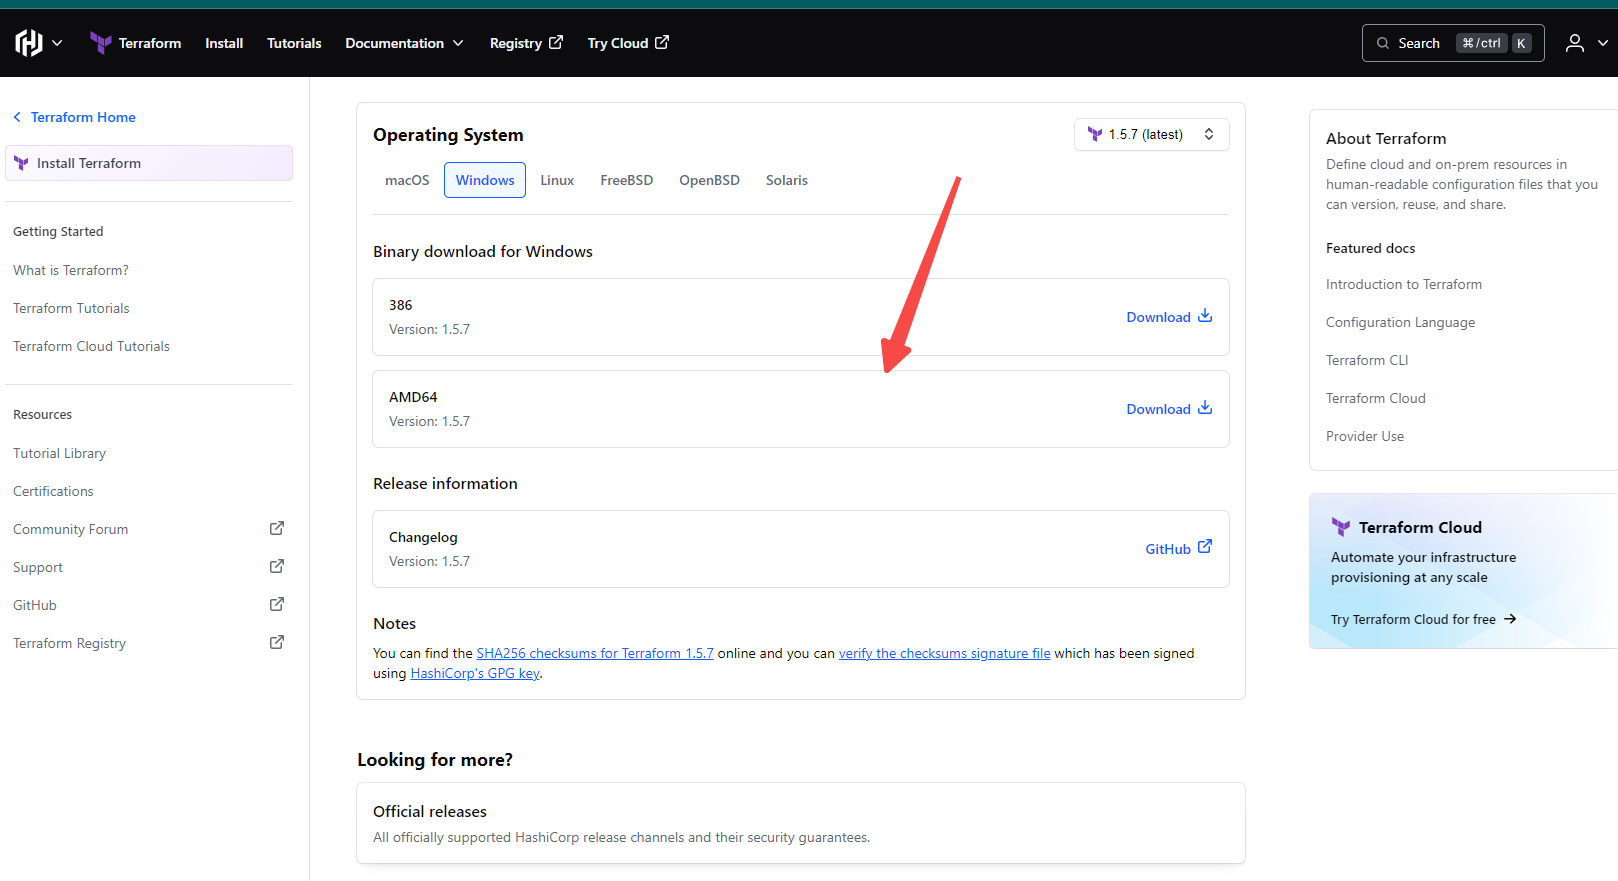
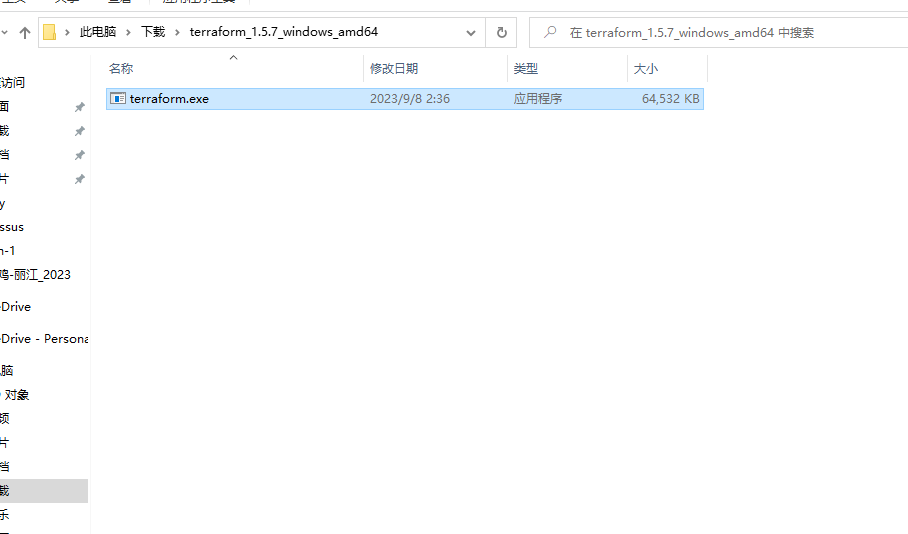
不一样的windows:
官方的方式
注:我的系统是Windows10专业版!
but 要配置系统变量…我个人是很嫌弃麻烦。这里参考了ucloud在知乎上面的Chocolate的安装方式:
Chocolate
Terraform初体验(一) windows安装。不求甚解,先跑一遍:
以管理员身份打开powershell:
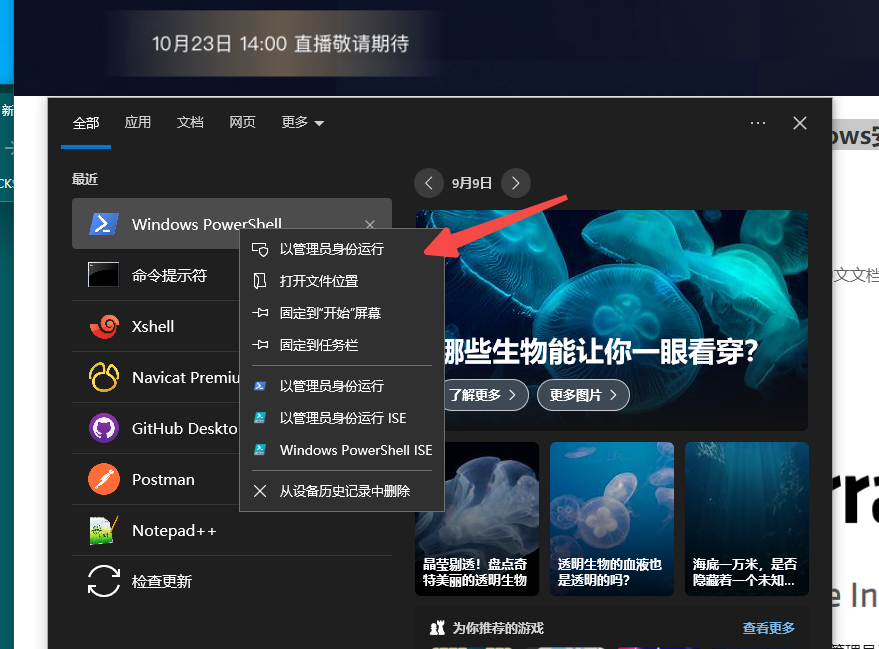
安装Chocolatey
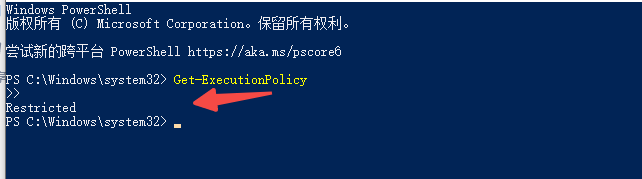
- 以管理员身份打开PowerShell,输入Get-ExecutionPolicy,返回Bypass则代表目前执行的是绕过策略来安装。如果返回的是Restricted受限制的,则需要运行Set-ExecutionPolicy AllSigned 或者 Set-ExecutionPolicy Bypass -Scope Process。
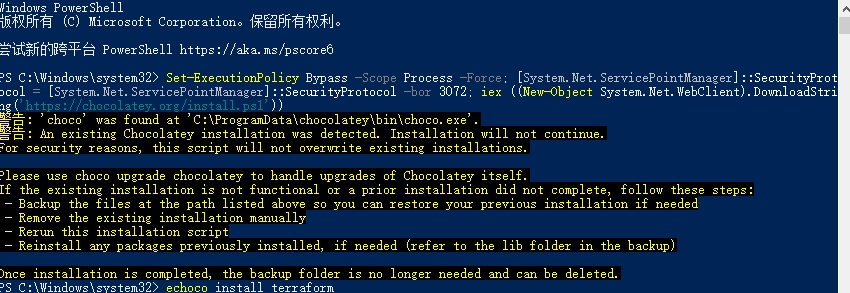
- 既然是Restricted受限制的,复制下面这条命令即可安装完成,这里没有太多坑。
Set-ExecutionPolicy Bypass -Scope Process -Force; [System.Net.ServicePointManager]::Sec
通过Chocolatey安装Terraform
执行命令choco install terraform 按照提示中间输入y,安装完成后输入terraform --version 确认安装成功。

如果有网络或者其他问题可以参考ucloud的知乎笔记:https://zhuanlan.zhihu.com/p/266784852
vscode相关插件的安装
vs code 安装就忽略了 安装一下terraform的组件:

vscode terraform 腾讯云
凭证获取
参照腾讯云官方文档https://cloud.tencent.com/document/product/1653/82868
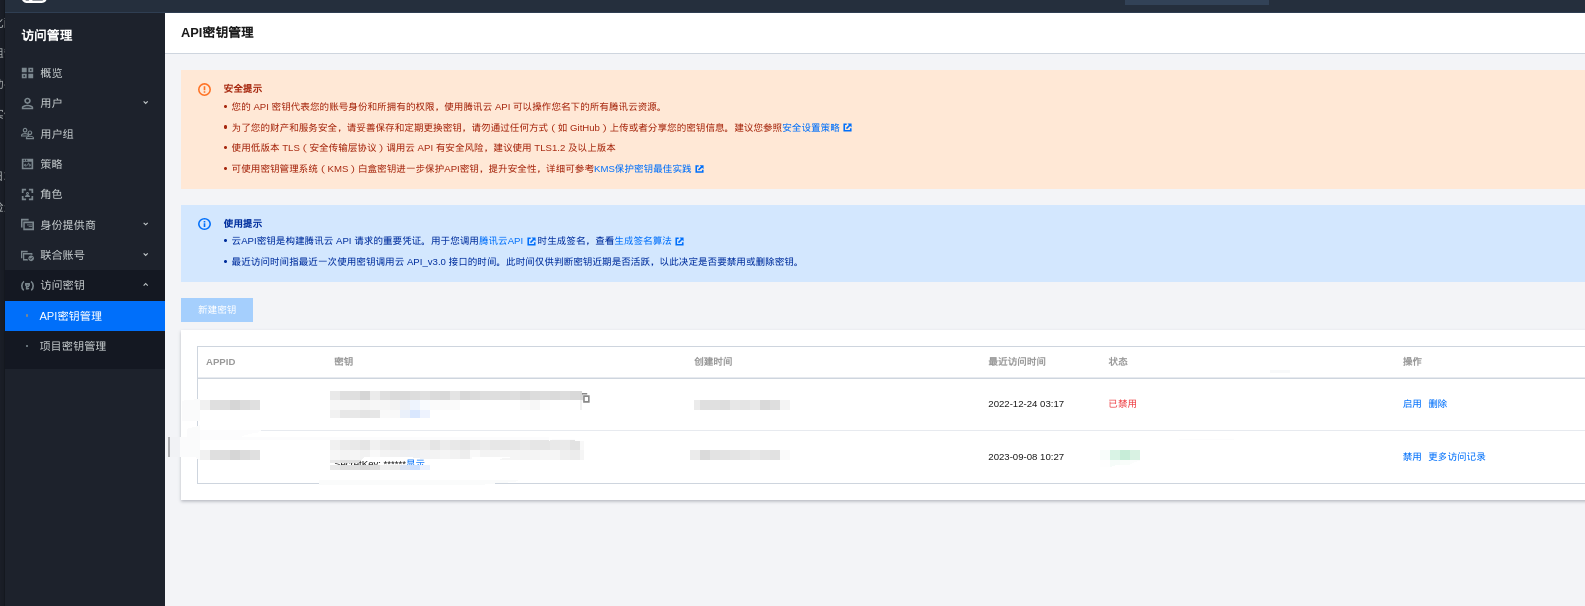
在首次使用 Terraform 之前,请前往 云 API 密钥页面 申请安全凭证 SecretId 和 SecretKey。若已有可使用的安全凭证,则跳过该步骤。
- 登录 访问管理控制台,在左侧导航栏,选择访问密钥 > API 密钥管理。
- 在 API 密钥管理页面,单击新建密钥,即可以创建一对 SecretId/SecretKey。
创建一个项目文件夹,使用vs code打开:
创建一个简单demo?
vscode 打开文件夹,以windows为例:
 从main.tf开始,创建一个main.tf文件
参照官方文档:
terraform {
  required_providers {
    tencentcloud = {
      source = "tencentcloudstack/tencentcloud"
      version = "1.81.25"
    }
  }
}

provider "tencentcloud" {

  # Configuration options
}
现在要在provider中引入腾讯云的配置。怎么样合理的引用呢?询问了一下cluda:

总结一下:
- 直接在provider模块中指定,这种应该是最直接的
- 环境变量
- 创建一个tfvar的文件写入
- 使用命令行参数
我个人这里下使用第三种了创建一个tfvar的文件…毕竟展示过程的时候可以不显示我的密钥哈哈哈哈
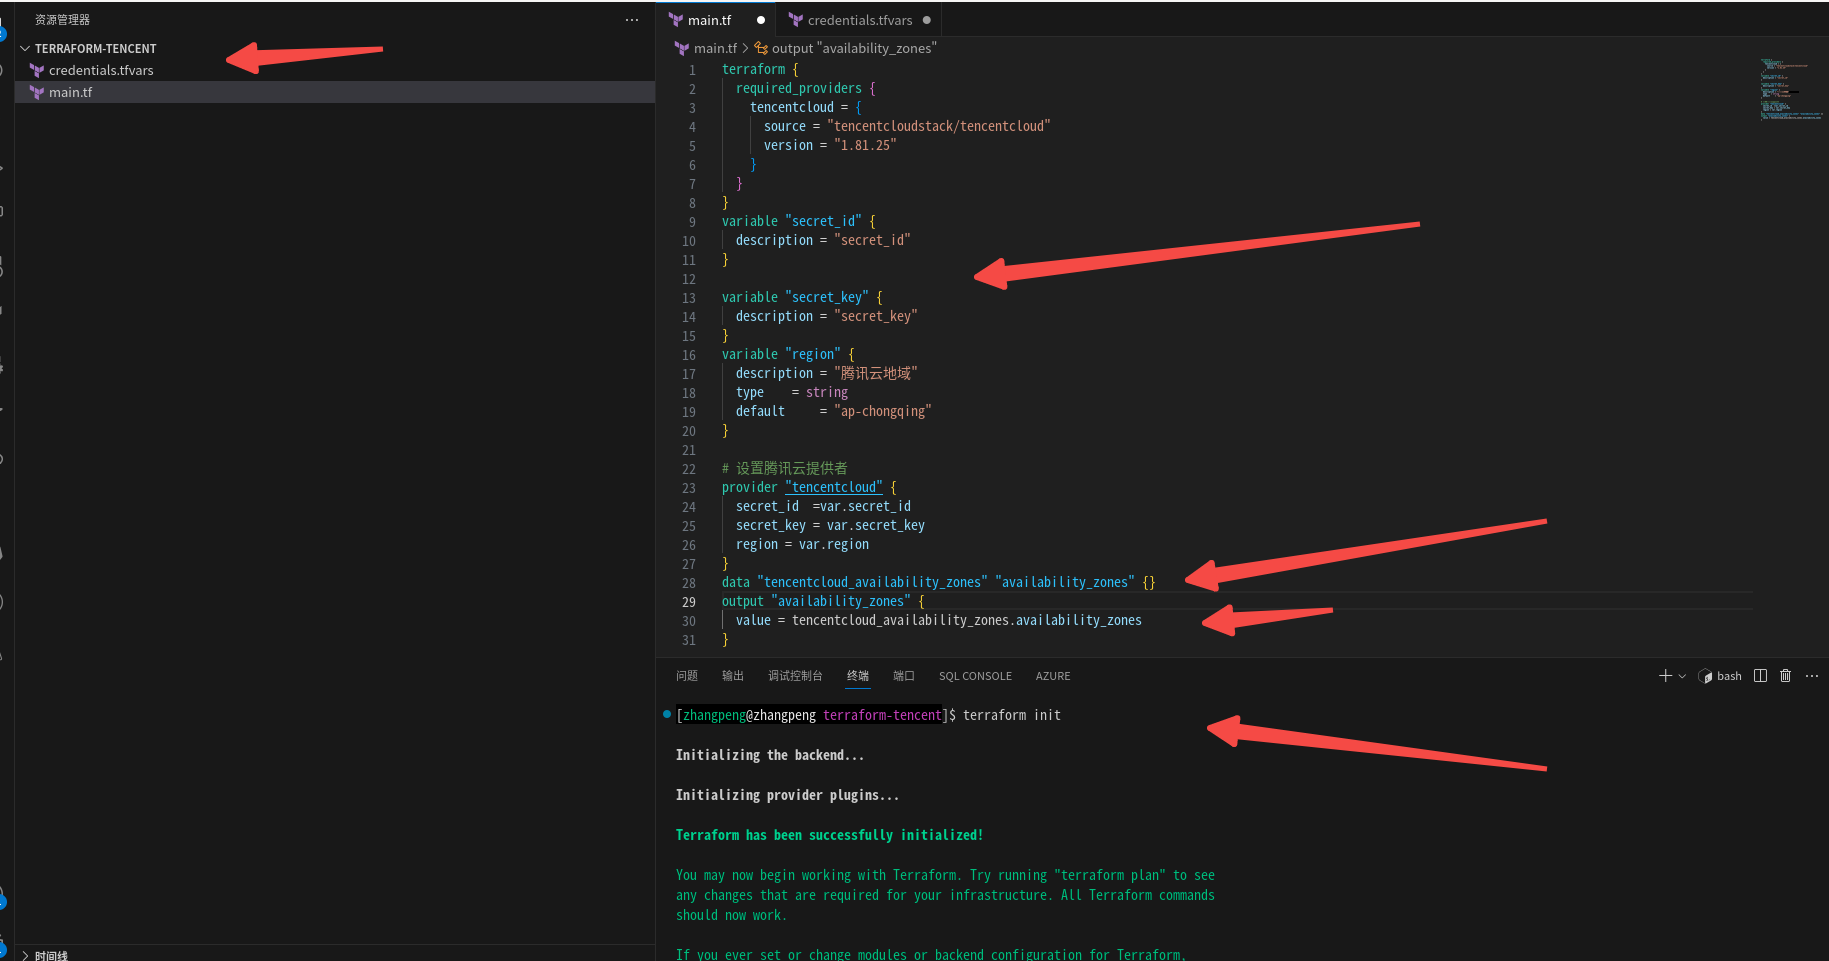
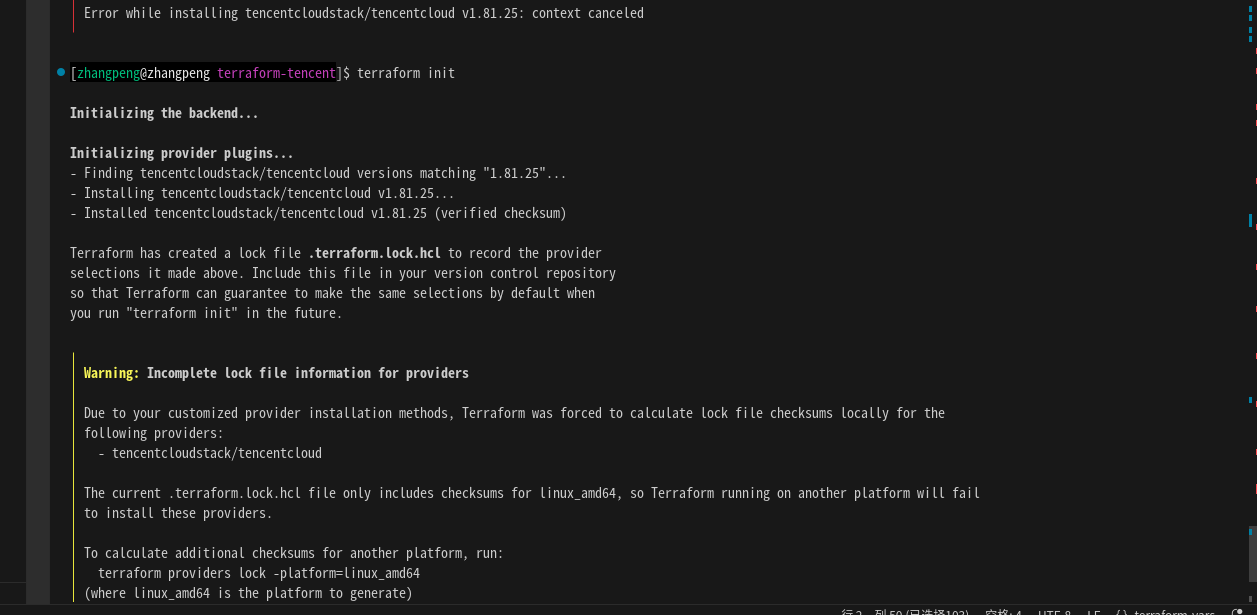
terraform init
初始化项目:
terraform init
当然也会出现下面这种状况


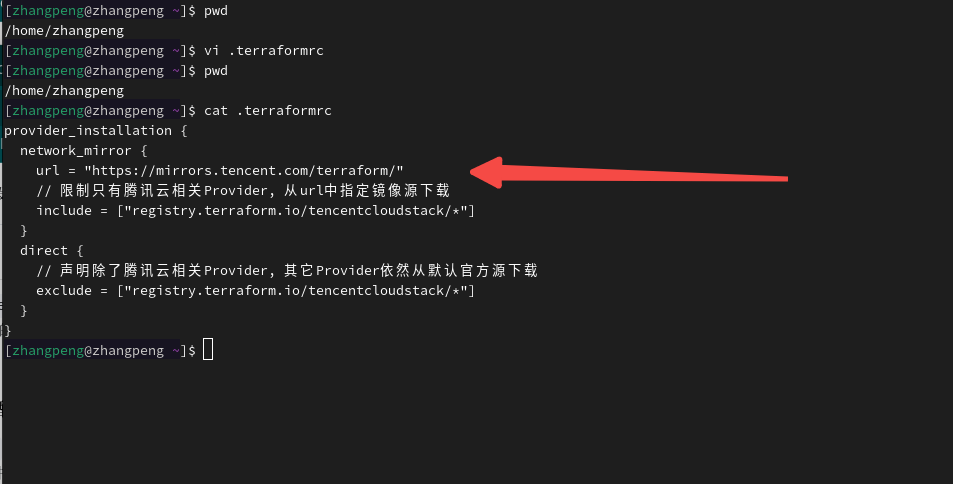
参照:https://cloud.tencent.com/document/product/1653/82912,到用户加目录下创建.terraformrc文件。阿里云或者华为云应该也有类似的方法:
provider_installation {
  network_mirror {
    url = "https://mirrors.tencent.com/terraform/"
    // 限制只有腾讯云相关Provider, 从url中指定镜像源下载
    include = ["registry.terraform.io/tencentcloudstack/*"]
  }
  direct {
    // 声明除了腾讯云相关Provider, 其它Provider依然从默认官方源下载
    exclude = ["registry.terraform.io/tencentcloudstack/*"]
  }
}
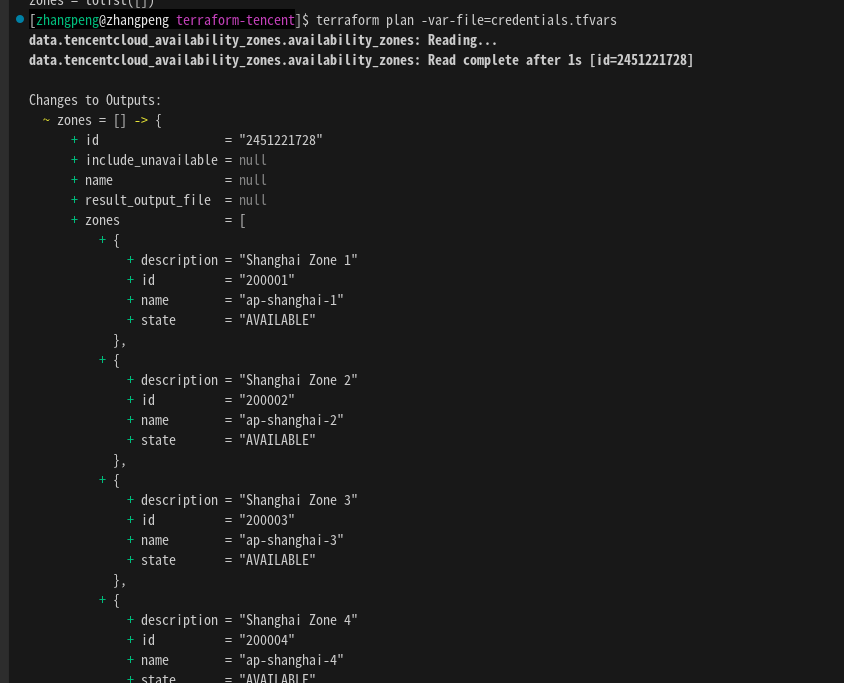
简单例子:查询区域下可用区列表:
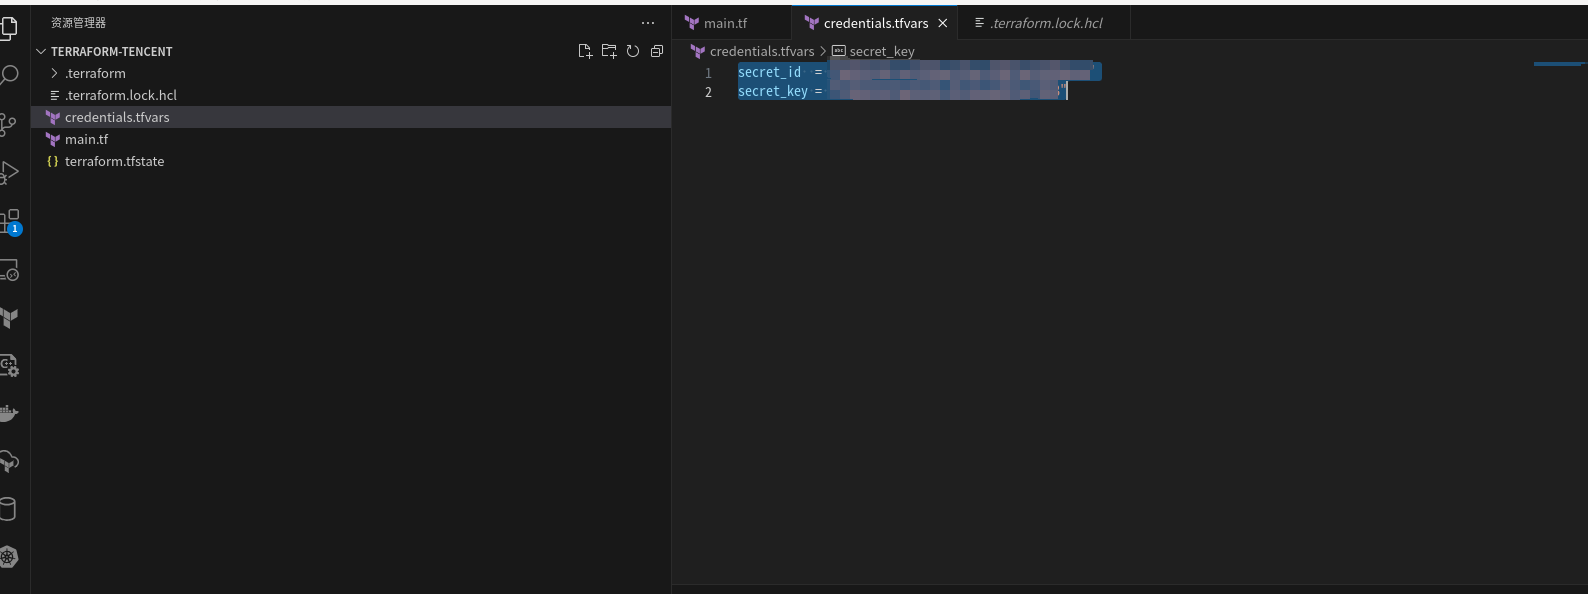
创建一个 变量的文件credentials.tfvars
secret_id  = "xxxxxxxxxxxxxxx"
secret_key = "xxxxxxxxxxx"
创建main.tf文件:
terraform {
  required_providers {
    tencentcloud = {
      source = "tencentcloudstack/tencentcloud"
      version = "1.81.25"
    }
  }
}
variable "region" {
  description = "腾讯云地域"
  type    = string
  default     = "ap-shanghai"
}
variable "secret_id" {}
variable "secret_key" {}

# 设置腾讯云提供者
provider "tencentcloud" {
  secret_id  =var.secret_id
  secret_key = var.secret_key
  region = var.region
}
data "tencentcloud_availability_zones" "availability_zones" {}

output "zones" {
  value = data.tencentcloud_availability_zones.availability_zones
}
terraform plan 检查:
terraform plan -var-file=credentials.tfvars

terraform apply执行:
terraform apply -var-file=credentials.tfvars
就是列一个简单例子这里,主要是为了密钥文件与main 分开 当然了这里还有data output这些字段也会逐步展现一下!


 592
592


 被折叠的 条评论
为什么被折叠?
被折叠的 条评论
为什么被折叠?
 到【灌水乐园】发言


