


本文参考地址:
官方帮助文档
软件下载
各个邮件服务器软件比较
官方和自签名证书for hmailserver
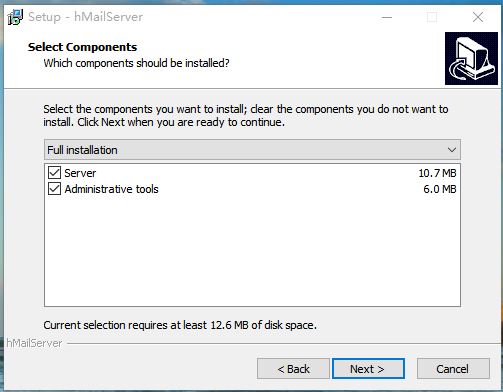
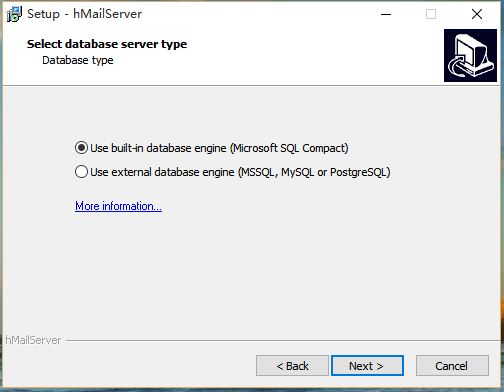
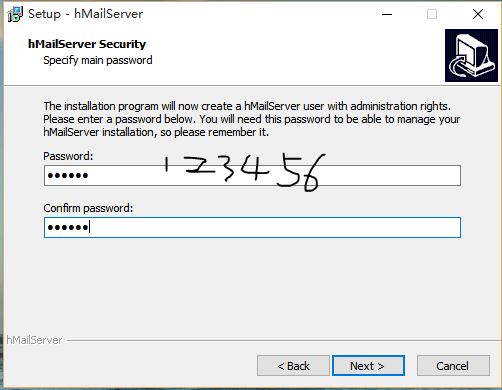
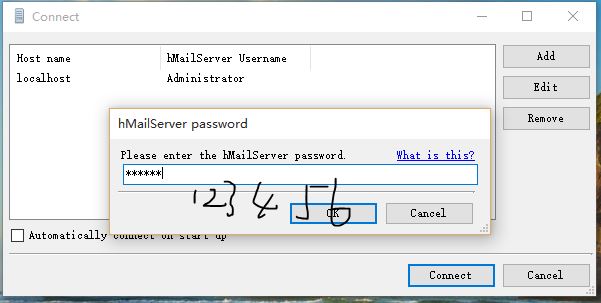
安装
如果是win10 务必安装.net 3.5 参见附录
下载完软件后,开始安装:

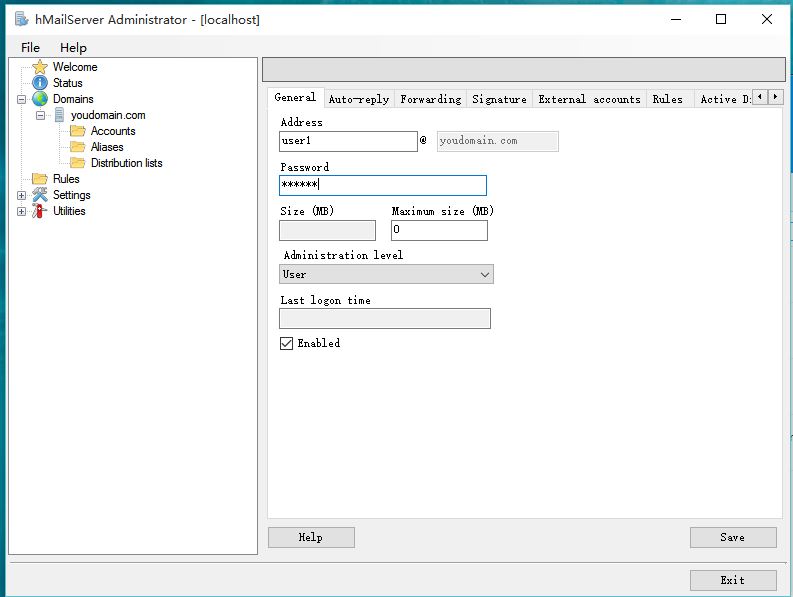
使用outlook访问
在outlook里面配置连接信息:
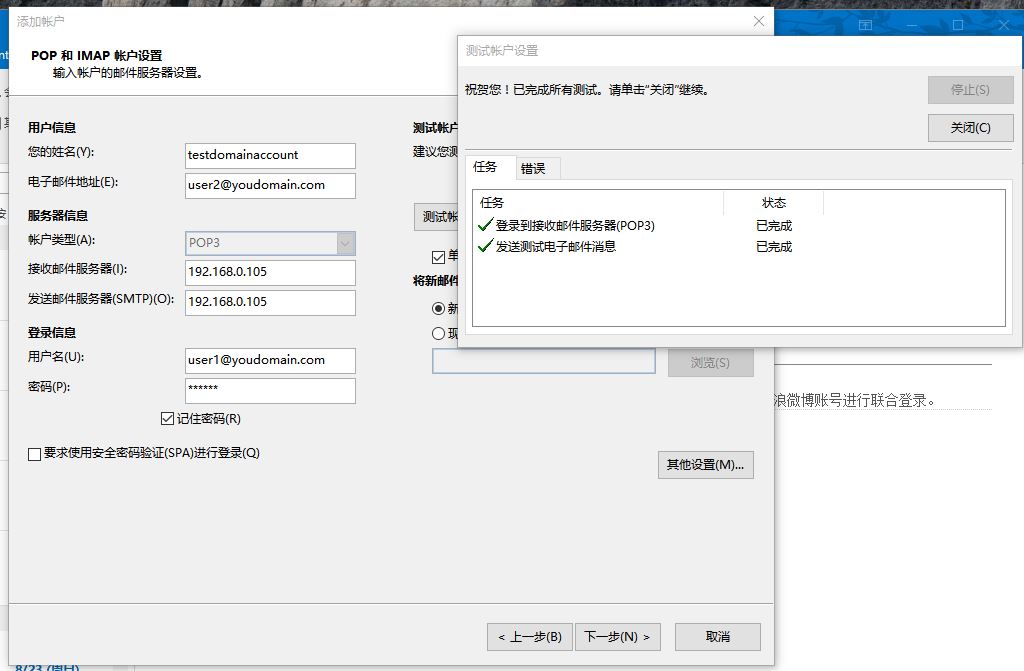
这里需要注意的是:
1.注意这里设置的用户名必须是完整的电子邮件地址
2.这里使用的简单的本地地址.
3.如果提示找不到ISP服务器,看下是不是输错多次密码了.在hmail的配置:Settings->Advanced ->Auto-ban里面是否有拦截
4.如果还是无法找到,看下ip段是否在可登陆的地址里面.在hmail的配置:Settings->Advanced->IP Ranges
5.查看绑定的各个服务的端口在:Settings -> Advanced ->TCP/IP ports
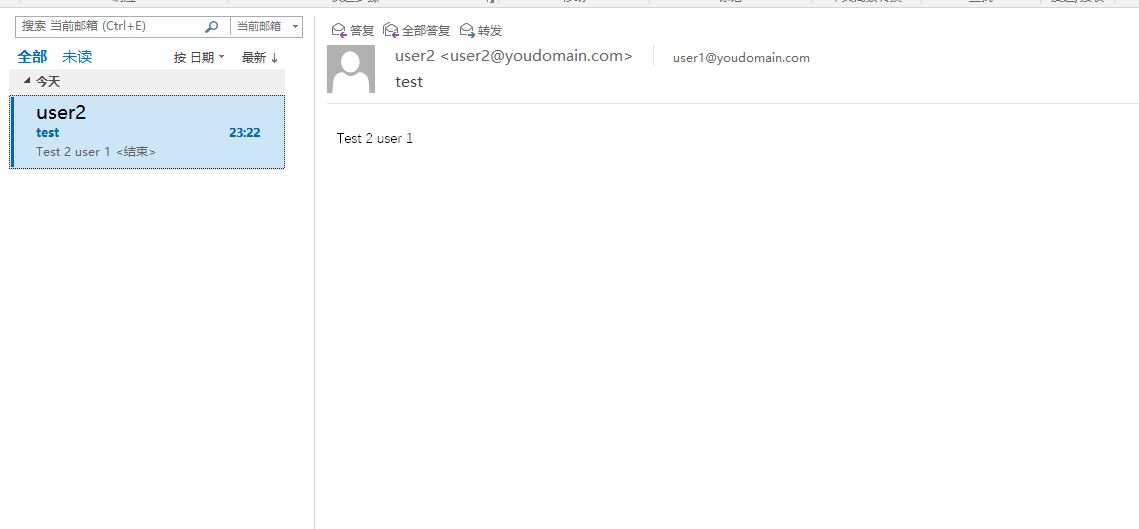
然后就可以相互发邮件了.
配置TLS AND SSL 支持
(1)配置证书,生成证书参考:http://blog.csdn.net/scugxl/article/details/49204685
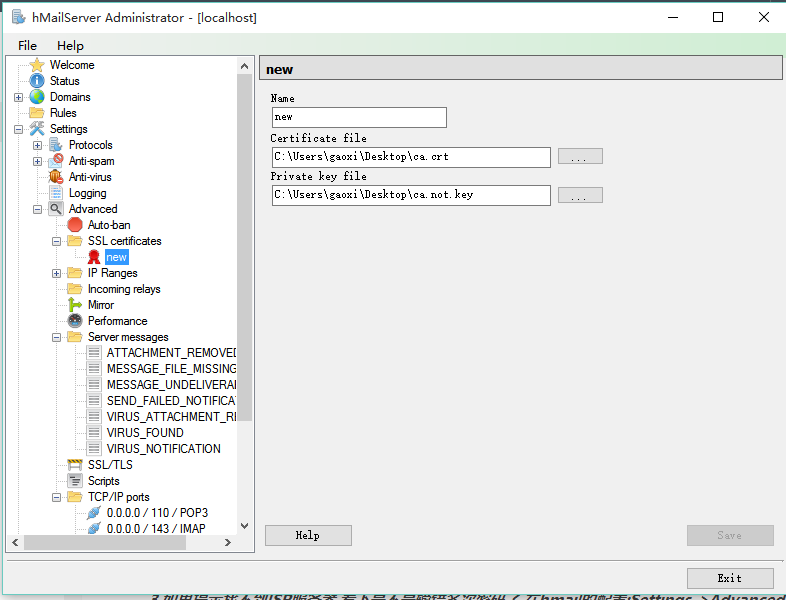
(2)配置证书:(使用9999端口,可以自定义)
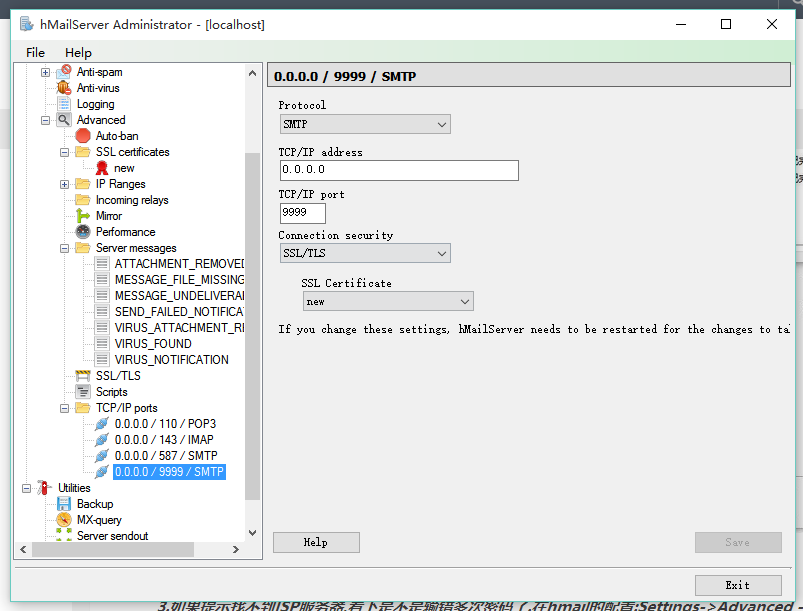
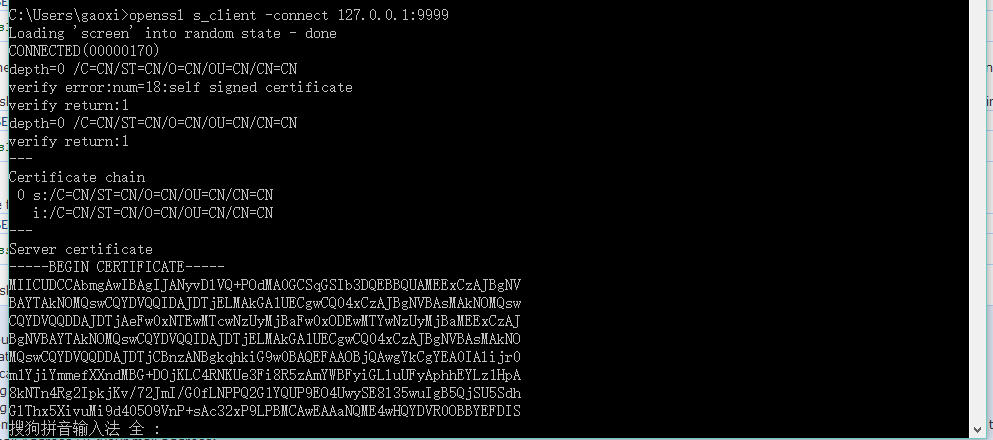
(3)查看是否ok:
常见问题:
[1]配置后 提示启动成功,但是发现没有该端口.
netstat -ano | findstr 9999
解决办法:打开hmail的日志后查看,目前我遇到了2种情况,打开日志方式:
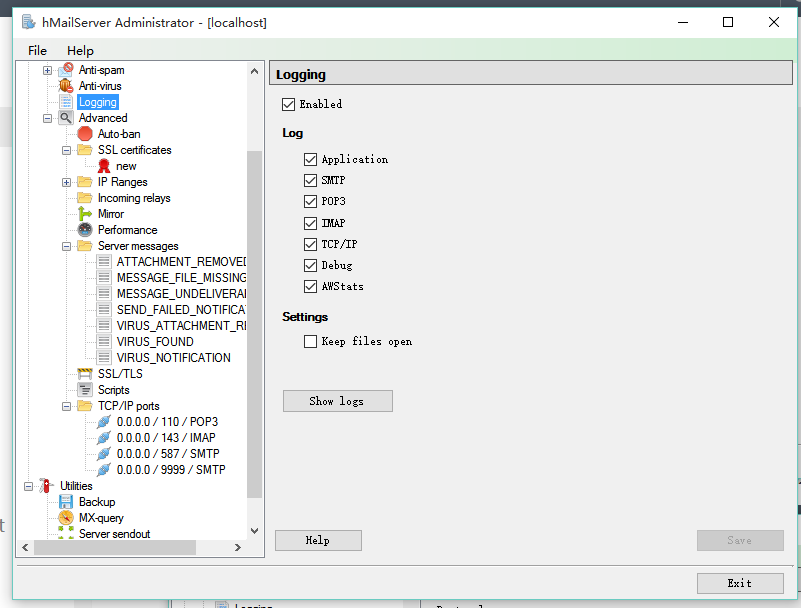
问题1:日志中有如下错误:
“ERROR” 8768 “2015-10-17 16:00:20.920” “Severity: 2 (High), Code: HM5143, Source: TCPServer::GetPassword(), Description: The private key file has a password. hMailServer does not support this.”
解决办法:证书文件私钥文件不能有密码.
问题2:报nosuch process
“ERROR” 8396 “2015-10-17 16:57:59.496” “Severity: 2 (High), Code: HM5113, Source: SslContextInitializer::InitServer, Description: Failed to load certificate file. Path: C:\Users\gaoxi\Desktop, Address: 0.0.0.0, Port: 9999, Error: use_certificate_file: No such process”
解决办法:试试证书路径是否包含中文路径.
使用java收发邮件
package javamail;

import java.io.BufferedReader;
import java.io.InputStreamReader;
import java.util.Date;
import java.util.Properties;

import javax.mail.Message;
import javax.mail.MessagingException;
import javax.mail.SendFailedException;
import javax.mail.Session;
import javax.mail.internet.InternetAddress;
import javax.mail.internet.MimeMessage;

import com.sun.mail.smtp.SMTPAddressFailedException;
import com.sun.mail.smtp.SMTPAddressSucceededException;
import com.sun.mail.smtp.SMTPSendFailedException;
import com.sun.mail.smtp.SMTPTransport;

/**
 * 根据java mail examples 修改
 * @author gxl
 *
 */
public class smtpsend
{

    /**
     * Example of how to extend the SMTPTransport class. This example
     * illustrates how to issue the XACT command before the SMTPTransport issues
     * the DATA command.
     *
     * public static class SMTPExtension extends SMTPTransport { public
     * SMTPExtension(Session session, URLName url) { super(session, url); // to
     * check that we're being used
     * System.out.println("SMTPExtension: constructed"); }
     *
     * protected synchronized OutputStream data() throws MessagingException { if
     * (supportsExtension("XACCOUNTING")) issueCommand("XACT", 250); return
     * super.data(); } }
     */

    public static void main(String[] argv)
    {
        String to = "user1@youdomain.com", subject = "Test subject", from = "user2@youdomain.com";
        String mailhost = null;
        String mailer = "smtpsend";
        String user = null, password = null;
        boolean debug = true;
        boolean verbose = false;
        boolean auth = false;
        String prot = "smtp";
        new BufferedReader(new InputStreamReader(System.in));
        try
        {

            /*
             * Initialize the JavaMail Session.
             */
            Properties props = System.getProperties();
            if (auth)
                props.put("mail." + prot + ".auth", "true");

            /*
             * Create a Provider representing our extended SMTP transport and
             * set the property to use our provider.
             *
             * Provider p = new Provider(Provider.Type.TRANSPORT, prot,
             * "smtpsend$SMTPExtension", "JavaMail demo", "no version");
             * props.put("mail." + prot + ".class", "smtpsend$SMTPExtension");
             */

            // Get a Session object
            Session session = Session.getInstance(props, null);
            if (debug)
                session.setDebug(true);

            /*
             * Register our extended SMTP transport.
             *
             * session.addProvider(p);
             */

            /*
             * Construct the message and send it.
             */
            Message msg = new MimeMessage(session);
            msg.setFrom(new InternetAddress(from));

            msg.setRecipients(Message.RecipientType.TO,
                    InternetAddress.parse(to, false));
            msg.setSubject(subject);

            String text = "This is a test message.";

            // If the desired charset is known, you can use
            // setText(text, charset)
            msg.setText(text);

            msg.setHeader("X-Mailer", mailer);
            msg.setSentDate(new Date());

            // send the thing off
            /*
             * The simple way to send a message is this:
             *
             * Transport.send(msg);
             *
             * But we're going to use some SMTP-specific features for
             * demonstration purposes so we need to manage the Transport object
             * explicitly.
             */
            SMTPTransport t = (SMTPTransport) session.getTransport(prot);
            try
            {
                if (auth)
                    t.connect(mailhost, user, password);
                else
                    t.connect();
                t.sendMessage(msg, msg.getAllRecipients());
            }
            finally
            {
                if (verbose)
                    System.out
                            .println("Response: " + t.getLastServerResponse());
                t.close();
            }

            System.out.println("\nMail was sent successfully.");

        }
        catch (Exception e)
        {
            /*
             * Handle SMTP-specific exceptions.
             */
            if (e instanceof SendFailedException)
            {
                MessagingException sfe = (MessagingException) e;
                if (sfe instanceof SMTPSendFailedException)
                {
                    SMTPSendFailedException ssfe = (SMTPSendFailedException) sfe;
                    System.out.println("SMTP SEND FAILED:");
                    if (verbose)
                        System.out.println(ssfe.toString());
                    System.out.println("  Command: " + ssfe.getCommand());
                    System.out.println("  RetCode: " + ssfe.getReturnCode());
                    System.out.println("  Response: " + ssfe.getMessage());
                }
                else
                {
                    if (verbose)
                        System.out.println("Send failed: " + sfe.toString());
                }
                Exception ne;
                while ((ne = sfe.getNextException()) != null
                        && ne instanceof MessagingException)
                {
                    sfe = (MessagingException) ne;
                    if (sfe instanceof SMTPAddressFailedException)
                    {
                        SMTPAddressFailedException ssfe = (SMTPAddressFailedException) sfe;
                        System.out.println("ADDRESS FAILED:");
                        if (verbose)
                            System.out.println(ssfe.toString());
                        System.out.println("  Address: " + ssfe.getAddress());
                        System.out.println("  Command: " + ssfe.getCommand());
                        System.out
                                .println("  RetCode: " + ssfe.getReturnCode());
                        System.out.println("  Response: " + ssfe.getMessage());
                    }
                    else if (sfe instanceof SMTPAddressSucceededException)
                    {
                        System.out.println("ADDRESS SUCCEEDED:");
                        SMTPAddressSucceededException ssfe = (SMTPAddressSucceededException) sfe;
                        if (verbose)
                            System.out.println(ssfe.toString());
                        System.out.println("  Address: " + ssfe.getAddress());
                        System.out.println("  Command: " + ssfe.getCommand());
                        System.out
                                .println("  RetCode: " + ssfe.getReturnCode());
                        System.out.println("  Response: " + ssfe.getMessage());
                    }
                }
            }
            else
            {
                System.out.println("Got Exception: " + e);
                if (verbose)
                    e.printStackTrace();
            }
        }
    }

}
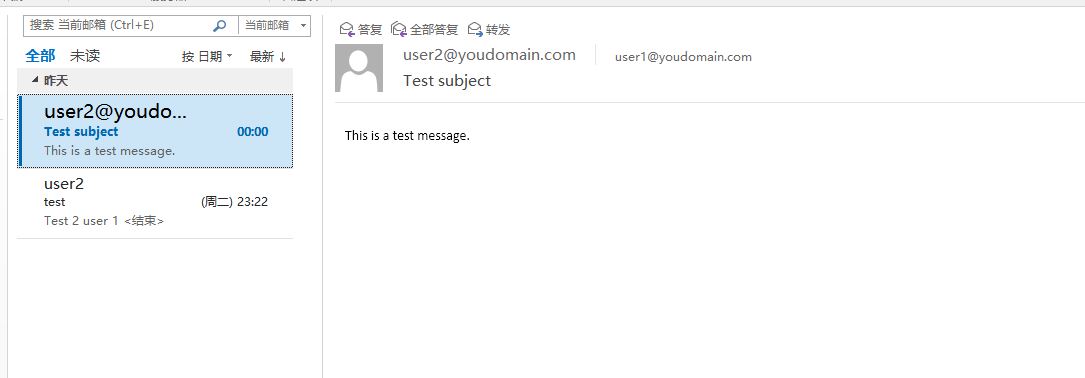
运行输出:
Subject: Test subject
MIME-Version: 1.0
Content-Type: text/plain; charset=us-ascii
Content-Transfer-Encoding: 7bit
X-Mailer: smtpsend

This is a test message.
.
250 Queued (0.064 seconds)
DEBUG SMTP: message successfully delivered to mail server
QUIT
221 goodbye

Mail was sent successfully.
在Outlook上看到的:
支持IPV6
IPV6
实际配置效果如下:
[1]新增一个ipv6专用的smtp端口.
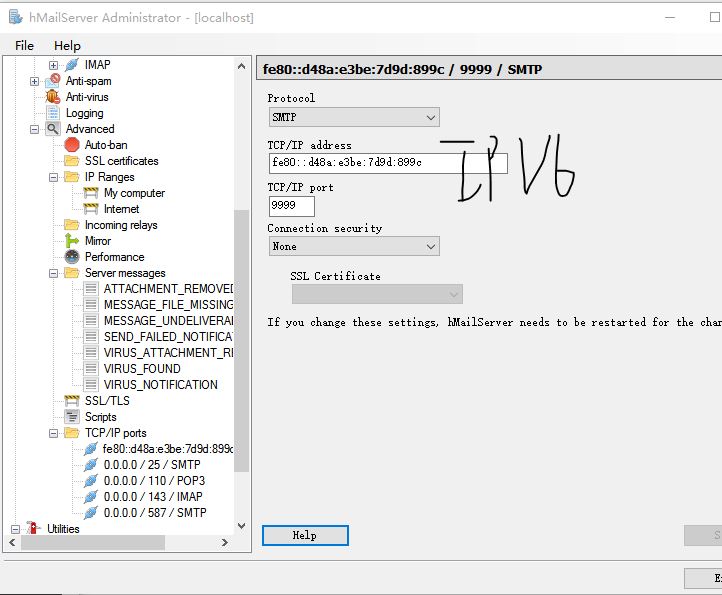
[2]设置新增的ipv6的登陆地址段.
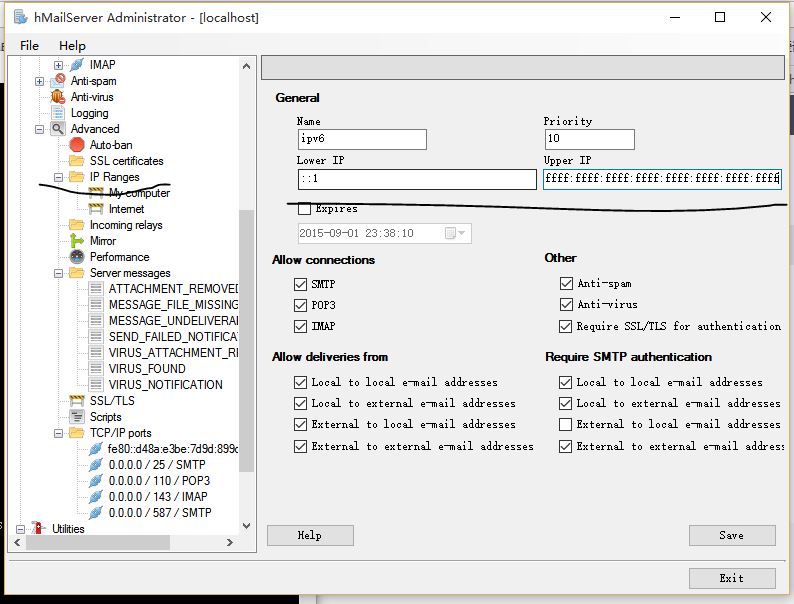
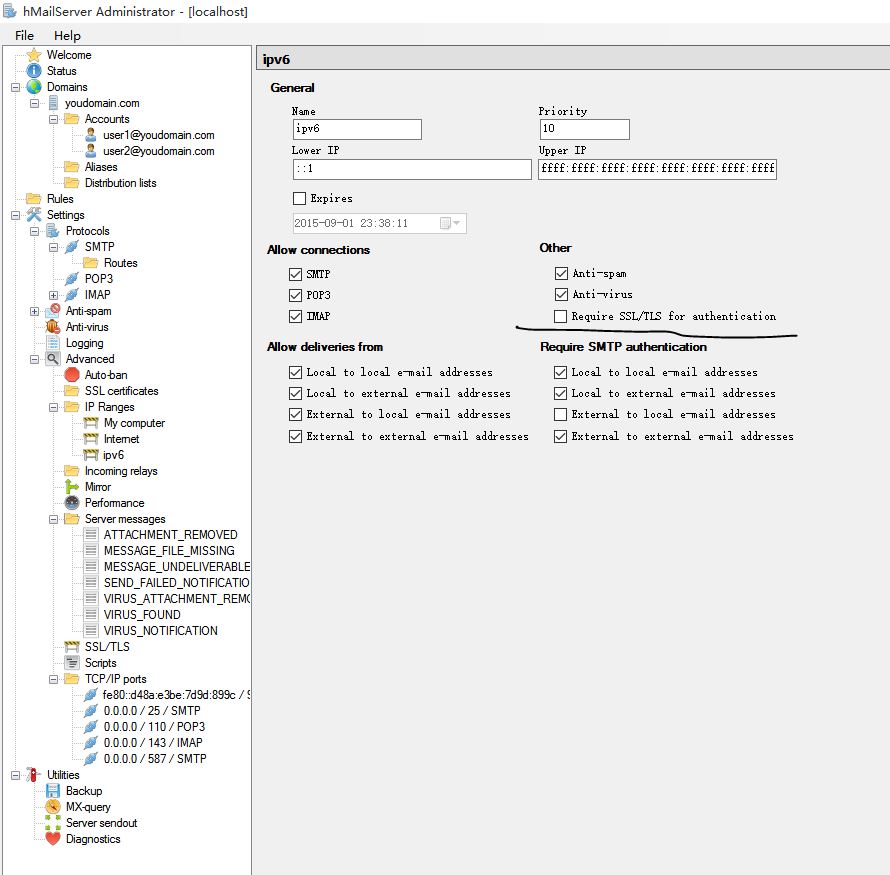
为了方便使用,修改了下hmailServer的鉴权设置 不适用SSL.
java代码:(与前面类似 只贴出了修改的点)
        String to = "user1@youdomain.com", subject = "Test subject", from = "user2@youdomain.com";
        boolean testipv6 = true; // 如果不测试ipv6 这里设置为false
        /**
         * test ipv6
         */
        String smtpipv6 = "fe80::d48a:e3be:7d9d:899c";
        int ipv6port = 9999;
        String mailhost = null;
....
....
            SMTPTransport t = (SMTPTransport) session.getTransport(prot);
            try
            {
                if (auth)
                {
                    t.connect(mailhost, user, password);
                }
                else if (testipv6)
                {
                    t.connect(smtpipv6, ipv6port, "user1@youdomain.com", "123456");
                }
                else
                {
                    t.connect();
                }
                t.sendMessage(msg, msg.getAllRecipients());
            }
查看数据文件位置
C:\Program Files (x86)\hMailServer\Bin\hMailServer.ini 地址根据你的安装路径变化.
常见错误
附录
1.win10 安装.net 3.5
如果你是win10 需要手动启用一下.net 3.5
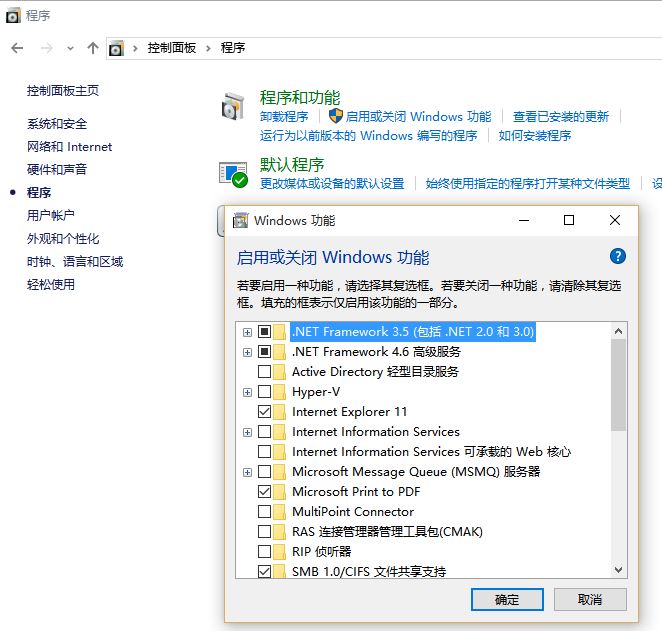
另外的请参考:win10 下安装.net framework 3.5
ITHOME
2.本文所涉及的所有文件
百度云
Java Mail API source code or @Baidu yun


 2441
2441


 被折叠的 条评论
为什么被折叠?
被折叠的 条评论
为什么被折叠?
 到【灌水乐园】发言


