


0 前言
题主一直有写计划的习惯,每天早上第一件事情就是先把每日计划好,不写计划,感觉一天里的生活毫无头绪。但写纸质计划容易遗忘工作进程,因此在之前计划的基础上,写了一个桌面便签的小程序,话不多说,上图。
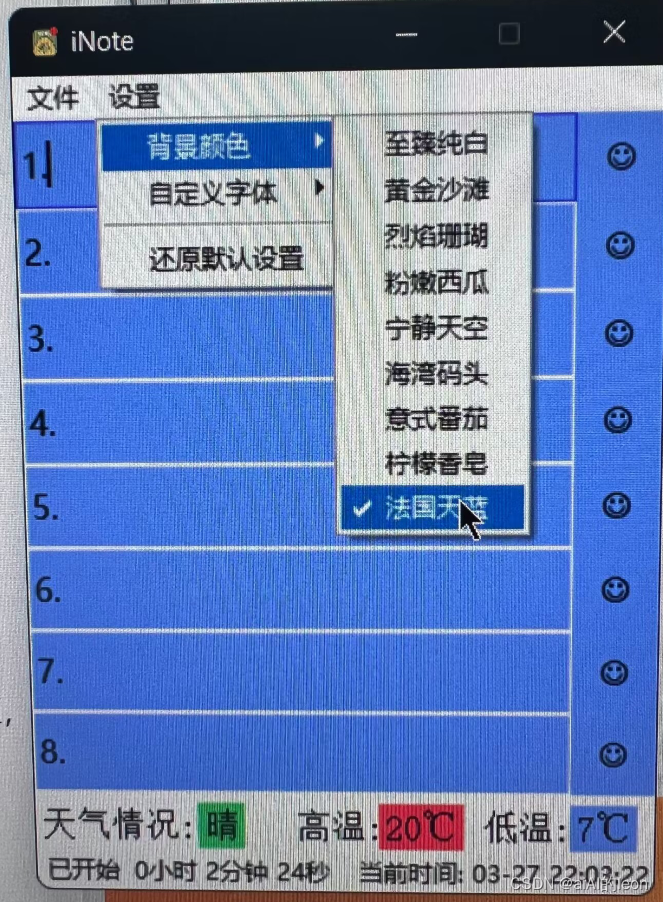
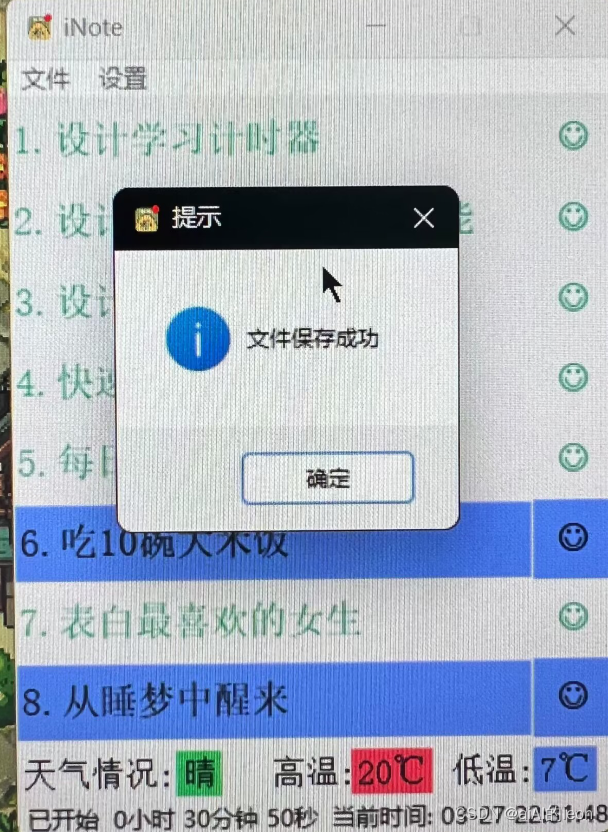
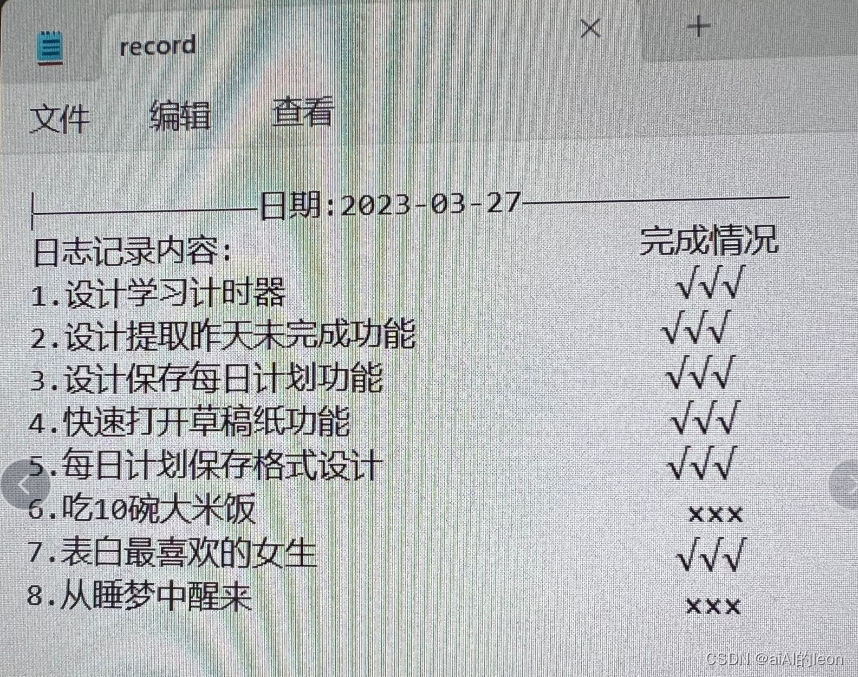
1 软件界面
程序主要有以下几个功能:
1.每日工作内容的填写与核实(点击小笑脸会锁定输入框);
2.获取当地的时间、天气情况;
3.学习计时器:点击计时器会计时,再次点击会暂停。
4.每日工作内容保存;
5.自动获取昨日未完成的工作内容;
6.快捷打开记事本;
7.更换主题背景和字体;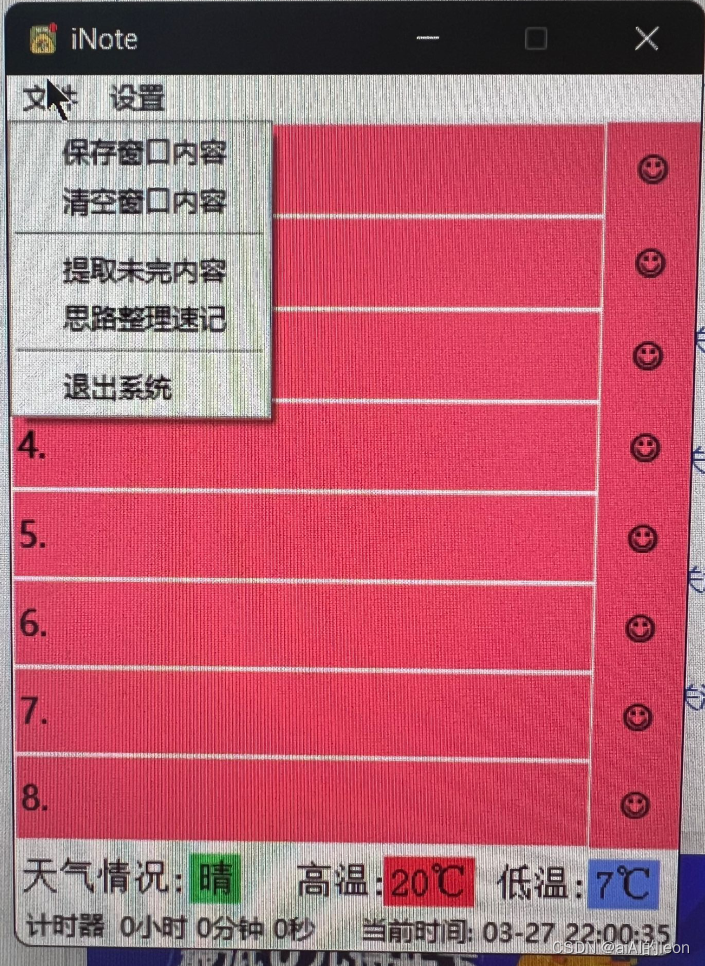
2 技术分析
每一块内容都是一块革新,在网上和GPT上搜索了很多案例,最后更改成自己适用的版本。其中很多地方加深了我对一些函数运行的理解。
2.1 批量生成按钮和按钮操作函数
    def notebook(self):
        for i in range(8):
            exec ("self.e{} = Entry(self.window,textvariable=self.var{},bg=self.default[0],font=tuple(i for i in self.default[1:]),
            width=30, highlightcolor='#3742fa',highlightthickness=1,relief=FLAT)"
                  "\nself.e{}.place(x=0, y={},width=260, height=40)"
                  "\nself.e{}.insert(0,'{}.')"
                  "\nself.b{} =Button(self.window, text='☺',bg=self.default[0],font=tuple(i for i in self.default[1:]), width=2, relief=FLAT,command= self.b{}command)"
                  "\nself.b{}.place(x=260, y={},width=40, height=40)".format(i+1,i+1,i+1,i*40,i+1,i+1,i+1,i+1,i+1,i*40))
    #批量生成按钮的若干操作
    for i in range(8):
        #利用exec()函数进行批量操作
        exec("def b{}command(self):\n\t"
             "if self.on_hit{} == False:"
             "\n\t\tself.b{}.configure(bg='SystemButtonFace',fg ='#10a674' )"
             "\n\t\tself.e{}.configure(fg='#10a674', highlightthickness=0)"
             "\n\t\tself.e{}.configure(state='readonly')"
             "\n\t\tself.on_hit{} = True"
             "\n\telse:"
             "\n\t\tself.e{}.configure(state='normal')"
             "\n\t\tself.b{}.configure(bg = list(self.colorthemes.values())[self.themesvar.get()],fg ='black')"
             "\n\t\tself.e{}.configure(fg='black', highlightthickness=1)"
             "\n\t\tself.on_hit{} = False".format(i+1, i+1, i+1, i+1, i+1, i+1, i+1, i+1, i+1, i+1))
你敢信,以上不到20行代码实现了8个文本输入框和按钮生成、布局,以及各自的点击操作?
事实上,对于复杂重复性操作,只要你能实现1个操作,就可以利用for循环实现所有操作。技术的手段就是exec()函数。这个函数的具体介绍大家自己去查,下面我贴一个这个函数的小例子。
- 1.批量赋值
for i in range(8):
     #exec()批量进行变量赋值
     exec("self.var{}=StringVar()".format(i+1))
这个操作等同于以下代码。
self.var1 = StringVar()
self.var2 = StringVar()
self.var3 = StringVar()
self.var4 = StringVar()
self.var5 = StringVar()
self.var6 = StringVar()
self.var7 = StringVar()
self.var8 = StringVar()
就说这个函数你学不学。
- 2.批量生成按钮、文本框等balaba。
有人说了,赋值我也会呀,感觉粘贴复制也不麻烦呀。分分钟的事情,那么看看重头戏。如果我要批量生成函数、页面、标签,你光是每个函数的变量你就要生成一堆,稍有不慎就可能弄错编号,比如下面。
self.e1 = Entry(self.window, textvariable=self.var1,bg=self.default[0],font=tuple(i for i in self.default[1:]),width=30, highlightcolor='#3742fa',
                 highlightthickness=1, relief=FLAT)
self.e1.place(x=0, y=0,width=260, height=40)
self.e1.insert(0,"1.")
def b1_command():
   if self.on_hit1 == False:
       self.b1.configure(bg="SystemButtonFace",fg ='#10a674' )
       self.e1.configure(fg='#10a674', highlightthickness=0)  # 修改字体颜色,修改其它参数只需要传入对应的参数即可
       self.e1.configure(state='readonly')  # 改为只读
       self.on_hit1 = True
   else:
       self.e1.configure(state='normal')
       self.b1.configure(bg = list(self.colorthemes.values())[self.themesvar.get()],fg ="black")
       self.e1.configure(fg='black', highlightthickness=1)  # 修改字体颜色,修改其它参数只需要传入对应的参数即可
       self.on_hit1 = False
self.b1 =Button(self.window, text='☺',bg=self.default[0],font=tuple(i for i in self.default[1:]), width=2, relief=FLAT,command= self.b1command)
self.b1.place(x=260, y=0,width=40, height=40)

self.e2 = Entry(self.window, textvariable=self.var2,bg=self.default[0],font=tuple(i for i in self.default[1:]),width=30, highlightcolor='#3742fa',
          highlightthickness=1, relief=FLAT)
self.e2.place(x=0, y=40,width=260, height=40)
self.e2.insert(0,"2.")
def b2_command():
   if self.on_hit2 == False:
       self.b2.configure(bg="SystemButtonFace",fg ='#10a674' )
       self.e2.configure(fg='#10a674', highlightthickness=0)  # 修改字体颜色,修改其它参数只需要传入对应的参数即可
       self.e2.configure(state='readonly')  # 改为只读
       self.on_hit2 = True
   else:
       self.e2.configure(state='normal')
       self.b2.configure(bg = list(self.colorthemes.values())[self.themesvar.get()],fg ="black")
       self.e2.configure(fg='black', highlightthickness=1)  # 修改字体颜色,修改其它参数只需要传入对应的参数即可
       self.on_hit2 = False
self.b2 =Button(self.window, text='☺',bg=self.default[0],font=tuple(i for i in self.default[1:]), width=2, relief=FLAT,command=b2_command)
self.b2.place(x=260, y=40,width=40, height=40)
这么多函数和代码只实现了2个输入框和按钮的操作。如果是更多个,管理起来难过死了。
而对应的解决方案就是2.1开头的两处代码。exec()可以将字符串中的函数转化为实际函数形式,而字符串可以用format()添加变量值,这两个的组合实现了重复类型函数优化的可能。
2.2 未完待续
3 注意事项
- 如有什么问题,可以优化或者您觉得有什么功能加进去会比较好,请联系作者。QQ:46574996


 2109
2109


 被折叠的 条评论
为什么被折叠?
被折叠的 条评论
为什么被折叠?
 到【灌水乐园】发言


