


(3)在ch5包内建立一个业务控制器Reg,如代码5.10所示。
代码5.10 HelloWorld拦截器示例的业务控制器
 package
ch5;
import
java.util.Date;
import
com.opensymphony.xwork2.ActionSupport;
package
ch5;
import
java.util.Date;
import
com.opensymphony.xwork2.ActionSupport; public
class
Reg
extends
ActionSupport
{
public
class
Reg
extends
ActionSupport
{ //定义用户名属性 private String username; //定义处理信息:注意同http中的msg不同名称 private String mymsg; //定义密码属性 private String password1; //定义确认密码 private String password2; //定义生日属性 private Date birthday;
 public String execute() throws Exception { if (username != null && getPassword1().equals(getPassword2()) && !getUsername().trim().equals("")) { //输出调试信息 System.out.println("Action信息:正在执行Actiion... ..."); return SUCCESS; } else { return INPUT;
 } } //getter和setter方法 public String getUsername() { return username; } public void setUsername(String username) { this.username = username; } public String getMymsg() { return mymsg; } public void setMymsg(String mymsg) { this.mymsg = mymsg; } public String getPassword1() { return password1; } public void setPassword1(String password1) { this.password1 = password1; } public String getPassword2() { return password2; } public void setPassword2(String password2) { this.password2 = password2; } public Date getBirthday() { return birthday; } public void setBirthday(Date birthday) { this.birthday = birthday; }
 }
}
(4)同样在ch5包内,建立一个用户注册reg.jsp文件和一个用于显示注册成功信息的success.jsp文件。内容分别如代码5.11和代码5.12所示。
代码5.11 用户注册界面reg.jsp
<%
@ page contentType="text/html;charset=UTF-8" language="java"
%>
<%
@ taglib prefix="s" uri="/struts-tags"
%>
<
html
>
<
head
>
<
title
>
用户注册
</
title
>
<
s:head
/>
</
head
>
<
body
>
<
table
>
<
s:form
id
="id"
action
="Reg"
>
<
s:textfield
name
="username"
label
="用户名:"
/>
<
s:password
name
="password1"
label
="密码:"
/>
<
s:password
name
="password2"
label
="确认密码:"
/>
<
s:datetimepicker
name
="birthday"
label
="生日:"
/>
<
s:submit
value
="注册"
/>
</
s:form
>
</
table
>
</
body
>
</
html
>
代码5.12 注册成功界面success.jsp
<%
@ page contentType="text/html;charset=UTF-8" language="java"
%>
<%
@ taglib prefix="s" uri="/struts-tags"
%>
<
html
>
<
head
>
<
title
>
注册成功界面
</
title
>
<
s:head
/>
</
head
>
<
body
>
<
table
>
<
h2
>
用户名:
<
s:property
value
="username"
/></
h2
>
<
h2
>
密码:
<
s:property
value
="password1"
/></
h2
>
<
h2
>
生日:
<
s:property
value
="birthday"
/></
h2
>
</
table
>
</
body
>
</
html
>
(5) 启动Tomcat服务器,在浏览器中输入:http://localhost:8080/bookcode/ch5/reg.jsp,运行界面如图5.6所示。
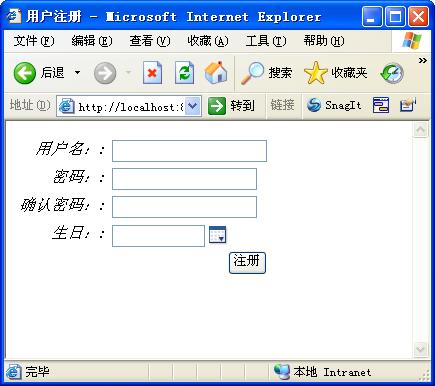
图5.6 HelloWorld拦截器的注册界面
(6)读者可以在“用户名”、“密码”、“确认密码”和“生日”输入框中填入相关字符串,单击“注册”按钮,会发现Tomcat控制台输出如下信息:
… …
信息: Detected AnnotationActionValidatorManager, initializing it...
拦截器信息:HelloWorld拦截器!
Action信息:正在执行Actiion... ...
拦截器信息:Action执行完毕!
… …
到此为止,第一个拦截器HelloWorld示例就建立成功了,读者通过本示例,可以了解拦截器的基本功能。
★ 说明 ★
Struts 2框架提供的拦截器功能确实给项目开发提供了一个非常有用的手段。后面笔者将会逐步深入介绍Struts 2的拦截器。


 1160
1160

 被折叠的 条评论
为什么被折叠?
被折叠的 条评论
为什么被折叠?
 到【灌水乐园】发言


