高性能网站架构之负载均衡 Nginx+tomcat实现tomcat集群

16 篇文章 0 订阅

         先说说为什么要用ngnix 做负载均衡,其实做负载均衡的最出名的莫过于F5了,F5是在硬件设施,动辄几万,几十万,几百万不等,对于一般的小公司来说,这也是一笔很大的开销,所以能尽量的使用软件,还是使用软件,效果上虽然会差一些,但是还是能够起到一定的作用的。

环境准备

        三台装有centos6.5 系统的机器。其中两台机器上装有tomcat7,一台机器上装有nginx3.0.2,至于具体如何安装tomcat和ngnix,这里就不再介绍了,请大家自己去网上查找资料。

        这样我们还需要准备一台装有redis服务的服务器,redis最好配置为集群的,这里为了演示tomcat集群,就使用单台服务器了。只与redis的安装,大家可以参照小编的Linux安装Redis并设置服务 。

测试程序

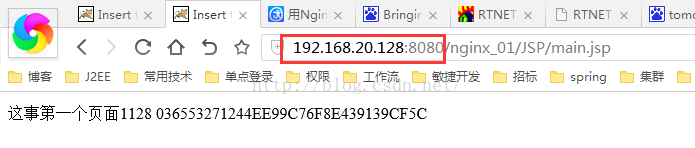
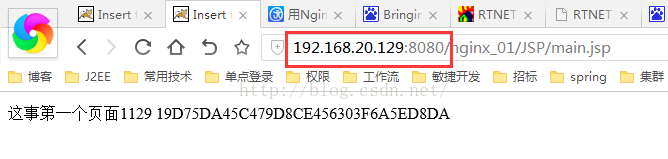
         环境准备好以后,我们写一个简单的测试程序,看看我们的两个tomcat服务是不是使用同一个redis服务,作为session的存储介质。应用程序如下,两台tomcat服务器本来应该部署同样的应用程序,但是这里为了区分,我们部署一个程序,但是页面不一致 加上ip的最后三位,用来区分不同的服务。

[html]  view plain  copy
  在CODE上查看代码片 派生到我的代码片
  1. <body>    
  2.    这事第一个页面128    
  3.    <%= session.getId() %>    
  4. </body>    
  5.      
  6. <body>    
  7.    这事第二个页面129    
  8.    <%= session.getId() %>    
  9. </body>  


        可以看到,如果两个sessionid是一样的,那么我们就可以证明两个tomcat服务器已经使用redis共享session了。

配置tomcat

        我们要将tomcat使用redis共享session需要的jar包,都准备好,共需要三个,如下所示。这个jar不是很好找,这里提供一个下载地址,tomcat+redis共享session


         Jar包下载好以后,我们将这些jar包放入到tomcat中lib下,然后修改tomcat/conf/context.xml文件,在最后一个</Context>上边添加 如下代码:

[html]  view plain  copy
  在CODE上查看代码片 派生到我的代码片
  1. <ValveclassNameValveclassNameValveclassNameValveclassName="com.orangefunction.tomcat.redissessions.RedisSessionHandlerValve"/>    
  2.    <ManagerclassNameManagerclassNameManagerclassNameManagerclassName="com.orangefunction.tomcat.redissessions.RedisSessionManager"    
  3.        host="192.168.20.128" <!—redis的ip地址-->    
  4.        port="6379"    
  5.        database="0"    
  6.        maxInactiveInterval="60"/>    


       到此我们的tomcat就配置完了!

Nginx配置

         Nginx安装好以后,修改/usr/local/conf/nginx.conf配置文件,下边为最简配置。主要配置我们的tomcat服务器的地址+端口号。和他们的权重。

[html]  view plain  copy
  在CODE上查看代码片 派生到我的代码片
  1. #user  nobody;  
  2. worker_processes  1;  
  3.   
  4. #error_log  logs/error.log;  
  5. #error_log  logs/error.log  notice;  
  6. #error_log  logs/error.log  info;  
  7.   
  8. #pid        logs/nginx.pid;  
  9.   
  10.   
  11. events {  
  12.     worker_connections  1024;  
  13. }  
  14.   
  15.   
  16. http {  
  17.     include       mime.types;  
  18.     default_type  application/octet-stream;  
  19.   
  20.     #log_format  main  '$remote_addr - $remote_user [$time_local] "$request" '  
  21.     #                  '$status $body_bytes_sent "$http_referer" '  
  22.     #                  '"$http_user_agent" "$http_x_forwarded_for"';  
  23.   
  24.     #access_log  logs/access.log  main;  
  25.   
  26.     sendfile        on;  
  27.     #tcp_nopush     on;  
  28.   
  29.     #keepalive_timeout  0;  
  30.     keepalive_timeout  65;  
  31.   
  32.     upstream myServer{    
  33.       server 192.168.96.130:8080;    
  34.       server 192.168.96.131:8080;    
  35.     }   
  36.   
  37.     #gzip  on;  
  38.   
  39.     server {  
  40.         listen       80;  
  41.         server_name  localhost;  
  42.   
  43.         #charset koi8-r;  
  44.   
  45.         #access_log  logs/host.access.log  main;  
  46.   
  47.         location / {  
  48.       #  proxy_pass  http://192.168.96.130:8080;    
  49.           #  root   html;  
  50.           #  index  index.html index.htm;  
  51.          proxy_pass  http://myServer;    
  52.         }  
  53.   
  54.         #error_page  404              /404.html;  
  55.   
  56.         # redirect server error pages to the static page /50x.html  
  57.         #  
  58.         error_page   500 502 503 504  /50x.html;  
  59.         location = /50x.html {  
  60.             root   html;  
  61.         }  
  62.   
  63.         # proxy the PHP scripts to Apache listening on 127.0.0.1:80  
  64.         #  
  65.         #location ~ \.php$ {  
  66.         #    proxy_pass   http://127.0.0.1;  
  67.         #}  
  68.   
  69.         # pass the PHP scripts to FastCGI server listening on 127.0.0.1:9000  
  70.         #  
  71.         #location ~ \.php$ {  
  72.         #    root           html;  
  73.         #    fastcgi_pass   127.0.0.1:9000;  
  74.         #    fastcgi_index  index.php;  
  75.         #    fastcgi_param  SCRIPT_FILENAME  /scripts$fastcgi_script_name;  
  76.         #    include        fastcgi_params;  
  77.         #}  
  78.   
  79.         # deny access to .htaccess files, if Apache's document root  
  80.         # concurs with nginx's one  
  81.         #  
  82.         #location ~ /\.ht {  
  83.         #    deny  all;  
  84.         #}  
  85.     }  
  86.   
  87.   
  88.     # another virtual host using mix of IP-, name-, and port-based configuration  
  89.     #  
  90.     #server {  
  91.     #    listen       8000;  
  92.     #    listen       somename:8080;  
  93.     #    server_name  somename  alias  another.alias;  
  94.   
  95.     #    location / {  
  96.     #        root   html;  
  97.     #        index  index.html index.htm;  
  98.     #    }  
  99.     #}  
  100.   
  101.   
  102.     # HTTPS server  
  103.     #  
  104.     #server {  
  105.     #    listen       443 ssl;  
  106.     #    server_name  localhost;  
  107.   
  108.     #    ssl_certificate      cert.pem;  
  109.     #    ssl_certificate_key  cert.key;  
  110.   
  111.     #    ssl_session_cache    shared:SSL:1m;  
  112.     #    ssl_session_timeout  5m;  
  113.   
  114.     #    ssl_ciphers  HIGH:!aNULL:!MD5;  
  115.     #    ssl_prefer_server_ciphers  on;  
  116.   
  117.     #    location / {  
  118.     #        root   html;  
  119.     #        index  index.html index.htm;  
  120.     #    }  
  121.     #}  
  122.   
  123. }  


       这样我们所有的准备工作就都做完了。接下来我们进行测试。

验证结果

         我们先对ip为128的进行访问,然后再对129的进行访问,我们会发现sessionid是不一样的。


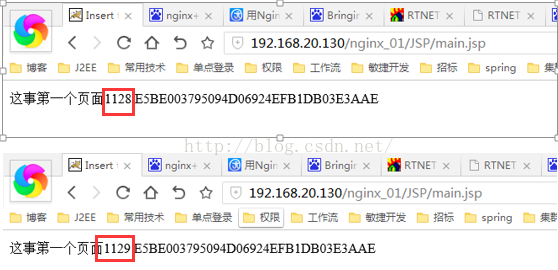
         然后我们通过nginx 进行访问,我们刷新几次,会发现他会随机的选择服务器,加载页面,但是我们可以发现不管是访问的ip为128 还是129 的,他的sessionid都是一个,所以我们断定两台tomcat服务器已经共享session了!


         这样我们的tomcat使用redis 实现session共享 就实现了,并且用ngnix 实现了负载均衡,但是我们想一下,如果我们使用一个nginx,如果该nginx所在的服务器,宕机了,那么我们的程序就挂掉了。那么我们该如下实现一个高可用的方案呢。篇文章将为我们介绍nginx+keepalived 实现高可用的负载均衡


  • 1
    点赞
  • 1
    收藏
    觉得还不错? 一键收藏
  • 0
    评论

“相关推荐”对你有帮助么?

  • 非常没帮助
  • 没帮助
  • 一般
  • 有帮助
  • 非常有帮助
提交
评论
添加红包

请填写红包祝福语或标题

红包个数最小为10个

红包金额最低5元

当前余额3.43前往充值 >
需支付:10.00
成就一亿技术人!
领取后你会自动成为博主和红包主的粉丝 规则
hope_wisdom
发出的红包
实付
使用余额支付
点击重新获取
扫码支付
钱包余额 0

抵扣说明:

1.余额是钱包充值的虚拟货币,按照1:1的比例进行支付金额的抵扣。
2.余额无法直接购买下载,可以购买VIP、付费专栏及课程。

余额充值