Android 合并生成分享图片(View截图)

有时候分享功能都是很需要分享一个当前屏幕的界面的截图因,以前做校内APP的时候用到过,拿出来分享分享,
用以前以前写过的自定义课表软件 ,

Android 自定义View课程表表格
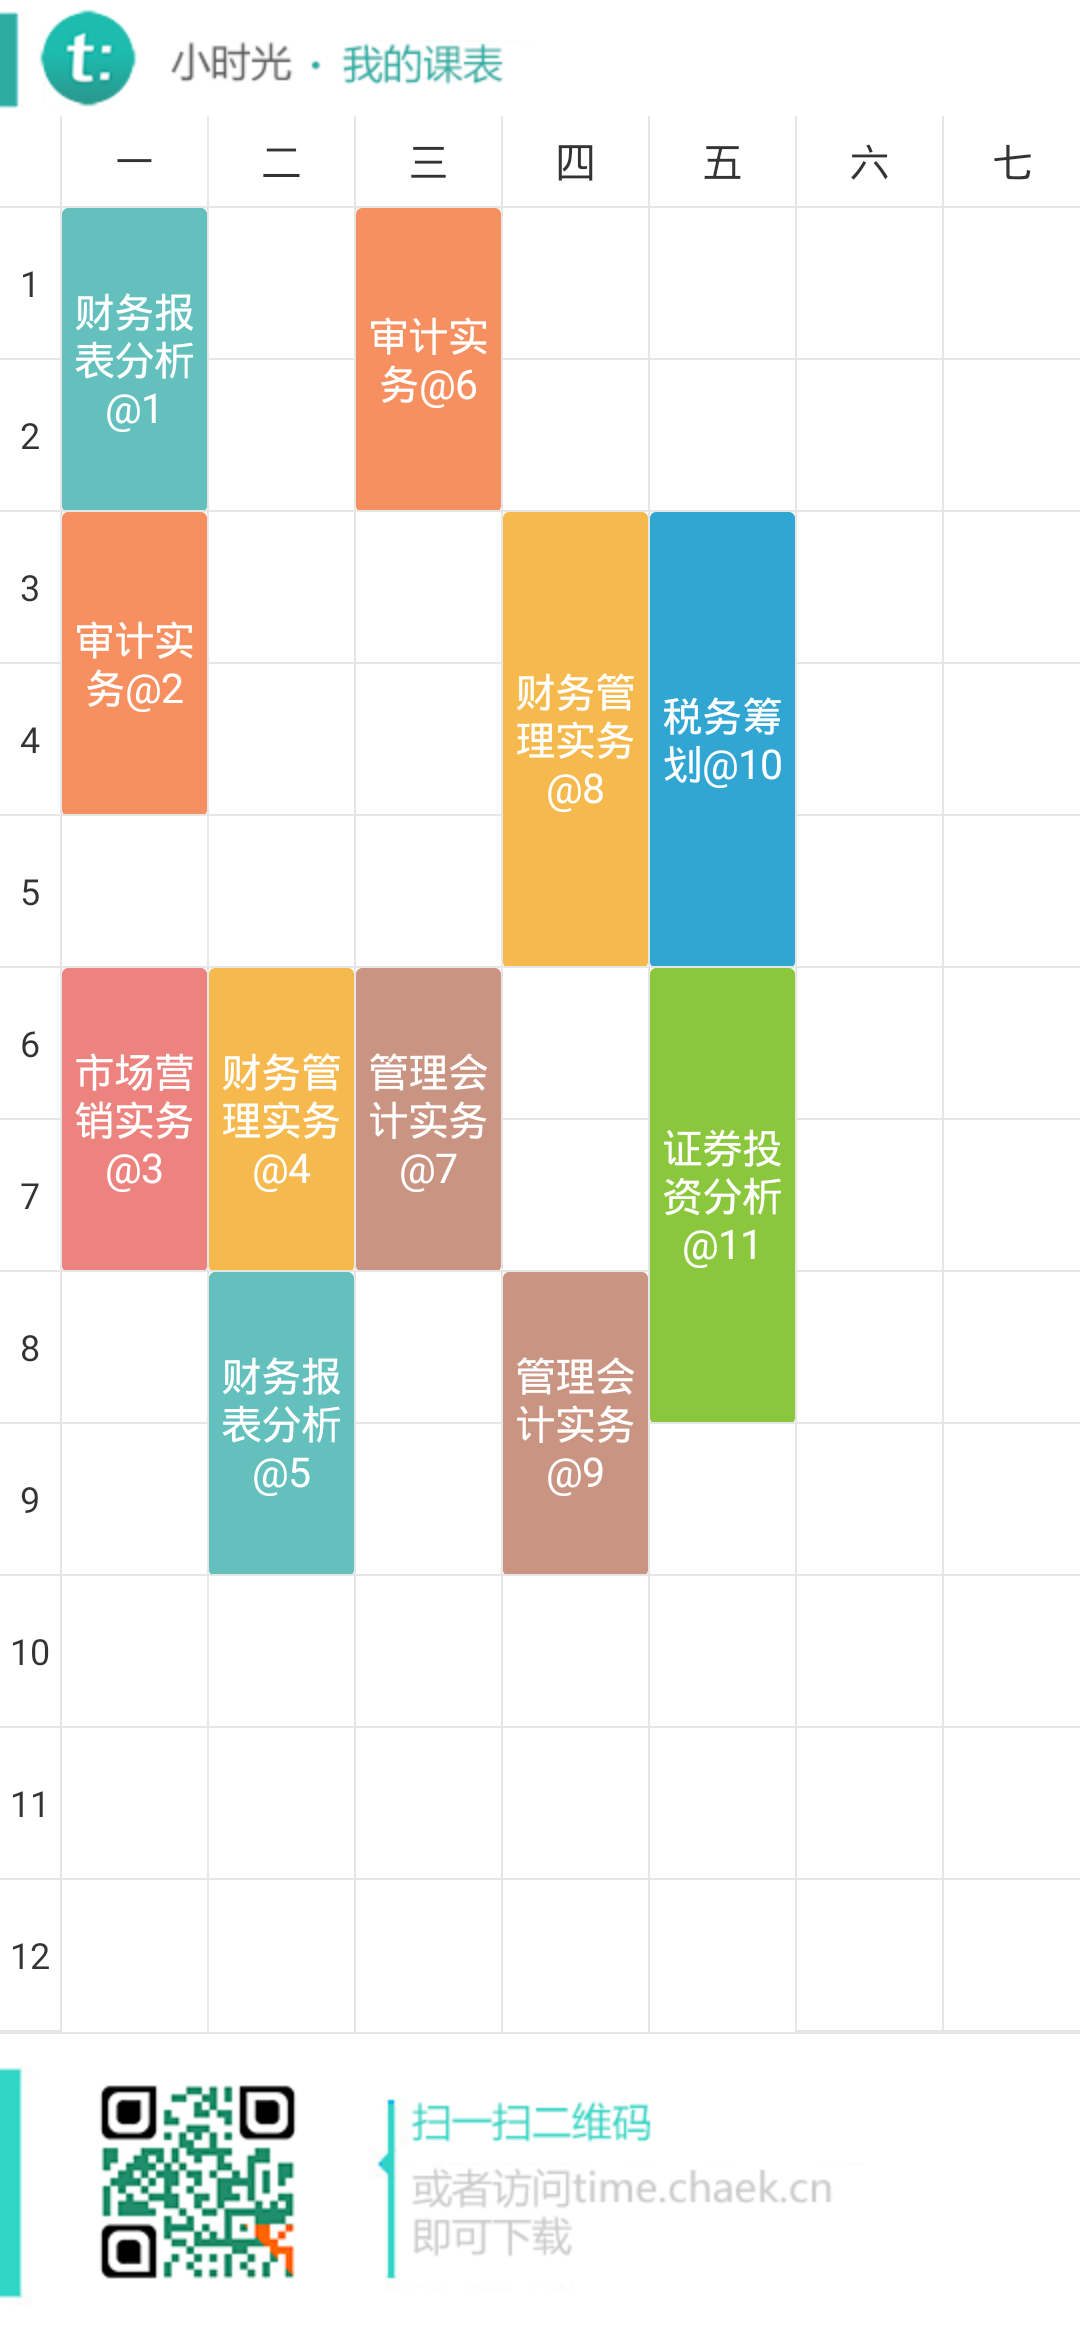


原生View截图合成分享的图片


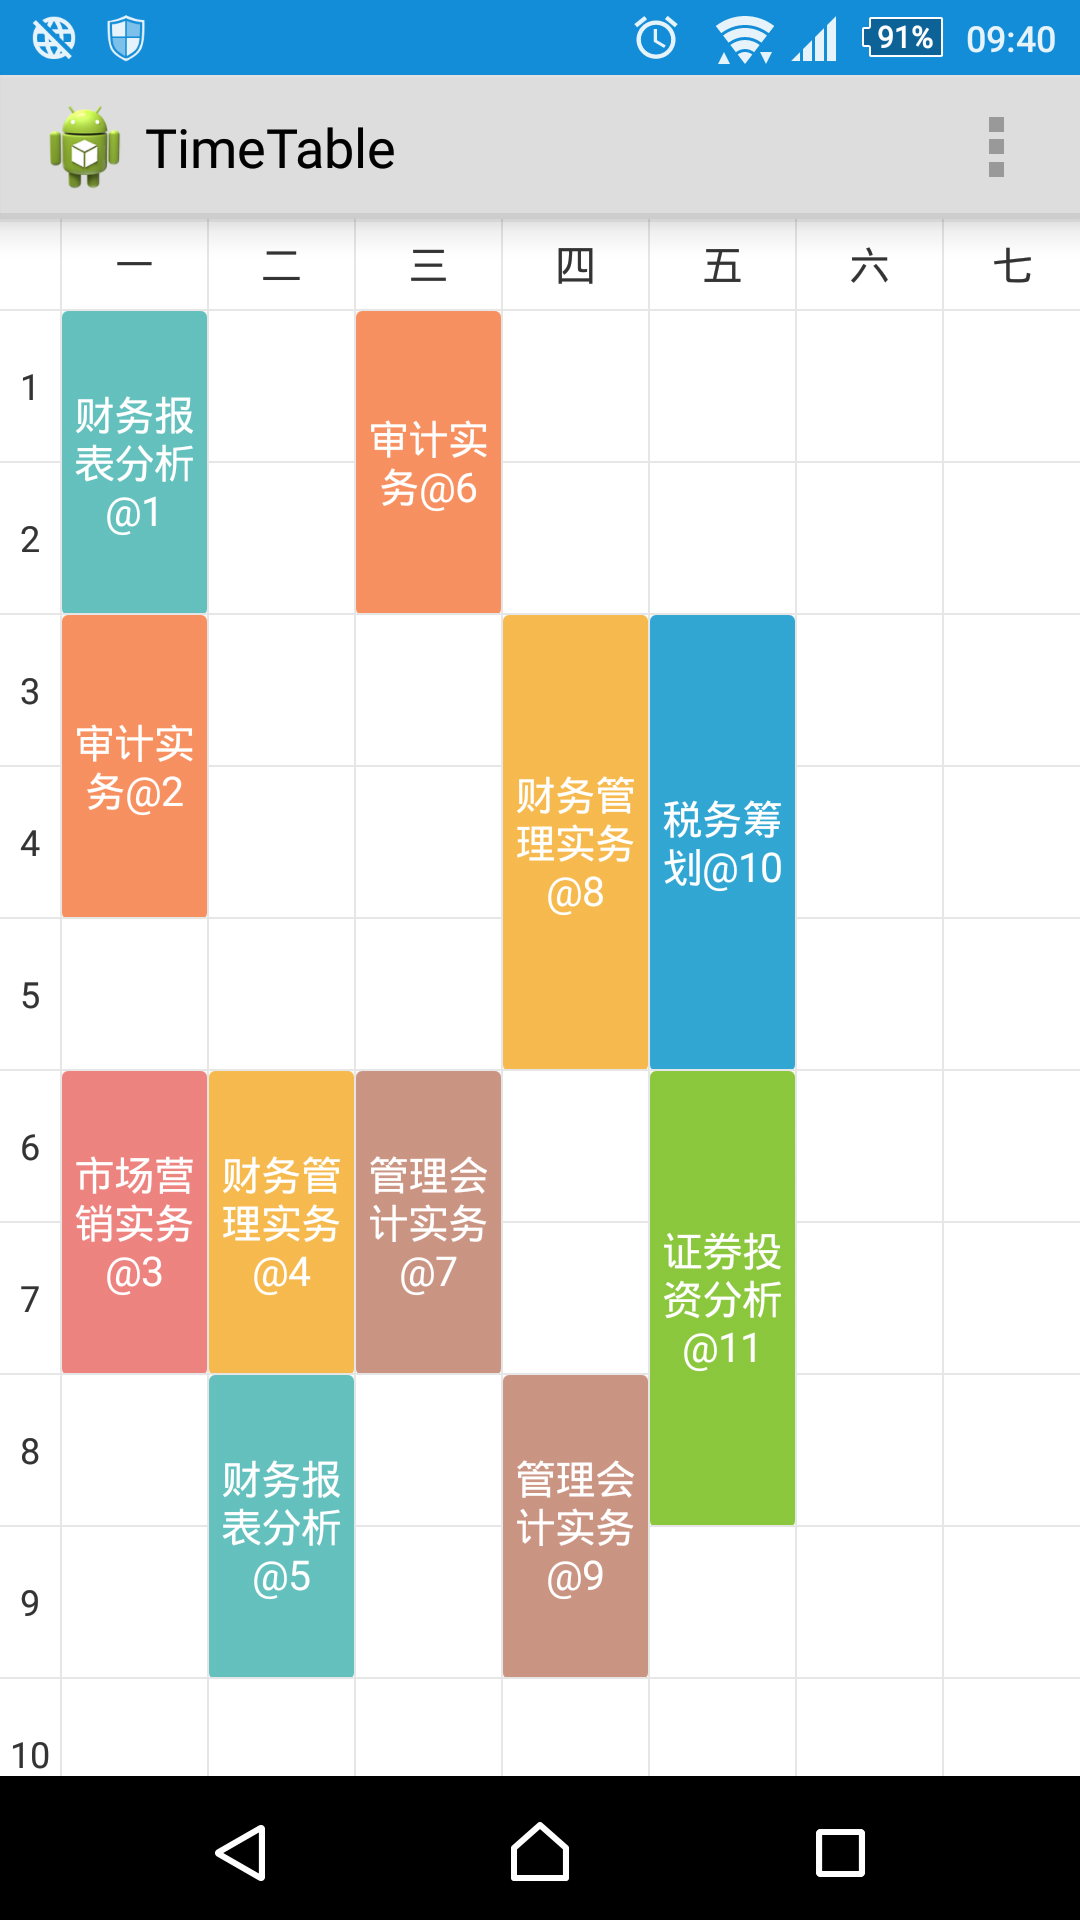
看到的是图片只显示到11节处,下面的没有显示到 所以用到的 ScrollView
因此截图节截取ScrollView View的图片

一,首先计算出整个ScrollView 的高度宽度生成对应大小的的Bitmap 然后把使用Canvas 将ScrollView 的界面绘制上去

      // 获取ScrollView 实际高度
        h = 0;
        for (int i = 0; i < scrollView.getChildCount(); i++) {
            h += scrollView.getChildAt(i).getHeight();
            scrollView.getChildAt(i).setBackgroundResource(android.R.color.white);
        }
        // 创建对应大小的bitmap
        Bitmap bitmap = Bitmap.createBitmap(scrollView.getWidth(), h,     Bitmap.Config.ARGB_8888);
        Canvas canvas = new Canvas(bitmap);
        scrollView.draw(canvas);

二、获取分享的头部和底部图片的Bitmap

   // BitmapFactory.decodeResource函数直接转换资源文件为Bitmap  

   Bitmap head = BitmapFactory.decodeResource(mContext.getResources(), R.drawable.share_term_table_header);
        Bitmap foot = BitmapFactory.decodeResource(mContext.getResources(), R.drawable.share_term_table_footer);

三、合并头部底部和界面View的截图

    if (head == null) {
            return null;
        }
        int headWidth = head.getWidth();
        int kebianwidth = kebiao.getWidth();
        int fotwid = san.getWidth();

        int headHeight = head.getHeight();
        int kebiaoheight = kebiao.getHeight();
        int footerheight = san.getHeight();
        //生成三个图片合并大小的Bitmap
        Bitmap newbmp = Bitmap.createBitmap(kebianwidth, headHeight + kebiaoheight + footerheight, Bitmap.Config.ARGB_8888);
        Canvas cv = new Canvas(newbmp);
        cv.drawBitmap(head, 0, 0, null);// 在 0,0坐标开始画入headBitmap

        //因为手机不同图片的大小的可能小了 就绘制白色的界面填充剩下的界面
        if (headWidth < kebianwidth) {
            System.out.println("绘制头");
            Bitmap ne = Bitmap.createBitmap(kebianwidth - headWidth, headHeight, Bitmap.Config.ARGB_8888);
            Canvas canvas = new Canvas(ne);
            canvas.drawColor(Color.WHITE);
            cv.drawBitmap(ne, headWidth, 0, null);
        }
        cv.drawBitmap(kebiao, 0, headHeight, null);// 在 0,headHeight坐标开始填充课表的Bitmap
        cv.drawBitmap(san, 0, headHeight + kebiaoheight, null);// 在 0,headHeight + kebiaoheight坐标开始填充课表的Bitmap
        //因为手机不同图片的大小的可能小了 就绘制白色的界面填充剩下的界面
        if (fotwid < kebianwidth) {
            System.out.println("绘制");
            Bitmap ne = Bitmap.createBitmap(kebianwidth - fotwid, footerheight, Bitmap.Config.ARGB_8888);
            Canvas canvas = new Canvas(ne);
            canvas.drawColor(Color.WHITE);
            cv.drawBitmap(ne, fotwid, headHeight + kebiaoheight, null);
        }
        cv.save(Canvas.ALL_SAVE_FLAG);// 保存
        cv.restore();// 存储
        //回收
        head.recycle();
        kebiao.recycle();
        san.recycle();

下载地址
环境Android Studio
csdn下载地址 http://download.csdn.net/detail/shallcheek/8921639
查看GIT https://github.com/shallcheek/TimeTable/

  • 6
    点赞
  • 33
    收藏
    觉得还不错? 一键收藏
  • 3
    评论
以下是 Android 生成条码图片的 demo 代码,您可以参考一下: ```java import android.graphics.Bitmap; import android.graphics.Color; import android.os.Bundle; import android.widget.ImageView; import androidx.appcompat.app.AppCompatActivity; import com.google.zxing.BarcodeFormat; import com.google.zxing.EncodeHintType; import com.google.zxing.WriterException; import com.google.zxing.common.BitMatrix; import com.google.zxing.qrcode.QRCodeWriter; import java.util.HashMap; import java.util.Map; public class MainActivity extends AppCompatActivity { private ImageView mBarcodeImageView; private final String mBarcodeContent = "https://www.example.com"; @Override protected void onCreate(Bundle savedInstanceState) { super.onCreate(savedInstanceState); setContentView(R.layout.activity_main); mBarcodeImageView = findViewById(R.id.barcode_image_view); // 生成条码图片 Bitmap barcodeBitmap = generateBarcodeBitmap(mBarcodeContent, BarcodeFormat.CODE_128); // 将生成的条码图片显示在 ImageView 上 mBarcodeImageView.setImageBitmap(barcodeBitmap); } /** * 根据指定内容和条码格式生成条码图片 * * @param content 条码内容 * @param format 条码格式 * @return 条码图片 */ private Bitmap generateBarcodeBitmap(String content, BarcodeFormat format) { // 定义条码图片的宽度和高度 final int barcodeWidth = 800; final int barcodeHeight = 400; try { // 设置条码的编码类型和内容 Map<EncodeHintType, Object> hints = new HashMap<>(); hints.put(EncodeHintType.CHARACTER_SET, "UTF-8"); BitMatrix matrix = new QRCodeWriter().encode(content, format, barcodeWidth, barcodeHeight, hints); // 根据 BitMatrix 生成条码图片 int width = matrix.getWidth(); int height = matrix.getHeight(); int[] pixels = new int[width * height]; for (int y = 0; y < height; y++) { int offset = y * width; for (int x = 0; x < width; x++) { pixels[offset + x] = matrix.get(x, y) ? Color.BLACK : Color.WHITE; } } Bitmap barcodeBitmap = Bitmap.createBitmap(width, height, Bitmap.Config.ARGB_8888); barcodeBitmap.setPixels(pixels, 0, width, 0, 0, width, height); return barcodeBitmap; } catch (WriterException e) { e.printStackTrace(); } return null; } } ``` 这个 demo 使用了 Google 的 ZXing 库来生成条码图片,其中 `generateBarcodeBitmap()` 方法就是生成条码图片的核心代码。在这个方法中,我们首先指定了条码图片的宽度和高度,然后根据指定的内容和条码格式(这里使用的是 CODE_128 格式)生成 BitMatrix,最后将 BitMatrix 转换成 Bitmap。

“相关推荐”对你有帮助么?

  • 非常没帮助
  • 没帮助
  • 一般
  • 有帮助
  • 非常有帮助
提交
评论 3
添加红包

请填写红包祝福语或标题

红包个数最小为10个

红包金额最低5元

当前余额3.43前往充值 >
需支付:10.00
成就一亿技术人!
领取后你会自动成为博主和红包主的粉丝 规则
hope_wisdom
发出的红包
实付
使用余额支付
点击重新获取
扫码支付
钱包余额 0

抵扣说明:

1.余额是钱包充值的虚拟货币,按照1:1的比例进行支付金额的抵扣。
2.余额无法直接购买下载,可以购买VIP、付费专栏及课程。

余额充值