


UIButton是ios中用来响应用户点击事件的控件.继承自UIControl
1.创建控件
UIButton *button=[UIButton buttonWithType:UIButtonTypeCustom];2.设置属性
(1).为按钮上颜色
button.backgroundColor=[UIColor yellowColor];(2).为按钮设置大小
button.frame=CGRectMake(20, 100, 280, 50);(3)为按钮设置样式
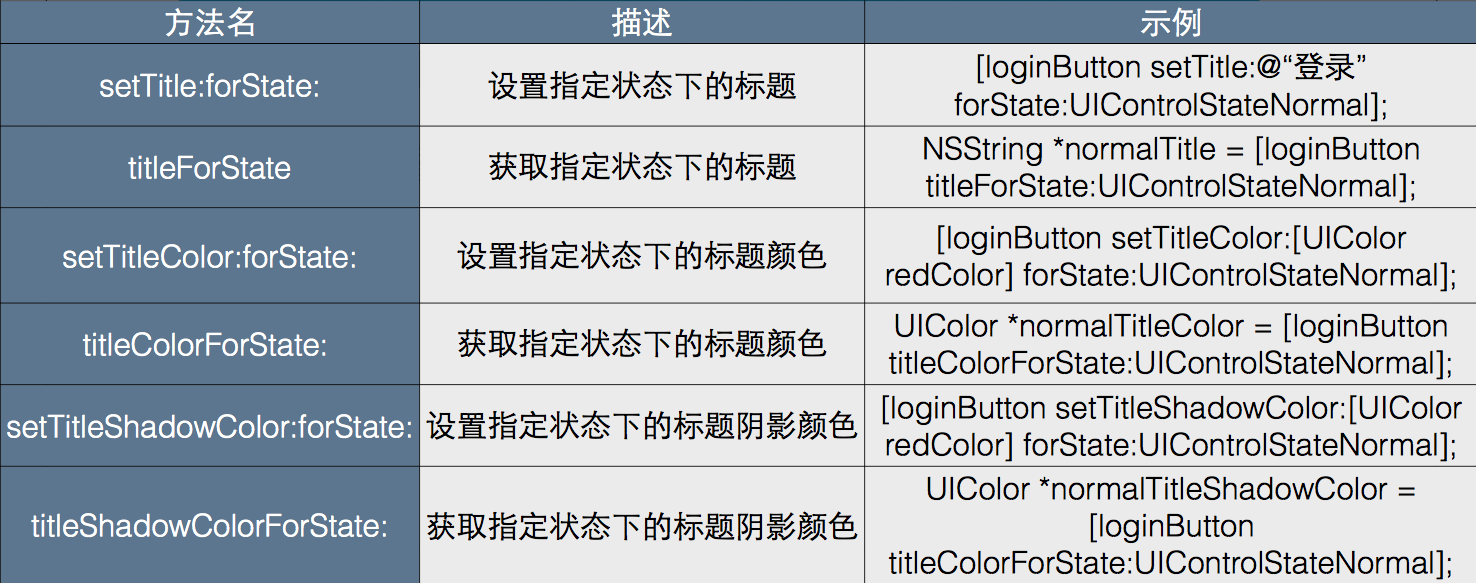
[button setTitle:@"正常状态" forState:UIControlStateNormal];
[button setTitle:@"高亮状态" forState:UIControlStateHighlighted];
[button setTitle:@"不可用状态" forState:UIControlStateDisabled];//默认是YES
button.enabled=NO;
[button setTitle:@"被选中状态" forState:UIControlStateSelected];//默认是NO
button.selected=YES;
button是一个复合视图(由多个视图构成),其中显示title(标题)的是titleLabel,设置标题的属性都是在titleLabel上
(4)给标题上色
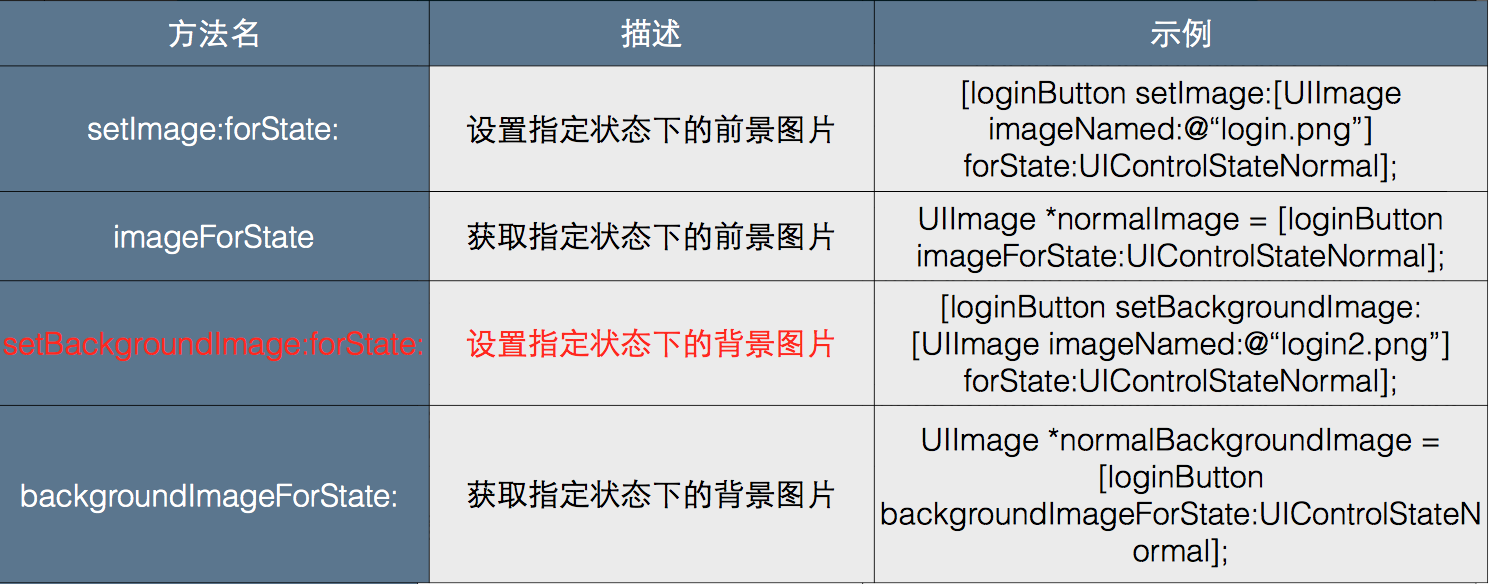
button.tintColor=[UIColor redColor];设置图片
UIImage 图片类,继承自NSObject
可以根据名字创建图片
注意:png格式的图片可以省略后缀,其他格式图片必须加上后缀
button.png
[button setImage:image forState:(UIControlStateNormal)];//这种方法 图片 会和 title 争夺地盘.优先显示image.一般采用下面这种,可以一起显示
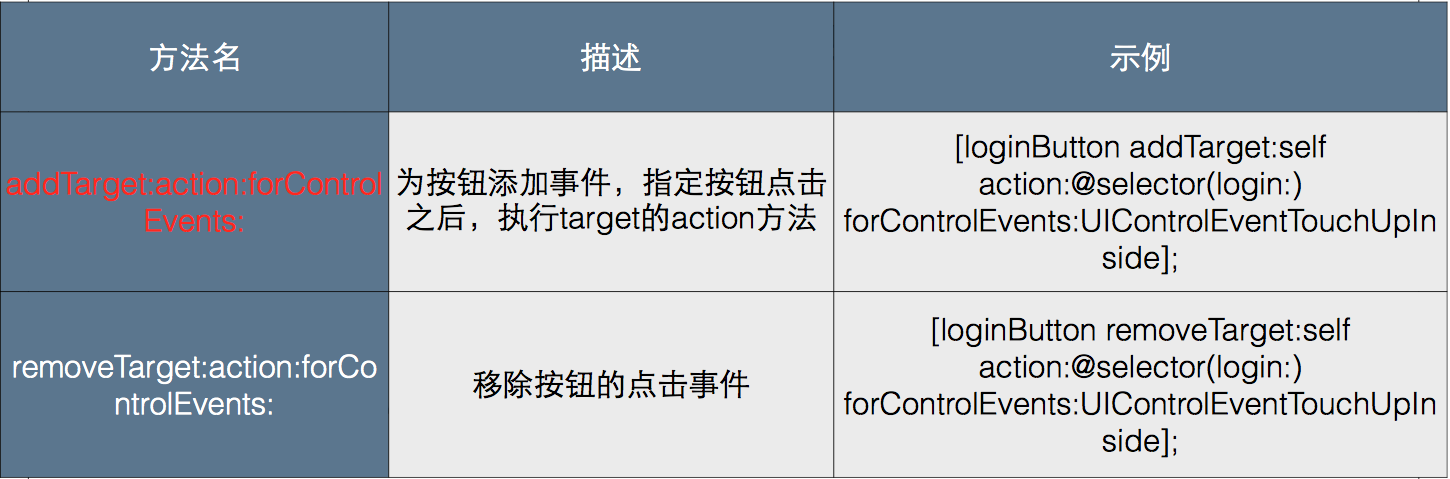
[button setBackgroundImage:image forState:UIControlStateNormal];为button添加关联事件
button addTarget:<#(id)#> action:<#(SEL)#> forControlEvents:<#(UIControlEvents)#>
addTarget:<#(id)#>—-关联事件对象,指定的响应对象
action:<#(SEL)#>——关联事件,指定对象的响应方法. 事件可以带参数,但是参数只能跟一个,帮谁处理事件就是跟谁的数据类型
forControlEvents:<#(UIControlEvents)#>------事件的触发时机
[button addTarget:self action:@selector(buttonAction) forControlEvents:UIControlEventTouchUpInside];
// 添加父视图上
[self.window addSubview:button];
self.window.backgroundColor = [UIColor whiteColor];
[self.window makeKeyAndVisible];
return YES;-(void)buttonAction{
NSLog(@"666");
}为button添加事件
外观控制1
外观控制2


 3602
3602


 被折叠的 条评论
为什么被折叠?
被折叠的 条评论
为什么被折叠?
 到【灌水乐园】发言


