


1 说明
前后端分离项目中,跨域问题不可避免。往往发生的情况是,后端开发验证接口没有问题,前端小伙伴说接口报跨域了。后端开发一般都是通过自带的Swagger在线文档或Postman验证接口的,这两个工具,没有跨域问题,所以误导了后端开发人员。
2 跨域验证
2.1 html代码
提供一段html代码,便于后端开发自行验证接口。
<!DOCTYPE html>
<html>
<head>
<meta charset="utf-8">
<script src="http://code.jquery.com/jquery-1.11.3.min.js"></script>
<title>Http跨域请求示例</title>
</head>
<style>
body {
-moz-backgroud-size: 100% 100%;
background-size: 100% 100%;
background-repeat: no-repeat;
}
input {
-web-kit-appearance: none;
-moz-appearance: none;
margin-top: 10px;
font-size: 1.2em;
width: 50%;
height: 2.0em;
border-radius: 10px;
border: 2px solid;
color: #6a6f77;
outline: 0;
padding: 2px 10px;
}
/* 此处内部样式覆盖外部样式 */
.main {
margin: 5% 10%;
overflow: hidden;
}
.top {
text-align: left;
background-color: #b5c4b1;
width: 100%;
padding: 15px;
}
.down {
text-align: left;
background-color: #b5c4b1;
width: 100%;
padding: 15px;
}
.title {
color: #000000;
font-size: 20px;
font-style: normal;
font-weight: bold;
}
.show-text {
border: none;
margin-top: 20px;
width: 96%;
border-radius: 5px;
background-color: #dadad8;
color: #222222;
height: 5.0em;
font-size: 15px;
}
.button1 {
border: none;
padding: 5px 15px;
margin-left: 10px;
height: 2.0em;
border-radius: 10px;
background-color: #1F7BFF;
color: #ffffff;
font-size: 1.2em;
}
.button1:active {
background-color: #076af5;
color: #eeeeee;
}
.button2 {
border: none;
margin-top: 5px;
padding: 5px 15px;
height: 2.0em;
width: 96%;
border-radius: 10px;
background-color: #a6a6a8;
color: #ffffff;
font-size: 1.2em;
}
.button2:active {
background-color: #9e9eaa;
color: #f8f8f8;
}
</style>
<body>
<div class="main">
<div class="top">
<div class="title">Get请求</div>
<div class="line">
<input id="en_input_id1" placeholder="请输入Url" />
<button id="en_btn_id2" class="button1" onclick="httpGet()">请求</buttondiv>
</div>
<textarea id="en_div_4" class="show-text">Get请求结果...</textarea>
<button id="en_btn_id5" class="button2" onclick="httpGetCopy()">复制结果</button>
</div>
<script>
function httpGet() {
x = document.getElementById("en_input_id1");
y = document.getElementById("en_div_4");
$.ajax({
url: x.value,
dataType: "json",
type: "get",
headers: {
"Content-Type": "application/json;charset=UTF-8",
// 'Authorization': "Bearer xxxxxxx",
},
data: {
// key: "7486e10d3ca83a934438176cf941df0c",
},
success: function (res) {
y.innerHTML = JSON.stringify(res);
console.log(res); //在console中查看数据
},
error: function (res) {
y.innerHTML = JSON.stringify(res);
// alert('failed!');
},
});
}
function httpGetCopy() {
console.log("httpGetCopy")
y = document.getElementById("en_div_4");
const el = document.createElement('input');
// 给input元素赋值需要复制的文本
el.setAttribute('value', y.innerHTML);
// 将input元素插入页面
document.body.appendChild(el);
// 选中input元素的文本
el.select();
// 复制内容到剪贴板
document.execCommand('copy');
// 删除input元素
document.body.removeChild(el);
alert("已复制");
}
</script>
<br>
<div class="down">
<div class="title">Post请求</div>
<div class="line">
<input id="de_input_id1" placeholder="请输入Url" />
<input id="de_input_id2" placeholder="请输入Body,Json格式(可不填)" />
<button id="de_btn_id2" class="button1" onclick="httpPost()">请求</buttondiv>
</div>
<textarea id="de_div_5" class="show-text">Post结果...</textarea>
<button id="de_btn_id5" class="button2" onclick="httpPostCopy()">复制结果</button>
</div>
<script>
function httpPost() {
x1 = document.getElementById("de_input_id1");
x2 = document.getElementById("de_input_id2");
y = document.getElementById("de_div_5");
$.ajax({
url: x1.value,
dataType: "json",
type: "POST",
headers: {
"Content-Type": "application/json;charset=UTF-8",
},
data: x2.value == "" ? {} : x2.value,
success: function (res) {
y.innerHTML = JSON.stringify(res);
console.log(res); //在console中查看数据
},
error: function (res) {
y.innerHTML = JSON.stringify(res);
// alert('failed!');
},
});
}
function httpPostCopy() {
y = document.getElementById("de_div_5");
const el = document.createElement('input');
// 给input元素赋值需要复制的文本
el.setAttribute('value', y.innerHTML);
// 将input元素插入页面
document.body.appendChild(el);
// 选中input元素的文本
el.select();
// 复制内容到剪贴板
document.execCommand('copy');
// 删除input元素
document.body.removeChild(el);
alert("已复制");
}
</script>
</div>
</body>
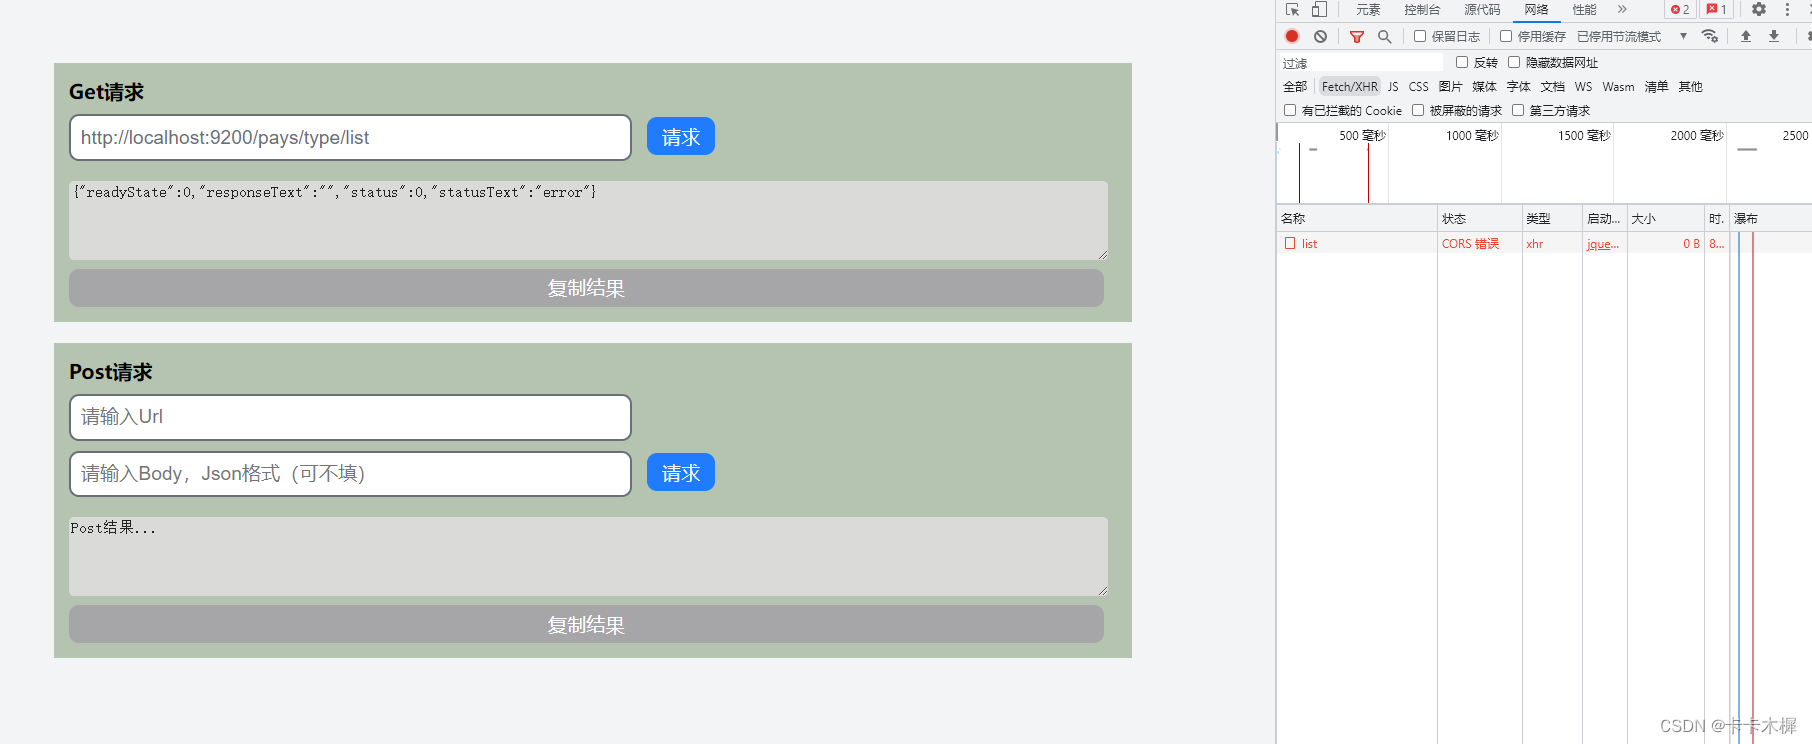
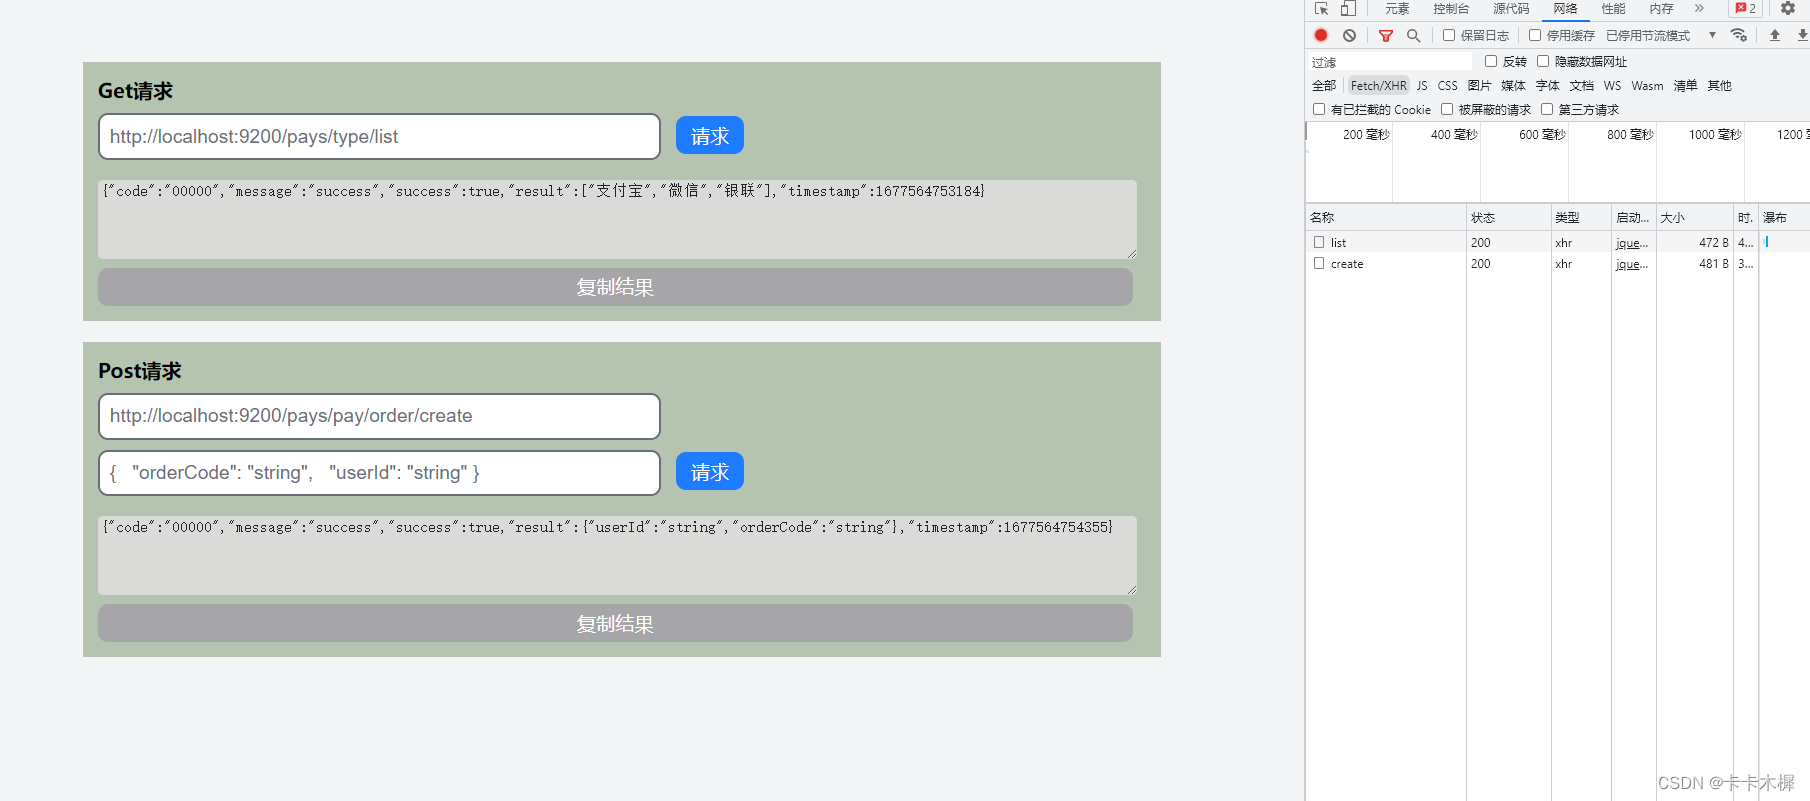
</html>2.2 验证
(1) 有跨域问题
(2) 跨域问题已解决
3 后端解决跨域问题
Spring不同版本处理方式有所不同,固提供两种方法,如下所示。
(1) Spring2.4之前的版本
package com.digital.art.config;

import org.springframework.context.annotation.Bean;
import org.springframework.context.annotation.Configuration;
import org.springframework.web.cors.CorsConfiguration;
import org.springframework.web.cors.UrlBasedCorsConfigurationSource;
import org.springframework.web.filter.CorsFilter;

/**
 * @author SSM
 * @description 对于spring security oauth2 默认接口,例如 /oauth/token 跨域问题,可以通过全局 CORS Filter 解决
 * @date 2019/12/25 10:46
 */
@Configuration
public class GlobalCorsConfiguration {


	@Bean
	public CorsFilter corsFilter() {
		CorsConfiguration corsConfiguration = new CorsConfiguration();
		corsConfiguration.setAllowCredentials(true);
		corsConfiguration.addAllowedOrigin("*");
//		corsConfiguration.setAllowedOrigins(Arrays.asList(orgins));
		corsConfiguration.addAllowedHeader("*");
		corsConfiguration.addAllowedMethod("*");
		UrlBasedCorsConfigurationSource urlBasedCorsConfigurationSource = new UrlBasedCorsConfigurationSource();
		urlBasedCorsConfigurationSource.registerCorsConfiguration("/**", corsConfiguration);
		return new CorsFilter(urlBasedCorsConfigurationSource);
	}

}
(2) Spring2.4之后的版本
package com.module.nacos.pay.config;

import org.springframework.context.annotation.Bean;
import org.springframework.context.annotation.Configuration;
import org.springframework.web.method.support.HandlerMethodArgumentResolver;
import org.springframework.web.servlet.config.annotation.*;

import java.util.List;

/**
 * @ClassName WebConfig
 * @Description
 * @Author ssm
 * @Date 2020/7/9 11:03
 */
@Configuration
public class WebConfig implements WebMvcConfigurer {


    @Override
    public void addArgumentResolvers(List<HandlerMethodArgumentResolver> argumentResolvers) {
    }

    @Override
    public void addInterceptors(InterceptorRegistry registry) {

    }

    // SpringBoot2.4.0 [allowedOriginPatterns]代替[allowedOrigins]
    @Override
    public void addCorsMappings(CorsRegistry registry) {
        registry.addMapping("/**")
                .allowedOriginPatterns("*")
                .allowedMethods("*")
                .maxAge(3600)
                .allowCredentials(true);
    }

    @Override
    public void addResourceHandlers(ResourceHandlerRegistry registry) {
        /**
         * 支持swagger
         */
        registry.addResourceHandler("swagger-ui.html")
                .addResourceLocations("classpath:/META-INF/resources/");

        /**
         * 支持webjars
         */
        registry.addResourceHandler("/webjars/**")
                .addResourceLocations("classpath:/META-INF/resources/webjars/");

        /**
         * templates模板
         */
        registry.addResourceHandler("/static/**")
                .addResourceLocations("classpath:/static/");
        registry.addResourceHandler("/templates/**")
                .addResourceLocations("classpath:/templates/");
    }
}


 455
455


 被折叠的 条评论
为什么被折叠?
被折叠的 条评论
为什么被折叠?
 到【灌水乐园】发言


