


准备篇:
CentOS 7.0系统安装配置图解教程
http://www.centoscn.com/image-text/setup/2014/0724/3342.html
下载软件包
1、下载nginx(目前稳定版)
http://nginx.org/download/nginx-1.6.0.tar.gz
2、下载MySQL
http://cdn.mysql.com/Downloads/MySQL-5.6/mysql-5.6.19.tar.gz
3、下载php
http://cn2.php.net/distributions/php-5.5.14.tar.gz
4、下载pcre (支持nginx伪静态)
ftp://ftp.csx.cam.ac.uk/pub/software/programming/pcre/pcre-8.35.tar.gz
5、下载openssl(nginx扩展)
http://www.openssl.org/source/openssl-1.0.1h.tar.gz
6、下载zlib(nginx扩展)
http://zlib.net/zlib-1.2.8.tar.gz
7、下载cmake(MySQL编译工具)
http://www.cmake.org/files/v2.8/cmake-2.8.11.2.tar.gz
8、下载libmcrypt(php扩展)
http://nchc.dl.sourceforge.net/project/mcrypt/Libmcrypt/2.5.8/libmcrypt-2.5.8.tar.gz
9、下载yasm(php扩展)
http://www.tortall.net/projects/yasm/releases/yasm-1.2.0.tar.gz
10、t1lib(php扩展)
ftp://sunsite.unc.edu/pub/Linux/libs/graphics/t1lib-5.1.2.tar.gz
11、下载gd库安装包
https://bitbucket.org/libgd/gd-libgd/downloads/libgd-2.1.0.tar.gz
12、libvpx(gd库需要)
https://webm.googlecode.com/files/libvpx-v1.3.0.tar.bz2
13、tiff(gd库需要)
http://download.osgeo.org/libtiff/tiff-4.0.3.tar.gz
14、libpng(gd库需要)
ftp://ftp.simplesystems.org/pub/png/src/libpng16/libpng-1.6.12.tar.gz
15、freetype(gd库需要)
http://download.savannah.gnu.org/releases/freetype/ft2demos-2.5.3.tar.gz
16、jpegsrc(gd库需要)
http://www.ijg.org/files/jpegsrc.v9a.tar.gz
以上软件包上传到/apps/soft(可自己定义)目录
安装编译工具及库文件(使用yum命令安装)
yum install -y apr* autoconf automake bison bzip2 bzip2* cloog-ppl compat* cpp curl curl-devel fontconfig fontconfig-devel freetype freetype* freetype-devel gcc gcc-c++ gtk+-devel gd gettext gettext-devel glibc kernel kernel-headers keyutils keyutils-libs-devel krb5-devel libcom_err-devel libpng libpng-devel libjpeg* libsepol-devel libselinux-devel libstdc++-devel libtool* libgomp libxml2 libxml2-devel libXpm* libtiff libtiff* make mpfr ncurses* ntp openssl openssl-devel patch pcre-devel perl php-common php-gd policycoreutils telnet t1lib t1lib* nasm nasm* wget zlib-devel
安装篇
安装Nginx
1、安装pcre
cd /apps/soft
mkdir /usr/local/pcre
tar zxvf pcre-8.35.tar.gz
cd pcre-8.35
./configure --prefix=/usr/local/pcre
make
make install
2、安装openssl
cd /apps/soft
mkdir /usr/local/openssl
tar zxvf openssl-1.0.1h.tar.gz
cd openssl-1.0.1h
./config --prefix=/usr/local/openssl
make
make install
vi /etc/profile
export PATH=$PATH:/usr/local/openssl/bin
:wq!
source /etc/profile
3、安装zlib
cd /apps/soft
mkdir /usr/local/zlib
tar zxvf zlib-1.2.8.tar.gz
cd zlib-1.2.8
./configure --prefix=/usr/local/zlib
make
make install
4、安装Nginx
groupadd www
useradd -g www www -s /bin/false
cd /apps/soft
tar zxvf nginx-1.6.0.tar.gz
cd nginx-1.6.0
./configure --prefix=/apps/nginx --without-http_memcached_module --user=www --group=www --with-http_stub_status_module --with-http_ssl_module --with-http_gzip_static_module --with-openssl=/apps/soft/openssl-1.0.1h --with-zlib=/apps/soft/zlib-1.2.8 --with-pcre=/apps/soft/pcre-8.35
注意:--with-openssl=/apps/soft/openssl-1.0.1h --with-zlib=/apps/soft/zlib-1.2.8 --with-pcre=/apps/soft/pcre-8.35指向的是源码包解压的路径,而不是安装的路径,否则会报错
make
make install
/apps/nginx/sbin/nginx #启动Nginx
设置nginx开机启动
vi /etc/rc.d/init.d/nginx #编辑启动文件添加下面内容
#!/bin/sh
#
# nginx - this script starts and stops the nginx daemon
#
# chkconfig: - 85 15
# description: Nginx is an HTTP(S) server, HTTP(S) reverse \
# proxy and IMAP/POP3 proxy server
# processname: nginx
# config: /etc/nginx/nginx.conf
# config: /apps/nginx/conf/nginx.conf
# pidfile: /apps/nginx/logs/nginx.pid
# Source function library.
. /etc/rc.d/init.d/functions
# Source networking configuration.
. /etc/sysconfig/network
# Check that networking is up.
[ "$NETWORKING" = "no" ] && exit 0
nginx="/apps/nginx/sbin/nginx"
prog=$(basename $nginx)
NGINX_CONF_FILE="/apps/nginx/conf/nginx.conf"
[ -f /etc/sysconfig/nginx ] && . /etc/sysconfig/nginx
lockfile=/var/lock/subsys/nginx
make_dirs() {
# make required directories
user=`$nginx -V 2>&1 | grep "configure arguments:" | sed 's/[^*]*--user=\([^ ]*\).*/\1/g' -`
if [ -z "`grep $user /etc/passwd`" ]; then
useradd -M -s /bin/nologin $user
fi
options=`$nginx -V 2>&1 | grep 'configure arguments:'`
for opt in $options; do
if [ `echo $opt | grep '.*-temp-path'` ]; then
value=`echo $opt | cut -d "=" -f 2`
if [ ! -d "$value" ]; then
# echo "creating" $value
mkdir -p $value && chown -R $user $value
fi
fi
done
}
start() {
[ -x $nginx ] || exit 5
[ -f $NGINX_CONF_FILE ] || exit 6
make_dirs
echo -n $"Starting $prog: "
daemon $nginx -c $NGINX_CONF_FILE
retval=$?
echo
[ $retval -eq 0 ] && touch $lockfile
return $retval
}
stop() {
echo -n $"Stopping $prog: "
killproc $prog -QUIT
retval=$?
echo
[ $retval -eq 0 ] && rm -f $lockfile
return $retval
}
restart() {
#configtest || return $?
stop
sleep 1
start
}
reload() {
#configtest || return $?
echo -n $"Reloading $prog: "
killproc $nginx -HUP
RETVAL=$?
echo
}
force_reload() {
restart
}
configtest() {
$nginx -t -c $NGINX_CONF_FILE
}
rh_status() {
status $prog
}
rh_status_q() {
rh_status >/dev/null 2>&1
}
case "$1" in
start)
rh_status_q && exit 0
$1
;;
stop)
rh_status_q || exit 0
$1
;;
restart|configtest)
$1
;;
reload)
rh_status_q || exit 7
$1
;;
force-reload)
force_reload
;;
status)
rh_status
;;
condrestart|try-restart)
rh_status_q || exit 0
;;
*)
echo $"Usage: $0 {start|stop|status|restart|condrestart|try-restart|reload|force-reload|configtest}"
exit 2
esac
:wq! #保存退出
chmod 775 /etc/rc.d/init.d/nginx #赋予文件执行权限
chkconfig nginx on #设置开机启动
/etc/rc.d/init.d/nginx restart #重启
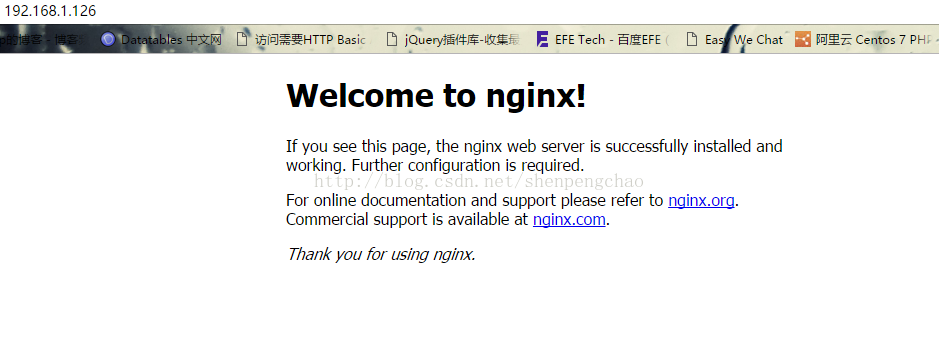
在浏览器中打开服务器IP地址,会看到下面的界面,说明Nginx安装成功。
安装MySQL
1.安装mysql源
$ yum localinstall http://dev.mysql.com/get/mysql57-community-release-el7-7.noarch.rpm
2.安装mysql
$ yum install mysql-community-server
确认一下mysql的版本,有时可能会提示mysql5.6
3.安装mysql的开发包,以后会有用
$ yum install mysql-community-devel
4.启动mysql
$ service mysqld start
Redirecting to /bin/systemctl start mysqld.service
5.查看mysql启动状态
$ service mysqld status
出现pid
证明启动成功
6.获取mysql默认生成的密码
$ grep 'temporary password' /var/log/mysqld.log
2017-03-05T05:41:09.104758Z 1 [Note] A temporary password is generated for root@localhost: %G1Rgns!dD!v
加粗的就是生成的密码
7.换成自己的密码
$ mysql -uroot -p
Enter password:输入上面的密码
成功输入后进入一下步,这里你估计会输入 好几次才进去
8. 更换密码
mysql> ALTER USER 'root'@'localhost' IDENTIFIED BY 'MyNewPass4!';
这个密码一定要足够复杂,不然会不让你改,提示密码不合法;
9.退出mysql;
mysql> quit;
10.用新密码再登录,试一下新密码
$ mysql -uroot -p
Enter password:输入你的新密码
11.确认密码正确后,退出mysql;
mysql> quit;
安装php (安装php7需要先安装三个依赖包)
1、安装mhash
cd /apps/soft
wget http://sourceforge.net/projects/mhash/files/mhash/0.9.9.9/mhash-0.9.9.9.tar.gz
tar zxvf mhash-0.9.9.9.tar.gz
cd mhash-0.9.9.9
./configure
make
make install
2、安装libmcrypt
cd /apps/soft
wget http://sourceforge.net/projects/mcrypt/files/Libmcrypt/2.5.8/libmcrypt-2.5.8.tar.gz
tar zxvf libmcrypt-2.5.8.tar.gz
cd libmcrypt-2.5.8
./configure
make
make install
3、安装mcrypt
cd /apps/soft
wget http://sourceforge.net/projects/mcrypt/files/MCrypt/2.6.8/mcrypt-2.6.8.tar.gz/
tar zxvf mcrypt-2.6.8.tar.gz
cd mcrypt-2.6.8
./configure
这里如果报错(you may also be able to get things to work by modifying LD_LIBRARY_PATH)
export LD_LIBRARY_PATH=/usr/local/lib:$LD_LIBRARY_PATH
ln -s /usr/local/bin/libmcrypt-config /usr/bin/libmcrypt-config然后重新编译./configure 没有就忽略
make
make install
编译安装php7
1.下载php7源码包(如果有就不需要下载,建议先下载需要的版本)
$ cd /root & wget -O php7.tar.gz http://cn2.php.net/get/php-7.0.1.tar.gz/from/this/mirror
2.解压源码包
$ tar -xvf php7.tar.gz
3.进入目录
$ cd php-7.0.1
4.安装php依赖包
$ yum install libxml2 libxml2-devel openssl openssl-devel bzip2 bzip2-devel libcurl libcurl-devel libjpeg libjpeg-devel libpng libpng-devel freetype freetype-devel gmp gmp-devel libmcrypt libmcrypt-devel readline readline-devel libxslt libxslt-devel
5.编译配置,这一步我们会遇到很多configure error,我们一一解决,基本都是相关软件开发包没有安装导致
$ ./configure \
--prefix=/apps/php \
--with-config-file-path=/apps/php/etc \
--enable-fpm \
--with-fpm-user=nginx  \
--with-fpm-group=nginx \
--enable-inline-optimization \
--disable-debug \
--disable-rpath \
--enable-shared  \
--enable-soap \
--with-libxml-dir \
--with-xmlrpc \
--with-openssl \
--with-mcrypt \
--with-mhash \
--with-pcre-regex \
--with-sqlite3 \
--with-zlib \
--enable-bcmath \
--with-iconv \
--with-bz2 \
--enable-calendar \
--with-curl \
--with-cdb \
--enable-dom \
--enable-exif \
--enable-fileinfo \
--enable-filter \
--with-pcre-dir \
--enable-ftp \
--with-gd \
--with-openssl-dir \
--with-jpeg-dir \
--with-png-dir \
--with-zlib-dir  \
--with-freetype-dir \
--enable-gd-native-ttf \
--enable-gd-jis-conv \
--with-gettext \
--with-gmp \
--with-mhash \
--enable-json \
--enable-mbstring \
--enable-mbregex \
--enable-mbregex-backtrack \
--with-libmbfl \
--with-onig \
--enable-pdo \
--with-mysqli=mysqlnd \
--with-pdo-mysql=mysqlnd \
--with-zlib-dir \
--with-pdo-sqlite \
--with-readline \
--enable-session \
--enable-shmop \
--enable-simplexml \
--enable-sockets  \
--enable-sysvmsg \
--enable-sysvsem \
--enable-sysvshm \
--enable-wddx \
--with-libxml-dir \
--with-xsl \
--enable-zip \
--enable-mysqlnd-compression-support \
--with-pear \
--enable-opcache
configure error:
1.configure: error: xml2-config not found. Please check your libxml2 installation.
解决:
$ yum install libxml2 libxml2-devel
2.configure: error: Cannot find OpenSSL's <evp.h>
解决:
$ yum install openssl openssl-devel
3.configure: error: Please reinstall the BZip2 distribution
解决:
$ yum install bzip2 bzip2-devel
4.configure: error: Please reinstall the libcurl distribution - easy.h should be in <curl-dir>/include/curl/
解决:
$ yum install libcurl libcurl-devel
5.If configure fails try --with-webp-dir=<DIR> configure: error: jpeglib.h not found.
解决:
$ yum install libjpeg libjpeg-devel
6.If configure fails try --with-webp-dir=<DIR>
checking for jpeg_read_header in -ljpeg... yes
configure: error: png.h not found.
解决:
$ yum install libpng libpng-devel
7.If configure fails try --with-webp-dir=<DIR>
checking for jpeg_read_header in -ljpeg... yes
checking for png_write_image in -lpng... yes
If configure fails try --with-xpm-dir=<DIR>
configure: error: freetype-config not found.
解决:
$ yum install freetype freetype-devel
8.configure: error: Unable to locate gmp.h
解决:
$ yum install gmp gmp-devel
9.configure: error: mcrypt.h not found. Please reinstall libmcrypt.
解决:
$ yum install libmcrypt libmcrypt-devel
10.configure: error: Please reinstall readline - I cannot find readline.h
解决:
$ yum install readline readline-devel
11.configure: error: xslt-config not found. Please reinstall the libxslt >= 1.1.0 distribution
解决:
$ yum install libxslt libxslt-devel
6.编译与安装
$ make && make install
这里要make好久,要耐心一下
7.添加 PHP 命令到环境变量
$ vim /etc/profile
在末尾加入
PATH=$PATH:/apps/php/bin
export PATH
要使改动立即生效执行
$ ./etc/profile
或
$ source /etc/profile
查看环境变量
$ echo $PATH
查看php版本
$ php -v
8.配置php-fpm
$ cp php.ini-production /etc/php.ini
$ cp /apps/php/etc/php-fpm.conf.default /apps/php/etc/php-fpm.conf

$ cp /apps/php/etc/php-fpm.d/www.conf.default /apps/php/etc/php-fpm.d/www.conf
$ cp sapi/fpm/init.d.php-fpm /etc/init.d/php-fpm
$ chmod +x /etc/init.d/php-fpm
9.启动php-fpm
$ vim /apps/php/etc/php-fpm.conf
user = www
group = www
$ /etc/init.d/php-fpm start
配置nginx虚拟机,绑定域名
1.
$ vim /etc/nginx/conf.d/php7.thinkcmf.com.conf
这里可以把php7.thinkcmf.com.conf改成自己的域名
把下面的内容复制到php7.thinkcmf.com.conf里
server{
    listen 80;
    server_name  php7.thinkcmf.com;
    root /var/www/html/php7.thinkcmf.com; # 该项要修改为你准备存放相关网页的路径
    location / {
        index  index.php index.html index.htm;
         #如果请求既不是一个文件,也不是一个目录,则执行一下重写规则
         if (!-e $request_filename)
         {
            #地址作为将参数rewrite到index.php上。
            rewrite ^/(.*)$ /index.php/$1;
            #若是子目录则使用下面这句,将subdir改成目录名称即可。
            #rewrite ^/subdir/(.*)$ /subdir/index.php/$1;
         }
    }
    #proxy the php scripts to php-fpm
    location ~ \.php {
            include fastcgi_params;
            ##pathinfo支持start
            #定义变量 $path_info ,用于存放pathinfo信息
            set $path_info "";
            #定义变量 $real_script_name,用于存放真实地址
            set $real_script_name $fastcgi_script_name;
            #如果地址与引号内的正则表达式匹配
            if ($fastcgi_script_name ~ "^(.+?\.php)(/.+)$") {
                    #将文件地址赋值给变量 $real_script_name
                    set $real_script_name $1;
                    #将文件地址后的参数赋值给变量 $path_info
                    set $path_info $2;
            }
            #配置fastcgi的一些参数
            fastcgi_param SCRIPT_FILENAME $document_root$real_script_name;
            fastcgi_param SCRIPT_NAME $real_script_name;
            fastcgi_param PATH_INFO $path_info;
            ###pathinfo支持end
        fastcgi_intercept_errors on;
        fastcgi_pass   127.0.0.1:9000;
    }

    location ^~ /data/runtime {
	return 404;
    }

    location ^~ /application {
	return 404;
    }

    location ^~ /simplewind {
	return 404;
    }
}
2.重启nginx
$ service nginx reload
3.
$ vim /var/www/html/php7.thinkcmf.com/index.php
把下面的代码复制到这个文件 里
<?php
phpinfo();
4.查看访问http://php7.thinkcmf.com
接下来扩展php-beast加密
        ____  __  ______     ____  _________   ___________
       / __ \/ / / / __ \   / __ )/ ____/   | / ___/_  __/
      / /_/ / /_/ / /_/ /  / __  / __/ / /| | \__ \ / /
     / ____/ __  / ____/  / /_/ / /___/ ___ |___/ // /
    /_/   /_/ /_/_/      /_____/_____/_/  |_/____//_/
安装此扩展必须使用非线程安全版本,否则可能出错!!!
编译安装如下:
$ wget https://github.com/liexusong/php-beast/archive/master.zip
$ unzip master.zip
$ cd php-beast-master
$ phpize
$ ./configure --with-php-config=/apps/php/bin/php-config
$ sudo make && make install

编译好之后修改php.ini配置文件, 加入配置项: extension=beast.so, 重启php-fpm
温馨提示: 可以设置较大的缓存提高效率
使用php-beast的性能:
不使用php-beast的性能:
 beast.cache_size = size
 beast.log_file = "path_to_log"
 beast.log_user = "user"
 beast.enable = On
 1. AES
 2. DES
 3. Base64
通过测试环境:
Nginx + Fastcgi + (PHP-5.2.x ~ PHP-7.1.x)
注意
如果出现502错误,一般是由于GCC版本太低导致,请先升级GCC再安装本模块。
怎么加密项目
安装完 php-beast 后可以使用 tools 目录下的 encode_files.php 来加密你的项目。使用 encode_files.php 之前先修改 tools 目录下的 configure.ini 文件,如下:
; source path
src_path = ""

; destination path
dst_path = ""

; expire time
expire = ""

; encrypt type (selection: DES, AES, BASE64)
encrypt_type = "DES"
src_path 是要加密项目的路径,dst_path 是保存加密后项目的路径,expire 是设置项目可使用的时间 (expire 的格式是:YYYY-mm-dd HH:ii:ss)。encrypt_type是加密的方式,选择项有:DES、AES、BASE64。 修改完 configure.ini 文件后就可以使用命令 php encode_files.php 开始加密项目。
制定自己的php-beast
php-beast 有多个地方可以定制的,以下一一列出:
1. 使用 header.c 文件可以修改 php-beast 加密后的文件头结构,这样网上的解密软件就不能认识我们的加密文件,就不能进行解密,增加加密的安全性。
2. php-beast 提供只能在指定的机器上运行的功能。要使用此功能可以在 networkcards.c 文件添加能够运行机器的网卡号,例如:
char *allow_networkcards[] = {
    "fa:16:3e:08:88:01",
    NULL,
};
这样设置之后,php-beast 扩展就只能在 fa:16:3e:08:88:01 这台机器上运行。另外要注意的是,由于有些机器网卡名可能不一样,所以如果你的网卡名不是 eth0 的话,可以在 php.ini 中添加配置项: beast.networkcard = "xxx" 其中 xxx 就是你的网卡名,也可以配置多张网卡,如:beast.networkcard = "eth0,eth1,eth2"。
3. 使用 php-beast 时最好不要使用默认的加密key,因为扩展是开源的,如果使用默认加密key的话,很容易被人发现。所以最好编译的时候修改加密的key,aes模块 可以在 aes_algo_handler.c 文件修改,而 des模块 可以在 des_algo_handler.c 文件修改。


 496
496


 被折叠的 条评论
为什么被折叠?
被折叠的 条评论
为什么被折叠?
 到【灌水乐园】发言


