


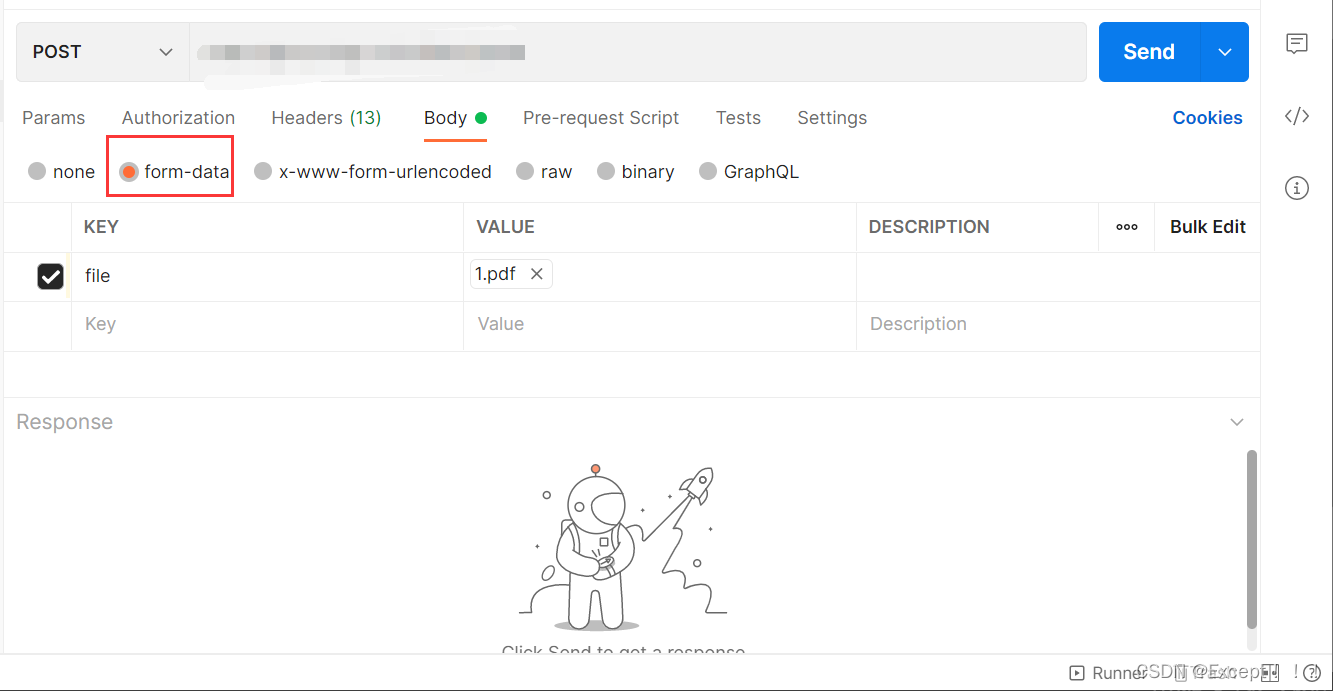
postman
代码:
 //PDF转文件流
 string path="D:\\1.pdf";
 byte[] bytes = File.ReadAllBytes(path);
 List<CTGDFile> fileList = new List<CTGDFile>();
 CTGDFile ctfile = new CTGDFile();
 ctfile.fileDate = bytes;
 ctfile.name = "file";
 ctfile.filename = path;//这里是文件的路径
 fileList.Add(ctfile);
 string boundary = "----------------------------" + DateTime.Now.Ticks.ToString("x");
 HttpWebRequest request = (HttpWebRequest)WebRequest.Create(url);
 request.ContentType = "multipart/form-data; boundary=" + boundary;
 request.Method = "POST";
 request.KeepAlive = true;
 //这里可以增加头部文件
 //request.Headers["x-timevale-project-id"] = Projectid;
 //request.Headers["x-timevale-signature"] = Secret;
 MemoryStream stream = new MemoryStream();
 byte[] line = Encoding.ASCII.GetBytes("--" + boundary + "\r\n");
 byte[] enterER = Encoding.ASCII.GetBytes("\r\n");
 提交文件
 if (fileList != null)
 {
     string fformat = "Content-Disposition:form-data; name=\"{0}\";filename=\"{1}\"\r\nContent-Type:{2}\r\n\r\n";
     foreach (CTGDFile file in fileList)
     {
         string contentType = "application/pdf";//上传文件的类型
         stream.Write(line, 0, line.Length);        //项目分隔符
         string s = string.Format(fformat, file.name, file.filename, contentType);
         WriteLog(s);
         byte[] data = Encoding.UTF8.GetBytes(s);
         stream.Write(data, 0, data.Length);
         stream.Write(file.fileDate, 0, file.fileDate.Length);
         stream.Write(enterER, 0, enterER.Length);  //添加\r\n
     }
 }
 byte[] foot_data = Encoding.UTF8.GetBytes("--" + boundary + "--\r\n");      //项目最后的分隔符字符串需要带上--
 stream.Write(foot_data, 0, foot_data.Length);
 request.ContentLength = stream.Length;
 Stream requestStream = request.GetRequestStream(); //写入请求数据
 stream.Position = 0L;
 stream.CopyTo(requestStream); //
 stream.Close();
 requestStream.Close();
 HttpWebResponse response = (HttpWebResponse)request.GetResponse();
 return response;


 2821
2821


 被折叠的 条评论
为什么被折叠?
被折叠的 条评论
为什么被折叠?
 到【灌水乐园】发言


