


一、兼容性检查
1.1 操作系统兼容性
elasticsearch不同版本对操作系统有兼容性要求,可参照如下官方链接查看ES和操作系统兼容需求列表。
产品和操作系统: https://www.elastic.co/cn/support/matrix#matrix_os
1.2 JVM兼容性
elasticsearch不同版本对JVM有兼容性要求,可参照如下官方链接查看ES和JVM兼容需求列表。
产品和JVM: https://www.elastic.co/cn/support/matrix#matrix_jvm
二、环境准备
2.1 环境列表
| 服务器IP | 主机名称 | 角色 | 端口号 | 操作系统版本 |
|---|---|---|---|---|
| 10.110.7.39 | xsky-node1 | master | 9200、9201 | CentOS Linux release 7.9.2009 (Core) |
| 10.110.7.40 | xsky-node2 | master | 9200、9201 | CentOS Linux release 7.9.2009 (Core) |
| 10.110.7.41 | xsky-node3 | master | 9200、9201 | CentOS Linux release 7.9.2009 (Core) |
2.2 关闭防火墙
-- root 用户执行,所有节点
systemctl stop firewalld && systemctl disable firewalld
systemctl status firewalld
2.3 设置内核参数
-- root 用户执行,所有节点

sed -e '/^vm.max_map_count/d' \
       -i.bak \
       /etc/sysctl.conf; \
sed -e '$a vm.max_map_count=655360' \
      -i.bak \
      /etc/sysctl.conf; \
sed -e '/^* soft nofile/d' \
    -e '/^* hard nofile/d' \
    -e '/^elasticsearch soft nofile/d' \
    -e '/^elasticsearch hard nofile/d' \
    -e '/^* soft memlock/d' \
    -e '/^* hard memlock/d' \
    -e '/^elasticsearch soft memlock/d' \
    -e '/^elasticsearch hard memlock/d' \
    -i.bak \
    /etc/security/limits.conf; \
sed -e '$a * soft nofile 655350' \
    -e '$a * hard nofile 655350' \
    -e '$a elasticsearch soft nofile 655350' \
    -e '$a elasticsearch hard nofile 655350' \
    -e '$a * soft memlock unlimited' \
    -e '$a * hard memlock unlimited' \
    -e '$a elasticsearch soft memlock unlimited' \
    -e '$a elasticsearch hard memlock unlimited' \
    -i.bak \
    /etc/security/limits.conf; \

sysctl -p
2.4 关闭交换分区
-- root 用户执行,所有节点
swapoff -a;

# 注释/etc/fstab文件swap信息
# /dev/mapper/centos-swap swap                    swap    defaults        0 0
2.5 安装JDK
# root 用户执行,所有节点
wget https://download.java.net/openjdk/jdk11/ri/openjdk-11+28_linux-x64_bin.tar.gz
tar -zxvf openjdk-11+28_linux-x64_bin.tar.gz
chown -R root:root /usr/java

# 编辑/etc/profile文件,文件末尾添加如下内容
export JAVA_HOME=/usr/java/jdk-11
export ES_JAVA_HOME=/usr/java/jdk-11
export PATH=$ES_JAVA_HOME/bin:$PATH
export PATH=$JAVA_HOME/bin:$PATH

# 执行source /etc/profile使其生效
2.6 创建用户
# elasticsearch 7启动需要使用普通用户
# 使用root用户创建esuser用户
groupadd esuser
useradd -g esuser esuser
2.7 创建目录
# 使用root用户,所有节点都操作
# 创建存放数据及日志目录
# 生产环境建议单独挂载目录
mkdir -p /path/to
chown -R esuser:esuser /path
三、安装部署elasticsearch
3.1 下载二进制安装包
# esuser用户
mkdir /home/esuser/deploy
wget https://artifacts.elastic.co/downloads/elasticsearch/elasticsearch-7.13.2-linux-x86_64.tar.gz /home/soft
tar -zxvf /home/soft/elasticsearch-7.13.2-linux-x86_64.tar.gz -C /home/esuser/deploy
chown -R esuser:esuser /home/esuser/deploy
su - esuser
mv /home/esuser/deploy/elasticsearch-7.13.2 /home/esuser/deploy/elasticsearch-7.13.2-9300
cp -a /home/esuser/deploy/elasticsearch-7.13.2-9300 /home/esuser/deploy/elasticsearch-7.13.2-9301
3.2 配置elasticsearch.yml
分别在每个节点配置9300和9301两个目录elasticsearch.yml文件,内容分别如下:
9300目录elasticsearch.yml
-- esuser用户,所有节点
-- 注意每个节点需该对应配置文件信息
cd elasticsearch-7.13.2-9300/config

cat elasticsearch.yml 内容如下(过滤#)
# ======================== Elasticsearch Configuration =========================
cluster.name: es-cluster
# ------------------------------------ Node ------------------------------------
node.name: node-7.39-9300  # node.name要根据对应节点进行修改,不能相同
node.attr.rack: r1
node.attr.type: hot
node.master: true
node.data: true
node.ingest: false
node.ml: false
cluster.remote.connect: false
thread_pool.write.queue_size: 1000
# ----------------------------------- Paths ------------------------------------
path.data: /path/to/data-9300
path.logs: /path/to/logs-9300
# ----------------------------------- Memory -----------------------------------
bootstrap.memory_lock: true
bootstrap.system_call_filter: false
# ---------------------------------- Network -----------------------------------
network.host: 10.110.7.39   # network.host要和物理服务器IP对应,不能相同
http.port: 9200
transport.tcp.port: 9300
# --------------------------------- Discovery ----------------------------------
cluster.initial_master_nodes: ["node-7.39-9300", "node-7.39-9301", "node-7.40-9300", "node-7.40-9301", "node-7.41-9300", "node-7.41-9301"]
discovery.zen.ping.unicast.hosts: ["10.110.7.39:9300","10.110.7.39:9301", "10.110.7.40:9300","10.110.7.40:9301", "10.110.7.41:9300","10.110.7.41:9301"]
discovery.zen.minimum_master_nodes: 3
discovery.zen.fd.ping_timeout: 60s
discovery.zen.fd.ping_retries: 3
discovery.zen.fd.ping_interval: 10s
# ---------------------------------- Gateway -----------------------------------
# ---------------------------------- Various -----------------------------------
xpack.security.enabled: true
xpack.security.transport.ssl.enabled: true
xpack.security.transport.ssl.verification_mode: certificate
xpack.security.transport.ssl.keystore.path: certs/elastic-certificates.p12
xpack.security.transport.ssl.truststore.path: certs/elastic-certificates.p12
xpack.security.http.ssl.supported_protocols: [ "TLSv1.3", "TLSv1.2", "TLSv1.1", "TLSv1" ]
http.cors.enabled: true
http.cors.allow-origin: "*"
http.cors.allow-headers: Authorization,X-Requested-With,Content-Length,Content-Type
http.max_content_length: 1000mb
action.destructive_requires_name: true
xpack.security.audit.enabled: true
xpack.security.audit.logfile.events.exclude: ["access_granted"]
xpack:
  security:
    authc:
      realms:
        native:
            native11:
                order: 0
        ldap.ldap1:
          order: 1
          url: ["ldap://authldap.vemic.com:389","ldap://ldap-proxy.vemic.com:389"]
          cache:
            ttl: 60m
          user_dn_templates:
            - "cn={0},cn=users,dc=xxx,dc=com"
          group_search:
            base_dn: "cn=users,dc=focuschina,dc=com"
          unmapped_groups_as_roles: false
xpack.notification.email:
    default_account: 110
    account:
        110:
            profile: standard
            smtp:
                auth: true
                host: 192.168.16.190
                user: 110@xxx.com
9301目录elasticsearch.yml
-- 注意每个节点需该对应配置文件信息
cd elasticsearch-7.13.2-9301/config

# ======================== Elasticsearch Configuration =========================
cluster.name: es-cluster
# ------------------------------------ Node ------------------------------------
node.name: node-7.39-9301  # node.name要根据节点进行对应修改
node.attr.rack: r1
node.attr.type: hot
node.master: true
node.data: true
node.ingest: false
node.ml: false
cluster.remote.connect: false
thread_pool.write.queue_size: 1000
# ----------------------------------- Paths ------------------------------------
path.data: /path/to/data-9300
path.logs: /path/to/logs-9300
# ----------------------------------- Memory -----------------------------------
bootstrap.memory_lock: true
bootstrap.system_call_filter: false
# ---------------------------------- Network -----------------------------------
network.host: 10.110.7.39   # network.host要和物理服务器IP对应
http.port: 9201
transport.tcp.port: 9301
# --------------------------------- Discovery ----------------------------------
cluster.initial_master_nodes: ["node-7.39-9300", "node-7.39-9301", "node-7.40-9300", "node-7.40-9301", "node-7.41-9300", "node-7.41-9301"]
discovery.zen.ping.unicast.hosts: ["10.110.7.39:9300","10.110.7.39:9301", "10.110.7.40:9300","10.110.7.40:9301", "10.110.7.41:9300","10.110.7.41:9301"]
discovery.zen.minimum_master_nodes: 3
discovery.zen.fd.ping_timeout: 60s
discovery.zen.fd.ping_retries: 3
discovery.zen.fd.ping_interval: 10s
# ---------------------------------- Gateway -----------------------------------
# ---------------------------------- Various -----------------------------------
xpack.security.enabled: true
xpack.security.transport.ssl.enabled: true
xpack.security.transport.ssl.verification_mode: certificate
xpack.security.transport.ssl.keystore.path: certs/elastic-certificates.p12
xpack.security.transport.ssl.truststore.path: certs/elastic-certificates.p12
xpack.security.http.ssl.supported_protocols: [ "TLSv1.3", "TLSv1.2", "TLSv1.1", "TLSv1" ]
http.cors.enabled: true
http.cors.allow-origin: "*"
http.cors.allow-headers: Authorization,X-Requested-With,Content-Length,Content-Type
http.max_content_length: 1000mb
action.destructive_requires_name: true
xpack.security.audit.enabled: true
xpack.security.audit.logfile.events.exclude: ["access_granted"]
xpack:
  security:
    authc:
      realms:
        native:
            native11:
                order: 0
        ldap.ldap1:
          order: 1
          url: ["ldap://authldap.vemic.com:389","ldap://ldap-proxy.vemic.com:389"]
          cache:
            ttl: 60m
          user_dn_templates:
            - "cn={0},cn=users,dc=xxx,dc=com"
          group_search:
            base_dn: "cn=users,dc=focuschina,dc=com"
          unmapped_groups_as_roles: false
xpack.notification.email:
    default_account: 110
    account:
        110:
            profile: standard
            smtp:
                auth: true
                host: 192.168.16.190
                user: 110@xxx.com
3.2 配置jvm.options
分别配置9300和9301两个目录jvm.options文件,内容如下:
-Xms8g
-Xmx8g

-XX:+UseConcMarkSweepGC
-XX:CMSInitiatingOccupancyFraction=75
-XX:+UseCMSInitiatingOccupancyOnly

-Des.networkaddress.cache.ttl=60
-Des.networkaddress.cache.negative.ttl=10
-XX:+AlwaysPreTouch
-Xss1m
-Djava.awt.headless=true
-Dfile.encoding=UTF-8
-Djna.nosys=true
-XX:-OmitStackTraceInFastThrow
-Dio.netty.noUnsafe=true
-Dio.netty.noKeySetOptimization=true
-Dio.netty.recycler.maxCapacityPerThread=0
-Dlog4j.shutdownHookEnabled=false
-Dlog4j2.disable.jmx=true
-Djava.io.tmpdir=${ES_TMPDIR}
-XX:+HeapDumpOnOutOfMemoryError
-XX:HeapDumpPath=data
-XX:ErrorFile=logs/hs_err_pid%p.log

8:-XX:+PrintGCDetails
8:-XX:+PrintGCDateStamps
8:-XX:+PrintTenuringDistribution
8:-XX:+PrintGCApplicationStoppedTime
8:-Xloggc:logs/gc.log
8:-XX:+UseGCLogFileRotation
8:-XX:NumberOfGCLogFiles=32
8:-XX:GCLogFileSize=64m

9-:-Xlog:gc*,gc+age=trace,safepoint:file=logs/gc.log:utctime,pid,tags:filecount=32,filesize=64m
9-:-Djava.locale.providers=COMPAT

10-:-XX:UseAVX=2
3.3 开启安全认证
3.3.1 生成节点证书
– 只需在一个节点生成凭证即可
3.3.1.1 创建证书办法机构CA
# esuser用户操作,在其中一节点操作
cd /home/esuser/deploy/elasticsearch-7.13.2-9300
[esuser@xsky-node1 elasticsearch-7.13.2-9300]$ ./bin/elasticsearch-certutil ca
This tool assists you in the generation of X.509 certificates and certificate
signing requests for use with SSL/TLS in the Elastic stack.

The 'ca' mode generates a new 'certificate authority'
This will create a new X.509 certificate and private key that can be used
to sign certificate when running in 'cert' mode.

Use the 'ca-dn' option if you wish to configure the 'distinguished name'
of the certificate authority

By default the 'ca' mode produces a single PKCS#12 output file which holds:
    * The CA certificate
    * The CA's private key

If you elect to generate PEM format certificates (the -pem option), then the output will
be a zip file containing individual files for the CA certificate and private key

Please enter the desired output file [elastic-stack-ca.p12]: # 按回车
Enter password for elastic-stack-ca.p12 : # 按回车

# 该命令默认在当前目录生成elastic-stack-ca.p12 单个证书文件,该文件是PKCS#12密钥库
# 其中包含CA的公共证书和用于对每个节点的证书签名的私钥
3.3.1.2 生成证书和私钥
# esuser用户操作,在其中一节点操作
[esuser@xsky-node1 elasticsearch-7.13.2-9300]$ ./bin/elasticsearch-certutil cert --ca elastic-stack-ca.p12
This tool assists you in the generation of X.509 certificates and certificate
signing requests for use with SSL/TLS in the Elastic stack.

The 'cert' mode generates X.509 certificate and private keys.
    * By default, this generates a single certificate and key for use
       on a single instance.
    * The '-multiple' option will prompt you to enter details for multiple
       instances and will generate a certificate and key for each one
    * The '-in' option allows for the certificate generation to be automated by describing
       the details of each instance in a YAML file

    * An instance is any piece of the Elastic Stack that requires an SSL certificate.
      Depending on your configuration, Elasticsearch, Logstash, Kibana, and Beats
      may all require a certificate and private key.
    * The minimum required value for each instance is a name. This can simply be the
      hostname, which will be used as the Common Name of the certificate. A full
      distinguished name may also be used.
    * A filename value may be required for each instance. This is necessary when the
      name would result in an invalid file or directory name. The name provided here
      is used as the directory name (within the zip) and the prefix for the key and
      certificate files. The filename is required if you are prompted and the name
      is not displayed in the prompt.
    * IP addresses and DNS names are optional. Multiple values can be specified as a
      comma separated string. If no IP addresses or DNS names are provided, you may
      disable hostname verification in your SSL configuration.

    * All certificates generated by this tool will be signed by a certificate authority (CA)
      unless the --self-signed command line option is specified.
      The tool can automatically generate a new CA for you, or you can provide your own with
      the --ca or --ca-cert command line options.

By default the 'cert' mode produces a single PKCS#12 output file which holds:
    * The instance certificate
    * The private key for the instance certificate
    * The CA certificate

If you specify any of the following options:
    * -pem (PEM formatted output)
    * -keep-ca-key (retain generated CA key)
    * -multiple (generate multiple certificates)
    * -in (generate certificates from an input file)
then the output will be be a zip file containing individual certificate/key files

Enter password for CA (elastic-stack-ca.p12) :    # 按回车
Please enter the desired output file [elastic-certificates.p12]: # 按回车
Enter password for elastic-certificates.p12 : # 按回车

Certificates written to /home/esuser/deploy/elasticsearch-7.13.2-9300/elastic-certificates.p12

This file should be properly secured as it contains the private key for
your instance.

This file is a self contained file and can be copied and used 'as is'
For each Elastic product that you wish to configure, you should copy
this '.p12' file to the relevant configuration directory
and then follow the SSL configuration instructions in the product guide.

For client applications, you may only need to copy the CA certificate and
configure the client to trust this certificate.

# 命令执行完后会在当前目录生成elastic-certificates.p12文件,此文件是各个节点通信凭证
3.3.1.3 移动凭证到指定目录
# esuser用户,每个节点都需操作
# 创建目录
mkdir ~$ES_HOME/config/certs

# 移动凭证到指定目录
mv elastic-certificates.p12 ~$ES_HOME/config/certs
mv elastic-stack-ca.p12 ~$ES_HOME/config/certs

# 设置权限
chmod 777 ~$ES_HOME/config/certs/elastic*.p12
3.3.2 拷贝文件
# 当以上操作完成后,我们可以将在10.110.7.39上的deploy打包拷贝到其它物理服务器,并对每台物理服务器上的elasticsearch.yml文件进行对应修改
# 只需调整 node.name、network.host,要分别和当前节点对应
[root@xsky-node1 ~]# su - esuser
[esuser@xsky-node1 ~]$ tar -cf deploy.tar ./deploy
[esuser@xsky-node1 ~]$ scp deploy.tar 10.110.7.40:/home/esuser
[esuser@xsky-node1 ~]$ scp deploy.tar 10.110.7.41:/home/esuser

# 然后分别使用esuser用户在10.110.7.40/41解压deploy.tar,修改对应节点的elasticsearch.yml文件
3.3.3 启动验证
-- 10.110.7.39
[root@xsky-node1 ~]# su esuser
[esuser@xsky-node1 root]$ cd /home/esuser/deploy
[esuser@xsky-node1 deploy]$ ./elasticsearch-7.13.2-9300/bin/elasticsearch
[esuser@xsky-node1 deploy]$ ./elasticsearch-7.13.2-9301/bin/elasticsearch

-- 10.110.7.40
[root@xsky-node1 ~]# su esuser
[esuser@xsky-node2 root]$ cd /home/esuser/deploy
[esuser@xsky-node2 deploy]$ ./elasticsearch-7.13.2-9300/bin/elasticsearch
[esuser@xsky-node2 deploy]$ ./elasticsearch-7.13.2-9301/bin/elasticsearch

-- 10.110.7.41
[root@xsky-node1 ~]# su esuser
[esuser@xsky-node3 root]$ cd /home/esuser/deploy
[esuser@xsky-node3 deploy]$ ./elasticsearch-7.13.2-9300/bin/elasticsearch
[esuser@xsky-node3 deploy]$ ./elasticsearch-7.13.2-9301/bin/elasticsearch
此时,待启动日志里不再报 master not discovered yet, this node has not previously joined a bootstrapped (v7+) cluster,其它节点已加入集群,再进行设置密码操作。
3.3.4 设置密码
使用esuser用户,只需在其中一个节点执行
# esuser用户
[root@xsky-node1 ~]# su - esuser
[esuser@xsky-node1 elasticsearch-7.13.2-9300]$ ./bin/elasticsearch-setup-passwords interactive
Initiating the setup of passwords for reserved users elastic,apm_system,kibana,kibana_system,logstash_system,beats_system,remote_monitoring_user.
You will be prompted to enter passwords as the process progresses.
Please confirm that you would like to continue [y/N]y # 输入y,按回车


Enter password for [elastic]:
Reenter password for [elastic]:
Enter password for [apm_system]:
Reenter password for [apm_system]:
Enter password for [kibana_system]:
Reenter password for [kibana_system]:
Enter password for [logstash_system]:
Reenter password for [logstash_system]:
Enter password for [beats_system]:
Reenter password for [beats_system]:
Enter password for [remote_monitoring_user]:
Reenter password for [remote_monitoring_user]:
Changed password for user [apm_system]
Changed password for user [kibana_system]
Changed password for user [kibana]
Changed password for user [logstash_system]
Changed password for user [beats_system]
Changed password for user [remote_monitoring_user]
Changed password for user [elastic]

# 还可以使用auto命令自动创建密码,如下所示:
-rw-r--r--  1 esuser esuser   2710 Jun 11  2021 README.asciidoc
[esuser@xsky-node1 elasticsearch-7.13.2-9300]$ ./bin/elasticsearch-setup-passwords auto
Initiating the setup of passwords for reserved users elastic,apm_system,kibana,kibana_system,logstash_system,beats_system,remote_monitoring_user.
The passwords will be randomly generated and printed to the console.
Please confirm that you would like to continue [y/N]y


Changed password for user apm_system
PASSWORD apm_system = ACZcJwVF3PO9P0NTKW2g

Changed password for user kibana_system
PASSWORD kibana_system = 3V9pXFd0X0C7Hwud7dyW

Changed password for user kibana
PASSWORD kibana = 3V9pXFd0X0C7Hwud7dyW

Changed password for user logstash_system
PASSWORD logstash_system = 4DNP3g7wljAfT0Arqnka

Changed password for user beats_system
PASSWORD beats_system = PauMKgnG10iZ5lN8HI9A

Changed password for user remote_monitoring_user
PASSWORD remote_monitoring_user = tCEzXCmupyZx43GST9Cs

Changed password for user elastic
PASSWORD elastic = 8sLIYpBKixfvD3KX8DE9
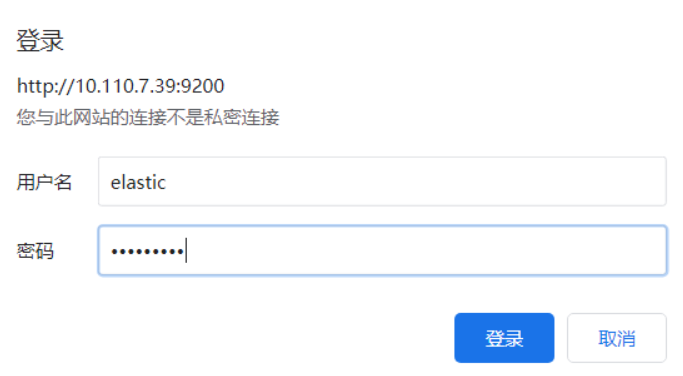
3.3.5 浏览器查看验证
1) 方式一
打开浏览器,输入 http://10.110.7.39:9200, 注意账号是 elastic,而非自己创建的普通用户,密码是设置的密码
输出结果如下:
{
  "name" : "node-7.39-9300",
  "cluster_name" : "es-cluster",
  "cluster_uuid" : "YJieTmJ4Qa6DjZE4j4Ba1Q",
  "version" : {
    "number" : "7.13.2",
    "build_flavor" : "default",
    "build_type" : "tar",
    "build_hash" : "4d960a0733be83dd2543ca018aa4ddc42e956800",
    "build_date" : "2021-06-10T21:01:55.251515791Z",
    "build_snapshot" : false,
    "lucene_version" : "8.8.2",
    "minimum_wire_compatibility_version" : "6.8.0",
    "minimum_index_compatibility_version" : "6.0.0-beta1"
  },
  "tagline" : "You Know, for Search"
}
2)方式二
curl -XGET -u elastic:password http://:端口号/_cluster/health?pretty
[root@xsky-node1 ~]# curl -XGET -u elastic:esuser123 http://10.110.7.39:9200/_cluster/health?pretty
{
  "cluster_name" : "es-cluster",
  "status" : "green",
  "timed_out" : false,
  "number_of_nodes" : 6,
  "number_of_data_nodes" : 6,
  "active_primary_shards" : 1,
  "active_shards" : 2,
  "relocating_shards" : 0,
  "initializing_shards" : 0,
  "unassigned_shards" : 0,
  "delayed_unassigned_shards" : 0,
  "number_of_pending_tasks" : 0,
  "number_of_in_flight_fetch" : 0,
  "task_max_waiting_in_queue_millis" : 0,
  "active_shards_percent_as_number" : 100.0
}


 被折叠的 条评论
为什么被折叠?
被折叠的 条评论
为什么被折叠?
 到【灌水乐园】发言


