


本文主要介绍如何读取yaml文件中的数据,并加载到自己的程序中
1. yaml开源库的生成
https://gitcode.net/mirrors/jbeder/yaml-cpp?utm_source=csdn_github_accelerator
文件的选择如下图所示:
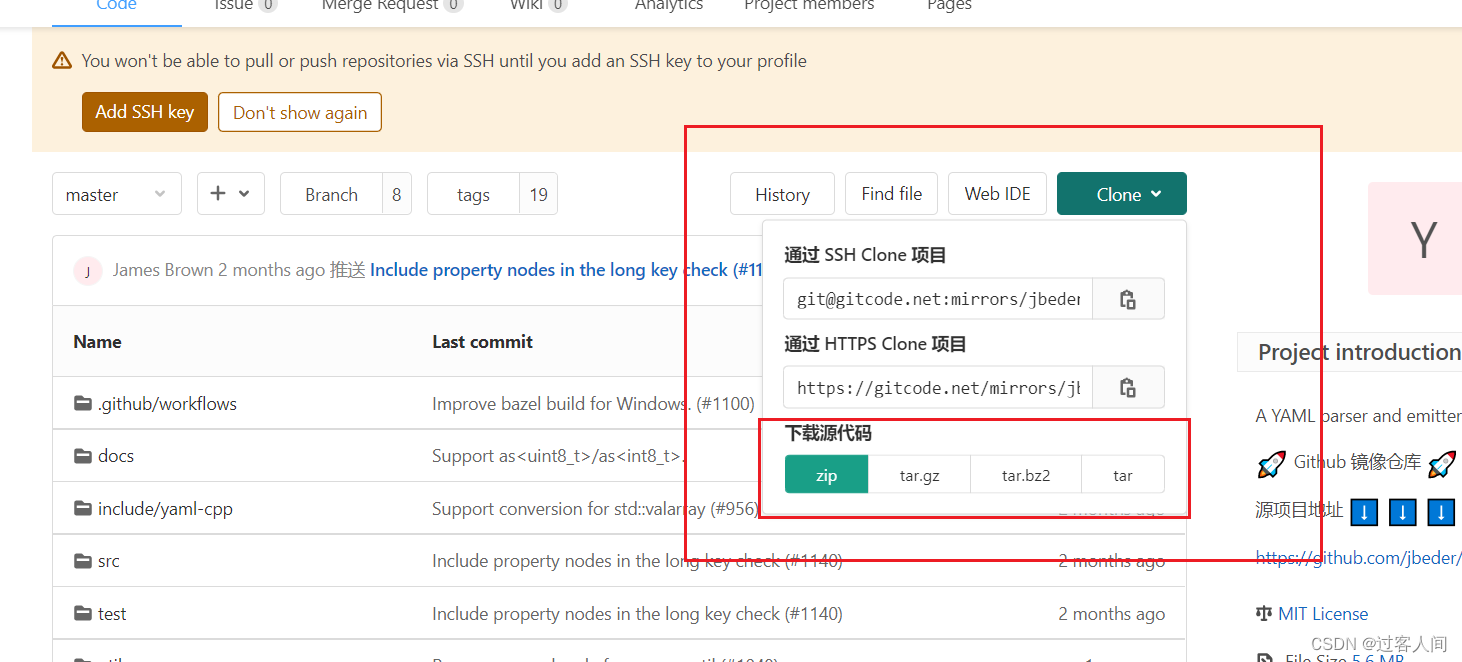
本人下载的是:yaml-cpp-master.zip
将文件拷贝到linux服务器上,解压:
unzip yaml-cpp-master.zip
解压之后
cd yaml-cpp-master
mkdir build
cd build
cmake ../ -DBUILD_STATIC_LIBS=ON -DBUILD_SHARED_LIBS=ON -DINCLUDE_INSTALL_DIR=../include -DARCHIVE_INSTALL_DIR=./ -DLIBRARY_INSTALL_DIR=./
make
在相同的目录下会得到yaml的动态库,如下图所示:

除此之外,还会用到yaml的头文件,其所在的目录为:
./yaml-cpp-master/include
2. 编写测试demo
所需要的为生成的动态库和头文件
测试文件及对应目录结构
├── CMakeLists.txt
├── config.yaml
├── include
│   └── yaml-cpp
│       ├── anchor.h
│       ├── binary.h
│       ├── contrib
│       │   ├── anchordict.h
│       │   └── graphbuilder.h
│       ├── depthguard.h
│       ├── dll.h
│       ├── emitfromevents.h
│       ├── emitterdef.h
│       ├── emitter.h
│       ├── emittermanip.h
│       ├── emitterstyle.h
│       ├── eventhandler.h
│       ├── exceptions.h
│       ├── mark.h
│       ├── node
│       │   ├── convert.h
│       │   ├── detail
│       │   │   ├── impl.h
│       │   │   ├── iterator_fwd.h
│       │   │   ├── iterator.h
│       │   │   ├── memory.h
│       │   │   ├── node_data.h
│       │   │   ├── node.h
│       │   │   ├── node_iterator.h
│       │   │   └── node_ref.h
│       │   ├── emit.h
│       │   ├── impl.h
│       │   ├── iterator.h
│       │   ├── node.h
│       │   ├── parse.h
│       │   ├── ptr.h
│       │   └── type.h
│       ├── noexcept.h
│       ├── null.h
│       ├── ostream_wrapper.h
│       ├── parser.h
│       ├── stlemitter.h
│       ├── traits.h
│       └── yaml.h
├── lib
│   ├── libyaml-cpp.so -> libyaml-cpp.so.0.7
│   ├── libyaml-cpp.so.0.7 -> libyaml-cpp.so.0.7.0
│   └── libyaml-cpp.so.0.7.0
└── main.cc
CMakeLists.txt为:
#指定cmake最低版本
cmake_minimum_required(VERSION 3.10.2)

#项目名称
project(json_demo)

set(CODE_LIST
   main.cc
)

MESSAGE(STATUS "code list is: ${CODE_LIST}")

#生成目标文件
add_executable(demo ${CODE_LIST})

#设置头文件路径
set(INCLUDE_DIR
        ${PROJECT_SOURCE_DIR}/include
    )
MESSAGE(STATUS "include_dir is: ${INCLUDE_DIR}")

#设置库文件路径
set(LIB_DIR
    ${PROJECT_SOURCE_DIR}/lib
)

MESSAGE(STATUS "lib_dir is: ${LIB_DIR}")

target_include_directories(demo
   PUBLIC ${INCLUDE_DIR}
)

MESSAGE(STATUS "LIB_DIR is: ${LIB_DIR}")

target_link_libraries(demo      ${LIB_DIR}/libyaml-cpp.so

)
main.cc文件:
/*
* yaml文件的测试
*
*/

#include <iostream>
#include <yaml-cpp/yaml.h>
#include <string>
#include <vector>
#include <map>

int main(int argc, char* argv[])
{
        std::map<std::string,std::string> detMap;

        YAML::Node config_ = YAML::LoadFile("config.yaml");     //需要写绝对路径

        if(config_["test"].IsDefined()){
                for (YAML::const_iterator it = config_["test"].begin(); it != config_["test"].end(); it++)
                {
                        std::string strKey = it->first.as<std::string>();
                        std::string strValue = it->second.as<std::string>();
                        detMap.insert(std::make_pair(strKey,strValue));
                }
        }

        for(auto au : detMap)
        {
                std::cout<<"au.first is: "<<au.first<<"   "<<"au.second is: "<<au.second<<std::endl;
        }

        return 0;
}
config.yaml文件:
test:
  test1: "t1"
  test2: "t2"
  test3: "t3"
  test4: "t4"
  test5: "t5"
测试步骤:
mkdir build
cd build
cmake ../
make
./demo
输出结果:
au.first is: test1   au.second is: t1
au.first is: test2   au.second is: t2
au.first is: test3   au.second is: t3
au.first is: test4   au.second is: t4
au.first is: test5   au.second is: t5
本文主要功能是通过yaml配置文件,在程序中完成映射关系的转换;


 6750
6750

 被折叠的 条评论
为什么被折叠?
被折叠的 条评论
为什么被折叠?
 到【灌水乐园】发言


