


本篇文章只是学习笔记,学习视频为b站up主爱编程的大丙,下面是他的b站主页链接
爱编程的大丙的个人空间-爱编程的大丙个人主页-哔哩哔哩视频 (bilibili.com)
字符串原始字面量
语法:R"xxx(text)xxx"
#include<iostream>

int main(){
    // 不使用原始字面量的情况
    std::cout << "不使用原始字面量的情况:" << "D:\hello\world\test.text" << endl;
    std::cout << "使用原始字面量的情况:" << R"(D:\hello\world\test.text)" << endl;
    return 0;
}
指针空值类型nullptr
#include<iostream>

void A(char* a) {
    std::cout << "void A(char* a)" << std::endl;
}

void A(int a) {
    std::cout << "void A(int a)" << std::endl;
}

int main() {
    A(10);
    A(NULL);
    A(nullptr);

    return 0;
}
nullptr无法隐式转换为整型,但是可以隐式匹配指针类型,在C++11标准下,相比NULL和0,使用nullptr初始化空指针可以令程序更加健壮。
自动类型推导auto
使用auto声明的变量必须要进行初始化,以让编译器推导出它的实际类型,在编译时将auto占位符替换为真正的类型。使用语法如下:
auto 变量名 = 变量值;举一些例子
auto x = 3.14;    // x 是浮点型 double
auto y = 520;     // y 是整型 int
auto z = 'a';     // z 是字符型 char
auto nb;          // error,变量必须要初始化
auto double nbl;  // 语法错误,不能修改数据类型
当auto遇到const、volatile这俩限定符时,有以下规则
- 当变量不是指针或者引用类型时,推到的结果中不会保留const、volatile关键字
- 当变量是指针或者引用类型时,推到的结果中会保留const、volatile关键字
再举一些例子
// 没有const修饰
int temp = 110;
auto* a = &temp;    // auto :int    a的类型为int*
auto b = &temp;     // auto :int*   b的类型为int*
auto& c = temp;     // auto :int    c的类型为int&
auto d = temp;      // auto :int    d的类型为int

// 有const修饰
int tmp = 250;
const auto a1 = tmp;        // auto :int    a1的类型为const int
auto a2 = a1;               // auto :int    a2的类型为int        因为a2不是引用也不是指针
const auto& a3 = tmp;       // auto :int    a3的类型为const int&
auto& a4 = a3;              // auto :const int    a4的类型为const int&
auto* pt4 = &a1;            // auto :const int    pt4的类型为const int*    此时pt4是常量指针(指针指向的值不可改变,但是指针的指向可以改变)
当然auto也不是万能的,它也有限制,限制场景如下:
- 不能作为函数参数使用。因为只有在函数调用的时候才会给函数参数传递实参,auto的要求是必须要给修饰的变量赋值,所以不行
// error int func(auto a, auto b){ std::cout << "a: " << a << "b: " << b << std::endl; } -
不能给类的非静态成员变量的初始化
class TestC{ auto a = 0; // error static auto b = 0; // error,类的静态非常量成员不允许在类内部直接初始化 static const auto c = 0; // ok } -
不能使用auto去创建数组
int func(){
    int array[] = {1,2,3,4,5};    // 创建数组
    auto s1 = array;    // ok,s1被推导为 int* 类型
    auto s2[] = array;    // error,auto无法创建数组
    auto s3[] = {1,2,3,4,5};    // error,auto无法定义数组
}
decltype
在某种情况下,不需要或者不能定义变量,但是希望得到某种类型,就可以使用decltype,它的作用是在编译器编译的时候推导出一个表达式的类型,语法如下
decltype(表达式)简单举例
int a = 10;
decltype(a) b = 10;            // b : int
decltype(a + 2.0) c = 52.0;    // c : double
decltype(a + b + c) d = 100.0; // d : double
decltype的推导规则如下:
- 表达式为普通变量或者普通表达式或类表达式,使用decltype推导出的类型和表达式的类型是一致的。
class Test{ public: string text; static const int value = 110; }; int main(){ int x = 100; const int& y = x; decltype(x) a = x; // a : int decltype(y) b = x; // b : const int& decltype(Test::value) c = 0; // c : const int Test t; decltype(t.text) d = "string"; // d : string return 0; } - 表达式是函数调用,使用decltype推导出的类型和函数返回值一致。
class Test{
public:
    string text;
    static const int value = 110;
};
// 函数声明
int func_int();
int& func_int_r();
int&& func_int_rr();

const int func_cint();
const int& func_cint_r();
const int&& func_cint_rr();

const Test func_ctest();

// decltype类型推导
int n = 100;
decltype(func_int()) a = 0;            // a : int
decltype(func_int_r()) b = n;          // b : int&
decltype(func_int_rr()) c = 0;         // c : int&&
decltype(func_cint()) d = 0;           // d : int
decltype(func_cint_r()) e = n;         // e : const int&
decltype(func_cint_rr()) f = 0;        // f : const int&&
decltype(func_ctest()) g = Test();     // g : const Test
函数 func_cint() 返回的是一个纯右值(在表达式执行结束后不再存在的数据,也就是临时性的数据),对于纯右值而言,只有类类型可以携带const、volatile限定符,除此之外需要忽略掉这两个限定符,因此推导出的变量d的类型为 int 而不是 const int。
- 表达式是一个左值,或者在()里,使用decltype推导出的是表达式类型的引用(如果有const、volatile限定符不能忽略)。
class Test{
public:
    int num;
};

int main(){
    const Test obj;
    // 带括号的表达式
    decltype(obj.num) a = 0;        // a : int
    decltype((obj.num)) b = a;      // b : const int&
    // 加法表达式
    int n = 0, m = 0;
    decltype(n + m) c = 0;          // c : int
    decltype(n = n + m) d = n;      // d : int&

    return 0;
}
decltype的应用举例
#include<iostream>
#include<list>
using namespace std;

template<typename T>
class Container
{
public:
    Container() {}
    void func(T& c) {
        for (m_it = c.begin(); m_it!=c.end(); m_it++)
        {
            cout << "value:" << *m_it << "\t\t";
        }
        cout << endl;
    }
private:
    decltype(T().begin()) m_it;     // 这里不能确定迭代器类型
};

int main() {
    const list<int> lst{1, 2, 3, 4, 5, 6, 7};
    Container<const list<int>> obj;
    obj.func(lst);
    return 0;
}
lambda表达式
语法:
[capture](params) opt -> ret {body;};
/*其中capture是捕获列表,params是参数列表,opt是函数选项,ret是返回值类型,body是函数体。

捕获列表[]: 捕获一定范围内的变量

参数列表(): 和普通函数的参数列表一样,如果没有参数参数列表可以省略不写。
auto f = [](){return 1;}	没有参数, 参数列表为空
auto f = []{return 1;}		没有参数, 参数列表省略不写

opt 选项, 不需要可以省略

mutable: 可以修改按值传递进来的拷贝(注意是能修改拷贝,而不是值本身)
exception: 指定函数抛出的异常,如抛出整数类型的异常,可以使用throw();
返回值类型:在C++11中,lambda表达式的返回值是通过返回值后置语法来定义的。

函数体:函数的实现,这部分不能省略,但函数体可以为空。*/
捕获列表的使用方法如下
[]- 不捕捉任何变量[&]- 捕获外部作用域中所有变量, 并作为引用在函数体内使用 (按引用捕获)[=]- 捕获外部作用域中所有变量, 并作为副本在函数体内使用 (按值捕获)拷贝的副本在匿名函数体内部是只读的
[=, &foo]- 按值捕获外部作用域中所有变量, 并按照引用捕获外部变量 foo[bar]- 按值捕获 bar 变量, 同时不捕获其他变量[&bar]- 按引用捕获 bar 变量, 同时不捕获其他变量[this]- 捕获当前类中的this指针- 让lambda表达式拥有和当前类成员函数同样的访问权限
- 如果已经使用了 & 或者 =, 默认添加此选项
捕获列表的具体用法
class Test{
public:
    void output(int x,int y){
        // 错误,没有捕获外部变量
        auto x1 = []{return m_number;};
        auto x2 = [=]{return m_number + y + x;};       // ok
        // 错误,=号捕获的值只读,除非加上mutable
        auto x3 = [=]{return m_number++;};
        auto x4 = [&]{return m_number + (x++);};       // ok
        // 错误,this只能捕获类内部成员,没有捕获到变量x,y
        auto x5 = [this]{return m_number + y + x;};
        auto x6 = [this]{return m_number++;};          // ok
    }
    int m_number = 0;
}
关于返回值
// 完整的lambda表达式定义
auto f = [](int a) -> int
{
    return a+10;
};

// 忽略返回值的lambda表达式定义
auto f = [](int a)
{
    return a+10;
};

// ok,可以自动推导出返回值类型
auto f = [](int i)
{
    return i;
}

// error,不能推导出返回值类型
auto f1 = []()
{
    return {1, 2};	// 基于列表初始化推导返回值,错误
}
函数本质
首先,在lambda表达式中按值捕获变量不能修改,如果希望修改就需要使用mutable
int a = 0;
auto f1 = [=] {return a++; };              // error, 按值捕获外部变量, a是只读的
auto f2 = [=]()mutable {return a++; }; // ok由于lambda表达式在C++中会被看做是一个仿函数,因此可以使用std::function和std::bind来存储和操作lambda表达式:
int main(void)
{
    // 包装可调用函数
    std::functin<int(int)> f1 = [](int a){return a;};
    // 绑定可调用函数
    std::function<int(int)> f2 = bind([](int a){return a;}, placeholders::_1);
    // 函数调用
    cout << f1(100) << endl;
    cout << f2(200) << endl;
}
对于没有捕获任何变量的lambda表达式,还可以转换成一个普通的函数指针:
using func_ptr = int(*)(int);
// 没有捕获任何外部变量
func_ptr f = [](int a){
    return a;
};

// 函数调用
f(100);
移动语义
基本概念:左值与右值
- 左值:是指存储在内存中、有明确存储地址(可取地址)的数据;
- 右值:是指可以提供数据值的数据(不可取地址);
其中右值又分为俩种,分别是:
- 纯右值:非引用返回的临时变量、运算表达式产生的临时变量、原始字面量和 lambda 表达式等。
- 将亡值:与右值引用相关的表达式,比如,T&&类型函数的返回值、 std::move 的返回值等。
右值引用的基本使用
class Test
{
public:
    Test()
    {
        cout << "构造函数" << endl;
    }
    Test(const Test& a)
    {
        cout << "拷贝构造" << endl;
    }
};

Test getObj()
{
    return Test();
}

int main()
{
    int&& a1 = 100;
    int a2;
    int &&a3 = a2;        // error 使用左值初始化一个右值是不合法的
    Test& t1 = getObj();   // error getObj()返回的是一个右值,而右值不能给普通的左值引用赋值
    Test && t2 = getObj();    // getObj()返回的是一个将亡值,t2是这个将亡值的右值引用
    const Test& t3 = getObj();    // 常量左值引用是一个万能的引用类型,它可以接受左值、右值、常量左值和常量右值
    return 0;
}由于“苏丙榅”这里的例子会被编译器优化而看不出效果,所以例子使用了Cherno的C++视频中的例子
#include<iostream>
using namespace std;

class String {
public:
    String() = default;

    String(const char* string) {
        printf("Create!\n");
        m_Size = strlen(string);
        m_Data = new char[m_Size];
        memcpy(m_Data, string, m_Size);
    };

    String(const String& other) {
        printf("Copy!\n");
        m_Size = other.m_Size;
        m_Data = new char[m_Size];
        memcpy(m_Data, other.m_Data, m_Size);
    }

    ~String() {
        delete[] m_Data;
    }

    void Print() {
        for (unsigned int i = 0; i < m_Size; i++)
        {
            printf("%c", m_Data[i]);
        }
        printf("\n");
    }

private:
    char* m_Data;
    unsigned int m_Size;
};

class Enity
{
public:
    Enity(const String& name):m_Name(name) {}
    void PrintName() {
        m_Name.Print();
    }
private:
    String m_Name;
};

int main() {
    Enity enity(String("My Name is xxx."));
    enity.PrintName();
    return 0;
}
输出结果如图

可以看到String对象的拷贝构造函数执行了一次,执行的地方在Enity对象的初始化列表中。
现在我们的目标是使用移动构造函数使这次拷贝消失,因为如果String对象很大的话这样的拷贝会很消耗资源。下面是使用移动构造函数之后的代码。
#include<iostream>
using namespace std;

class String {
public:
    String() = default;

    String(const char* string) {
        printf("Create!\n");
        m_Size = strlen(string);
        m_Data = new char[m_Size];
        memcpy(m_Data, string, m_Size);
    };

    String(const String& other) {
        printf("Copy!\n");
        m_Size = other.m_Size;
        m_Data = new char[m_Size];
        memcpy(m_Data, other.m_Data, m_Size);
    }

    // 移动构造函数
    String(String&& other) noexcept {
        printf("Moved!\n");
        m_Size = other.m_Size;
        m_Data = other.m_Data;
        other.m_Size = 0;
        other.m_Data = nullptr;
    }

    ~String() {
        delete[] m_Data;
    }

    void Print() {
        for (unsigned int i = 0; i < m_Size; i++)
        {
            printf("%c", m_Data[i]);
        }
        printf("\n");
    }

private:
    char* m_Data;
    unsigned int m_Size;
};

class Enity
{
public:
    // 实际上接受右值的函数在参数传进来后其右值属性就退化了,所以给m_Name的参数仍然是左值,还是会调用复制构造函数。解决的办法是将name转型,
    Enity(String&& name):m_Name(std::move(name)) {}
    void PrintName() {
        m_Name.Print();
    }
private:
    String m_Name;
};

int main() {
    Enity enity(String("My Name is xxx."));
    enity.PrintName();
    return 0;
}
输出结果
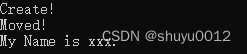
可以看到拷贝操作已经变成了移动操作
移动复制操作符
移动复制操作符是将一个已经存在的对象移动给另一个已经存在的对象,就像下面这样。
#include<iostream>
using namespace std;
class String {
public:
String() = default;
String(const char* string) {
printf("Create!\n");
m_Size = strlen(string);
m_Data = new char[m_Size];
memcpy(m_Data, string, m_Size);
};
String(const String& other) {
printf("Copy!\n");
m_Size = other.m_Size;
m_Data = new char[m_Size];
memcpy(m_Data, other.m_Data, m_Size);
}
String(String&& other) noexcept {
printf("Moved!\n");
m_Size = other.m_Size;
m_Data = other.m_Data;
other.m_Size = 0;
other.m_Data = nullptr;
}
String& operator=(String&& other) noexcept {
printf("=Moved=!\n");
if (this != &other) {
delete[] m_Data;
m_Size = other.m_Size;
m_Data = other.m_Data;
other.m_Size = 0;
other.m_Data = nullptr;
}
return *this;
}
~String() {
delete[] m_Data;
}
void Print() {
for (unsigned int i = 0; i < m_Size; i++)
{
printf("%c", m_Data[i]);
}
printf("\n");
}
private:
char* m_Data;
unsigned int m_Size;
};
int main() {
String apple = "苹果";
String dest;
cout << "apple: ";
apple.Print();
cout << "dest: ";
dest.Print();
dest = std::move(apple);
cout << "apple: ";
apple.Print();
cout << "dest: ";
dest.Print();
return 0;
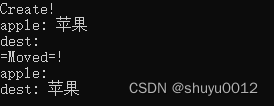
}输出结果
using的使用
using在c++中有三种用法,分别是:
- 用于声明命名空间。
- 通过using调用父类的同名隐藏函数
#include<iostream> using namespace std; class Father { public: void ab(int a) { cout << "void ab(int a)" << endl; } void ab(int a, int b) { cout << "void ab(int a, int b)" << endl; } }; class Son :public Father { public: void ab(int a,string str) { cout << "void ab(int a,string str)" << endl; } using Father::ab; // 通过using调用父类的同名隐藏函数 }; int main() { Son son; son.ab(1); son.ab(1,2); son.ab(1,"123"); return 0; } - 定义别名
这里主要讲的是定义别名这个功能
在c++中,原本就可以使用typedef定义别名,下面分别使用using和typedef来给基础数据类型定义别名和定义函数指针
#include<iostream>
using namespace std;

void test(int a,string b) {
    cout << "我是test函数" << endl;
}

int main() {
    // 使用using和typedef定义基础类型的别名
    using mInt1 = int;
    typedef int mInt2;
    mInt1 t1 = 1;
    mInt2 t2 = 2;

    // 使用using定义函数指针
    using func_ptr1 = void(*)(int, string);
    func_ptr1 f1 = test;
    f1(t1, "1");
    (*f1)(t1, "2"); // 加*号就是调用函数本身

    // 使用typedef定义函数指针
    typedef void(*func_ptr2)(int, string);
    func_ptr1 f2 = test;
    f2(t2, "2");
    return 0;
}
可以看到,在定义函数指针的时候,使用using会提高程序的可读性。
下面我们来给模板定义别名
#include<iostream>
#include<map>
using namespace std;

// 使用typedef给模板定义别名
template<typename T>
// 定义外敷类
struct MyMap
{
    typedef map<int, T> typeMap;
};

// 使用using给模板定义别名
template<typename T>
using MMap = map<int, T>;

// 遍历类模板
template<typename T>
class Container
{
public:
    void print(T& t) {
        auto it = t.begin();
        for (; it != t.end(); ++it)
        {
            cout << it->first << ", " << it->second << endl;
        }
    }
};


int main() {
    MyMap<string>::typeMap mm1;
    mm1.insert(make_pair(1, "hello"));
    mm1.insert(make_pair(2, "world"));
    mm1.insert(make_pair(3, "Cplusplus"));
    Container<MyMap<string>::typeMap> c;
    c.print(mm1);

    MMap<string> mm2;
    mm2.insert(make_pair(3, "hello"));
    mm2.insert(make_pair(2, "world"));
    mm2.insert(make_pair(1, "Cplusplus"));
    Container<MMap<string>> cc;
    cc.print(mm2);

    return 0;
}
可调用对象包装器、绑定器
在c++里什么是可调用对象?
- 函数指针
// 函数指针 int print(int a, double b) { cout << a << ", " << b << endl; return 0; } // 定义函数指针 using func = int(*)(int, double); int main() { func f1 = print; f1(1, 1.2); return 0; } - 具有 operator() 成员函数的类对象(仿函数)
// 具有operator()成员函数的类对象(仿函数) class Test1 { public: void operator()(string str) { cout << "str: " << str << endl; } }; int main() { Test1 t1; t1("具有operator()成员函数的类对象(仿函数)"); return 0; } - 可被转换为函数指针的类对象
int print(int a, double b) {
    cout << a << ", " << b << endl;
    return 0;
}

// 可被转换为函数指针的类对象
class Test2
{
public:
    static int print(int, double) {
        cout << "可被转换为函数指针的类对象" << endl;
        return 0;
    }
    operator func() {
        return print;
    }
};

int main() {
    Test2 t2;
    t2(1, 20.2);

    return 0;
}
可调用对象包装器的使用
std::function 是可调用对象的包装器。它是一个类模板,可以容纳除了类成员(函数)指针之外的所有可调用对象。通过指定它的模板参数,它可以用统一的方式处理函数、函数对象、函数指针,并允许保存和延迟执行它们。ps.这段是up主网站里的原话
基本用法:
#include <functional>
std::function<返回值类型(参数类型列表)> diy_name = 可调用对象;
举例:
#include<iostream>
#include<functional>
using namespace std;

int add(int a, int b) {
    cout << a << " + " << b << " = " << a + b << endl;
    return a + b;
}

class T1
{
public:
    static int sub(int a, int b) {
        cout << a << " - " << b << " = " << a - b << endl;
        return a - b;
    }
};

class T2
{
public:
    int operator()(int a, int b) {
        cout << a << " * " << b << " = " << a * b << endl;
        return a * b;
    }
};

int main() {
    // 绑定一个普通函数
    function<int(int, int)> f1 = add;
    // 绑定一个静态成员类
    function<int(int, int)> f2 = T1::sub;
    // 绑定一个仿函数
    T2 t2;
    function<int(int, int)> f3 = t2;

    // 函数调用
    f1(9, 2);
    f2(9, 2);
    f3(9, 2);
    return 0;
}
通过测试代码可以得到结论:std::function 可以将可调用对象进行包装,得到一个统一的格式,包装完成得到的对象相当于一个函数指针,和函数指针的使用方式相同,通过包装器对象就可以完成对包装的函数的调用了。ps.up网站的原话
作为回调函数使用
因为回调函数本身就是通过函数指针实现的,使用对象包装器可以取代函数指针的作用,来看一下下面的例子
#include<iostream>
#include<functional>
using namespace std;

class A
{
public:
    // 构造函数参数是一个包装器对象
    A(const function<void()>& f) :callback(f) {

    }
    void notify() {
        // 调用通过构造函数得到的函数指针
        callback();
    }

private:
    function<void()> callback;
};

class B
{
public:
    void operator()(){
        cout << "classB()" << endl;
    }
};

int main() {
    B b;
    A a(b);     // 仿函数通过包装器对象进行包装
    a.notify();

    return 0;
}
std::bind 用来将可调用对象与其参数一起进行绑定。绑定后的结果可以使用std::function进行保存,并延迟调用到任何我们需要的时候。通俗来讲,它主要有两大作用:
- 将可调用对象与其参数一起绑定成一个仿函数。
- 将多元(参数个数为n,n>1)可调用对象转换为一元或者(n-1)元可调用对象,即只绑定部分参数。
绑定器函数使用语法如下
// 绑定非类成员函数/变量
auto f = std::bind(可调用对象地址, 绑定的参数/占位符);
// 绑定类成员函/变量
auto f = std::bind(类函数/成员地址, 类实例对象地址, 绑定的参数/占位符);
下面来举一些例子
#include<iostream>
#include<functional>
using namespace std;

void callFunc(int x, const function<void(int)>& f) {
    if (x % 2 == 0) {
        f(x);
    }
}

void output(int x) {
    cout << x << " ";
}

void output_add(int x) {
    cout << x + 10 << " ";
}

int main() {
    // 使用绑定器绑定可调用对象和参数
    auto f1 = bind(output, placeholders::_1);
    for (int i = 0; i < 10; i++)
    {
        callFunc(i, f1);
    }
    cout << endl;

    auto f2 = bind(output_add, placeholders::_1);
    for (int i = 0; i < 10; i++)
    {
        callFunc(i,f2);
    }
    cout << endl;
    return 0;
}
在上面的程序中,使用了 std::bind 绑定器,在函数外部通过绑定不同的函数,控制了最后执行的结果。std::bind 绑定器返回的是一个仿函数类型,得到的返回值可以直接赋值给一个std::function,在使用的时候我们并不需要关心绑定器的返回值类型,使用auto进行自动类型推导就可以了。
placeholders::_1 是一个占位符,代表这个位置将在函数调用时被传入的第一个参数所替代。同样还有其他的占位符 placeholders::_2、placeholders::_3、placeholders::_4、placeholders::_5等……
有了占位符的概念之后,使得std::bind的使用变得非常灵活:
#include<iostream>
#include<functional>
using namespace std;

void output(int x, int y) {
    cout << x << " " << y << endl;
}

int main() {
   // 使用绑定器绑定可调用对象和参数,并调用得到的仿函数
    bind(output, 1, 2)();
    bind(output, placeholders::_1, 2)(10);
    bind(output, 2, placeholders::_1)(10);

    // error,调用时没有第二个参数
    // bind(output, 2, placeholders::_2)(10);
    // 调用时第一个参数10被吞掉了,没有被使用
    bind(output, 2, placeholders::_2)(10,20);

    bind(output, placeholders::_1, placeholders::_2)(10, 20);
    bind(output, placeholders::_2, placeholders::_1)(10, 20);

    return 0;
}
通过测试可以看到,std::bind可以直接绑定函数的所有参数,也可以仅绑定部分参数。在绑定部分参数的时候,通过使用std::placeholders来决定空位参数将会属于调用发生时的第几个参数。
可调用对象包装器std::function是不能实现对类成员函数指针或者类成员指针的包装的,但是通过绑定器std::bind的配合之后,就可以完美的解决这个问题了,再来看一个例子,然后再解释里边的细节:
#include<iostream>
#include<functional>
using namespace std;

class Test
{
public:
    void output(int x, int y) {
        cout << "x: " << x << ", y: " << y << endl;
    }
    int m_number = 100;
};


int main() {
    Test t;
    // 绑定类成员函数
    function<void(int, int)> f1 = bind(&Test::output, &t, placeholders::_1, placeholders::_2);

    // 绑定类成员变量(公共)
    function<int& (void)> f2 = bind(&Test::m_number, &t);

    // 调用
    f1(200, 100);
    f2() = 233;
    cout << "t.m_number: " << t.m_number << endl;
    return 0;
}
在用绑定器绑定类成员函数或者成员变量的时候需要将它们所属的实例对象一并传递到绑定器函数内部。f1 的类型是 function<void(int, int)>,通过使用std::bind将Test的成员函数 output 的地址和对象 t 绑定,并转化为一个仿函数并存储到对象f1中。
使用绑定器绑定的类成员变量 m_number 得到的仿函数被存储到了类型为 function<int&(void)> 的包装器对象 f2 中,并且可以在需要的时候修改这个成员。其中int是绑定的类成员的类型,并且允许修改绑定的变量,因此需要指定为变量的引用,由于没有参数因此参数列表指定为 void。
示例程序中是使用 function 包装器保存了 bind 返回的仿函数,如果不知道包装器的模板类型如何指定,可以直接使用 auto 进行类型的自动推导,这样使用起来会更容易一些。


 620
620


 被折叠的 条评论
为什么被折叠?
被折叠的 条评论
为什么被折叠?
 到【灌水乐园】发言


