


websocket+Django+python+paramiko实现web页面执行命令并实时输出
一、概述
WebSocket
WebSocket的工作流程:浏览器通过JavaScript向服务端发出建立WebSocket连接的请求,在WebSocket连接建立成功后,客户端和服务端就可以通过 TCP连接传输数据。因为WebSocket连接本质上是TCP连接,不需要每次传输都带上重复的头部数据,所以它的数据传输量比轮询和Comet技术小很多。
paramiko
paramiko模块,基于SSH用于连接远程服务器并执行相关操作。
shell脚本
/opt/test.sh
#!/bin/bash

for i in {1..10}
do
    sleep 0.5
    echo 母鸡生了$i个鸡蛋;
done
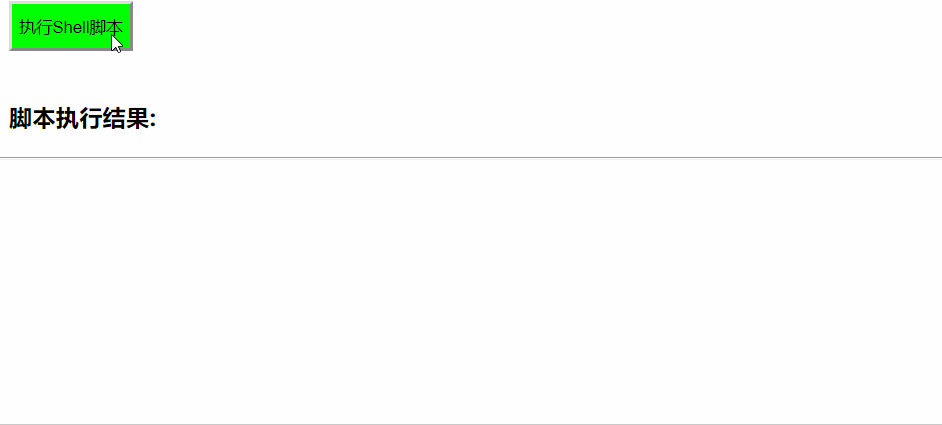
网页执行脚本,效果如下:

怎么样,是不是很nb!下面会详细介绍如何具体实现!
二、详细操作
django版本
最新版本 2.1.5有问题,使用websocket,谷歌浏览器会报错
WebSocket connection to 'ws://127.0.01:8000/echo_once/' failed: Error during WebSocket handshake: Unexpected response code: 400
所以不能使用最新版本,必须使用 2.1.4以及2.x系列都可以!
安装模块
pip3 install paramiko dwebsocket django==2.1.4
创建项目
使用Pycharm创建一个项目 wdpy ,这个是测试的,名字无所谓!

添加路由,修改文件 urls.py
from django.contrib import admin
from django.urls import path
from websocket import views

urlpatterns = [
    path('admin/', admin.site.urls),
    path('echo_once/', views.echo_once),
]
修改views.py,增加视图函数


from django.shortcuts import render
from dwebsocket.decorators import accept_websocket, require_websocket
from django.http import HttpResponse
import paramiko


# def exec_command(comm):
#     hostname = '192.168.0.162'
#     username = 'root'
#     password = 'root'
#
#     ssh = paramiko.SSHClient()
#     ssh.set_missing_host_key_policy(paramiko.AutoAddPolicy())
#     ssh.connect(hostname=hostname, username=username, password=password)
#     stdin, stdout, stderr = ssh.exec_command(comm,get_pty=True)
#     result = stdout.read()
#     ssh.close()
#     yield result


@accept_websocket
def echo_once(request):
    if not request.is_websocket():  # 判断是不是websocket连接
        try:  # 如果是普通的http方法
            message = request.GET['message']
            return HttpResponse(message)
        except:
            return render(request, 'index.html')
    else:
        for message in request.websocket:
            message = message.decode('utf-8')  # 接收前端发来的数据
            print(message)
            if message == 'backup_all':#这里根据web页面获取的值进行对应的操作
                command = 'bash /opt/test.sh'#这里是要执行的命令或者脚本

                # 远程连接服务器
                hostname = '192.168.0.162'
                username = 'root'
                password = 'root'

                ssh = paramiko.SSHClient()
                ssh.set_missing_host_key_policy(paramiko.AutoAddPolicy())
                ssh.connect(hostname=hostname, username=username, password=password)
                # 务必要加上get_pty=True,否则执行命令会没有权限
                stdin, stdout, stderr = ssh.exec_command(command, get_pty=True)
                # result = stdout.read()
                # 循环发送消息给前端页面
                while True:
                    nextline = stdout.readline().strip()  # 读取脚本输出内容
                    # print(nextline.strip())
                    request.websocket.send(nextline) # 发送消息到客户端
                    # 判断消息为空时,退出循环
                    if not nextline:
                        break

                ssh.close()  # 关闭ssh连接
            else:
                request.websocket.send('小样儿,没权限!!!'.encode('utf-8'))
在 templates 目录下新建文件 index.html
<!DOCTYPE html >
<html>
<head>
    <meta http-equiv="Content-Type" content="text/html; charset=utf-8"/>
    <title>CMDB系统</title>
    <script src="/static/jquery-1.12.4.js"></script>
    <script type="text/javascript">
    $(function () {
        $('#backup_all').click(function () {
            var socket = new WebSocket("ws://" + window.location.host + "/echo_once/");
            console.log(socket);
            socket.onopen = function () {
                console.log('WebSocket open');//成功连接上Websocket
                socket.send($('#backup_all').val());//发送数据到服务端
            };
            socket.onmessage = function (e) {
                console.log('message: ' + e.data);//打印服务端返回的数据
                //$('#messagecontainer').prepend('<p><pre>' + e.data + '</pre></p>');
                //$('#messagecontainer').prepend('<hr />');
                $('#messagecontainer').append(e.data+'<br/>');
                {#$('#messagecontainer').prepend('<hr />');#}

            };
        });
    });
    </script>
</head>
<body>
{#<br>#}
<button style="margin: 20px;height: 40px;background-color: #00ff00;" type="button" id="backup_all" value="backup_all">
    执行Shell脚本
</button>
<h3 style="margin: 20px;">脚本执行结果:</h3>
<div id="messagecontainer" style="margin: 20px;">
</div>
<hr/>
</body>
</html>
和manage.py 同级目录,新建目录static,在里面放 jquery-1.12.4.js 文件
从百度搜索下载即可!
修改 settings.py ,设置satic路径
STATIC_URL = '/static/'
STATICFILES_DIRS = (
    os.path.join(BASE_DIR,"static"),
)
requirements.txt 这个是项目依赖文件,内容如下:
Django==2.1.4
dwebsocket==0.5.10
paramiko==2.4.2
此时,目录结果如下:
./
├── db.sqlite3
├── manage.py
├── requirements.txt
├── static
│   └── jquery-1.12.4.js
├── templates
│   └── index.html
├── untitled2
│   ├── __init__.py
│   ├── settings.py
│   ├── urls.py
│   └── wsgi.py
└── websocket
    ├── admin.py
    ├── apps.py
    ├── __init__.py
    ├── migrations
    │   └── __init__.py
    ├── models.py
    ├── tests.py
    └── views.py
启动linux服务器
这里使用的是linux服务器,系统是 ubuntu-16.04.4-server-amd64
脚本 /opt/test.sh 就是上面的内容,已经设置了755权限
启动项目
使用Pycharm启动,访问网页:
http://127.0.0.1:8000/echo_once/
效果就是上面演示的!
测试命令
除了执行脚本,还可以执行其他命令,比如安装ntpdate
修改views.py,将 command 修改一下
command = 'apt-get install -y ntpdate'#这里是要执行的命令或者脚本
再次执行,效果如下:
完整项目
如需完整项目代码,请访问:
https://github.com/py3study/wdpy
本文参考链接:
https://blog.csdn.net/linxi7/article/details/76161584
注意:这篇文章的效果并不是实时输出,它是命令执行完成之后,才显示在网页上面的!
那么因此,我在他的代码基础上,做了一些改进!才实现 实时输出的效果!


 1712
1712

 被折叠的 条评论
为什么被折叠?
被折叠的 条评论
为什么被折叠?
 到【灌水乐园】发言


