


一:
设置别名:
三个参数:this:上下文
"zjy":设置的别名,这个自己可以随便写
new TagAliasCallback() :
在 TagAliasCallback 的 gotResult 方法,返回对应的参数 alias, tags。并返回对应的状态码arg0:0为成功,其他返回码请参考错误码定义
JPushInterface.setAlias(this, "zjy", new TagAliasCallback() {
@Override
public void gotResult(int arg0, String arg1, Set<String> arg2) {
Log.i("zjy", "msg"+arg0);
}
});
二:
设置标签:
注:这个方法与第一个差不多,不同的是第二个参数是个set集合
JPushInterface.setTags(this, set, new TagAliasCallback() {
@Override
public void gotResult(int arg0, String arg1, Set<String> arg2) {
}
});
三:
别名和标签都:
zjy:别名
set:标签集合
JPushInterface.setAliasAndTags(this, "
zjy",
set,
new TagAliasCallback() {
@Override
public void gotResult(int arg0, String arg1,
Set<String> arg2) {
Log.i("zjy", "msg" + arg0);
}
});
四:
发送自定义消息
上面三种使用于发送
通知,我们发送自定义消息的时候,则需要服务接收者
public class MyReceiver extends BroadcastReceiver {
@Overrid
public void onReceive(Context context, Intent intent) {
String action = intent.getAction();
Bundle extras = intent.getExtras();
if(JPushInterface.ACTION_MESSAGE_RECEIVED.equals(action)){
String msg = extras.getString(JPushInterface.EXTRA_MESSAGE);
Log.i("zjy", msg);
}
}
}
这样,我们就能够接收到推送方发过来的自定义消息,从而便于我们进行处理
需要注意的是,我们需要在清单文件中进行注册
<receiver //自己的服务接收器名字
android:name="
com.example.myjpush.MyReceiver"
android:enabled="true" >
<intent-filter>
<action android:name="cn.jpush.android.intent.REGISTRATION" />
<action android:name="cn.jpush.android.intent.MESSAGE_RECEIVED" />
<action android:name="cn.jpush.android.intent.NOTIFICATION_RECEIVED" />
<action android:name="cn.jpush.android.intent.NOTIFICATION_OPENED" />
<category android:name="com.example.myjpush" />
</intent-filter>
</receiver>
五:
通知栏样式定制
MainActivity.this:上下文
R.layout.customer_notitfication_layout:通知栏布局
R.id.icon:通知栏图标
R.id.title:通知栏标题
R.id.text:通知栏内容
CustomPushNotificationBuilder builder =
new
CustomPushNotificationBuilder(MainActivity.
this
,
R.layout.customer_notitfication_layout, R.id.icon, R.id.title, R.id.text);
// 指定定制的 Notification Layout
builder.statusBarDrawable = R.drawable.your_notification_icon;
// 指定最顶层状态栏小图标
builder.layoutIconDrawable = R.drawable.your_2_notification_icon;
// 指定下拉状态栏时显示的通知图标
JPushInterface.setPushNotificationBuilder(
2, builder);
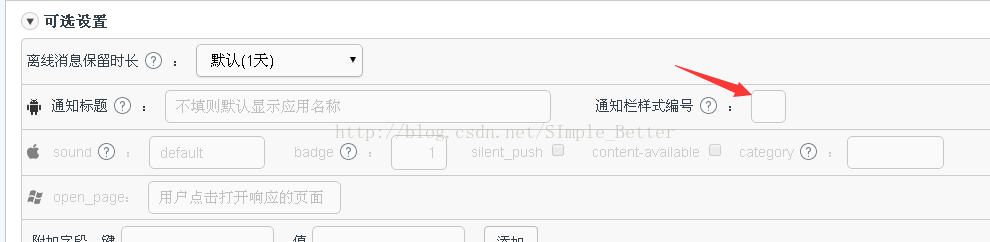
另:如何使用我们的自定义通知栏
将我们定义的通知栏样式编号填进去,也就是
JPushInterface.setPushNotificationBuilder(
2
, builder)中的数字
2
;


 5640
5640

 被折叠的 条评论
为什么被折叠?
被折叠的 条评论
为什么被折叠?
 到【灌水乐园】发言


