基于Redux的ReactNative项目开发总结(一)

写在前面

http://blog.csdn.net/u011413061/article/details/51694158上周把基于Redux的单页应用开发完 紧接着就开始了ReactNative的开发。真的快得不可思议,只花了一周时间,我们两个人就分工把APP也开发完了,并且同时兼容IOS操作系统和Android操作系统。内部测试了一轮,流畅性和用户体验方面也都相当给力! 接下去几篇依次介绍项目开发中领悟的技巧和遇到的坑。

项目架构

React开发的单页应用不同,ReactNative开发不需要依赖webpackfacebook已经提供的一套基于NodeJS的转换和运行工具,这里不多做介绍。项目的架构如下:


1
2
3
4
5
6
7
8
9
10
11
12
13
14
15
16
17
     
     
|---- project
|---- android // android外壳
|---- ios // ios外壳
|---- node_modules // 项目依赖的node模块
|---- app // 本项目的js代码
|---- actions // Redux的actions
|---- assets // 项目使用的icon
|---- components // 项目自定义的组件
|---- containers // 项目的容器页面
|---- mixins // 全局使用的工具方法
|---- modules // 全局使用的自定义模块
|---- reducers // Redux的reducers
|---- configureStore.js // Redux的store配置
|---- index.js // APP入口页面
|---- index.ios.js // android入口
|---- index.android.js // ios入口
|---- packge.json // 项目包信息

Redux不清楚的童鞋可以出门看我之前的《基于Redux的单页应用开发总结》 。其实除了路由,其他和单页应用的结构差别不大。

依赖的Node模块

ReactNative开发离不开NodeJS的支持,相比单页应用,这里依赖的模块比较少,除了Redux相关的模块,其他都是项目中用到的三方组件。


1
2
3
4
5
6
7
8
9
10
11
12
13
14
15
     
     
"dependencies": {
"@remobile/react-native-toast": "^1.0.4", // 用于错误提示的小弹窗
"base-64": "^0.1.0",
"react": "^0.14.8",
"react-native": "^0.25.1",
"react-native-animatable": "^0.6.0", // 动画库
"react-native-communications": "^2.0.0", // 调用手机通讯功能
"react-native-image-picker": "^0.18.17", // 图片选择
"react-native-modalbox": "^1.3.3", // 模态框
"react-native-tab-navigator": "^0.2.18", // 导航栏
"react-native-viewpager": "^0.2.1", // 图片轮播切换
"react-redux": "^4.4.5",
"redux": "^3.5.2",
"redux-thunk": "^2.0.1"
}

错误提示

App里错误提示和网站稍有不同,网站页面宽度大,错误提示信息一般出现在输入框的后面或者悬浮在右上角。但是在App里,需要考虑用户不同的屏幕尺寸,错误信息应该放在一个相对独立且不影响其他元素显示的位置,目前主流的展现形式是这样的:
这里写图片描述
即悬浮放置在页面的中底部,并且定时自动关闭。这个玩意自己写一个也不难,不过为了省事和好的兼容性,就直接使用三方的@remobile/react-native-toast了。使用方法如下:


1
2
3
4
5
     
     
import Toast from '@remobile/react-native-toast';
// ...
Toast.showShortBottom('用户名或密码不正确');

对外的API有以下几个,顾名思义:


1
2
3
4
5
6
7
8
9
10
11
12
13
14
15
16
17
18
19
20
21
22
23
24
25
26
27
28
29
30
31
     
     
Toast.showShortTop = function (message) {
showToast(message, "short", "top");
};
Toast.showShortCenter = function (message) {
showToast(message, "short", "center");
};
Toast.showShortBottom = function (message) {
showToast(message, "short", "bottom");
};
Toast.showLongTop = function (message) {
showToast(message, "long", "top");
};
Toast.showLongCenter = function (message) {
showToast(message, "long", "center");
};
Toast.showLongBottom = function (message) {
showToast(message, "long", "bottom");
};
Toast.show = function (message) {
showToast(message, "short", "bottom");
};
Toast.hide = function () {
RCTToast.hide();
};

安装和使用方法请查看 官方文档

动画库

之前花时间研究过CSS3的动画库,其实目前主流的动画类型和动画创意就那么些,感兴趣的可以 clone一下myAnimate 这个项目。一句话,CSS3里使用的动画方案,ReactNative里也应有尽有。我这边使用的是 react-native-animatable 组件。使用方式如下:


1
2
3
4
5
6
7
8
9
10
11
     
     
import * as Animatable from 'react-native-animatable';
class ExampleView extends Component {
render() {
return (
<TouchableOpacity onPress={() => this.setState({fontSize: (this.state.fontSize || 10) + 5 })}>
<Animatable.Text transition="fontSize" style={{fontSize: this.state.fontSize || 10}}>Size me up, Scotty</Animatable.Text>
</TouchableOpacity>
);
}
}

下面是官方的Demo

这里写图片描述

调用手机通讯功能

HybridApp里实现这个功能还是挺麻烦的,需要客户端封装好接口给H5调用,但是在ReactNative里,一个组件就能搞定—— react-native-communications,安装请查看官方文档

这个组件安装很简单,支持的功能有:拨号、发短信、发Email、打开网页 等 ,下面是官方一个综合的例子:
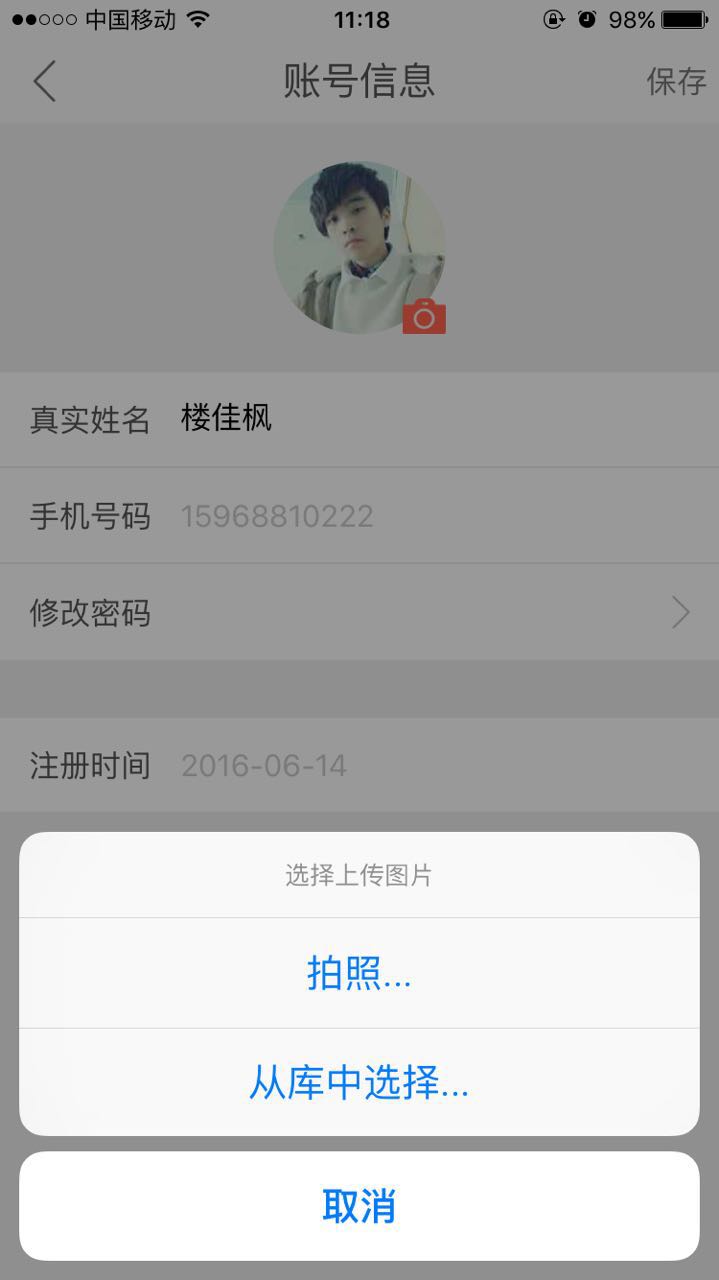
     
     
1
2
3
4
5
6
7
8
9
10
11
12
13
14
15
16
17
18
19
20
21
22
23
24
25
26
27
28
29
30
31
32
33
34
35
36
37
38
39
40
41
42
43
44
45
46
47
48
49
50
51
52
53
54
55
56
57
58
     
     
import React, { Component } from 'react';
import {
AppRegistry,
StyleSheet,
Text,
View,
TouchableOpacity
} from 'react-native';
import Communications from 'react-native-communications';
class RNCommunications extends Component({
render() {
return (
<View style={styles.container}>
<TouchableOpacity onPress={() => Communications.phonecall('0123456789', true)}>
<View style={styles.holder}>
<Text style={styles.text}>Make phonecall</Text>
</View>
</TouchableOpacity>
<TouchableOpacity onPress={() => Communications.email(['emailAddress1', 'emailAddress2'],null,null,'My Subject','My body text')}>
<View style={styles.holder}>
<Text style={styles.text}>Send an email</Text>
</View>
</TouchableOpacity>
<TouchableOpacity onPress={() => Communications.text('0123456789')}>
<View style={styles.holder}>
<Text style={styles.text}>Send a text/iMessage</Text>
</View>
</TouchableOpacity>
<TouchableOpacity onPress={() => Communications.web('https://github.com/facebook/react-native')}>
<View style={styles.holder}>
<Text style={styles.text}>Open react-native repo on Github</Text>
</View>
</TouchableOpacity>
</View>
);
}
});
const styles = StyleSheet.create({
container: {
flex: 1,
alignItems: 'center',
backgroundColor: 'rgb(253,253,253)',
},
holder: {
flex: 0.25,
justifyContent: 'center',
},
text: {
fontSize: 32,
},
});
AppRegistry.registerComponent('RNCommunications', () => RNCommunications);

访问手机相册

调取手机相册和上传图片是个老生常谈的问题,ReactNative里可以通过react-native-image-picker 来处理,安装请查看官方文档

拎一段代码片段:


1
2
3
4
5
6
7
8
9
10
11
12
13
14
15
16
17
18
19
20
21
22
23
24
25
26
27
28
29
30
31
32
33
34
     
     
import ImagePicker from 'react-native-image-picker'
const options = {
title: '选择上传图片', // specify null or empty string to remove the title
cancelButtonTitle: '取消',
takePhotoButtonTitle: '拍照...', // specify null or empty string to remove this button
chooseFromLibraryButtonTitle: '从库中选择...', // specify null or empty string to remove this button
//customButtons: {
// 'Choose Photo from Facebook': 'fb', // [Button Text] : [String returned upon selection]
//},
cameraType: 'back', // 'front' or 'back'
mediaType: 'photo',
//videoQuality: 'high', // 'low', 'medium', or 'high'
maxWidth: 200, // photos only
maxHeight: 200, // photos only
allowsEditing: true,
noData: false,
}
//...
onUpload() {
ImagePicker.showImagePicker(options, (response) => {
if (response.didCancel) {
//console.log('User cancelled image picker');
}
else if (response.error) {
//console.log('ImagePicker Error: ', response.error);
} else {
let source = {uri: response.uri.replace('file://', ''), isLocal: true, isStatic: true};
this.setState({ form: {...this.state.form, avatar: source} })
}
})
}

模态框

模态框在App里使用的也比较多,比如确认模态、加载模态、输入模态等,出于良好的用户体验和兼容性考虑,我这里底层采用react-native-modalbox,然后根据不同功能进行二次加工。

ConfirmModal

很常见,不多做介绍,copy下面代码 直接可以使用


1
2
3
4
5
6
7
8
9
10
11
12
13
14
15
16
17
18
19
20
21
22
23
24
25
26
27
28
29
30
31
32
33
34
35
36
37
38
39
40
41
42
43
44
45
46
47
48
49
50
51
52
53
54
55
56
57
58
59
60
61
62
63
64
65
66
67
68
69
70
71
72
73
74
75
76
77
78
79
80
81
82
83
84
85
86
87
88
89
90
91
92
     
     
import React, { Component } from 'react';
import {
Dimensions,
StyleSheet,
Text,
TouchableOpacity,
View,
} from 'react-native';
import ModalBox from 'react-native-modalbox';
const styles = StyleSheet.create({
modal: {
borderRadius: 10,
},
modalContent: {
flex: 1,
paddingLeft: 10,
paddingRight: 10,
},
h2: {
marginTop: 15,
fontSize: 20,
color: '#555',
textAlign: 'center',
},
modalOption: {
flexDirection: 'row',
borderTopWidth: 1,
borderTopColor: '#ddd',
},
modalCancel: {
flex: 1,
padding: 15,
},
modalCancelText: {
fontSize: 16,
textAlign: 'center',
},
modalConfirm: {
flex: 1,
padding: 15,
borderLeftWidth: 1,
borderLeftColor: '#ddd',
},
modalConfirmText: {
fontSize: 16,
textAlign: 'center',
},
message: {
flex: 1,
justifyContent: 'center',
alignItems: 'center',
},
messageText: {
color: '#555',
fontSize: 16,
},
});
export default class ConfirmModal extends Component {
constructor(props) {
super(props);
}
open() {
this.refs.modal.open()
}
close() {
this.refs.modal.close()
}
render() {
let { width } = Dimensions.get('window');
return (
<ModalBox
ref={"modal"}
style={[styles.modal, {width: this.props.width || (width-60), height: this.props.height || 200}]}
backdropOpacity={0.3}
position={"center"}
isOpen={false}>
<View style={styles.modalContent}>
<Text style={styles.h2}>{ this.props.title || '提示' }</Text>
<View style={styles.message}><Text style={styles.messageText}>{ this.props.message }</Text></View>
</View>
<View style={styles.modalOption}>
<TouchableOpacity style={styles.modalCancel} onPress={()=> this.refs.modal.close() }>
<Text style={styles.modalCancelText}>取消</Text>
</TouchableOpacity>
<TouchableOpacity style={styles.modalConfirm} onPress={()=> this.props.onConfirm() }>
<Text style={styles.modalConfirmText}>确定</Text>
</TouchableOpacity>
</View>
</ModalBox>
)
}
}

LoadingModal

这个也很常见,copy下面代码 直接可以使用


1
2
3
4
5
6
7
8
9
10
11
12
13
14
15
16
17
18
19
20
21
22
23
24
25
26
27
28
29
30
31
32
33
34
35
36
37
38
39
     
     
import React, { Component } from 'react';
import {
StyleSheet,
} from 'react-native';
import ModalBox from 'react-native-modalbox';
const styles = StyleSheet.create({
modal: {
justifyContent: 'center',
alignItems: 'center',
backgroundColor: 'transparent'
},
});
export default class LoadingModal extends Component {
constructor(props) {
super(props);
}
open() {
this.refs.modal.open()
}
close() {
this.refs.modal.close()
}
render() {
return (
<ModalBox
style={styles.modal}
ref="modal"
position={"center"}
backdrop={false}
isOpen={this.props.isOpen || false}
//backdropOpacity={.3}
backdropPressToClose={false}
animationDuration={10}
>
</ModalBox>
);
}
}

PickerModal

这个特别讲解一下,PickerModal用于页面上的Picker的处理,显示效果如下:

这里写图片描述


1
2
3
4
5
6
7
8
9
10
11
12
13
14
15
16
17
18
19
20
21
22
23
24
25
26
27
28
29
30
31
32
33
34
35
36
37
38
39
40
41
42
43
44
45
46
47
48
49
50
51
52
53
54
55
56
57
58
59
60
61
62
63
64
65
66
67
68
69
70
71
72
73
74
75
76
77
78
79
80
81
82
83
84
85
86
87
88
89
90
91
92
93
94
95
96
97
98
     
     
import React, { Component } from 'react';
import {
Dimensions,
StyleSheet,
Text,
TouchableOpacity,
Picker,
View,
} from 'react-native';
import ModalBox from 'react-native-modalbox'
import dismissKeyboard from '../mixins/dismiss-keyboard'
const styles = StyleSheet.create({
popup: {
},
popupContent: {
flex: 1,
paddingLeft: 10,
paddingRight: 10,
},
h2: {
marginTop: 15,
fontSize: 20,
color: '#555',
textAlign: 'center',
},
popupOption: {
flexDirection: 'row',
borderTopWidth: 1,
borderTopColor: '#ddd',
},
popupCancel: {
flex: 1,
padding: 15,
},
popupCancelText: {
fontSize: 16,
textAlign: 'center',
},
popupConfirm: {
flex: 1,
padding: 15,
borderLeftWidth: 1,
borderLeftColor: '#ddd',
},
popupConfirmText: {
fontSize: 16,
textAlign: 'center',
},
message: {
flex: 1,
justifyContent: 'center',
alignItems: 'center',
},
messageText: {
color: '#555',
fontSize: 16,
},
});
export default class PickerModal extends Component {
constructor(props) {
super(props);
}
open() {
dismissKeyboard()
this.refs.modal.open()
}
close() {
this.refs.modal.close()
}
_renderPickerItems(data) {
data.map((item)=>{
return [
<Picker.Item label={item[0]} value={item[1]} />
]
})
}
render() {
let { width } = Dimensions.get('window');
return (
<ModalBox
ref={"modal"}
style={[styles.popup, {width: this.props.width || (width), height: this.props.height || 200}]}
backdropOpacity={0.3}
position={"bottom"}
swipeToClose={false}
isOpen={false}>
<View style={styles.popupContent}>
<Picker {...this.props}>
{this.props.dataSource.map((item,i)=> {
if (item.length) return <Picker.Item key={i} label={item[0]} value={item[1]} />
})}
</Picker>
</View>
</ModalBox>
)
}
}

补充说明一下dismissKeyboard()这个方法,该方法用于关闭页面的keyboard(键盘),ReactNative 默认没有这种方法,需要自己编写:


1
2
3
4
5
     
     
import { TextInput } from 'react-native';
const { State: TextInputState } = TextInput;
export default function dismissKeyboard() {
TextInputState.blurTextInput(TextInputState.currentlyFocusedField());
}

导航条

这个组件其实ReactNative提供了原生版本的,但是样式和功能上不好控制,建议自己手写一个,代码如下:


1
2
3
4
5
6
7
8
9
10
11
12
13
14
15
16
17
18
19
20
21
22
23
24
25
26
27
28
29
30
31
32
33
34
35
36
37
38
39
40
41
42
43
44
45
46
47
48
49
50
51
52
53
54
55
56
57
58
59
60
61
62
63
64
65
66
67
68
69
70
71
72
73
74
75
76
77
78
79
80
81
82
83
84
85
86
87
88
89
90
91
92
93
     
     
import React, { Component } from "react";
import {
Image,
Platform,
StyleSheet,
Text,
TouchableOpacity,
View,
} from 'react-native';
const styles = StyleSheet.create({
leftButton: {
marginLeft: 5,
},
rightButton: {
marginRight: 5,
},
button: {
width: 44,
height: 44,
justifyContent: 'center',
alignItems: 'center',
},
nav: {
backgroundColor: '#f9f9f9',
flexDirection: 'row',
alignItems: 'center',
},
title: {
flex: 1,
height: 44,
justifyContent: 'center',
},
btnText: {
fontSize: 16,
color: '#777',
},
marginForIOS: {
marginTop: 20,
},
titleText: {
fontSize: 20,
textAlign: 'center',
color: '#555'
}
});
export class RightButton extends Component {
render() {
return (
<TouchableOpacity
style={styles.button}
onPress={this.props.onPress}>
{ this.props.text ? <Text style={styles.btnText}>{this.props.text}</Text> : null }
{ this.props.icon ? <Image source={this.props.icon} style={styles.rightButton} /> : null }
</TouchableOpacity>
);
}
}
export class NavigatorBar extends Component {
_leftButton() {
if (this.props.navigator.getCurrentRoutes().length > 1) return (
<TouchableOpacity
style={styles.button}
onPress={()=> this.props.navigator.pop() }>
<Image source={require('../assets/icon-nav-left.png')} style={styles.leftButton} />
</TouchableOpacity>
)
}
_rightButton() {
if (this.props.rightButton) return (
<RightButton {...this.props.rightButton} />
)
}
render() {
return (
<View style={styles.nav}>
<View style={[styles.button, Platform.OS=='ios' ? styles.marginForIOS : null]}>
{this._leftButton()}
</View>
<View style={[styles.title, Platform.OS=='ios' ? styles.marginForIOS : null]}>
<Text style={styles.titleText}>{ this.props.name }</Text>
</View>
<View style={[styles.button, Platform.OS=='ios' ? styles.marginForIOS : null]}>
{this._rightButton()}
</View>
</View>
);
}
}

然后在container里就可以使用了:


1
2
3
4
5
6
7
8
9
10
     
     
import { NavigatorBar } from '../components/navigator'
// 没有右侧按钮
<NavigatorBar name="登录" navigator={this.props.navigator} />
// 右侧按钮为图标
<NavigatorBar name="我的" navigator={this.props.navigator} rightButton={{onPress: ()=>{this.props.navigator.push({component: Setting})}, icon: require('../../assets/icon-set.png')}} />
// 右侧按钮为文字
<NavigatorBar name="我的订单" navigator={this.props.navigator} rightButton={{text: '历史 ', onPress: ()=> this.props.navigator.push({component: OrderHitory}) }} />

图片轮播

建议使用三方的react-native-viewpager组件,安装请查看 官方文档

下面是一个demo:


1
2
3
4
5
6
7
8
9
10
11
12
13
14
15
16
17
18
19
20
     
     
var ViewPager = require('react-native-viewpager');
<ViewPager
dataSource={this.state.dataSource}
renderPage={this._renderPage}
animation = {(animatedValue, toValue, gestureState) => {
// Use the horizontal velocity of the swipe gesture
// to affect the length of the transition so the faster you swipe
// the faster the pages will transition
var velocity = Math.abs(gestureState.vx);
var baseDuration = 300;
var duration = (velocity > 1) ? 1/velocity * baseDuration : baseDuration;
return Animated.timing(animatedValue,
{
toValue: toValue,
duration: duration,
easing: Easing.out(Easing.exp)
});
}}
/>

海内存知己,天涯若比邻

支付宝
微信
  • 0
    点赞
  • 0
    收藏
    觉得还不错? 一键收藏
  • 0
    评论
评论
添加红包

请填写红包祝福语或标题

红包个数最小为10个

红包金额最低5元

当前余额3.43前往充值 >
需支付:10.00
成就一亿技术人!
领取后你会自动成为博主和红包主的粉丝 规则
hope_wisdom
发出的红包
实付
使用余额支付
点击重新获取
扫码支付
钱包余额 0

抵扣说明:

1.余额是钱包充值的虚拟货币,按照1:1的比例进行支付金额的抵扣。
2.余额无法直接购买下载,可以购买VIP、付费专栏及课程。

余额充值