


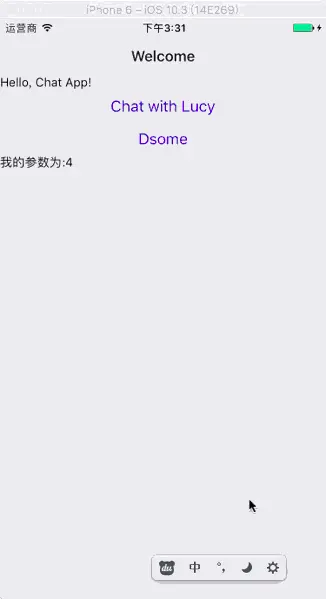
先来看一下示意图
先来安利一下官方文档
还有不错的一个详解博客
安装步骤或者有什么属性之类的,看一下这个博客和官方文档,基本差不多了,现在我们来将跳转和传值的问题。
跳转
import { StackNavigator } from 'react-navigation';
导入必要的包的是关键。
StackNavigator是用于页面跳转的东西。
其次需要导入navigate。
利用navigate实现跳转,前面是 ‘xxx’ 你要跳转的名字,后面是你要传递的参数。
路由:明确跳转的方向。
代码
 const { navigate } = this.props.navigation;
        <Button
          onPress={() => navigate('Chat', { user: 'Lucy' })}
          title="Chat with Lucy"
        />

 const SimpleApp = StackNavigator({
      Home: { screen: HomeScreen },
      Chat: { screen: ChatScreen },
      Dsome:{screen:Dsome},
});页面效果参考上面的GIF
传值
代码中,我们已经向Chat传递了user的参数,那么Chat这个页面该如何接受参数呢?
class ChatScreen extends React.Component {
  static navigationOptions = ({ navigation }) => ({
    title: `Chat with ${navigation.state.params.user}`,
  });
  render() {
    const { params } = this.props.navigation.state;
    return (
      <View>
        <Text>Chat with {params.user}</Text>

      </View>
    );
  }
}
在navigationOptions 中可以通过接受一个 navigation 之后通过navigation.state.params.user来接受参数。
而在Render里渲染的时候,通过
const { params } = this.props.navigation.state;来得到params。之后直接params.user来接受参数。
回调传值
在实际场景中,第一个页面会向第二个页面传递值,第二个页面会处理这样的值,之后将值传递给第一个页面。。。
这就用到了回调传值。
直接帖代码
    <Button
      onPress={()=>navigate('Dsome',{
        boom:this.state.boom,
          callback: (data)=>{
                this.setState({
                  boom:data,
                })
                 }
      }
       )}
      title="Dsome"
    />
这里我们通过Button传值给下一个页面。。这里,传递的值有boom,还有一个回调函数callback。如果得到的callback,我们就直接传给boom这个state。
第二个页面的处理也很简单。
定义一个goback方法,之后,const {navigate,goBack,state} = this.props.navigation;这个是关键。 在第二个页面,在goBack之前,将上个页面的方法取到,并回传参数,这样回传的参数会重走render方法http://www.jianshu.com/p/aca22ef29bfe
 goback(){
    const {navigate,goBack,state} = this.props.navigation;
    state.params.callback(this.state.boom);
    this.props.navigation.goBack();
}
这样就可以实现一开始的效果图,点击第二个页面,回到第一个页面实现boom的值的改变。

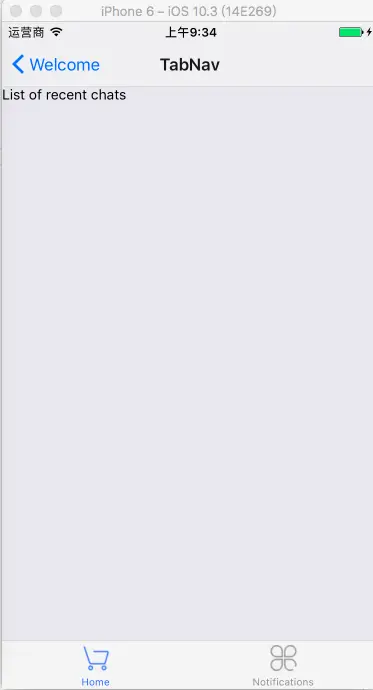
通过以上的效果图,其实我们可以看出使用react-navigation没有出现卡顿的情况,在运行的时候也很流畅。那么一步步来。先来看一下,TabNavigator如何实现。
TabNavigator
步骤
先导入import {StackNavigator,TabNavigator,DrawerNavigator} from 'react-navigation';
我们知道每个页面都是一个class。然后通过render()渲染页面。定义这个页面。有哪些属性呢?
screen:和导航的功能是一样的,对应界面名称,可以在其他页面通过这个screen传值和跳转。


navigationOptions:配置TabNavigator的一些属性

title:标题,会同时设置导航条和标签栏的title

tabBarVisible:是否隐藏标签栏。默认不隐藏(true)

tabBarIcon:设置标签栏的图标。需要给每个都设置

tabBarLabel:设置标签栏的title。推荐

导航栏配置

tabBarPosition:设置tabbar的位置,iOS默认在底部,安卓默认在顶部。(属性值:'top','bottom')

swipeEnabled:是否允许在标签之间进行滑动

animationEnabled:是否在更改标签时显示动画

lazy:是否根据需要懒惰呈现标签,而不是提前,意思是在app打开的时候将底部标签栏全部加载,默认false,推荐为true

trueinitialRouteName: 设置默认的页面组件

backBehavior:按 back 键是否跳转到第一个Tab(首页), none 为不跳转

tabBarOptions:配置标签栏的一些属性iOS属性

activeTintColor:label和icon的前景色 活跃状态下

activeBackgroundColor:label和icon的背景色 活跃状态下

inactiveTintColor:label和icon的前景色 不活跃状态下

inactiveBackgroundColor:label和icon的背景色 不活跃状态下

showLabel:是否显示label,默认开启 style:tabbar的样式

labelStyle:label的样式安卓属性

activeTintColor:label和icon的前景色 活跃状态下

inactiveTintColor:label和icon的前景色 不活跃状态下

showIcon:是否显示图标,默认关闭

showLabel:是否显示label,默认开启 style:tabbar的样式

labelStyle:label的样式 upperCaseLabel:是否使标签大写,默认为true

pressColor:material涟漪效果的颜色(安卓版本需要大于5.0)

pressOpacity:按压标签的透明度变化(安卓版本需要小于5.0)

scrollEnabled:是否启用可滚动选项卡 tabStyle:tab的样式

indicatorStyle:标签指示器的样式对象(选项卡底部的行)。安卓底部会多出一条线,可以将height设置为0来暂时解决这个问题

labelStyle:label的样式

iconStyle:图标样式
在ios是底层,在android是顶层。如何调整一致呢?tabBarPosition可以设置top 或者 bottom。
tabBarIcon: ({ tintColor }) => (
  <Image
    source={require('../img/gouwu.png')}
    style={[styles.icon, {tintColor: tintColor}]}
  />
),tabBarIcon设置图标。
定义TabNavigation
const TabNavigation = TabNavigator({
  Recent: { screen: RecentChatsScreen },
  All: { screen: AllContactsScreen },
});
定义一个展示的的TabNav。
export default class TabNav extends React.Component{
    static navigationOptions = {
        title:'TabNav',
};
    render(){
        return(

                <TabNavigation />


        );
    }
}
这样就可以展示出TabNavigation
DrawerNavigator
这是一个抽屉导航。效果如下:
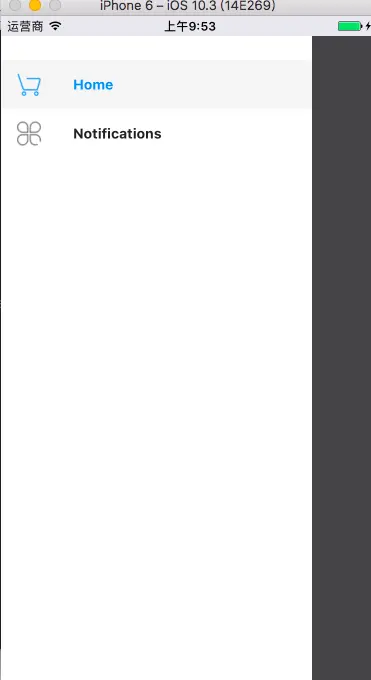
实现的代码。其实和Tab差不多,只不过,我们需要设置的属性有所差异,这这里,要设置drawerLabel,drawerIcon,其实属性不止这些,还有更多的设置的属性
DrawerNavigatorConfig

drawerWidth - 抽屉的宽度

drawerPosition - 选项是左或右。 默认为左侧位置

contentComponent - 用于呈现抽屉内容的组件,例如导航项。 接收抽屉的导航。 默认为DrawerItems

contentOptions - 配置抽屉内容

initialRouteName - 初始路由的routeName

order - 定义抽屉项目顺序的routeNames数组。

路径 - 提供routeName到路径配置的映射,它覆盖routeConfigs中设置的路径。

backBehavior - 后退按钮是否会切换到初始路由? 如果是,设置为initialRoute,否则为none。 默认为initialRoute行为

DrawerItems的contentOptions属性

activeTintColor - 活动标签的标签和图标颜色

activeBackgroundColor - 活动标签的背景颜色

inactiveTintColor - 非活动标签的标签和图标颜色

inactiveBackgroundColor - 非活动标签的背景颜色

内容部分的样式样式对象
labelStyle - 当您的标签是字符串时,要覆盖内容部分中的文本样式的样式对象
贴出源码。可以更好的参考。
class MyHomeScreen extends React.Component {
  static navigationOptions = {
    drawerLabel: 'Home',
    drawerIcon: ({ tintColor }) => (
      <Image
        source={require('../img/gouwu.png')}
        style={[styles.icon, {tintColor: tintColor}]}
      />
    ),
  };

  render() {
    return (
     <View>
      <Button
        onPress={() => this.props.navigation.navigate('Notifications')}
        title="Go to notifications"
      />
      <Button
        onPress={()=>this.props.navigation.navigate('DrawerOpen')}
        title="open the draw"
      />
      </View>
    );
  }
}

class MyNotificationsScreen extends React.Component {
  static navigationOptions = {
    drawerLabel: 'Notifications',
    drawerIcon: ({ tintColor }) => (
      <Image
        source={require('../img/quan.png')}
        style={[styles.icon, {tintColor: tintColor}]}
      />
    ),
  };

  render() {
    return (
        <View>
      <Button
        onPress={() => this.props.navigation.goBack()}
        title="Go back home"
      />

       <Button
        onPress={()=>this.props.navigation.navigate('DrawerOpen')}
        title="open the draw"
      />
      </View>
    );
  }
}

const styles = StyleSheet.create({
  icon: {
    width: 24,
    height: 24,
  },
});

const MyApp = DrawerNavigator({
  Home: {
    screen: MyHomeScreen,
  },
  Notifications: {
    screen: MyNotificationsScreen,
  },
});
export default class DrawNav extends React.Component {
  static navigationOptions={
      title:'app',
      gesturesEnabled:false,
      header:null,
  }

  render() {
        return (
            <View style = {{flex:1,marginTop:20,}}>
                {/*<TouchableOpacity onPress = {this.open.bind(this)}>
                    <Image source = {require('../img/bianji.png')} style = {{width:36,height:36}}/>
                </TouchableOpacity>*/}
          <MyApp />
          </View>
        );
  }
}
打开抽屉的方法
  //打开的方法
  open(){
      this.props.navigation.navigate('DrawerOpen');
  }
关闭抽屉的方法
     //关闭的方法
     close(){
         this.props.navigation.navigate('DrawerClose');
     }
在实际的应用中,我们就可以通过图片等方式来实现打开或者关闭抽屉导航。
总结
项目中一开始使用的是navigator。习惯传值push,回调的pop。老实说一开始相对比较地址react-navigation,但是在自己尝试做了几个这样demo之后,我也有了重构自己代码的想法。希望通过react-navigation来实现切换的更加流畅。
其实react-navigation看似复杂,但是实现简单的一些东西,他反而更加简单,
StackNavigator
我们实现页面的跳转的时候,navigate ‘xxx‘跳转的页面,后面{},是传递的参数,参数值,或者回调函数。
 const SimpleApp = StackNavigator({
    Home: { screen: HomeScreen },
    Chat: { screen: ChatScreen },
    Dsome:{screen:Dsome},
});
TabNavigator
需要定义TabNavigator,然后React,和All都需要渲染和定义
const TabNavigation = TabNavigator({
  Recent: { screen: RecentChatsScreen },
  All: { screen: AllContactsScreen },
});
DrawerNavigator
const MyApp = DrawerNavigator({
  Home: {
    screen: MyHomeScreen,
  },
  Notifications: {
    screen: MyNotificationsScreen,
  },
});
赶紧的,配合一些必要的属性,去实现react-navigation的功能吧。


 293
293

 被折叠的 条评论
为什么被折叠?
被折叠的 条评论
为什么被折叠?
 到【灌水乐园】发言


