


前面我们已经把home控制器的小细节给完成了,下面我们就开始攻克最难理解也是最复杂的一个功能,就是cell的设计和展示。可以看到目前我们的微博跟实际的相差还很大,实际的cell会有头像,昵称,创建时间,微博来源,以及转发微博的内容,还有包含转发,评论,点赞的工具栏。乍一看是不是感觉无从下手,头都要大了。但是不要着急,跟着课程走,我们会一步一步分析如何设计cell结构。而且这节课我们会给大家引入一个新的概念—-视图模型。
本节内容
- 自定义cell,以及其子控件
- 设计MVVM模型
本节资料
11.1 自定义cell,以及子控件
看到这么复杂的cell,我们就知道一定要自定义cell了,首先我们分析出cell的结构如下图所示:
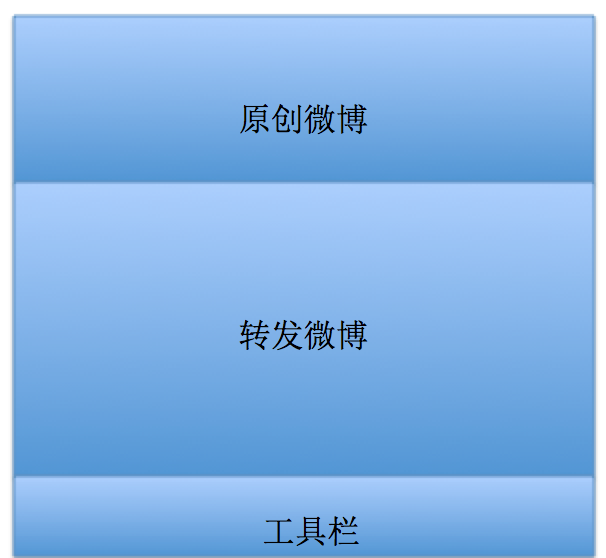
遵循循序渐进的原则,我们首先先设计原创微博不带配图的cell,在设计原创微博有配图的cell,然后再设计包含转发微博且有图片的cell。
首先我们先定义一个YGStatusCell,然后在其初始化方法添加三个子控件代码如下:
// 注意:cell是用initWithStyle初始化

- (instancetype)initWithStyle:(UITableViewCellStyle)style reuseIdentifier:(NSString *)reuseIdentifier{

    if (self = [super initWithStyle:style reuseIdentifier:reuseIdentifier]) {

        // 添加所有子控件
        [self setUpAllChildView];
    }

    return self;
}
这里我们只是先写了一个方法,具体里面应该怎么添加子控件呢?我们可以回想下,我们是怎么给tabBarController添加子控制器的,无外乎就是创建相应的控制器,然后添加到父视图上,最后赋值给实例变量。我们有三个子控件,但是如果我们仅仅是创建UIView的实例,就会发现代码很多很复杂,而且每个子控件里面都会有其它子控件。为了以后开发方便,我们要为每个子控件设计一个类,专门处理子控件的内容。这里我们创建三个类分别是:YGOriginalView,YGRetweetView,YGStatusToolBar,且都继承自UIView。然后在自定义YGStatusCell内使用它们。
这样YGStatusCell添加子控件的方法就为:
// 添加所有子控件
- (void)setUpAllChildView
{
    // 原创微博
    YGOriginalView *originalView = [[YGOriginalView alloc] init];
    [self addSubview:originalView];
    _originalView = originalView;

    // 转发微博
    YGRetweetView *retweetView = [[YGRetweetView alloc] init];
    [self addSubview:retweetView];
    _retweetView = retweetView;

    // 工具条
    YGStatusToolBar *toolBar = [[YGStatusToolBar alloc] init];
    [self addSubview:toolBar];
    _toolBar = toolBar;
}
这里别忘记添加成员变量,并赋值给成员都实例变量。因为以后可能会对子控件的内容作修改或者赋值。
而且要想设置cell的内容,必须给它传递数据吧,所以我们要在YGStatusCell 的头文件中添加一个YGStatus属性。
这样我们就可以修改YGHomeViewController内设置cell代理的方法内做更改,且实用我们自定义的cell:
- (UITableViewCell *)tableView:(UITableView *)tableView cellForRowAtIndexPath:(NSIndexPath *)indexPath {

    static NSString *ID =@"cell";
    YGStatusCell *cell = [tableView dequeueReusableCellWithIdentifier:ID];

    // Configure the cell...
    if (cell ==nil) {
        cell = [[YGStatusCell alloc]initWithStyle:UITableViewCellStyleSubtitle reuseIdentifier:ID];
    }
    YGStatus *status =self.statuses[indexPath.row];
    cell.status =status;
    return cell;
}
大家可以看到,我们开发的步骤不是一开始就从细小地方着手,而是先把框架搭建好,把数据打通,下面才是使用数据,展示数据到手机屏幕上。
当我们把自定义cell搭建好后,就可以搭建每个子控件内的子控件了,首先是添加原创微博YGOrginalView内的子控件,且这里与刚才自定义cell原理是一样的,代码如下:
// 头像
@property (nonatomic, weak) UIImageView *iconView;


// 昵称
@property (nonatomic, weak) UILabel *nameView;


// vip
@property (nonatomic, weak) UIImageView *vipView;


// 时间
@property (nonatomic, weak) UILabel *timeView;

// 来源
@property (nonatomic, weak) UILabel *sourceView;


// 正文
@property (nonatomic, weak) UILabel *textView;


@end

@implementation CZOriginalView

- (instancetype)initWithFrame:(CGRect)frame
{
    if (self = [super initWithFrame:frame]) {

        // 添加所有子控件
        [self setUpAllChildView];

    }
    return self;
}

// 添加所有子控件
- (void)setUpAllChildView
{
    // 头像
    UIImageView *iconView = [[UIImageView alloc] init];
    [self addSubview:iconView];
    _iconView = iconView;

    // 昵称
    UILabel *nameView = [[UILabel alloc] init];
    [self addSubview:nameView];
    _nameView = nameView;

    // vip
    UIImageView *vipView = [[UIImageView alloc] init];
    [self addSubview:vipView];
    _vipView = vipView;

    // 时间
    UILabel *timeView = [[UILabel alloc] init];
    [self addSubview:timeView];
    _timeView = timeView;

    // 来源
    UILabel *sourceView = [[UILabel alloc] init];
    [self addSubview:sourceView];
    _sourceView = sourceView;

    // 正文
    UILabel *textView = [[UILabel alloc] init];
    [self addSubview:textView];
    _textView = textView;
}
我们设想,当程序在启动后,会初始化YGStatusCell,当我们一给它传递YSStatus值的时候,他就应该能计算出每个子控件的位置,并且给子控件赋值,然后在tableView 上显示出来。
但是根据我们以前的开发经验,或者这里你也可以自己摸索一下,tableView的代理方法的执行是有先后顺序的,它首先要返回一个cell高度值:
-(CGFloat)tableView:(UITableView *)tableView heightForRowAtIndexPath:(NSIndexPath *)indexPath然后才创建cell:
- (UITableViewCell *)tableView:(UITableView *)tableView cellForRowAtIndexPath:(NSIndexPath *)indexPath {
这就跟我们设计的思路就不一样了,我们是在创建cell并赋值后才知道它的高度是多少,所以不能在YGStatusCell 的setStatus方法内计算cell的高度。而且cell的高度必须要先计算出每个子控件的frame,才能确定,如果在cell的setStatus方法计算子控件的位置,会比较耗性能。写到这里是不是感觉走不下去了,懵逼了吧。没事,下面我们就引入新的概念来解决这个问题。
11.2 MVVM视图模型
前面已经解释,cell高度不能在setStatus方法内计算,那我们在哪里计算比较好呢?牛逼的前辈就提出来一个MVVM视图模型的概念来解决这个问题。视图模型不仅包含了数据模型,也包含了模型对应视图的frame属性。以后大部分情况下,只要自定义frame大小跟内容有关系,就可以采用MVVM模型。下面我们用代码告诉大家,MVVM怎么设计:
#import <Foundation/Foundation.h>

@class YGStatus;
@interface YGStatusFrame : NSObject

/**
 *  微博数据
 */
@property (nonatomic, strong) YGStatus *status;

// 原创微博frame
@property (nonatomic, assign) CGRect originalViewFrame;

/**   ******原创微博子控件frame**** */
// 头像Frame
@property (nonatomic, assign) CGRect originalIconFrame;

// 昵称Frame
@property (nonatomic, assign) CGRect originalNameFrame;

// vipFrame
@property (nonatomic, assign) CGRect originalVipFrame;

// 时间Frame
@property (nonatomic, assign) CGRect originalTimeFrame;

// 来源Frame
@property (nonatomic, assign) CGRect originalSourceFrame;

// 正文Frame
@property (nonatomic, assign) CGRect originalTextFrame;


// 转发微博frame
@property (nonatomic, assign) CGRect retweetViewFrame;

/**   ******转发微博子控件frame**** */
// 昵称Frame
@property (nonatomic, assign) CGRect retweetNameFrame;

// 正文Frame
@property (nonatomic, assign) CGRect retweetTextFrame;


// 工具条frame
@property (nonatomic, assign) CGRect toolBarFrame;


// cell的高度
@property (nonatomic, assign) CGFloat cellHeight;

@end
可见这里的视图模型,不尽包含了我们的YGStatus数据模型,也包含了每个子控件,以及子控件的子控件的frame,还有最后根据所有子控件算出来的cell的高度。
这里我们先不着急写计算各种子控件frame的具体步骤,而是想一想怎么使用这个视图模型。
1.首先我们要更改保存微博模型的statuses数组为statusFrames,因为我们以后用到的都是YGStatusFrame视图模型,要更改的包括懒加载方法。
2.然后,我们在请求到最新的微博时候,把模型改为视图模型,代码如下:
#pragma mark - 请求最新的微博
- (void)loadNewStatus
{
    NSString *sinceId = nil;
    if (self.statuseFrames.count) { // 有微博数据,才需要下拉刷新
        YGStatus *s =[self.statuseFrames[0] status];

        sinceId = s.idstr;
    }

    [YGStatusTool newStatusWithSinceId:sinceId success:^(NSArray *statuses) {
        //  展示最新微博数
        [self showNewStatusCount:(unsigned)statuses.count];

        // 结束下拉刷新
        [self.tableView.mj_header endRefreshing];
        //模型转换为视图模型
        NSMutableArray *statusFrameTmpArray = [NSMutableArray array];
        for (YGStatus *status in statuses)
        {
            YGStatusFrame *statusFrame = [[YGStatusFrame alloc]init];
            statusFrame.status = status;
            [statusFrameTmpArray addObject:statusFrame];
        }
        NSIndexSet *indexSet = [NSIndexSet indexSetWithIndexesInRange:NSMakeRange(0, statuses.count)];
        // 把最新的微博数插入到最前面
        [self.statuseFrames insertObjects:statusFrameTmpArray atIndexes:indexSet];

        // 刷新表格
        [self.tableView reloadData];

    } failure:^(NSError *error) {

    }];
}
3.改完这个方法后,不要忘了在loadMoreStatus方法内也做以上更改:
#pragma mark - 请求更多旧的微博
- (void)loadMoreStatus
{
    NSString *maxIdStr = nil;
    if (self.statuseFrames.count) { // 有微博数据,才需要下拉刷新
        YGStatus *s = [self.statuseFrames[0] status];

        long long maxId = [s.idstr longLongValue] - 1;
        maxIdStr = [NSString stringWithFormat:@"%lld",maxId];
    }
[YGStatusTool moreStatusWithMaxId:maxIdStr success:^(NSArray *statuses) {

    // 结束上拉刷新
    [self.tableView.mj_footer endRefreshing];
    //模型转视图模型
    NSMutableArray *statusFrameTemArray = [NSMutableArray array];
    for (YGStatus *status in statuses) {
        YGStatusFrame *statusFrame = [[YGStatusFrame alloc]init];
        statusFrame.status = status;
        [statusFrameTemArray addObject:statusFrame];
    }
    // 把数组中的元素添加进去
    [self.statuseFrames addObjectsFromArray:statusFrameTemArray];
    // 刷新表格
    [self.tableView reloadData];

} failure:^(NSError *error) {

}];

}
4.然后在我们自定义的YGStatusCell内我们就要把YGStatus属性改为YGStatusFrame属性。以后我们直接给cell传递视图模型即可。
5.获取到视图模型后,我们就可以在tableView的代理方法内使用它了。代码如下:
#pragma mark - Table view data source


- (NSInteger)tableView:(UITableView *)tableView numberOfRowsInSection:(NSInteger)section {
    return self.statuseFrames.count;
}


- (UITableViewCell *)tableView:(UITableView *)tableView cellForRowAtIndexPath:(NSIndexPath *)indexPath {

    static NSString *ID =@"cell";
    YGStatusCell *cell = [tableView dequeueReusableCellWithIdentifier:ID];

    // Configure the cell...
    if (cell ==nil) {
        cell = [[YGStatusCell alloc]initWithStyle:UITableViewCellStyleSubtitle reuseIdentifier:ID];
    }
    YGStatusFrame *statusF = self.statuseFrames[indexPath.row];
    //给cell传递模型
    cell.statusFrame = statusF;
    return cell;
}
6.在返回cell高度的代理中,我们也可以使用YGStatusFrame来设置了,代码如下:
//返回cell高度
- (CGFloat)tableView:(UITableView *)tableView heightForRowAtIndexPath:(NSIndexPath *)indexPath
{
    // 获取status模型
    YGStatusFrame *statusF = self.statuseFrames[indexPath.row];

    return statusF.cellHeight;
}
这里想必大家就能了解整个视图模型的工作原理了吧,我们在获取微博模型后,不是立马赋值给cell来使用,而是把微博模型转换为模型视图,然后再赋值给cell。这样就把cell高度的计算全部都提前到了视图模型里了。
这节课就先讲到这里吧,太多了怕亲们不好消化,如果大家能把MVVM使用的原因和使用的步骤都给整明白了,下节课就很简单了。下节课我们就要在YGStatusFrame模型里根据传入的YGStatus模型计算每个子控件的frame,然后再分别完善原创微博,转发微博和微博工具栏的设计。


 1432
1432

 被折叠的 条评论
为什么被折叠?
被折叠的 条评论
为什么被折叠?
 到【灌水乐园】发言


