工具包地址:http://simplemvvmtoolkit.codeplex.com/
1 前言
之前参加项目的时候,用到了MVVM设计模式,现在回顾一下觉得整个工程相当混乱,View的.cs里面写满了逻辑代码,ViewModel里面写的全是业务逻辑,总之并没有达到UI与逻辑分离的效果,现在看来相当不友好。
2 Simple MVVM介绍
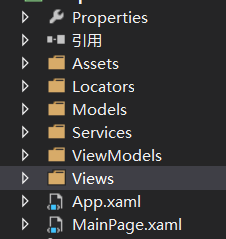
(1)工程结构介绍

除了常规的Model,Views,ViewModel,还增加了Locator,Services
Locator:定位器
Services:里面放的是功能管理类及相应的接口
(2)V-VM之间的连接
还记得在MVVM里面View和ViewModel是怎么联系的吗?在View.cs文件的构造函数里面写上DataContext的来源即可。
在SimpleMVVM里面我们用了Locator来作为V与VM的连接桥梁
在App.xaml文件里面写明资源(当然实际中这些是自动生成的,不用手写)
<Application.Resources>
        <local:ViewModelLocator x:Key="Locator" />
</Application.Resources>
在Mainpage里面
<Page
    x:Class="SimpleMvvmWindowsStore1.MainPage"
    xmlns="http://schemas.microsoft.com/winfx/2006/xaml/presentation"
    xmlns:x="http://schemas.microsoft.com/winfx/2006/xaml"
    xmlns:local="using:SimpleMvvmWindowsStore1"
    xmlns:d="http://schemas.microsoft.com/expression/blend/2008"
    xmlns:mc="http://schemas.openxmlformats.org/markup-compatibility/2006"
    xmlns:views="using:SimpleMvvmWindowsStore1.Views"
    mc:Ignorable="d"
    DataContext="{Binding Source={StaticResource Locator}, Path=MainPageViewModel}" />
为该View指定binding的内容
在ViewModelLocator.cs文件中
public class ViewModelLocator
    {
        // Create MainPageViewModel on demand
        public MainPageViewModel MainPageViewModel
        {
            get { return new MainPageViewModel(); }
        }

        // Create CustomerViewModel on demand
        public CustomerViewModel CustomerViewModel
        {
            get
            {
                ICustomerServiceAgent serviceAgent = new MockCustomerServiceAgent();
                return new CustomerViewModel(serviceAgent);
            }
        }

    }
就这样,我们的View通过Locator知道了去找哪一个Viewmodel
(3)VM-M之间呢
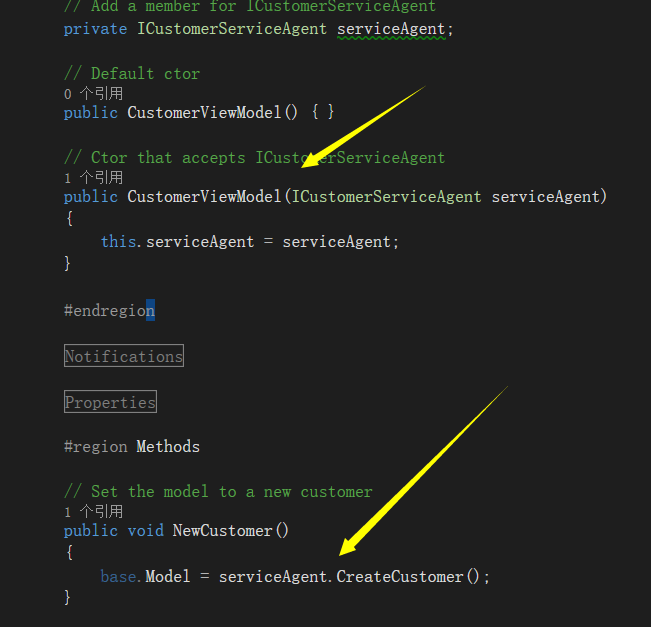
抛弃掉在VM里面实例化Model这种方式,现在我们用接口来管理,在VM里面我们不写业务功能,将功能分配给接口去管理,我们只需在VM里面去调用接口即可。还是那示例代码作为例子:
定义一个Model类
publicclassCustomer : ModelBase<Customer>
    {
        privateint customerId;
        publicint CustomerId
        {
            get { return customerId; }
            set
            {
                customerId =value;
                NotifyPropertyChanged(m => m.CustomerId);
            }
        }

        privatestring customerName;
        publicstring CustomerName
        {
            get { return customerName; }
            set
            {
                customerName =value;
                NotifyPropertyChanged(m => m.CustomerName);
            }
        }

        privatestring city;
        publicstring City
        {
            get { return city; }
            set
            {
                city =value;
                NotifyPropertyChanged(m => m.City);
            }
        }
}
声明一个名为ICustomerServiceAgent接口,定义一个返回类型为Customer的抽象方法
public interface ICustomerServiceAgent
    {
        Customer CreateCustomer();
    }
定义一个名为MockCustomerServiceAgent功能类,实现该接口
public class MockCustomerServiceAgent : ICustomerServiceAgent
    {
        // Create a fake customer
        public Customer CreateCustomer()
        {
            return new Customer
            {
                CustomerId = 1,
                CustomerName = "John Doe",
                City = "Dallas"
            };
        }
}
public CustomerViewModel CustomerViewModel
        {
            get
            {
                ICustomerServiceAgent serviceAgent = new MockCustomerServiceAgent();
                return new CustomerViewModel(serviceAgent);
            }
        }
在VM里面我们可以利用它了,

这样呢,所有业务功能修改我们都可以到功能接口里面去修改,方便管理.
至此,整个理解结束,可以自己搞个Demo玩一玩,有什么理解不当之处还望指正,Thanks~~~~


 5114
5114

 被折叠的 条评论
为什么被折叠?


