


背景
做了一个校园招聘类小程序,使用 uniapp + vue3 + uview-plus + pinia 构建,这个小程序要实现多角色登录,根据权限动态切换 tab 栏文字、图标。
使用pages.json中配置tabBar无法根据角色动态配置 tabBar,因此自定义tabBar,根据下面的截图说明的几种自定义方案,第一种使用custom-tab-bar组件,这个只有 H5 支持,使用 view 自己绘制 tabBar 也可以,我采用微信小程序自定义tabBar 这个方式。
目标
实现一个自定义 tabBar,能够根据登录角色显示不同的导航栏
参考文档
参考 uniapp 关于 自定义 tabBar 的说明,

以及微信小程序自定义tabbar的文档

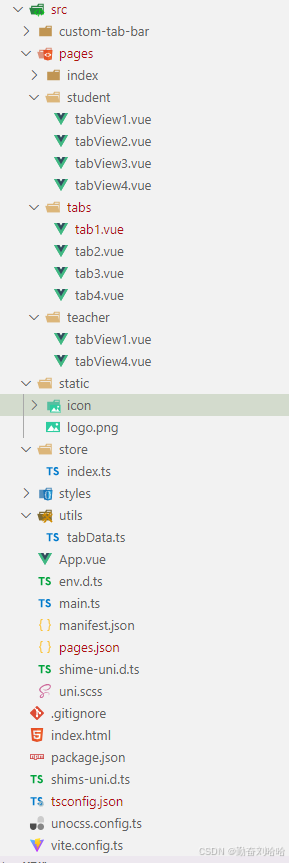
项目结构
效果图


实现过程
- 添加微信小程序
custom-tab-bar组件 - 配置
pages.json - 引入
pinia,创建store目录 - 创建
tabData.ts文件,放置 tabBar 数据 - 创建
tabs目录,标签栏对应的页面 - 创建标签页对应的组件
- 在
App.vue中初始化
添加微信小程序custom-tab-bar组件
根据文档描述需要在根目录(cli 项目在 src 目录)下创建custom-tab-bar目录,里面是小程序wxml,wxss文件,不是vue文件。
我将custom-tab-bar组件的代码放在下面了,或者可以去微信小程序文档中下载示例代码
<!-- src/custom-tab-bar/index.wxml -->
<cover-view class="tab-bar">
  <!-- <cover-view class="tab-bar-border"></cover-view> -->
  <cover-view wx:for="{{tabBar.list}}" wx:key="index" class="tab-bar-item" data-path="{{item.pagePath}}" data-index="{{index}}" bindtap="switchTab">
    <cover-image src="{{selected === index ? item.selectedIconPath : item.iconPath}}"></cover-image>
    <cover-view style="color: {{selected === index ? selectedColor : color}}">{{item.text}}</cover-view>
  </cover-view>
</cover-view>
/* src/custom-tab-bar/index.js */
Component({
  data: {
    selected: 0,
    color: '#333333',
    selectedColor: '#1874F5',
  },
  methods: {
    switchTab(e) {
      const data = e.currentTarget.dataset
      const url = '/' + data.path
      wx.switchTab({url})
      this.setData({
        selected: data.index
      })
    }
  }
})
/* src/custom-tab-bar/index.wxss */
.tab-bar {
  position: fixed;
  left: 0;
  right: 0;
  bottom: 0;
  display: flex;
  padding-bottom: env(safe-area-inset-bottom);
  height: 96rpx;
  background: white;
  box-shadow: 0 -4px 16px 0 #00000014;
  z-index: 10000;
}

.tab-bar-border {
  background-color: rgba(0, 0, 0, 0.33);
  position: absolute;
  left: 0;
  top: 0;
  width: 100%;
  height: 2rpx;
  transform: scaleY(0.5);
}

.tab-bar-item {
  flex: 1;
  text-align: center;
  display: flex;
  justify-content: center;
  align-items: center;
  flex-direction: column;
}

.tab-bar-item cover-image {
  width: 48rpx;
  height: 48rpx;
}

.tab-bar-item cover-view {
  font-size: 20rpx;
}
// src/custom-tab-bar/index.json
{
  "component": true,
  "usingComponents": {}
}
配置pages.json
pages设置中需要引入tab对应的页面,否则在小程序中会报错
tabbar设置中添加 custom: true,list列表中的配置保留,后面在页面初始化时会被自定义 tabBar 数据覆盖
{
  "pages": [ //pages数组中第一项表示应用启动页,参考:https://uniapp.dcloud.io/collocation/pages
    {
      "path": "pages/tabs/tab1",
      "style": {
        "navigationStyle": "custom"
      }
    },
    {
      "path": "pages/tabs/tab2",
      "style": {
        "navigationStyle": "custom"
      }
    },
    {
      "path": "pages/tabs/tab3",
      "style": {
        "navigationStyle": "custom"
      }
    },
    {
      "path": "pages/tabs/tab4",
      "style": {
        "navigationStyle": "custom"
      }
    },
    {
      "path": "pages/index/index",
      "style": {
        "navigationBarTitleText": "uni-app"
      }
    }
  ],
  "tabBar": {
    "custom": true,
    "color": "#5F5F5F",
    "selectedColor": "#07c160",
    "borderStyle": "black",
    "backgroundColor": "#F7F7F7",
    "list": [
      {
        "pagePath": "pages/tabs/tab1",
        "text": "按钮1",
        "iconPath": "static/icon/icon-tab1.png",
        "selectedIconPath": "static/icon/icon-tab1-active.png"
      },
      {
        "pagePath": "pages/tabs/tab2",
        "text": "按钮2",
        "iconPath": "static/icon/icon-tab2.png",
        "selectedIconPath": "static/icon/icon-tab2-active.png"
      },
      {
        "pagePath": "pages/tabs/tab3",
        "text": "按钮3",
        "iconPath": "static/icon/icon-tab3.png",
        "selectedIconPath": "static/icon/icon-tab3-active.png"
      },
      {
        "pagePath": "pages/tabs/tab4",
        "text": "按钮4",
        "iconPath": "static/icon/icon-tab4.png",
        "selectedIconPath": "static/icon/icon-tab4-active.png"
      }
    ]
  }
}
引入pinia,创建store目录
在状态库中增加 roleId 参数,根据 roleId 参数判断角色权限
// src/store/index.ts
import {defineStore} from 'pinia'

const appStore = defineStore('app', {
  state: () => {
    return {
      roleId: '',
    }
  },
  actions: {
	setRoleId(id: string) {
      this.roleId = id
    },
  }
 })
在main.ts中引入pinia
import { createSSRApp } from "vue";
import App from "./App.vue";

import uviewPlus from "uview-plus";
import * as Pinia from "pinia";

import "uno.css";

export function createApp() {
  const app = createSSRApp(App);

  app.use(Pinia.createPinia())
  app.use(uviewPlus)

  return {
    app,
    Pinia
  };
}
创建tabData.ts文件
import useAppStore from '@/store/index'

// tabBar的data
export const tabData = {
  selected: 0,
  //底部按钮高亮下标
  tabBar: {
    custom: true,
    color: '#5F5F5F',
    selectedColor: '#07c160',
    backgroundColor: '#F7F7F7',
    list: [] as any
  }
};

// roleId == '01' 显示的导航栏
const list1 = [
  {
    pagePath: 'pages/tabs/tab1',
    text: '首页',
    iconPath: '/static/icon/icon-tab1.png',
    selectedIconPath: '/static/icon/icon-tab1-active.png'
  },
  {
    pagePath: 'pages/tabs/tab2',
    text: '标签2',
    iconPath: '/static/icon/icon-tab2.png',
    selectedIconPath: '/static/icon/icon-tab2-active.png'
  },
  {
    pagePath: 'pages/tabs/tab3',
    text: '标签3',
    iconPath: '/static/icon/icon-tab3.png',
    selectedIconPath: '/static/icon/icon-tab3-active.png'
  },
  {
    pagePath: 'pages/tabs/tab4',
    text: '我的',
    iconPath: '/static/icon/icon-tab4.png',
    selectedIconPath: '/static/icon/icon-tab4-active.png'
  }
];

// roleId == '02' 显示的导航栏
const list2 = [
  {
    pagePath: 'pages/tabs/tab1',
    text: '推荐',
    iconPath: '/static/icon/icon-tab1.png',
    selectedIconPath: '/static/icon/icon-tab1-active.png'
  },
  {
    pagePath: 'pages/tabs/tab4',
    text: '我的',
    iconPath: '/static/icon/icon-tab4.png',
    selectedIconPath: '/static/icon/icon-tab4-active.png'
  }
];

// 更新菜单
export const updateRole = (that: any, type: string) => {
  //这里设置权限
  if (type === '01') {
    tabData.tabBar.list = list1;
  } else {
    tabData.tabBar.list = list2;
  }
  tabData.selected = 0;
  useAppStore().setRoleId(type)
  updateTab(that);
};

// 更新底部高亮
export const updateIndex = (that: any, index: number) => {
  tabData.selected = index;
  updateTab(that);
};

// 更新Tab状态
export const updateTab = (that: any) => {
  if ((typeof that.getTabBar === 'function') && that.getTabBar()) {
    that.getTabBar().setData(tabData);
  }
};
创建tabs目录,标签栏对应的页面
以tab4为例,其他的 tab 页类似,根据roleId渲染符合条件的组件
<!-- src/pages/tabs/tab4.vue -->
<template>
  <student-tab v-if="store.roleId === '01'" />
  <teacher-tab v-if="store.roleId === '02'" />
</template>

<script lang="ts" setup>
import { onShow } from '@dcloudio/uni-app'
import appStore from '@/store/index'
import { updateIndex } from '@/utils/tabData'

import TeacherTab from '../teacher/tabView4.vue'
import StudentTab from '../student/tabView4.vue'

const store = appStore();

onShow(() => {
  // 获取页面对象
  const page = getCurrentPages()[0]

  // 更新tabBar选中状态
  updateIndex(page, store.roleId === '02' ? 1 : 3);
})
</script>

<style lang="scss" scoped></style>
创建标签页对应的组件
以下只是示例,增加了一个切换角色的按钮
<!-- src/pages/student/tabView1.vue -->
<template>
  <!-- 状态栏占位 -->
  <view class="status-bar"></view>

  <view class="m-20">tabView1</view>

  <view class="m-20">
    <up-button type="primary" text="切换角色" @click="changeRole"></up-button>
  </view>
</template>

<script lang="ts" setup>
import { updateRole } from "@/utils/tabData";

const changeRole = () => {
  const page = getCurrentPages()[0]
  updateRole(page, "02")
}
</script>

<style lang="scss" scoped></style>
在App.vue中初始化
<!-- src/App.vue -->
<script lang="ts" setup>
import { updateRole } from '@/utils/tabData'
import { onLaunch } from '@dcloudio/uni-app'

onLaunch(() => {
	updateRole({}, '01')
})
</script>
总结
以上是使用微信小程序自定义 tabBar 导航栏的主要实现过程,实现并不复杂,只是之前在开发的时候花了点时间调试,容易漏掉一些配置,导致导航栏不显示或者切换没有效果和高亮的选项不正确。
有更好的实现方式,欢迎大家分享出来看看。
还有一个问题,在微信开发者工具上看,标签栏首次点击时,还是会出现标签栏图片闪烁的情况,有知道的小伙伴欢迎指点一下。


 被折叠的 条评论
为什么被折叠?
被折叠的 条评论
为什么被折叠?
 到【灌水乐园】发言


