


背景
前端技术的不断发展过程中,组件化、模块化已成为主流。
当开发的项目中有一些公共组件可以沉淀的时候,将这些组件抽离出来,开发一个组件库无疑是一个好的选择。
那么怎么去开发一个组件库呢?本文将和你一起从零开发一个 React 组件库。
- 本文项目源码:github.com/jiaozitang/…
- 本文组件库 npm 包地址:www.npmjs.com/package/rea…
一、搭建项目
组件库的第一步是搭建项目,选择合适的技术,并制定代码规范。
1. 技术选型
1.1 前端框架
前端框架的选择不用多说,大家都是选择日常开发中使用到的框架,本文使用的是 React。
1.2 组件库工具
组件库工具,市面上比较流行的 2 个组件库工具分别的 dumi 和 Storybook。
dumi,是一款为组件开发场景而生的文档工具,与 father 一起为开发者提供一站式的组件开发体验,father 负责构建,而 dumi 负责组件开发及组件文档生成。
Storybook 是一个用于单独构建 UI 组件和页面的前端工具。成千上万的团队将它用于 UI 开发、测试和文档。它是开源和免费的。
dumi 和 Storybook 都是专用于组件开发场景的工具,由于 Storybook 更加支持测试难以到达的状态和边缘案例,因此最终选择 Storybook 来开发组件库。
2. 快速开始
2.1 creat-react-app
使用 creat-react-app 创建一个支持 TypeScript 的 React 项目。
-
npx
create
-react
-app my
-react
-component
--template typescript
-
复制代码
2.2 Storybook
Storybook 教程:storybook.js.org/。
为 React 项目添加 Storybook 能力。
-
cd ./my-react-component
-
npx storybook init
-
复制代码
此时通过 yarn storybook,将在本地启动 Storybook 并输出地址。根据您的系统配置,它会自动在新的浏览器选项卡中打开地址,然后您会看到一个欢迎屏幕。

3. 代码规范
3.1 Prettier
Prettier 是一个代码格式化工具,可以让团队的代码风格保持一致。可支持的源码类型包括:JavaScript、JSX、Angular、Vue、Flow、TypeScript、CSS、HTML、JSON、YAML 等等。
安装:
-
yarn
add prettier
-D
-
复制代码
项目根目录下添加配置文件 .prettierrc:
-
{
-
"arrowParens":
"always",
-
"bracketSameLine":
false,
-
"bracketSpacing":
true,
-
"embeddedLanguageFormatting":
"auto",
-
"htmlWhitespaceSensitivity":
"css",
-
"insertPragma":
false,
-
"jsxSingleQuote":
false,
-
"printWidth":
80,
-
"proseWrap":
"preserve",
-
"quoteProps":
"as-needed",
-
"requirePragma":
false,
-
"semi":
true,
-
"singleQuote":
false,
-
"tabWidth":
2,
-
"trailingComma":
"es5",
-
"useTabs":
false,
-
"vueIndentScriptAndStyle":
false
-
}
-
复制代码

修改 packages.json:
-
"scripts": {
-
"prettier":
"prettier src --write",
-
}
-
复制代码
运行 yarn prettier 将会格式化 src 目录下所有文件的代码样式。
3.2 ESlint
ESLint 用于检测 JS 代码,发现代码质量问题并修复问题,还可以自己根据项目需要进行规则的自定义配置以及检查范围等等。
安装:
-
yarn add eslint eslint-plugin-react eslint-plugin-simple-
import-sort eslint-plugin-unused-imports
@typescript-eslint/eslint-plugin
@typescript-eslint/parser -D
-
复制代码
项目根目录下添加配置文件 .eslintrc.js:
-
module.exports = {
-
env: {
-
browser: true,
-
es2021: true,
-
},
-
extends: [
-
"eslint:recommended",
-
"plugin:react/recommended",
-
"plugin:@typescript-eslint/recommended",
-
],
-
overrides: [],
-
parser:
"@typescript-eslint/parser",
-
parserOptions: {
-
ecmaVersion:
"latest",
-
sourceType:
"module",
-
},
-
plugins: [
-
"react",
-
"@typescript-eslint",
-
"unused-imports",
-
"simple-import-sort",
-
],
-
rules: {
-
"no-unused-vars":
"off",
//
or
"@typescript-eslint/no-unused-vars":
"off",
-
"unused-imports/no-unused-imports":
"warn",
-
"unused-imports/no-unused-vars": [
-
"warn",
-
{
-
vars:
"all",
-
varsIgnorePattern:
"^_",
-
args:
"after-used",
-
argsIgnorePattern:
"^_",
-
},
-
],
-
"simple-import-sort/imports":
"warn",
-
"simple-import-sort/exports":
"warn",
-
"react/react-in-jsx-scope":
"off",
-
"react/prop-types":
"off",
-
},
-
};
-
复制代码
修改 packages.json:
-
"scripts": {
-
"eslint":
"eslint src --fix",
-
}
-
复制代码
运行 yarn eslint 将会检测 src 下所有 js、ts、jsx、tsx 的语法及样式问题并进行修复。
3.3 lint-staged
lint-staged 相当于一个文件过滤器,每次提交时只检查本次提交的暂存区的文件,它不能格式化代码和校验文件,需要自己配置一下,如:.eslintrc、.stylelintrc 等,然后在 package.json 中引入。
安装:
-
yarn
add lint
-staged
-D
-
复制代码
项目根目录下添加配置文件 .lintstagedrc:
-
{
-
"
src
/**/*
.tsx": [
"prettier --write",
"eslint --fix"],
-
"src/**/*.scss": [
"prettier --write"],
-
"src/**/*.mdx": [
"prettier --write"],
-
"src/**/*.md": [
"prettier --write"]
-
}
-
复制代码
修改 packages.json:
-
"scripts": {
-
"ling-staged":
"ling-staged",
-
}
-
复制代码
运行 yarn lint-staged 将对 git 暂存区所有文件执行 .lintstagedrc 中配置的命令。
3.4 husky
husky 工具可以定义拦截 git 钩子,对提交的文件和信息做校验和自动修复。
安装:
-
yarn
add husky
-D
-
复制代码
修改 packages.json:
-
"scripts": {
-
"prepare":
"husky install",
-
}
-
复制代码
初始化 husky 配置文件:
-
yarn
prepare
-
复制代码
初始化 husky 配置文件后根目录会生成以下目录:
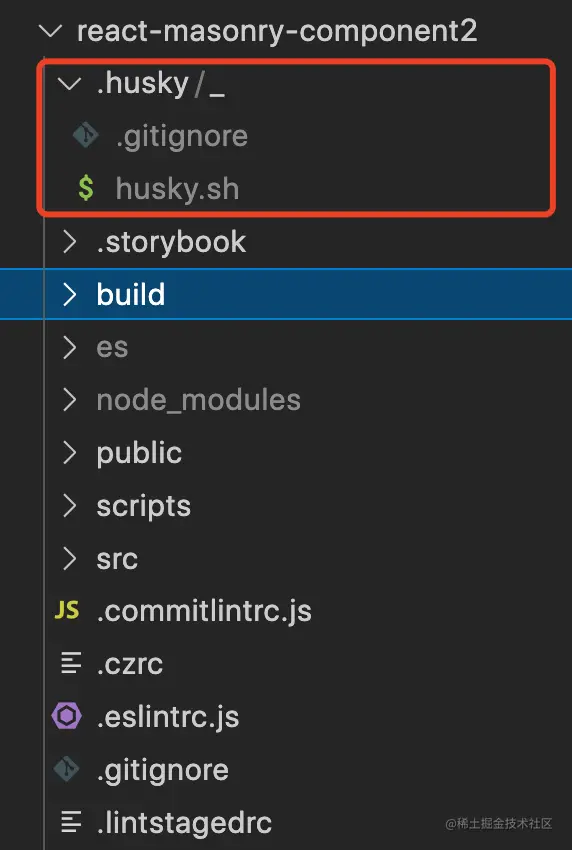
.husky 下新增配置文件 pre-commit:
-
#!/bin/sh
-
.
"$(dirname "$0")/_/husky.sh"
-
-
npx --no-install lint-staged
-
复制代码
在 git commit 之前,将会自动执行上面 pre-commit 脚本配置的命令。
3.5 commitlint
commitlint 是一个 git commit 信息校验工具。
安装:
-
yarn
add commitlint
@commitlint
/config
-conventional
-D
-
复制代码
项目根目录下添加配置文件 .commitlintrc.js:
-
module.
exports = {
-
extends: [
"@commitlint/config-conventional"],
-
};
-
复制代码
.husky 下新增配置文件 commit-msg:
-
#!/bin/sh
-
.
"$(dirname "$0")/_/husky.sh"
-
-
npx --no-install commitlint --edit
$1
-
复制代码
在 git commit-msg 钩子函数触发时,将会自动执行 commit-msg 脚本配置的命令,校验 commit msg 是否符合规范。
4. 新增组件
在 src 目录下新增组件:

每个组件包含 4 个基础文件:
[component-name].tsx[component-name].scssindex.ts[component-name].stories.mdx
下文将举例瀑布流组件源码:
完整的瀑布流组件代码地址:github.com/jiaozitang/…。
4.1 masonry.tsx
React 组件。
-
import
React
from
"react";
-
-
import {
DEFAULT_COLUMNS_COUNT_POINTS,
MasonryDirection }
from
"./const";
-
import { useColumnCount }
from
"./hooks";
-
import
MasonryAbsolute
from
"./masonry-absolute";
-
import
MasonryColumn
from
"./masonry-column";
-
import
MasonryFlex
from
"./masonry-flex";
-
-
export
interface
MasonryProps
extends
React.
HTMLAttributes<
HTMLElement> {
-
/** 排列方向 */
-
direction?:
"row" |
"column";
-
sortWithHeight?:
boolean;
// 是否需要按高度排序
-
useAbsolute?:
boolean;
// 是否开启绝对定位方法实现瀑布流,该模式默认开始按高度排序
-
columnsCountBreakPoints?: {
-
// 自适应的配置
-
[
props:
number]:
number;
-
};
-
children?:
React.
ReactNode;
-
className?:
string;
-
style?:
Record<
string,
any>;
-
gutter?:
number;
-
}
-
-
const
Masonry:
React.
FC<
MasonryProps> =
(props) => {
-
const {
-
direction =
MasonryDirection.
row,
-
columnsCountBreakPoints =
DEFAULT_COLUMNS_COUNT_POINTS,
-
useAbsolute,
-
} = props;
-
const columnCount =
useColumnCount(columnsCountBreakPoints);
-
-
if (useAbsolute) {
-
return
<MasonryAbsolute {...props} columnCount={columnCount} />;
-
}
-
if (direction ===
MasonryDirection.
column) {
-
return
<MasonryColumn {...props} columnCount={columnCount} />;
-
}
-
if (direction ===
MasonryDirection.
row) {
-
return
<MasonryFlex {...props} columnCount={columnCount} />;
-
}
-
return
<div></div>;
-
};
-
-
export
default
Masonry;
-
复制代码
4.2 masonry.scss
组件的样式文件。
4.3 index.ts
组件需要导出的内容。
-
import
Masonry
from
"./masonry";
-
import {
MasonryAbsoluteItem,
MasonryItem }
from
"./masonry-item";
-
-
export {
MasonryAbsoluteItem,
MasonryItem };
-
export
type {
MasonryProps }
from
"./masonry";
-
export
default
Masonry;
-
复制代码
4.4 masonry.stories.mdx
组件案例,Storybook 特定语法。
Storybook 教程:storybook.js.org/。
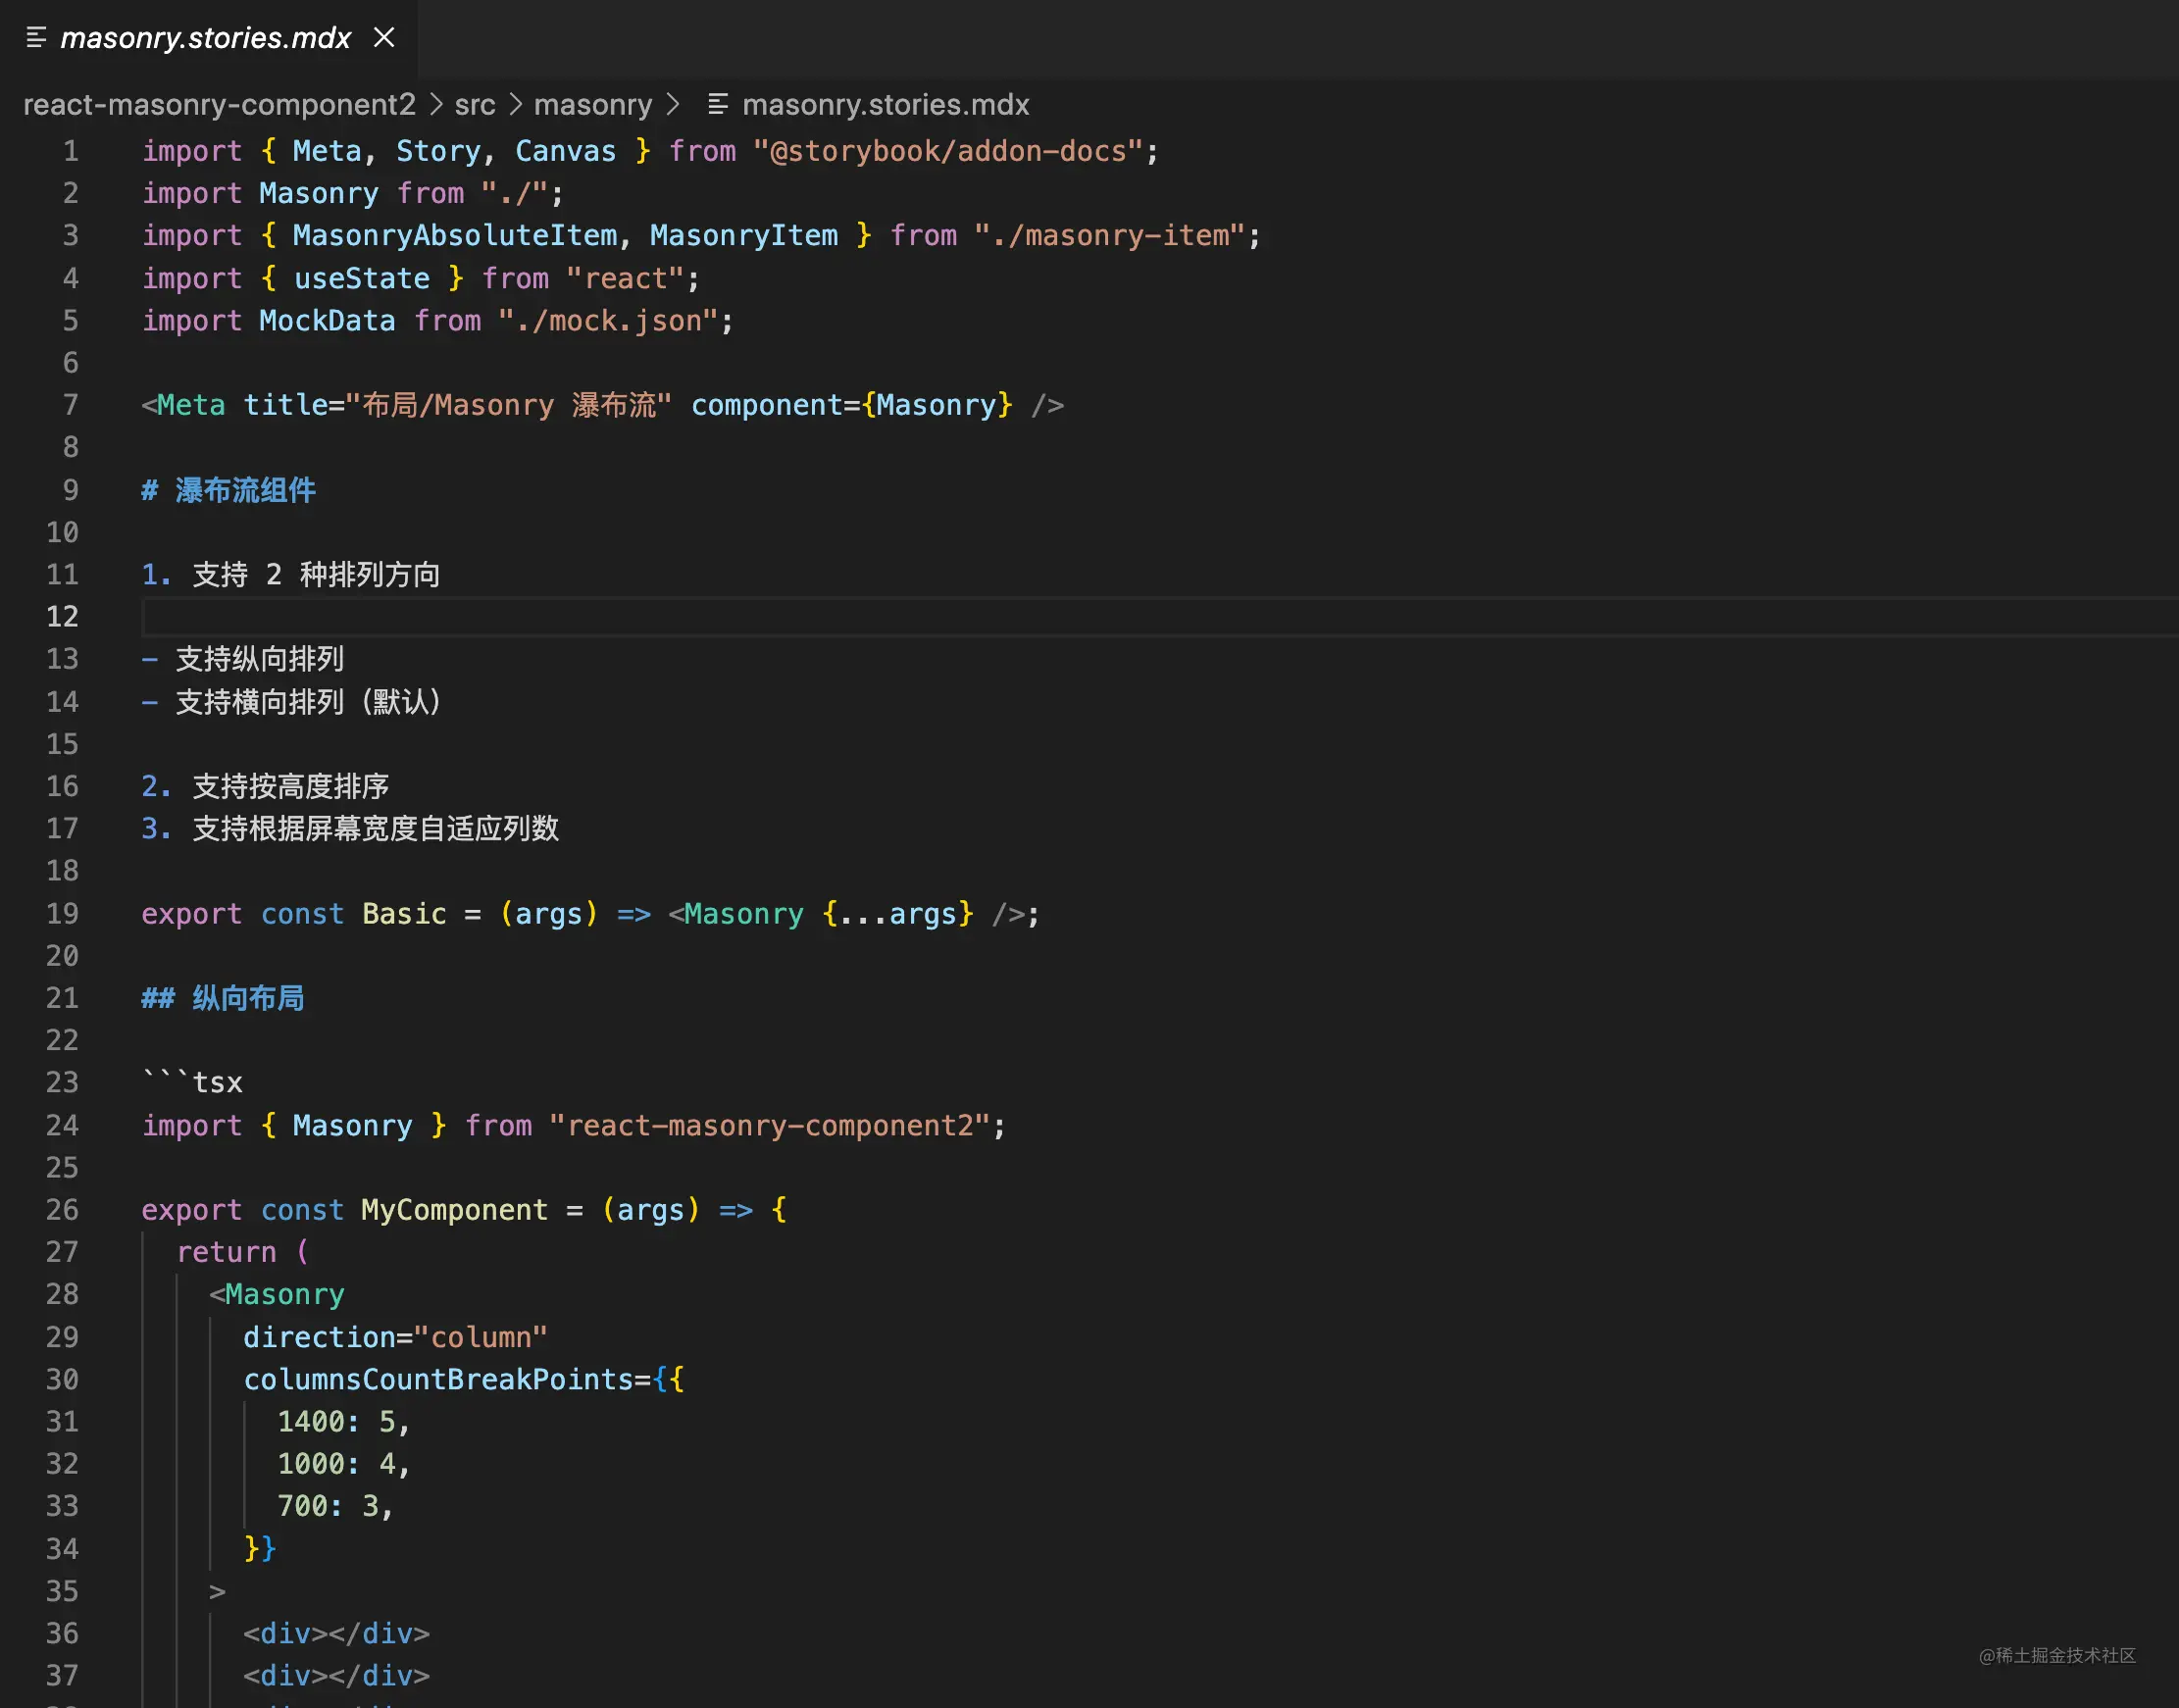
组件案例在 yarn storybook 后可以在线查看效果:


也可以通过 Storybook 官方提供的工具发布成一个在线的文档地址,详细的发布教程在第三章节将会介绍。
二、打包组件库
1. 技术选型
比较热门的打包工具有 Webpack、rollup。
Webpack 对于代码分割和静态资源导入有着“先天优势”,并且支持热模块替换(HMR),而 Rollup 并不支持,所以当项目需要用到以上,则可以考虑选择 Webpack。但是,Rollup 对于代码的 Tree-shaking 和 ES6 模块有着算法优势上的支持,若你项目只需要打包出一个简单的 bundle 包,并是基于 ES6 模块开发的,可以考虑使用 Rollup。
因此组件库打包工具选择 rollup。
2. 快速开始
2.1 安装
-
yarn
add
rollup
@rollup
/plugin
-strip
@rollup
/plugin
-typescript
rollup
-plugin
-postcss postcss
-url
-D
-
复制代码
2.2 打包配置
项目根目录下新增配置文件 rollup.config.js:
-
import strip
from
"@rollup/plugin-strip";
-
import typescript
from
"@rollup/plugin-typescript";
-
import path
from
"path";
-
import postcss
from
"rollup-plugin-postcss";
-
-
import postcssUrl
from
"postcss-url";
-
import pkg
from
"./package.json";
-
-
function getOutputConfig({ dir = "lib/index.js", format = "cjs" }) {
-
return {
-
dir,
-
format,
-
exports:
"named",
-
name: pkg.name,
-
preserveModules:
true,
-
preserveModulesRoot:
"src",
-
};
-
}
-
-
export
default [
-
{
-
input:
"./src/index.ts",
-
external: [
"ms"],
-
output: [
getOutputConfig({
dir: path.
dirname(pkg.module),
format:
"es" })],
-
plugins: [
-
typescript({
-
outDir:
"es",
-
declaration:
true,
-
declarationDir:
"es",
-
}),
-
postcss({
-
modules:
false,
-
use: [
-
"sass",
-
"stylus",
-
[
-
"less",
-
{
-
javascriptEnabled:
true,
-
},
-
],
-
],
-
plugins: [
-
postcssUrl({
-
url:
"inline",
-
}),
-
],
-
}),
-
strip(),
-
],
-
},
-
];
-
复制代码
2.3 入口文件
新增文件 src/index.ts:
-
export {
-
default
as
Masonry,
-
MasonryAbsoluteItem,
-
MasonryItem,
-
}
from
"./masonry";
-
export
type {
MasonryProps }
from
"./masonry";
-
复制代码
2.4 打包命令
修改 packages.json:
-
"scripts": {
-
"build":
"rimraf es && rollup -c",
-
}
-
复制代码
打包产物如图所示:

三、发布组件库文档网站
Storybook 文档发布教程地址:storybook.js.org/docs/react/…。
- 安装
chromatic:
-
yarn
add
--dev chromatic
-
复制代码
- 发布
Storybook:
注意:确保your-project-token用您自己的项目令牌替换。
-
npx chromatic --project-token=
<your-project-token>
-
复制代码
然后就得到了一个线上的组件库文档网站:632339a3ed0b247d36b0fa3c-njrsmzdcdj.chromatic.com/?path=/stor…
四、发布项目
1. 注册 npm
如已注册可跳过该步骤。
注册帮助文档:docs.npmjs.com/creating-a-…
2. 登录 npm
进入项目根目录,并登录:
-
npm login
-
复制代码
如果已经登录过,可以查看登录过的账号是否是期望的账号:
-
npm
whoami
-
复制代码
3. 开源证书
项目根目录下新增 LICENCE.md:
注意:替换[npm username]为你刚刚登录的 username。
-
The MIT License (MIT)
-
-
Copyright (c) [npm username]
-
-
Permission
is hereby granted,
free
of charge,
to
any person obtaining a
copy
-
of this software
and associated documentation files (the "Software"),
to deal
-
in the Software
without restriction, including
without limitation the rights
-
to use,
copy, modify,
merge, publish, distribute, sublicense,
and
/
or sell
-
copies
of the Software,
and
to permit persons
to whom the Software
is
-
furnished
to do so, subject
to the following conditions:
-
-
The above copyright notice
and this permission notice shall be included
in
-
all copies
or substantial portions
of the Software.
-
-
THE SOFTWARE
IS PROVIDED "AS IS",
WITHOUT WARRANTY
OF
ANY KIND, EXPRESS
OR
-
IMPLIED, INCLUDING BUT
NOT LIMITED
TO THE WARRANTIES
OF MERCHANTABILITY,
-
FITNESS
FOR A PARTICULAR PURPOSE
AND NONINFRINGEMENT.
IN
NO EVENT SHALL THE
-
AUTHORS
OR COPYRIGHT HOLDERS BE LIABLE
FOR
ANY CLAIM, DAMAGES
OR OTHER
-
LIABILITY, WHETHER
IN AN ACTION
OF CONTRACT, TORT
OR OTHERWISE, ARISING
FROM,
-
OUT
OF
OR
IN CONNECTION
WITH THE SOFTWARE
OR THE USE
OR OTHER DEALINGS
IN
-
THE SOFTWARE.
-
复制代码
4. 更新 npm 包数据
更新 packages.json:
注意:
- 确认 name 未被注册过,如果已被注册过将无法发布成功;
- module、types 需要和 rollup 配置的输出路径一致。
-
"name":
"xx",
-
"version":
"1.0.3",
-
"author": {
-
"name":
"xx",
-
"email":
"xx"
-
},
-
"description":
"xx",
-
"homepage":
"https://github.com/xx",
-
"keywords": [
-
"react",
-
"masonry",
-
"css",
-
"flexbox",
-
"responsive",
-
"absolute",
-
"column"
-
],
-
"license":
"MIT",
-
"module":
"es/index.js",
-
"types":
"es/index.d.ts",
-
"files": [
-
"es"
-
],
-
复制代码
5. 发布
更新 packages.json:
-
"version":
"1.0.8",
-
复制代码
发布:
-
npm publish
-
复制代码
五、调试项目
项目发布成功后,如果有问题,可以通过 yarn link 进行调试,确认没问题后再发布版本。
link 的本质就是软链接,这样可以让我们快速使用本地正在开发的其它包。
假设组件库仓库为项目 A,使用组件库的仓库为项目 B。
在项目 A 下运行 yarn link,在项目 B 下运行 yarn link A,就可以实时调试项目 A 了。
小结
本文是我个人在实际开发中沉淀 React 组件库的一次小结,不是一个完美的组件库,但是也足够日常开发使用。感兴趣的朋友可以跟着一起敲一遍,发布一个属于自己的组件库。
- 本文项目源码:github.com/jiaozitang/…
- 本文组件库 npm 包地址:www.npmjs.com/package/rea…


 2094
2094


 被折叠的 条评论
为什么被折叠?
被折叠的 条评论
为什么被折叠?
 到【灌水乐园】发言


