


首先附上Swiper官方中文网站:https://www.swiper.com.cn/
在Angular中使用Swiper滑动插件
1、安装Swiper
npm install swiper --save
2、在angular.json文件添加swiper.min.js和swiper.min.css
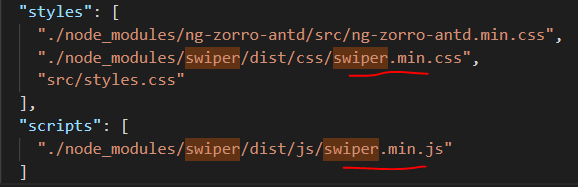
"./node_modules/swiper/dist/css/swiper.min.css",
...
"./node_modules/swiper/dist/js/swiper.min.js"
3、安装模组定义档
npm install @types/swiper --save
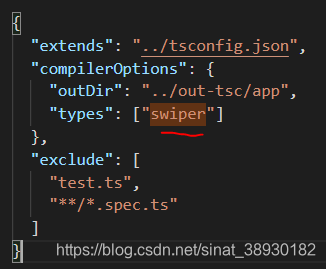
4、配置tsconfig文件
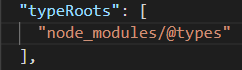
(原本已有,无需添加)
在tsconfig.app.json中添加:
按照上面的配置完成后,angular里就可以使用swiper啦~
下面是一个小Demo:
test.component.ts
import { Component, OnInit, AfterViewInit } from '@angular/core';
import Swiper from 'swiper';

@Component({
  selector: 'app-test',
  templateUrl: './test.component.html',
  styleUrls: ['./test.component.less'],
})
export class TestComponent implements OnInit, AfterViewInit {
  testSwiper: Swiper;
  slides = [
    'https://via.placeholder.com/300x200/FF5733/ffffff',
    'https://via.placeholder.com/300x200/C70039/ffffff',
    'https://via.placeholder.com/300x200/900C3F/ffffff'
  ];

  constructor() { }

  ngOnInit() {
  }

  ngAfterViewInit() {
    this.testSwiper = new Swiper('.swiper-container', {
      direction: 'horizontal', // 水平切换选项
      loop: true, // 循环模式选项

      // 如果需要分页器
      pagination: {
        el: '.swiper-pagination',
      },

      // 如果需要前进后退按钮
      navigation: {
        nextEl: '.swiper-button-next',
        prevEl: '.swiper-button-prev',
      },

      // 如果需要滚动条
      scrollbar: {
        el: '.swiper-scrollbar',
      },
    });
  }

}
test.component.html
<div class="swiper-container">
  <div class="swiper-wrapper">
    <div class="swiper-slide" *ngFor="let data of slides">
      <img [src]="data" alt="" width="100%">
    </div>
  </div>
  <!-- 如果需要分页器 -->
  <div class="swiper-pagination"></div>

  <!-- 如果需要导航按钮 -->
  <div class="swiper-button-prev"></div>
  <div class="swiper-button-next"></div>
</div>
导航等组件可以放在container之外
test.component.less (你可能想要给Swiper定义一个大小)
.swiper-container {
    width: 600px;
    height: 300px;
}
效果如图:

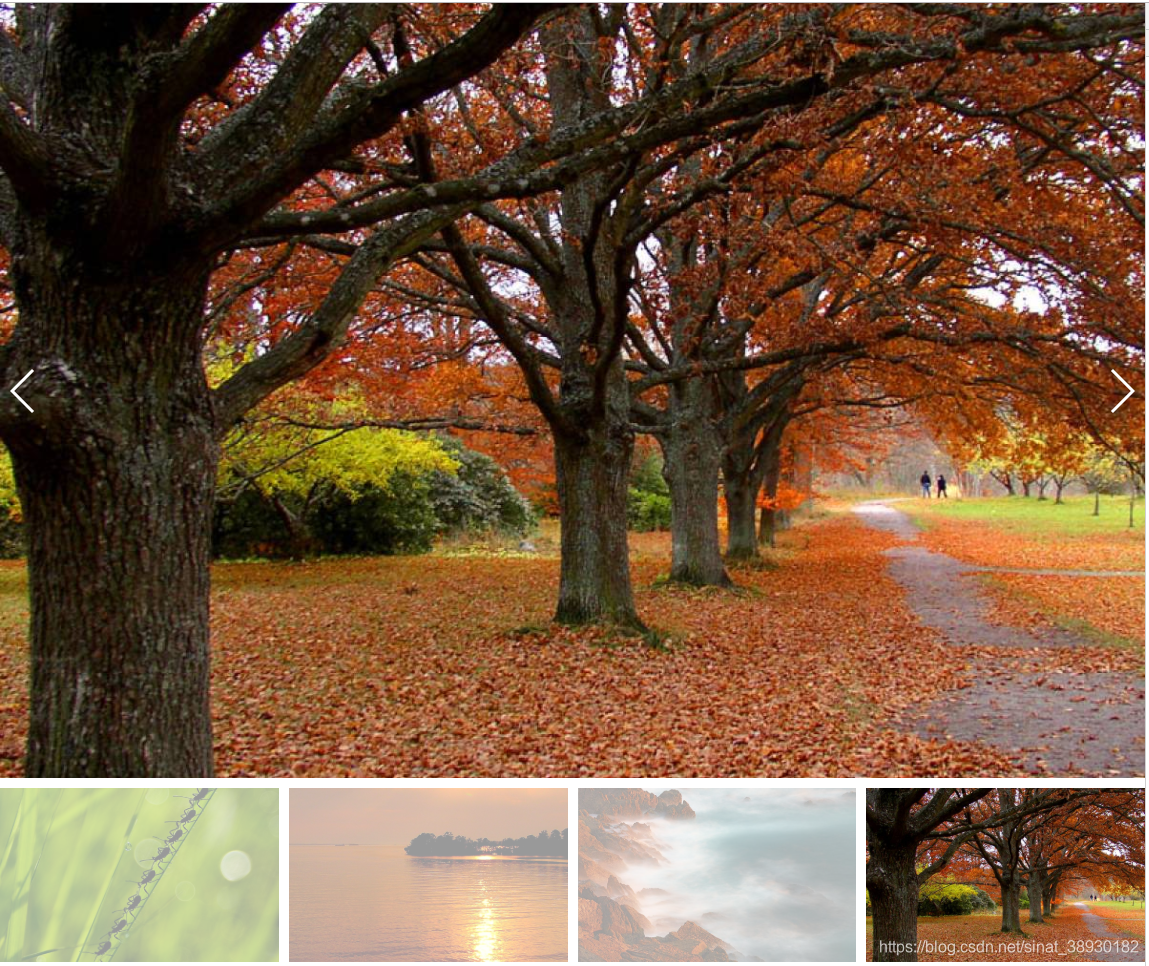
再举一个演示案例——缩略图控制 / Swiper互相控制(300)
test1.component.ts
import { Component, OnInit, AfterViewInit } from '@angular/core';
import Swiper from 'swiper';

@Component({
  selector: 'app-test1',
  templateUrl: './test1.component.html',
  styleUrls: ['./test1.component.less'],
})
export class Test1Component implements OnInit, AfterViewInit {
  galleryThumbs: Swiper;
  galleryTop: Swiper;

  constructor() { }

  ngOnInit() {
  }

  ngAfterViewInit() {
    this.galleryThumbs = new Swiper('.gallery-thumbs', {
      spaceBetween: 10,
      slidesPerView: 4,
      freeMode: true,
      watchSlidesVisibility: true,
      watchSlidesProgress: true,
    });

    this.galleryTop = new Swiper('.gallery-top', {
      spaceBetween: 10,
      navigation: {
        nextEl: '.swiper-button-next',
        prevEl: '.swiper-button-prev',
      },
      thumbs: {
        swiper: this.galleryThumbs
      }
    });
  }

}
test1.component.html
<!-- Swiper -->
<div class="swiper-container gallery-top">
  <div class="swiper-wrapper">
    <div class="swiper-slide" style="background-image:url(http://lorempixel.com/1200/1200/nature/1)"></div>
    <div class="swiper-slide" style="background-image:url(http://lorempixel.com/1200/1200/nature/2)"></div>
    <div class="swiper-slide" style="background-image:url(http://lorempixel.com/1200/1200/nature/3)"></div>
    <div class="swiper-slide" style="background-image:url(http://lorempixel.com/1200/1200/nature/4)"></div>
    <div class="swiper-slide" style="background-image:url(http://lorempixel.com/1200/1200/nature/5)"></div>
    <div class="swiper-slide" style="background-image:url(http://lorempixel.com/1200/1200/nature/6)"></div>
    <div class="swiper-slide" style="background-image:url(http://lorempixel.com/1200/1200/nature/7)"></div>
    <div class="swiper-slide" style="background-image:url(http://lorempixel.com/1200/1200/nature/8)"></div>
    <div class="swiper-slide" style="background-image:url(http://lorempixel.com/1200/1200/nature/9)"></div>
    <div class="swiper-slide" style="background-image:url(http://lorempixel.com/1200/1200/nature/10)"></div>
  </div>
  <!-- Add Arrows -->
  <div class="swiper-button-next swiper-button-white"></div>
  <div class="swiper-button-prev swiper-button-white"></div>
</div>
<div class="swiper-container gallery-thumbs">
  <div class="swiper-wrapper">
    <div class="swiper-slide" style="background-image:url(http://lorempixel.com/1200/1200/nature/1)"></div>
    <div class="swiper-slide" style="background-image:url(http://lorempixel.com/1200/1200/nature/2)"></div>
    <div class="swiper-slide" style="background-image:url(http://lorempixel.com/1200/1200/nature/3)"></div>
    <div class="swiper-slide" style="background-image:url(http://lorempixel.com/1200/1200/nature/4)"></div>
    <div class="swiper-slide" style="background-image:url(http://lorempixel.com/1200/1200/nature/5)"></div>
    <div class="swiper-slide" style="background-image:url(http://lorempixel.com/1200/1200/nature/6)"></div>
    <div class="swiper-slide" style="background-image:url(http://lorempixel.com/1200/1200/nature/7)"></div>
    <div class="swiper-slide" style="background-image:url(http://lorempixel.com/1200/1200/nature/8)"></div>
    <div class="swiper-slide" style="background-image:url(http://lorempixel.com/1200/1200/nature/9)"></div>
    <div class="swiper-slide" style="background-image:url(http://lorempixel.com/1200/1200/nature/10)"></div>
  </div>
</div>
test1.component.less
.swiper-container {
    width: 100%;
    height: 300px;
    margin-left: auto;
    margin-right: auto;
}
.swiper-slide {
    background-size: cover;
    background-position: center;
}
.gallery-top {
height: 80%;
width: 100%;
}
.gallery-thumbs {
height: 20%;
box-sizing: border-box;
padding: 10px 0;
}
.gallery-thumbs .swiper-slide {
width: 25%;
height: 100%;
opacity: 0.4;
}
.gallery-thumbs .swiper-slide-thumb-active {
opacity: 1;
}
效果如图:


 1417
1417


 被折叠的 条评论
为什么被折叠?
被折叠的 条评论
为什么被折叠?
 到【灌水乐园】发言


