


一.Nginx 下载
在http://nginx.org官网上下载安装包。nginx-1.12.0.tar.gz
2.Nginx 安装
1).解压及简单配置
[root@server1 ~]# yum install gcc -y ##安装gcc
[root@server1 ~]# tar zxf nginx-1.10.3.tar.gz ##解压nginx-1.10.3.tar.gz
[root@server1 ~]# ls
nginx-1.12.0 nginx-1.12.0.tar.gz
[root@server1 ~]# cd nginx-1.12.0
[root@server1 nginx-1.12.0]# vim auto/cc/gcc
178 # debug
179 #CFLAGS=”$CFLAGS -g” ##禁止debug调试
[root@server1 nginx-1.12.0]# vim src/core/nginx.h
14 #define NGINX_VER “nginx/” ##禁止出现nginx的版本号
2)软件配置
[root@server1 nginx-1.12.0]# ./configure –prefix=/usr/local/nginx –with-http_ssl_module –with-file-aio –with-threads –with-http_stub_status_module
如果出现以下错误:

[root@server1 nginx-1.12.0]# yum install pcre-devel.x86_64 -y
重新配置:
[root@server1 nginx-1.12.0]# ./configure –prefix=/usr/local/nginx –with-http_ssl_module –with-file-aio –with-threads –with-http_stub_status_module
如果出现以下错误:

[root@server1 nginx-1.12.0]# yum install openssl-devel.x86_64 -y
重新配置:
[root@server1 nginx-1.12.0]# ./configure –prefix=/usr/local/nginx –with-http_ssl_module –with-file-aio –with-threads –with-http_stub_status_module
3.编译、安装
[root@server1 nginx-1.12.0]# make
[root@server1 nginx-1.12.0]# make install
4.将nginx作为系统变量,开启nginx
cd /usr/local/nginx
ls -n /usr/local/nginx/sbin/nginx /usr/local/sbin/ ##作为软连接将nginx的启动命令作为系统命令。
nginx -t ##检测
nginx -s reload ##重新加载
5.配置文件中模块的修改
1.建立nginx用户:
useradd -M -d /usr/local/nginx -s /sbin/nologin -u 800 nginx
修改配置文件
vim /usr/local/nginx/conf/nginx.conf
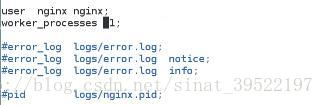
user nginx nginx; #修改nginx的用户
worker_processes 1; #工作进程,一块cpu
nginx -t ##检测
nginx -s reload ##重新加载
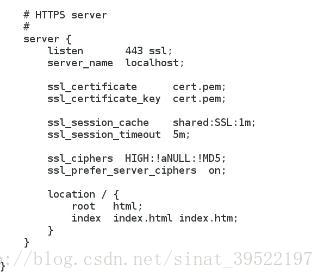
2.nginx访问加密
vim /usr/local/nginx/conf/nginx.conf
[root@server1 conf]# cd /etc/pki/tls/certs/
[root@server1 certs]# make cert.pem #生成自定义签名证书
umask 77 ; \
PEM1=/bin/mktemp/tmp/openssl.XXXXXX ; \
PEM2=/bin/mktemp/tmp/openssl.XXXXXX ; \
/usr/bin/openssl req-utf8 -newkey rsa:2048 -keyout
PEM1−nodes−x509−days365−out
PEM2-set_serial 0 ; \
cat
PEM1>cert.pem; echo“”>>cert.pem; cat
PEM2 >>cert.pem ; \
rm -f
PEM1
PEM2
Generating a 2048 bit RSA private key
…………..+++
…………….+++
writing new private key to ‘/tmp/openssl.9egbT2’
You are about to be asked to enter information that will beincorporated
into your certificate request.
What you are about to enter is what is called a DistinguishedName or a DN.
There are quite a few fields but you can leave some blank
For some fields there will be a default value,
If you enter ‘.’, the field will be left blank.
Country Name (2 letter code) [XX]:CN
State or Province Name (full name) []:Shaanxi
Locality Name (eg, city) [Default City]:xi’an
Organization Name (eg, company) [Default Company Ltd]:westos
Organizational Unit Name (eg, section) []:linux
Common Name (eg, your name or your server’s hostname)[]:server1.example.com
Email Address []:777@westos.org
[root@server1 certs]# cp cert.pem /usr/local/nginx/conf/
nginx -t ##检测
nginx -s reload ##重新加载
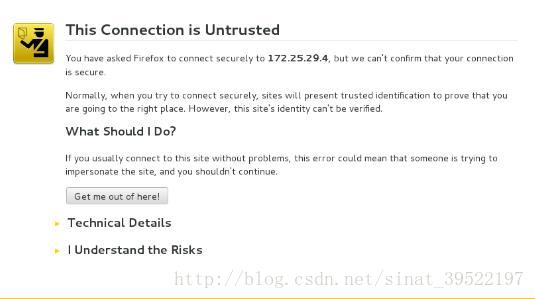
测试 https://172.25.6.1
4.虚拟主机
虚拟主机允许从一个httpd服务器同时为多个网站提供服务
[root@server1 certs]# cd /usr/local/nginx/conf/
[root@server1 conf]# vim nginx.conf
[root@server1 conf]# vim nginx.conf
120 server {
121 listen 80; #监听端口
122 server_name www.wen.com; #域名
123
124 location / {
125 root /web1; #默认发布目录
126 index index.html; #默认发布文件
127 }
128 }
129 server {
130 listen 80;
131 server_name www.mi.com;
132
133 location / {
134 root /web2;
135 index index.html;
136 }
137 }
[root@server1 conf]# mkdir /web1 /web2
[root@server1 conf]# vim /web1/index.html
Welcome to www.wen.com
[root@server1 conf]# vim /web2/index.html
Welcome to www.mi.com
[root@server1 conf]# nginx -t
nginx: the configuration file /usr/local/lnmp/nginx/conf/nginx.confsyntax is ok
nginx: configuration file /usr/local/lnmp/nginx/conf/nginx.conftest is successful
[root@server1 conf]# nginx -s reload
测试
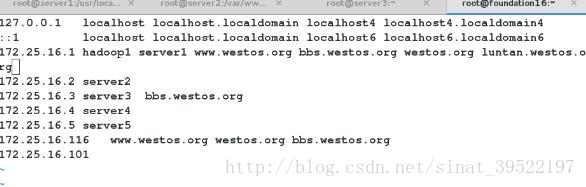
在测试端的主机里加上域名解析
[root@foundation6 ~]# vim /etc/hosts
172.25.6.1 www.wen.com www.mi.com
在浏览器中输入域名


5.域名重定向解析
[root@server1 ~]# cd /usr/local/nginx/conf/
[root@server1 conf]# vim nginx.conf


测试主机里加上域名解析
vim /etc/hosts
测试
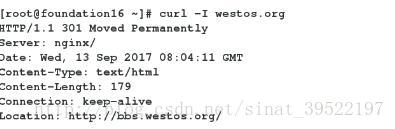
curl -I westos.org
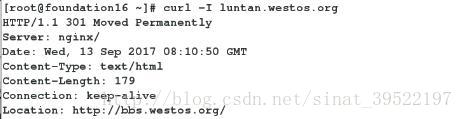
curl -I luntan.westos.org


 53万+
53万+

 被折叠的 条评论
为什么被折叠?
被折叠的 条评论
为什么被折叠?
 到【灌水乐园】发言


