


前言:之前一直都在学习别人的博客,而很少自己写,事实上最近做到一个项目,由于学习安卓时间很短,对于安卓中一些经典的组件以及布局方式不是很熟习,因此借着此篇博客来和大家一起学习和巩固一下Android中的DrawerLayout+Naviagation+Toolbar组件的以及沉浸式状态栏的应用。
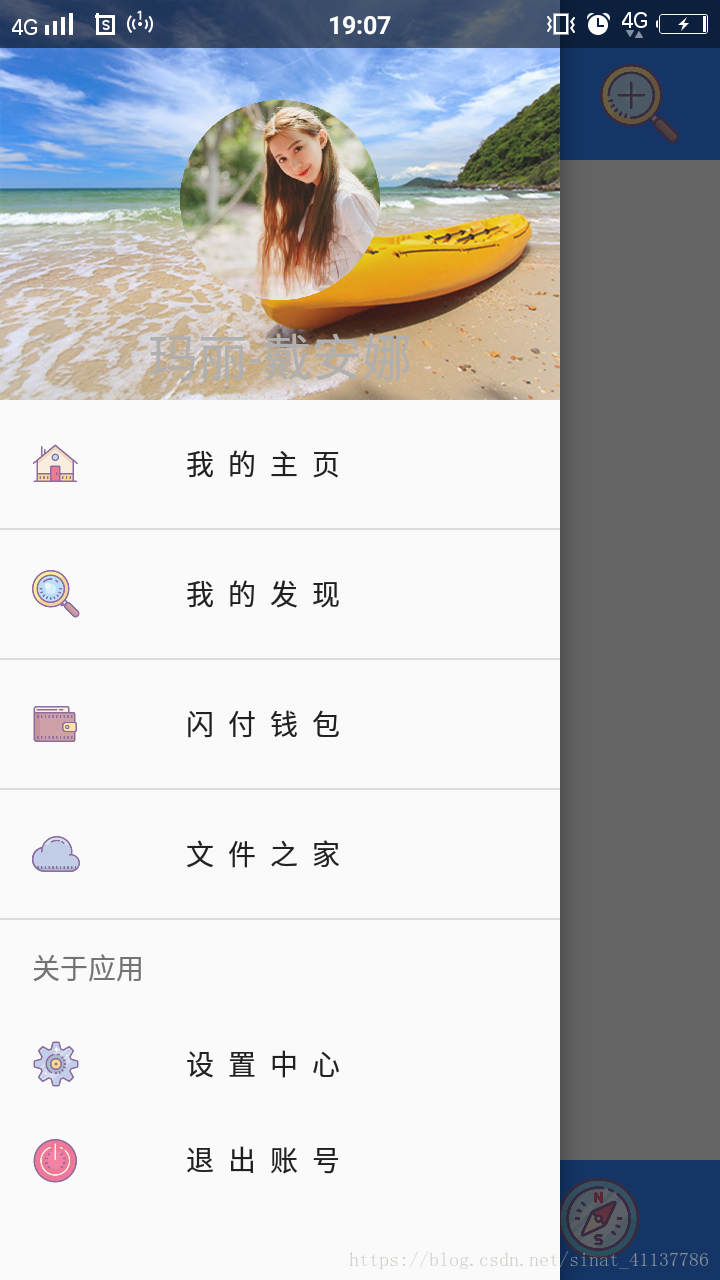
首先各组件整体应用后的效果如下图:

第一步在新建项目,将MainActivity的布局文件的根元素变为DrawerLayout,主布局文件整体代码如下:
注意:对于Navigation组件的应用,须在gradle文件
dependencies
中添加依赖:
compile 'com.android.support:design:26.+'
<?xml version="1.0" encoding="utf-8"?>
<android.support.v4.widget.DrawerLayout
    xmlns:android="http://schemas.android.com/apk/res/android"
    xmlns:app="http://schemas.android.com/apk/res-auto"
    xmlns:tools="http://schemas.android.com/tools" android:layout_width="match_parent"
    android:layout_height="match_parent"
    android:fitsSystemWindows="true"
    tools:context="com.example.drawerlayoutexample.MainActivity">

   <LinearLayout
       android:fitsSystemWindows="true"
       android:orientation="vertical"
       android:layout_width="match_parent"
       android:layout_height="match_parent">
      <android.support.v7.widget.Toolbar
          app:contentInsetStart="0dp"
          android:layout_width="match_parent"
          android:background="@color/colorPrimary"
          android:layout_height="?attr/actionBarSize"
          app:popupTheme="@style/ThemeOverlay.AppCompat.Light"
          app:theme="@style/ThemeOverlay.AppCompat.Dark.ActionBar">
         <LinearLayout
             android:layout_width="match_parent"
             android:layout_height="match_parent">
         <RelativeLayout
             android:layout_weight="1"
             android:layout_width="0dp"
             android:layout_height="match_parent">
            <ImageButton
                android:layout_marginLeft="20dp"
                android:id="@+id/menu"
                android:layout_width="40dp"
                android:layout_height="40dp"
                android:layout_centerVertical="true"
                android:layout_alignParentLeft="true"
                android:background="@drawable/main_menu" />
         </RelativeLayout>
         <RelativeLayout
             android:layout_weight="1"
             android:layout_width="0dp"
             android:layout_height="match_parent"
 最低0.47元/天 解锁文章


 1013
1013


 被折叠的 条评论
为什么被折叠?
被折叠的 条评论
为什么被折叠?
 到【灌水乐园】发言


