


本文教大家如何调用pptxgenJs生成ppt进行保存。
安装flutter_js库
在pubspec.yml的dependencies中添加
flutter_js: any
并执行pub get命令
创建jsRuntime并注入库代码
创建JavascriptRuntime
JavascriptRuntime runtime = getJavascriptRuntime(xhr: false);
导入pptxgenjs库代码
String jszip = await rootBundle.loadString('assets/js/jszip.min.js');
String ppt = await rootBundle.loadString('assets/js/pptxgen.min.js');
await runtime.evaluateAsync("""var window = global = self = globalThis;""");
await runtime.evaluateAsync(jszip);
await runtime.evaluateAsync(ppt);
其中jszip.min.js和pptxgen.min.js可从pptxgenjs的项目库中下载
调用js代码
JsEvalResult jsEvalResult = await runtime.evaluateAsync(code);
String data = (await runtime.handlePromise(
        jsEvalResult,
        timeout: const Duration(seconds: 60),
      ))
      .stringResult;
进行交互时,传入与返回的参数仅支持String类型。如果传入参数是Map,需要进行encode
String transformToString(Map outline) {
  String str = jsonEncode({'data': jsonEncode(outline)});
  str = str.substring(9, str.length - 2);
  return '"$str"';
}
然后在js代码中进行调用
String code = 'generatePPT(${transformToString(outline)});';
生成ppt
下面是一个生成ppt的示例函数
async function generatePPT(outline) {
  // {
  //   "title": "",
  //   "subtitle": "",
  //   "chapters": [
  //     {
  //       "chapterTitle": "",
  //       "sections": [
  //         {
  //           "sectionTitle": "",
  //           "coverUrl": "",
  //           "items": [
  //             "11111",
  //             "22222"
  //           ]
  //         }
  //       ]
  //     }
  //   ]
  // }
  let outlineMap = JSON.parse(outline);
  // Create a new Presentation
  let pres = new PptxGenJS();
  pres.theme = { headFontFace: "微软雅黑", bodyFontFace: "微软雅黑" };
  const themeColor = "#0088CC";

  // 创建标题页
  let titleSlide = pres.addSlide();

  titleSlide.addText(outlineMap["title"], {
    x: 0.0,
    y: "25%",
    w: "100%",
    h: 1.5,
    align: "center",
    fontSize: 30,
    color: themeColor,
    fill: { color: "#F1F1F1" },
  });
  titleSlide.addText(outlineMap["subtitle"], {
    x: 0.0,
    y: "53%",
    w: "100%",
    h: 0.8,
    align: "center",
    fontSize: 24,
    color: "#767171",
  });

  // 添加章节目录页
  let chapterTitleSlide = pres.addSlide();
  const chaptersString = outlineMap["chapters"]
    .map((chapter) => chapter["chapterTitle"])
    .join("\n");
  chapterTitleSlide.addText("目录", {
    x: 0.0,
    y: "30%",
    w: "30%",
    h: 1.5,
    fontSize: 24,
    align: "center",
    color: themeColor,
  });
  chapterTitleSlide.addText(chaptersString, {
    x: "30%",
    y: "30%",
    w: "70%",
    h: 1.5,
    lineSpacingMultiple: 1.5,
    fontSize: 18,
    color: "#313131",
    bullet: true,
  });

  for (let index = 0; index < outlineMap["chapters"].length; index++) {
    const chapter = outlineMap["chapters"][index];
    // 创建章节名称页,显示章节名称和section列表
    let chapterTitleSlide = pres.addSlide();
    chapterTitleSlide.addText(index < 9 ? `0${index + 1}` : `${index + 1}`, {
      x: 0.0,
      y: "34%",
      w: "50%",
      h: 0.5,
      align: "center",
      fontSize: 24,
      bold: true,
      color: themeColor,
    });
    chapterTitleSlide.addText(chapter["chapterTitle"], {
      x: 0.0,
      y: "38%",
      w: "50%",
      h: 1.0,
      align: "center",
      fontSize: 24,
      color: "#313131",
    });
    const sectionString = chapter["sections"]
      .map((section) => section["sectionTitle"])
      .join("\n");
    chapterTitleSlide.addText(sectionString, {
      x: "50%",
      y: "30%",
      w: "50%",
      h: 1.5,
      fontSize: 16,
      color: "#313131",
      lineSpacingMultiple: 1.5,
      fill: { color: "#F2F2F2" },
      bullet: { type: "number" },
    });

    for (let index = 0; index < chapter["sections"].length; index++) {
      const section = chapter["sections"][index];
      // 创建section列表页
      let sectionTitleSlide = pres.addSlide();
      sectionTitleSlide.addText(section["sectionTitle"], {
        x: 0.0,
        y: 0.0,
        w: "50%",
        h: 0.5,
        align: "center",
        fontSize: 18,
        color: "#313131",
        fill: { color: themeColor },
      });
      // section列表

      // 定义文本框之间的间距
      const spacing = 0.5; // 间距(英寸)

      // 定义文本框的内容
      let texts = section["items"];
      if (texts.length > 6) {
        texts = texts.slice(0, 6);
      }

      // 每个文本框的宽度,LAYOUT_16x9	Yes	10 x 5.625 inches
      const textBoxWidth = (10 - spacing * (texts.length + 1)) / texts.length;
      const textBoxHeight = 1.5;

      // 计算文本框的起始位置
      let startX = spacing; // 起始X位置(英寸)
      let startY = 2.5; // 起始Y位置(英寸)
      // 添加文本框并实现横向分布对齐
      texts.forEach((text, index) => {
        sectionTitleSlide.addText(text, {
          x: startX + (textBoxWidth + spacing) * index,
          y: startY,
          w: textBoxWidth,
          h: textBoxHeight,
          align: "center", // 水平对齐方式
          valign: "middle", // 垂直对齐方式
          color: "#F2F2F2", // 文本颜色
          fontSize: 12, // 字体大小
          rectRadius: 0.1,
          shape: pres.shapes.ROUNDED_RECTANGLE,
          fill: { color: themeColor },
        });
      });
    }
  }

  // 添加结束页
  let endSlide = pres.addSlide();
  endSlide.addText("THE END\nTHANKS", {
    x: 0.0,
    y: "30%",
    w: "100%",
    h: 1.5,
    align: "center",
    fontSize: 24,
    lineSpacingMultiple: 1.5,
    bold: true,
    color: themeColor,
  });

  // 4. Save the Presentation
  return await pres.write("base64");
}
返回数据为base64加密后的数据,解密后保存到文件即可。
生成的ppt截图

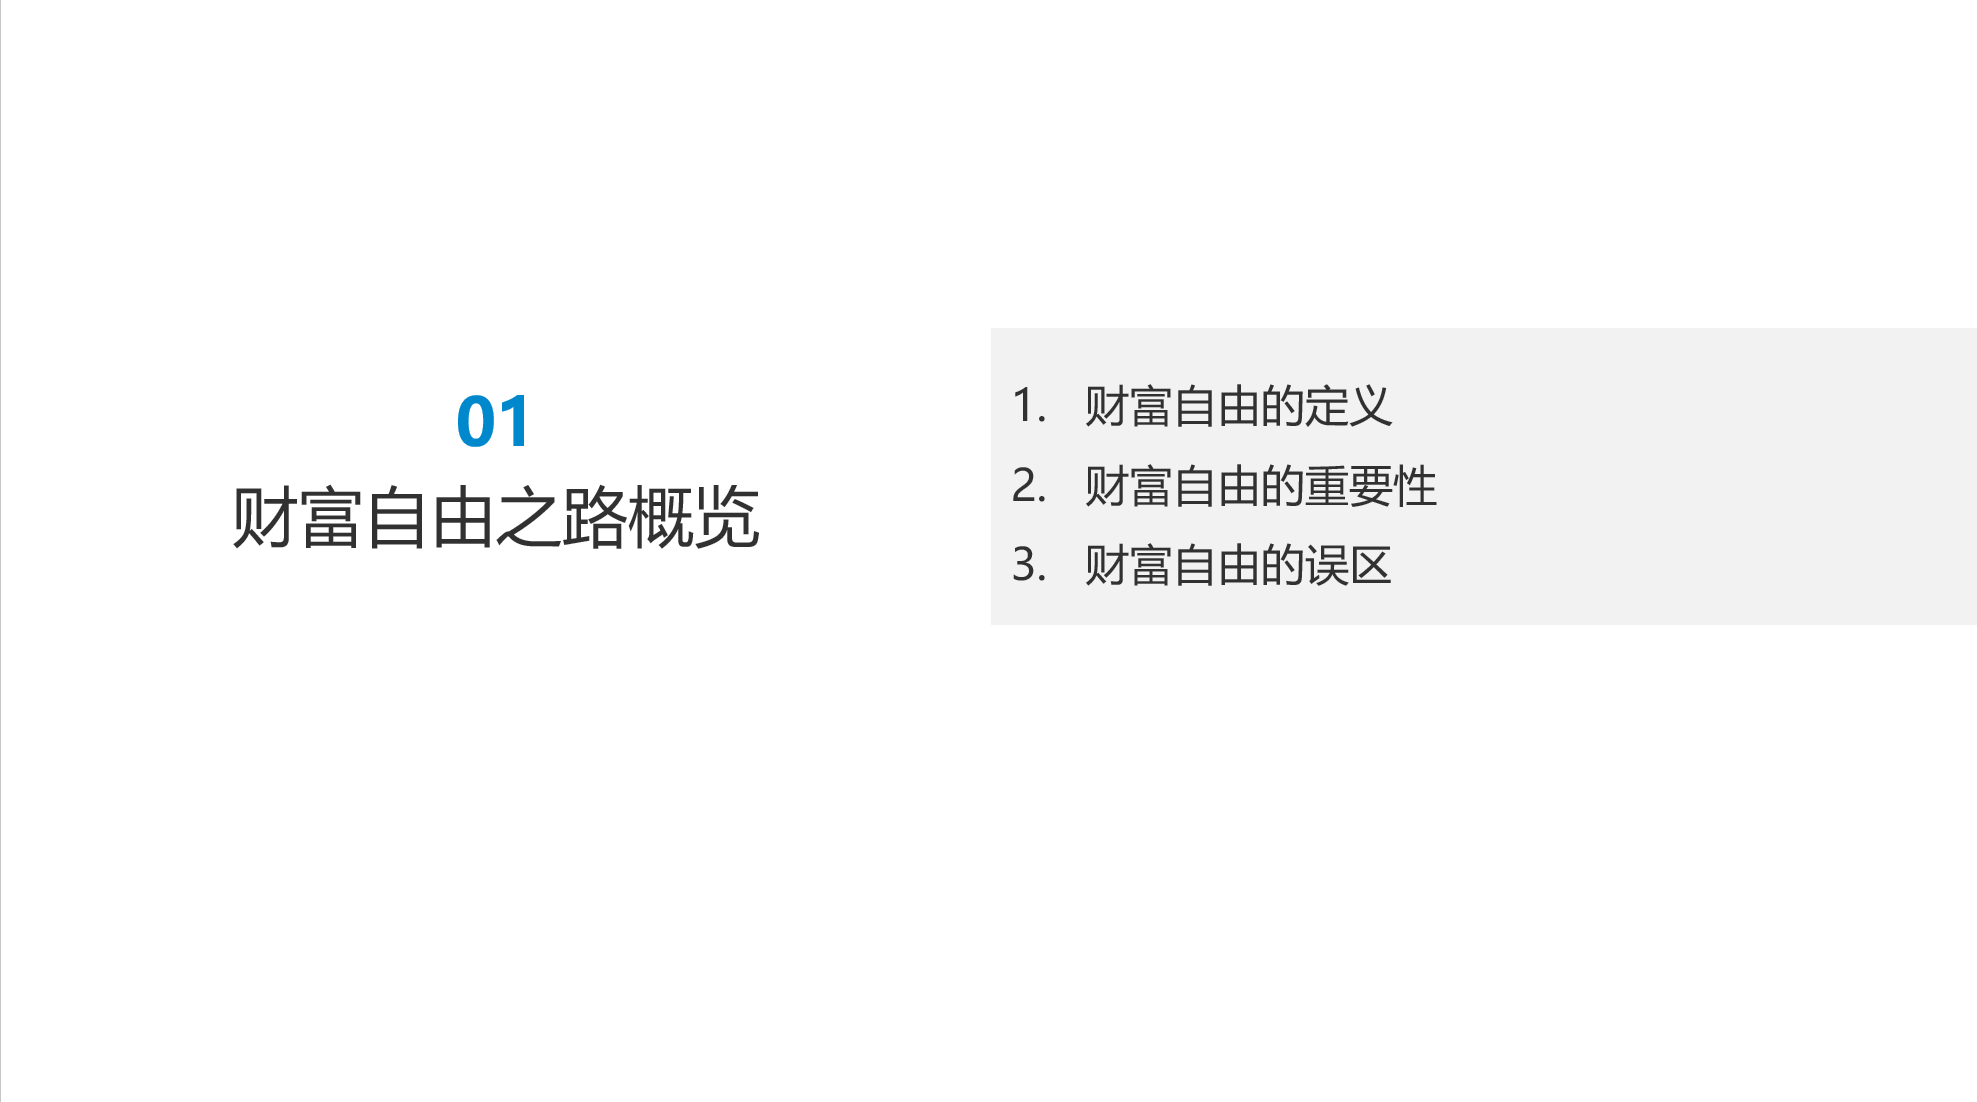
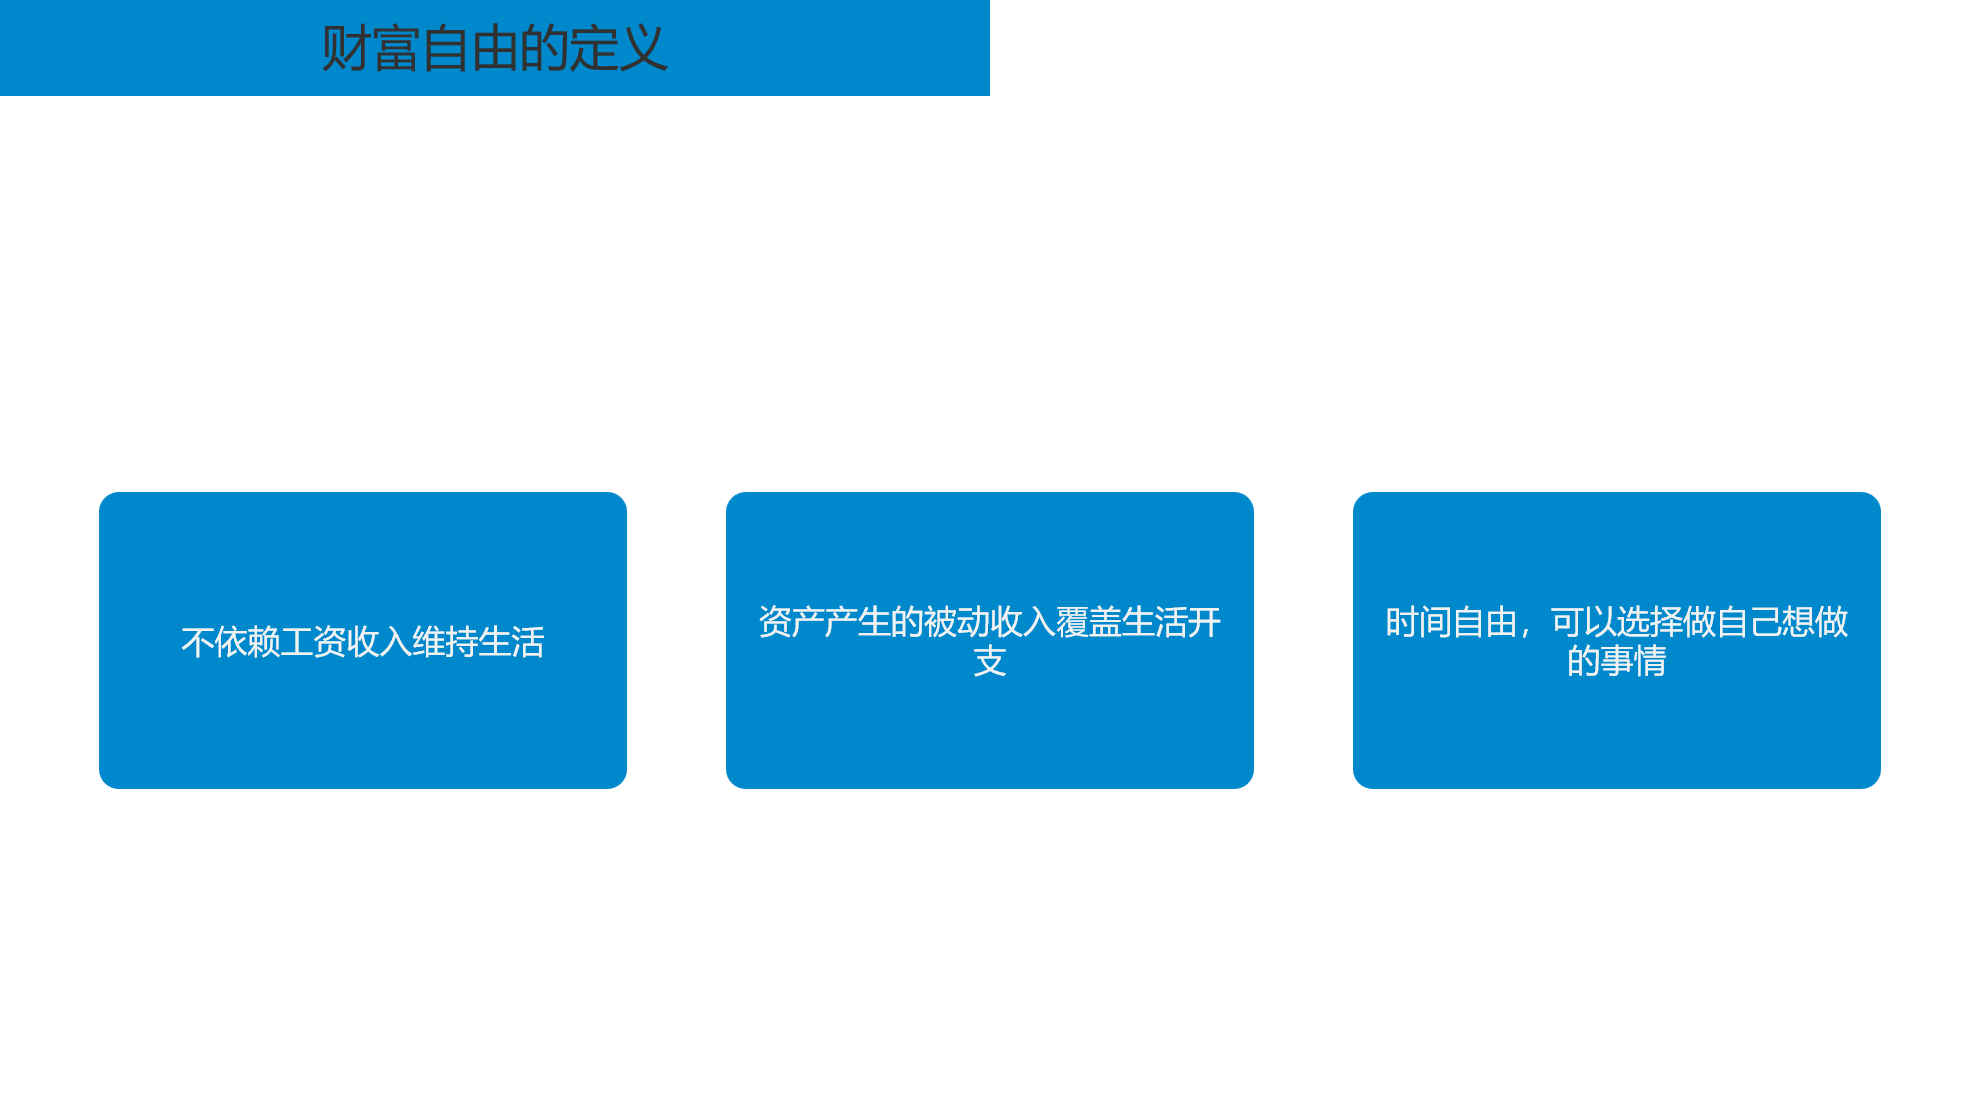
生成结果只进行了简单排版,后续继续优化。
关注【元助手AI】,获取更多教程。


 被折叠的 条评论
为什么被折叠?
被折叠的 条评论
为什么被折叠?
 到【灌水乐园】发言


