


一、Spring Boot Admin简介
spring boot admin github开源地址:https://github.com/codecentric/spring-boot-admin
它主要的作用是在Spring Boot Actuator的基础上提供简洁的WEB UI展示。
二、项目使用:
1、搭建一个maven web项目
2、pom依赖配置
<dependency>
	<groupId>org.springframework.boot</groupId>
	<artifactId>spring-boot-starter-web</artifactId>
</dependency>
<dependency>
	<groupId>org.springframework.boot</groupId>
	<artifactId>spring-boot-starter-security</artifactId>
</dependency>
<dependency>
	<groupId>de.codecentric</groupId>
	<artifactId>spring-boot-admin-starter-client</artifactId>
</dependency>
<dependency>
	<groupId>de.codecentric</groupId>
	<artifactId>spring-boot-admin-server</artifactId>
</dependency>
<dependency>
	<groupId>de.codecentric</groupId>
	<artifactId>spring-boot-admin-server-ui</artifactId>
</dependency>
<dependency>
	<groupId>de.codecentric</groupId>
	<artifactId>spring-boot-admin-server-ui-login</artifactId>
</dependency>
在pom.xml中添加上以上配置
admin服务端:spring-boot-admin-server、spring-boot-admin-server-ui
admin客户端:spring-boot-admin-starter-client (加上该项能监控服务端自身的运行状态,其他项目只需要引入client就可以引入监控)
安全:spring-boot-starter-security
登录验证:spring-boot-admin-server-ui-login (也可以自行添加简单的登录界面)
3、application.yml
info:
  app:
    name: imard
    version: v1.0.0
logging:
  file: "d:/logs/imard/boot.log"

management:
  context-path: "/actuator"

spring:
  application:
    name: "@pom.artifactId@"
  boot:
    admin:
      url: http://www.test.com:8080
  profiles:
    active:
      - secure

---
spring:
  profiles: insecure

management:
  security:
    enabled: false

security:
  basic:
    enabled: false

---
spring:
  profiles: secure
  boot:
    admin:
      username: "${security.user.name}"
      password: "${security.user.password}"
      client:
        metadata:
          user.name: "${security.user.name}"
          user.password:  "${security.user.password}"

security:
  user:
    name: user
password: passinfo配置app的基本信息
www.test.com 在本机hosts中做了映射
4、Application.java
@Configuration
@EnableAutoConfiguration
@EnableAdminServer
public class Application extends SpringBootServletInitializer {
    @Override
    protected SpringApplicationBuilder configure(SpringApplicationBuilder application) {
        return application.sources(Application.class);
    }

    public static void main(String[] args) {
        SpringApplication.run(Application.class, args);
    }
}
@EnableAdminServer 添加上该注解启动监控
5、SecurityConfig
@Profile("secure")
@Configuration
public class SecurityConfig extends WebSecurityConfigurerAdapter {
    @Override
    protected void configure(HttpSecurity http) throws Exception {
        http.formLogin().loginPage("/login.html").loginProcessingUrl("/login").permitAll();
        http.logout().logoutUrl("/logout");
        http.csrf().disable();

        http.authorizeRequests()
            .antMatchers("/login.html", "/**/*.css", "/img/**", "/third-party/**").permitAll();

        http.authorizeRequests().antMatchers("/api/**").permitAll().antMatchers("/**")
            .authenticated();

        // Enable so that the clients can authenticate via HTTP basic for registering
        http.httpBasic();
    }
}6、监管管理
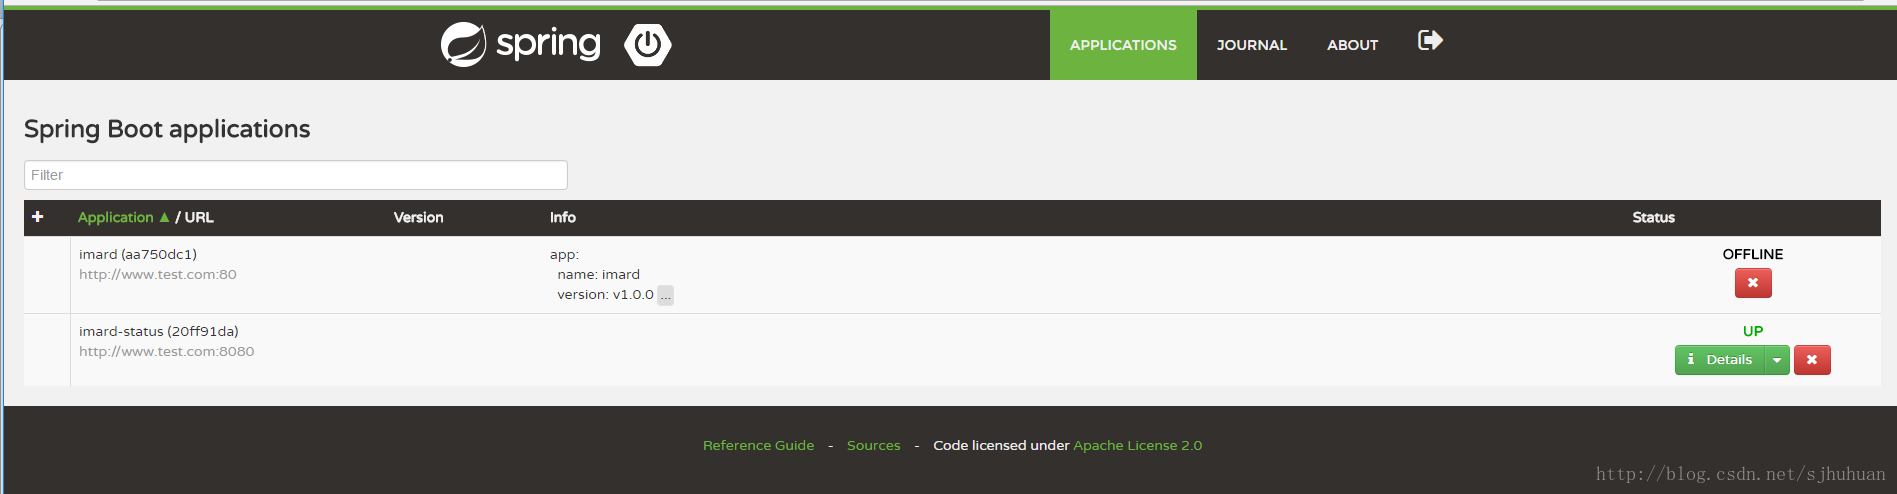
配置完1~5个步骤以后,使用application启动监控程序。
通过http://www.test.com:8080/login.html监控登录界面进行安全验证后,如下图:


 679
679

 被折叠的 条评论
为什么被折叠?
被折叠的 条评论
为什么被折叠?
 到【灌水乐园】发言


