


 ConfigMap是Kubernetes中用于存储非加密配置数据的API对象,常用于环境变量、命令行参数和存储卷。本文介绍了如何通过命令行和YAML文件创建ConfigMap,以及在Pod中作为环境变量、命令行参数和Volume使用的方式,并对比了不同使用方式的更新特性。
一、ConfigMap介绍
ConfigMap是一种API对象,用来将非加密数据保存到键值对中。可以用作环境变量、命令行参数或者存储卷中的配置文件。
ConfigMap可以将环境变量配置信息和容器镜像解耦,便于应用配置的修改。如果需要存储加密信息时可以使用Secret对象。
二、ConfigMap创建
1.通过命令行创建configmap
可以使用 kubectl create configmap 从文件、目录或者 key-value 字符串创建等创建 ConfigMap
(1)通过文件创建configmap
$ echo hello > test1.txt
$ ehco world > test2.txt
$ kubectl create configmap my-config --from-file=key1=test1.txt  --from-file=key2=test2.txt
$ kubectl describe configmap my-config
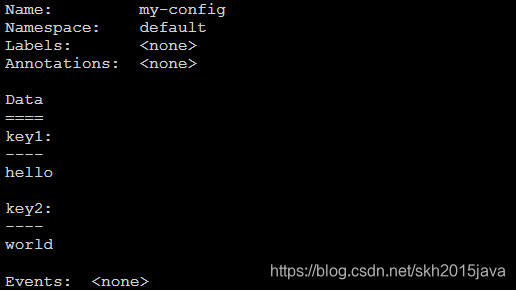
看到该configmap中有两个键值对,key1:hello 和 key2:world
(2)通过文件夹创建configmap
$ mkdir config
$ echo hello > config/test1
$ echo world > config/test2
#根据文件夹创建configmap
$ kubectl create configmap dir-config --from-file=config/$ kubectl describe configmap dir-config
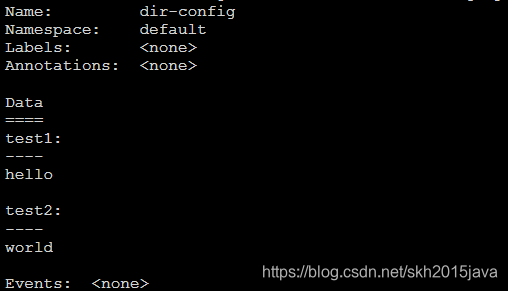
看到该configmap资源中有两个键值对,test1:hello和test2:world,key为文件名,value为文件内容
(3)通过键值对创建configmap
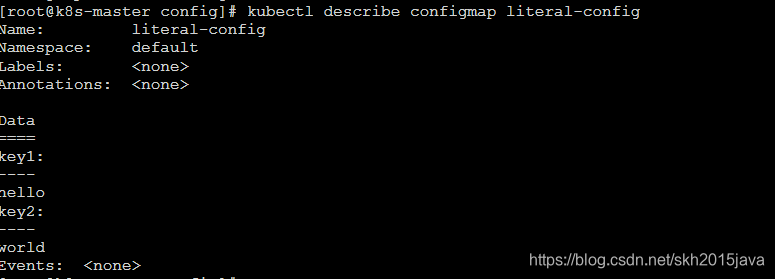
$ kubectl create configmap literal-config --from-literal=key1=hello --from-literal=key2=world
$ kubectl describe configmap literal-config
2.通过yaml文件创建
#config.yaml
apiVersion: v1
kind: ConfigMap
metadata:
 name: my-config
data:
 key1: hello
 key2: world
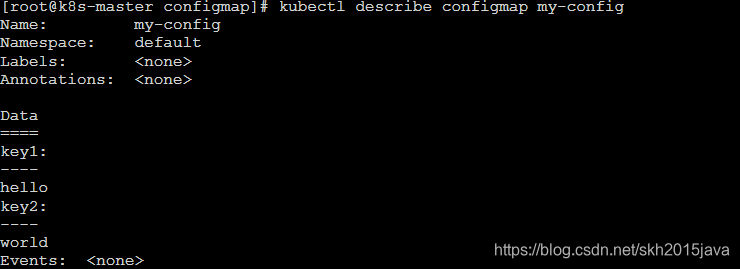
$ kubectl create -f config.yaml
$ kubectl describe configmap my-config
三、ConfigMap的使用
Pod的使用方式:
1. 将ConfigMap中的数据设置为容器的环境变量
2. 将ConfigMap中的数据设置为命令行参数
3. 使用Volume将ConfigMap作为文件或目录挂载
4. 编写代码在 Pod 中运行,使用 Kubernetes API 来读取 ConfigMap
1.配置到容器的环境变量
# test-pod-configmap.yaml
apiVersion: v1
kind: Pod
metadata:
 name: test-pod-configmap
spec:
 containers:
  - name: test-busybox
    image: busybox
    imagePullPolicy: IfNotPresent
    args:
    - sleep
    - "86400"
    env:
    - name: KEY1
      valueFrom:
       configMapKeyRef:
        name: my-config
        key: key1
    - name: KEY2
      valueFrom:
       configMapKeyRef:
        name: my-config
        key: key2
#创建pod
$ kubectl create -f test-pod-configmap.yaml
2. 设置为命令行参数
# test-pod-configmap-cmd
apiVersion: v1
kind: Pod
metadata:
 name: test-pod-configmap-cmd
spec:
 containers:
  - name: test-busybox
    image: busybox
    imagePullPolicy: IfNotPresent
    command: [ "/bin/sh","-c","echo $(KEY1) $(KEY2)"]
    env:
    - name: KEY1
      valueFrom:
       configMapKeyRef:
        name: my-config
        key: key1
    - name: KEY2
      valueFrom:
       configMapKeyRef:
        name: my-config
        key: key2
 restartPolicy: Never
# 创建pod,该pod成功启动后会输出环境变量KEY1和KEY2的值
$ kubectl create -f test-pod-configmap-cmd.yaml
#查看pod的日志
$ kubectl logs test-pod-configmap-cmd
![]()
#进入到容器中查看环境变量
$ kubectl exec -it test-pod-configmap -- /bin/sh

3.将configmap挂载到容器中
# test-pod-projected-configmap-volume.yaml
apiVersion: v1
kind: Pod
metadata:
 name: test-pod-projected-configmap-volume
spec:
 containers:
 - name: test-pod-busybox
   image: busybox
   imagePullPolicy: IfNotPresent
   args:
   - sleep
   - "86400"
   volumeMounts:
   - name: config-volume
     mountPath: "/projected-volume"
     readOnly: true
 volumes:
 - name: config-volume
   projected:
    sources:
    - configMap:
       name: my-config
#创建pod
kubectl create -f test-pod-projected-configmap-volume.yaml
#进入容器
$ kubectl exec -it test-pod-projected-configmap-volume -- /bin/sh
#查看挂在到容器中的文件内容

通过volume挂载和环境变量的区别
通过Volume挂载到容器内部时,当该configmap的值发生变化时,容器内部具备自动更新的能力,但是通过环境变量设置到容器内部该值不具备自动更新的能力。
注意:
ConfigMap必须在Pod使用它之前创建
使用envFrom时,将会自动忽略无效的键
Pod只能使用同一个命名空间的ConfigMap
感谢:
https://kubernetes.io/zh/docs/concepts/configuration/configmap/


 2947
2947

 被折叠的 条评论
为什么被折叠?
被折叠的 条评论
为什么被折叠?
 到【灌水乐园】发言


