


作者简介:大家好,我是smart哥,前中兴通讯、美团架构师,现某互联网公司CTO
联系qq:184480602,加我进群,大家一起学习,一起进步,一起对抗互联网寒冬
学习必须往深处挖,挖的越深,基础越扎实!
阶段1、深入多线程
阶段2、深入多线程设计模式
阶段3、深入juc源码解析
码哥源码部分
码哥讲源码-原理源码篇【2024年最新大厂关于线程池使用的场景题】
码哥讲源码-原理源码篇【揭秘join方法的唤醒本质上决定于jvm的底层析构函数】
码哥源码-原理源码篇【Doug Lea为什么要将成员变量赋值给局部变量后再操作?】
码哥讲源码【谁再说Spring不支持多线程事务,你给我抽他!】
打脸系列【020-3小时讲解MESI协议和volatile之间的关系,那些将x86下的验证结果当作最终结果的水货们请闭嘴】
1、官网
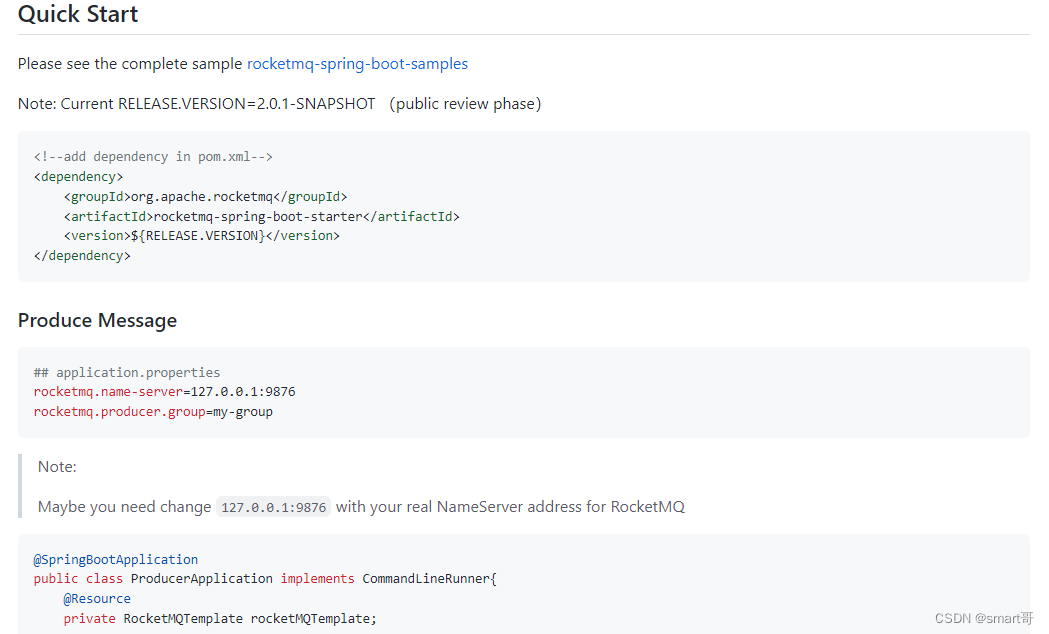
RocketMQ为 SpringBoot 提供了整合方案,官网地址如下,上面提供了详细的整合步骤及案例。
https://github.com/apache/rocketmq-spring
官方详细文档(可以切换不同的版本)
https://github.com/apache/rocketmq-spring/blob/release-2.0.1/README.md
2、消息生产者
1)添加依赖
    <parent>
        <groupId>org.springframework.boot</groupId>
        <artifactId>spring-boot-starter-parent</artifactId>
        <version>2.7.1</version>
        <relativePath/> <!-- lookup parent from repository -->
    </parent>
    <properties>
        <java.version>1.8</java.version>
    </properties>
    <dependencies>
        <dependency>
            <groupId>org.springframework.boot</groupId>
            <artifactId>spring-boot-starter</artifactId>
        </dependency>

        <dependency>
            <groupId>org.projectlombok</groupId>
            <artifactId>lombok</artifactId>
            <optional>true</optional>
        </dependency>
        <dependency>
            <groupId>org.springframework.boot</groupId>
            <artifactId>spring-boot-starter-test</artifactId>
            <scope>test</scope>
        </dependency>

        <dependency>
            <groupId>org.apache.rocketmq</groupId>
            <artifactId>rocketmq-spring-boot-starter</artifactId>
            <version>2.2.1</version>
        </dependency>
    </dependencies>

    <build>
        <plugins>
            <plugin>
                <groupId>org.springframework.boot</groupId>
                <artifactId>spring-boot-maven-plugin</artifactId>
                <configuration>
                    <excludes>
                        <exclude>
                            <groupId>org.projectlombok</groupId>
                            <artifactId>lombok</artifactId>
                        </exclude>
                    </excludes>
                </configuration>
            </plugin>
        </plugins>
    </build>
2)配置文件
    rocketmq.name-server=192.168.25.135:9876;192.168.25.138:9876
    rocketmq.producer.group=my-group
3)启动类
    @SpringBootApplication
    public class MQProducerApplication {
        public static void main(String[] args) {
            SpringApplication.run(MQSpringBootApplication.class);
        }
    }
4)测试类
    @RunWith(SpringRunner.class)
    @SpringBootTest(classes = {MQSpringBootApplication.class})
    public class ProducerTest {

        @Autowired
        private RocketMQTemplate rocketMQTemplate;

        @Test
        public void test1(){
            rocketMQTemplate.convertAndSend("springboot-mq","hello springboot rocketmq");
        }
    }
3、消息消费者
1)添加依赖
同消息生产者
2)配置文件
同消息生产者
3)启动类
    @SpringBootApplication
    public class MQConsumerApplication {
        public static void main(String[] args) {
            SpringApplication.run(MQSpringBootApplication.class);
        }
    }
4)消息监听器
    @Slf4j
    @Component
    @RocketMQMessageListener(topic = "springboot-mq",consumerGroup = "springboot-mq-consumer-1")
    public class Consumer implements RocketMQListener<String> {

        @Override
        public void onMessage(String message) {
            log.info("Receive message:"+message);
        }
    }
5)RocketMQMessageListener参数
    @Target(ElementType.TYPE)
    @Retention(RetentionPolicy.RUNTIME)
    @Documented
    public @interface RocketMQMessageListener {

        String NAME_SERVER_PLACEHOLDER = "${rocketmq.name-server:}";
        String ACCESS_KEY_PLACEHOLDER = "${rocketmq.consumer.access-key:}";
        String SECRET_KEY_PLACEHOLDER = "${rocketmq.consumer.secret-key:}";
        String TRACE_TOPIC_PLACEHOLDER = "${rocketmq.consumer.customized-trace-topic:}";
        String ACCESS_CHANNEL_PLACEHOLDER = "${rocketmq.access-channel:}";

        /**
         * 消费者分组
         *
         * @return
         */
        String consumerGroup();

        /**
         * 主题
         */
        String topic();

        /**
         * selectorType:消息选择器类型
         * - SelectorType.TAG:默认值,根据TAG选择,仅支持表达式格式如:“tag1 || tag2 || tag3”,如果表达式为null或者“*”标识订阅所有消息
         * - SelectorType.SQL92:根据SQL92表达式选择
         */
        SelectorType selectorType() default SelectorType.TAG;

        /**
         * selectorType 对应的表达式
         */
        String selectorExpression() default "*";


        /**
         * consumeMode:消费模式
         * - ConsumeMode.CONCURRENTLY:默认值,并行处理
         * - ConsumeMode.ORDERLY:按顺序处理
         */
        ConsumeMode consumeMode() default ConsumeMode.CONCURRENTLY;

        /**
         * messageMode:消息模型
         * - MessageModel.CLUSTERING:默认值,集群
         * - MessageModel.BROADCASTING:广播
         */
        MessageModel messageModel() default MessageModel.CLUSTERING;

        /**
         * 最大线程数,默认值 64
         */
        int consumeThreadMax() default 64;

        /**
         * 消费失败,最大重试次数
         * <p>
         * - 在并发模式中,-1表示16
         * - 在有序模式中,-1表示整数最大值
         */
        int maxReconsumeTimes() default -1;

        /**
         * 消息可能阻止使用线程的最长时间(分钟)
         */
        long consumeTimeout() default 15L;

        /**
         * 发送回复消息超时
         */
        int replyTimeout() default 3000;

        /**
         * 默认值 ${rocketmq.consumer.access-key:}
         */
        String accessKey() default ACCESS_KEY_PLACEHOLDER;

        /**
         * 默认值 ${rocketmq.consumer.secret-key:}
         */
        String secretKey() default SECRET_KEY_PLACEHOLDER;

        /**
         * 启用消息轨迹,默认值 false
         */
        boolean enableMsgTrace() default false;

        /**
         * 自定义的消息轨迹主题,默认值${rocketmq.consumer.customized-trace-topic:}
         * 没有配置此配置项则使用默认的主题
         */
        String customizedTraceTopic() default TRACE_TOPIC_PLACEHOLDER;

        /**
         * 命名服务器地址,默认值${rocketmq.name-server:}
         */
        String nameServer() default NAME_SERVER_PLACEHOLDER;

        /**
         * 默认值${rocketmq.access-channel:}
         */
        String accessChannel() default ACCESS_CHANNEL_PLACEHOLDER;
    }
4、发送同步消息
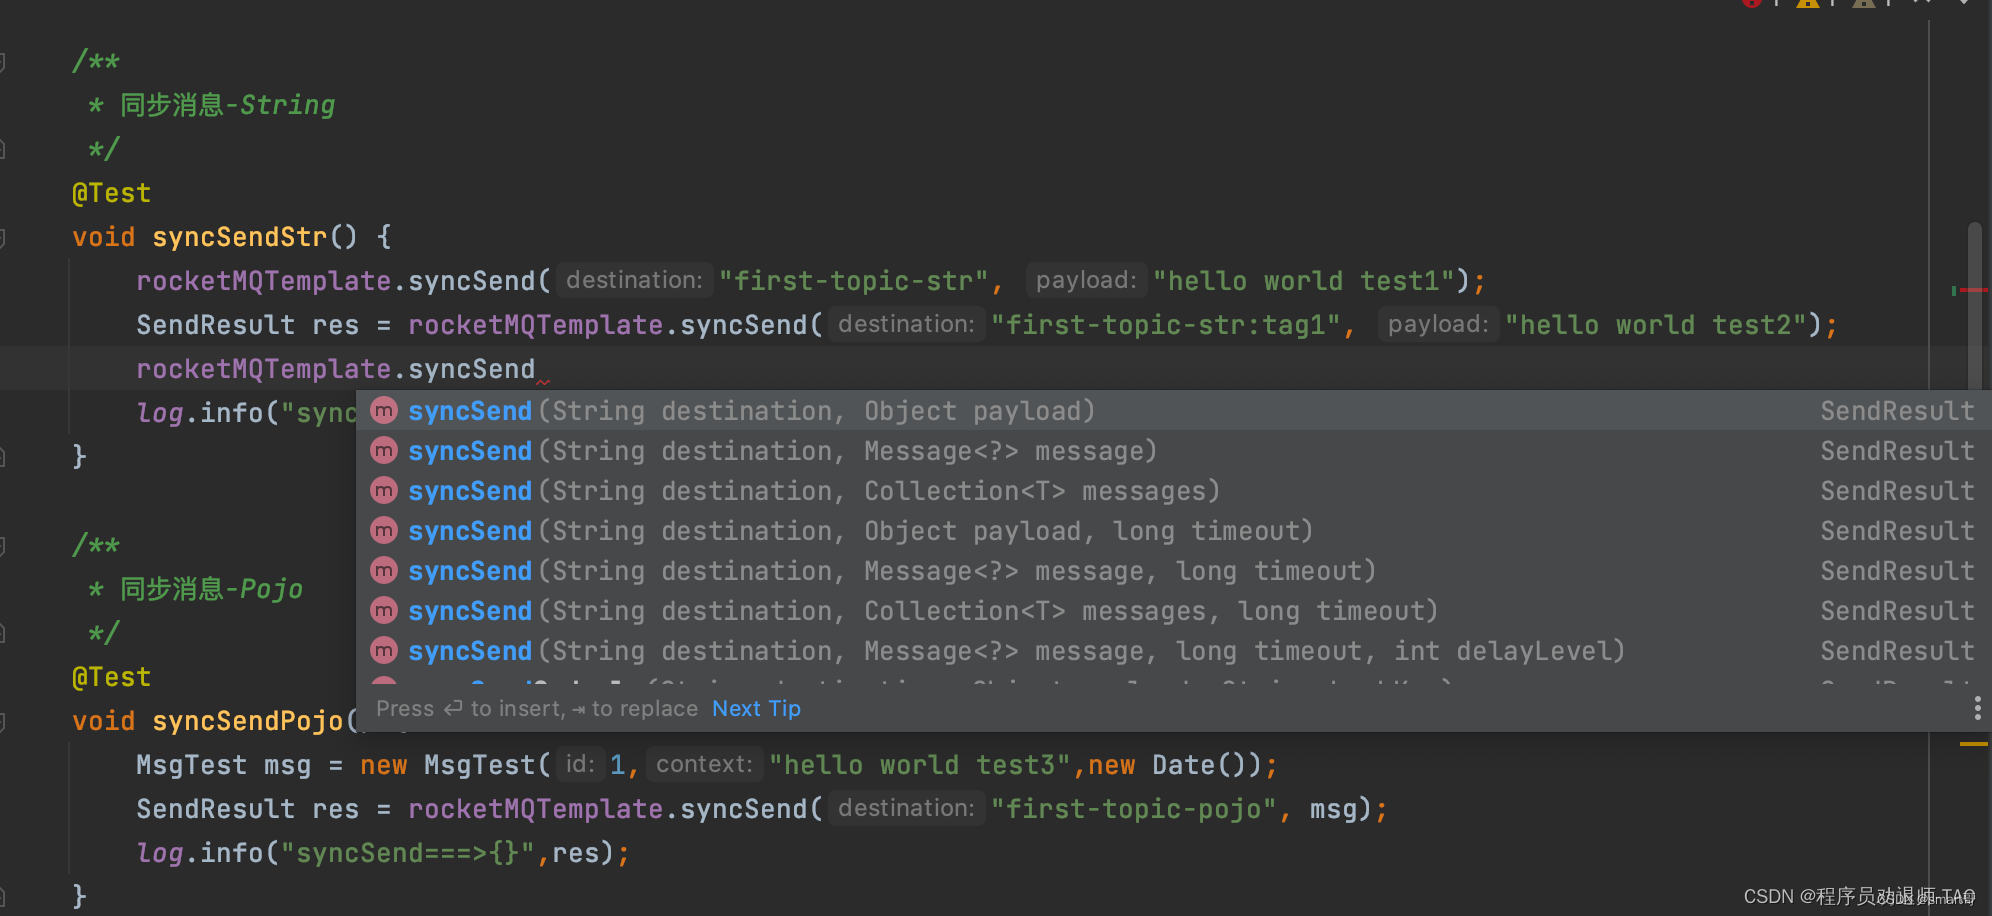
同步消息也就这些API,简单讲解一下!
    //发送普通同步消息-Object
    syncSend(String destination, Object payload)
    //发送普通同步消息-Message
    syncSend(String destination, Message<?> message)
    //发送批量普通同步消息
    syncSend(String destination, Collection<T> messages)
    //发送普通同步消息-Object,并设置发送超时时间
    syncSend(String destination, Object payload, long timeout)
    //发送普通同步消息-Message,并设置发送超时时间
    syncSend(String destination, Message<?> message, long timeout)
    //发送批量普通同步消息,并设置发送超时时间
    syncSend(String destination, Collection<T> messages, long timeout)
    //发送普通同步延迟消息,并设置超时,这个下文会演示
    syncSend(String destination, Message<?> message, long timeout, int delayLevel)
    @Setter
    @Getter
    @Accessors(chain = true)
    @AllArgsConstructor
    @NoArgsConstructor
    public class MsgTest {
        private int id;
        private String context;
        private Date date;

    }

    /**
     * 同步消息-
     */
    @Test
    void syncSendStr() {
        //syncSend和send是等价的
        rocketMQTemplate.syncSend("first-topic-str", "hello world test1");
        //send底层还是会调用syncSend的代码
        rocketMQTemplate.send("first-topic-str", MessageBuilder.withPayload("hello world test1").build());
        SendResult res = rocketMQTemplate.syncSend("first-topic-str:tag1", "hello world test2");
        log.info("syncSend===>{}",res);
    }

    /**
     * 同步消息-
     */
    @Test
    void syncSendPojo() {
        MsgTest msg = new MsgTest(1,"hello world test3",new Date());
        SendResult res = rocketMQTemplate.syncSend("first-topic-pojo", MessageBuilder.withPayload(msg).build());
        log.info("syncSend===>{}",res);
    }
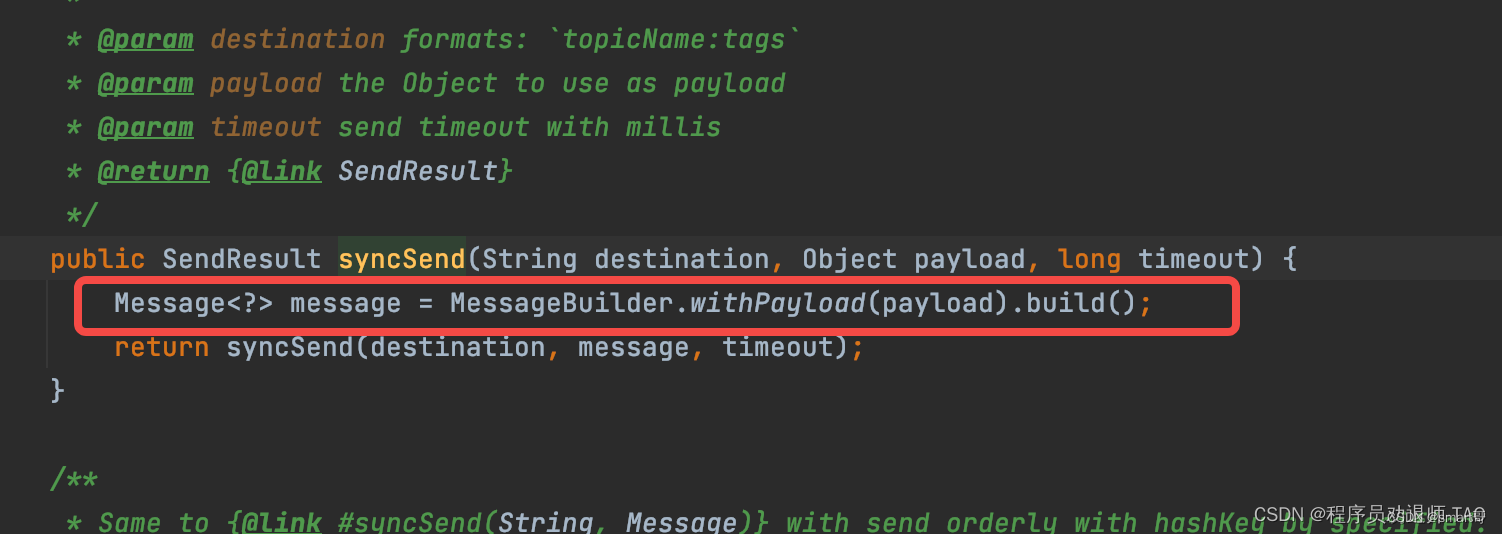
这里存在两种消息体,一种是Object的,另一种是Message<?>的形式的,其实我们发送Object的时候,底层是有帮我们做转换的,其实和我们在上层调用
MessageBuilder.withPayload("hello world test1").build()
是一样的!源码如下
5、异步消息
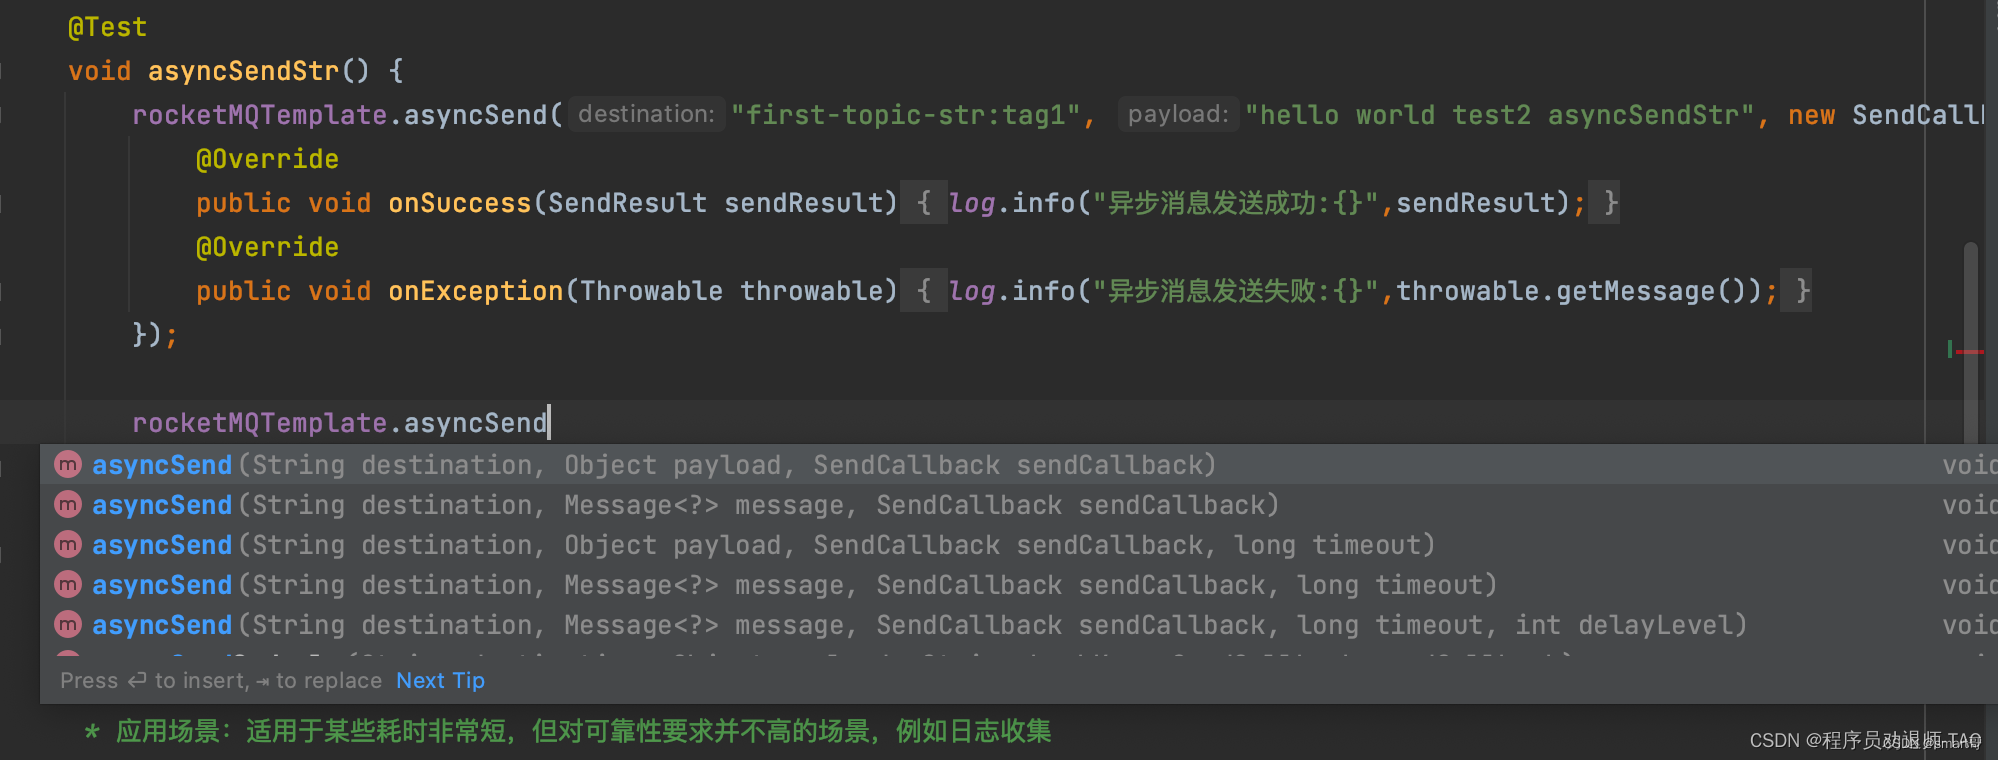
    //发送普通异步消息-Object
    asyncSend(String destination, Object payload, SendCallback sendCallback)
    //发送普通异步消息-Message
    asyncSend(String destination, Message<?> message, SendCallback sendCallback)
    //发送普通异步消息-Object,并设置发送超时时间
    asyncSend(String destination, Object payload, SendCallback sendCallback, long timeout)
    //发送普通异步消息-Message,并设置发送超时时间
    asyncSend(String destination, Message<?> message, SendCallback sendCallback, long timeout)
    //发送普通异步延迟消息,并设置超时,这个下文会演示
    asyncSend(String destination, Message<?> message, SendCallback sendCallback, long timeout, int delayLevel)
    /**
     * 异步消息-String
     * 指发送方发出数据后,不等接收方发回响应,接着发送下个数据包
     * 关键实现异步发送回调接口(SendCallback)
     * 在执行消息的异步发送时应用不需要等待服务器响应即可直接返回,通过回调接口接收务器响应,并对服务器的响应结果进行处理
     * 这种方式任然需要返回发送消息任务的执行结果,异步不影响后续任务,不会造成阻塞
     */
    @Test
    void asyncSendStr() {
        rocketMQTemplate.asyncSend("first-topic-str:tag1", "hello world test2 asyncSendStr", new SendCallback() {
            @Override
            public void onSuccess(SendResult sendResult) {
                log.info("异步消息发送成功:{}", sendResult);
            }

            @Override
            public void onException(Throwable throwable) {
                log.info("异步消息发送失败:{}", throwable.getMessage());
            }
        });
    }
6、单向消息
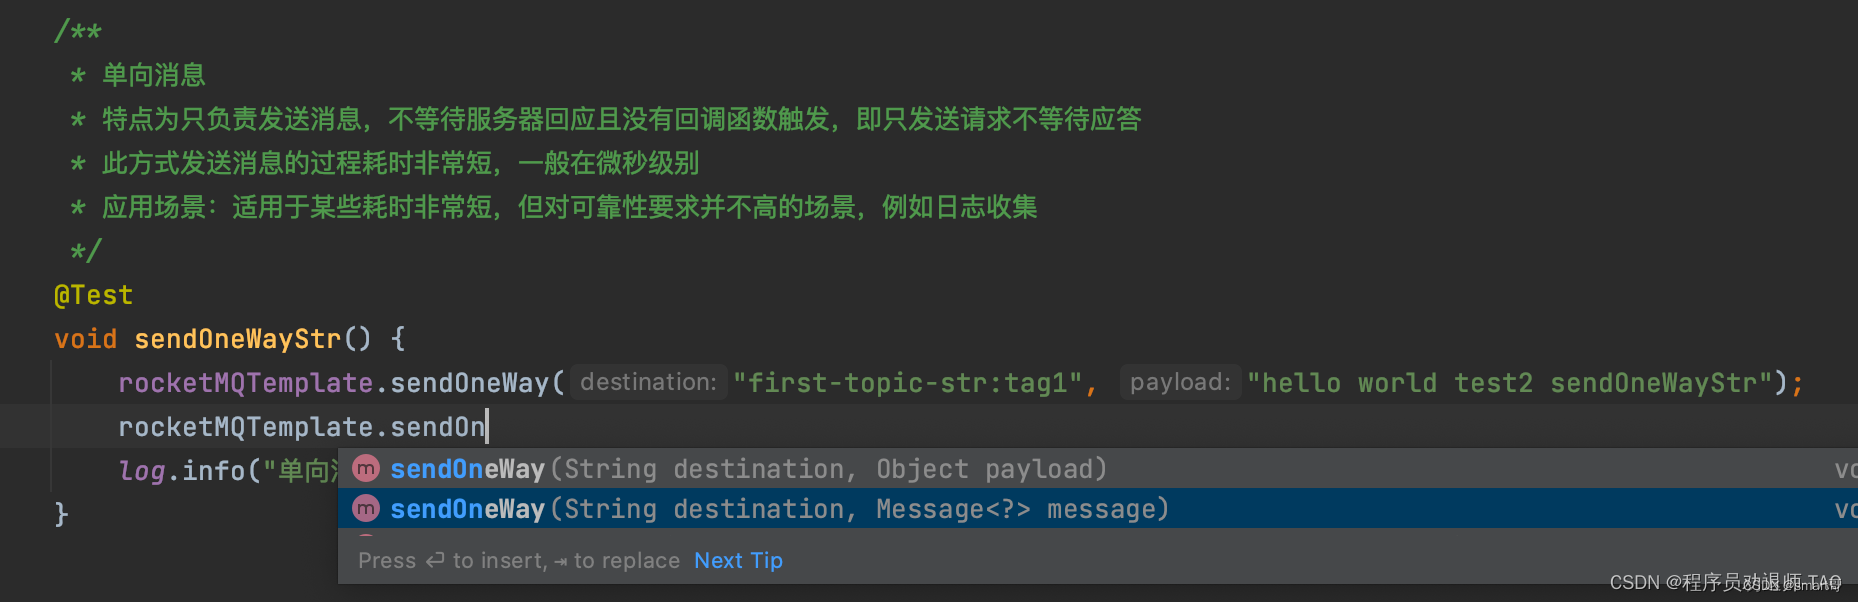
这里普通单向消息就只有两个操作空间,这个不用多说了,一个是Object,另一个是Message
    /**
     * 单向消息
     * 特点为只负责发送消息,不等待服务器回应且没有回调函数触发,即只发送请求不等待应答
     * 此方式发送消息的过程耗时非常短,一般在微秒级别
     * 应用场景:适用于某些耗时非常短,但对可靠性要求并不高的场景,例如日志收集
     */
    @Test
    void sendOneWayStr() {
        rocketMQTemplate.sendOneWay("first-topic-str:tag1", "hello world test2 sendOneWayStr");
        log.info("单向消息已发送");
    }
6、批量消息
    /**
     * 批量消息
     */
    @Test
    void asyncSendBatch() {
        Message<String> msg = MessageBuilder.withPayload("hello world test1").build();
        List<Message> msgList = Arrays.asList(msg,msg,msg,msg,msg);
        SendResult res = rocketMQTemplate.syncSend("first-topic-str:tag1", msgList);
        log.info("批量消息");
    }
7、延迟消息
1)同步延迟消息
    /**
     * 同步延迟消息
     * rocketMQ的延迟消息发送其实是已发送就已经到broker端了,然后消费端会延迟收到消息。
     * RocketMQ 目前只支持固定精度的定时消息。
     * 固定等级:1到18分别对应1s 5s 10s 30s 1m 2m 3m 4m 5m 6m 7m 8m 9m 10m 20m 30m 1h 2h
     * 延迟的底层方法是用定时任务实现的。
     */
    @Test
    void syncSendDelayedStr() {
        Message<String> message = MessageBuilder.withPayload("syncSendDelayedStr" + new Date()).build();
        /**
         * @param destination formats: `topicName:tags`
         * @param message 消息体
         * @param timeout 发送超时时间
         * @param delayLevel 延迟级别  1到18
         * @return {@link SendResult}
         */
        SendResult res = rocketMQTemplate.syncSend("first-topic-str:tag1", message, 3000, 3);
        log.info("res==>{}", res);
    }
2)异步延迟消息
    /**
     * 异步延迟消息
     */
    @Test
    void asyncSendDelayedStr() {
        //Callback
        SendCallback sc=new SendCallback() {
            @Override
            public void onSuccess(SendResult sendResult) {
                log.info("发送异步延时消息成功");
            }
            @Override
            public void onException(Throwable throwable) {
                log.info("发送异步延时消息失败:{}",throwable.getMessage());
            }
        };

        Message<String> message= MessageBuilder.withPayload("asyncSendDelayedStr").build();
        rocketMQTemplate.asyncSend("first-topic-str:tag1", message, sc, 3000, 3);
    }
8、顺序消息
使用rocketmq-spring-boot-starter发送顺序消息就比较方便了,不像使用rocket-client那样,需要手动获取RocketMQ中当前topic的队列个数然后再通过hashKey值,mqs.size()取模,得到一个索引值,这里底层都帮我们做好了处理!
    /**
     * 顺序消息
     */
    @Test
    void SendOrderStr() {
        List<MsgTest> msgList = new ArrayList<>();
        for (int i = 0; i < 100; i++) {
            msgList.add(new MsgTest(100, "我是id为100的第" + (i + 1) + "条消息", new Date()));
        }
        msgList.forEach(t -> {
            rocketMQTemplate.asyncSendOrderly("first-topic-str:tag1", t, String.valueOf(t.getId()), new SendCallback() {
                @Override
                public void onSuccess(SendResult sendResult) {
                    log.info("异步消息发送成功:{}", sendResult);
                }

                @Override
                public void onException(Throwable throwable) {
                    log.info("异步消息发送失败:{}", throwable.getMessage());
                }
            });
        });
    }
9、事务消息
1)发送者
    /**
     * 事务消息  注意这里还有一个监听器 TransactionListenerImpl
     */
    @Test
    void sendTransactionStr() {

        String[] tags = {"TAGA", "TAGB", "TAGC"};
        for (int i = 0; i < 3; i++) {
            Message<String> message = MessageBuilder.withPayload("事务消息===>" + i).build();
            TransactionSendResult res = rocketMQTemplate.sendMessageInTransaction("transaction-str:" + tags[i], message, i + 1);
            if (res.getLocalTransactionState().equals(LocalTransactionState.COMMIT_MESSAGE) && res.getSendStatus().equals(SendStatus.SEND_OK)) {
                log.info("事物消息发送成功");
            }

            log.info("事物消息发送结果:{}", res);
        }
    }
2)事务消息生产者端的消息监听器
    import lombok.extern.slf4j.Slf4j;
    import org.apache.rocketmq.spring.annotation.RocketMQTransactionListener;
    import org.apache.rocketmq.spring.core.RocketMQLocalTransactionListener;
    import org.apache.rocketmq.spring.core.RocketMQLocalTransactionState;
    import org.springframework.messaging.Message;
    import org.springframework.stereotype.Component;

    @Slf4j
    @Component
    @RocketMQTransactionListener
    public class TransactionListenerImpl implements RocketMQLocalTransactionListener {
        @Override
        public RocketMQLocalTransactionState executeLocalTransaction(Message msg, Object arg) {
            log.info("executeLocalTransaction");
            // 执行本地事务
            String tag = String.valueOf(msg.getHeaders().get("rocketmq_TAGS"));
            if ("TAGA".equals(tag)) {
                //这里只讲TAGA消息提交,状态为可执行
                return RocketMQLocalTransactionState.COMMIT;
            } else if ("TAGB".equals(tag)) {
                return RocketMQLocalTransactionState.ROLLBACK;
            } else if ("TAGC".equals(tag)) {
                return RocketMQLocalTransactionState.UNKNOWN;
            }
            return RocketMQLocalTransactionState.UNKNOWN;
        }

        //mq回调检查本地事务执行情况
        @Override
        public RocketMQLocalTransactionState checkLocalTransaction(Message msg) {
            log.info("checkLocalTransaction===>{}", msg);
            return RocketMQLocalTransactionState.COMMIT;
        }
    }
3)消费者
    @Slf4j
    @Component
    @RocketMQMessageListener(consumerGroup = "transaction-group", topic = "transaction-str")
    public class TransactionConsumer implements RocketMQListener<String> {

        @Override
        public void onMessage(String str) {
            log.info("===>"+str);
        }

    }


 5731
5731

 被折叠的 条评论
为什么被折叠?
被折叠的 条评论
为什么被折叠?
 到【灌水乐园】发言


