


thinkphp swiftmailer(phpmailer)
目录结构
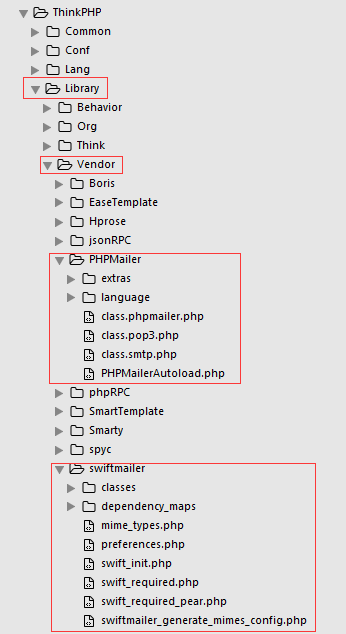
图 1 swiftmailer-phpmailer
将swiftmailer整合到thinkphp中,如上图 1
我下载的版本是 swiftmailer-5.x, 将目录里面的lib文件夹重命名为swiftmailer,并拷贝到ThinkPHP/Library/Vendor目录下,如上图 1
配置
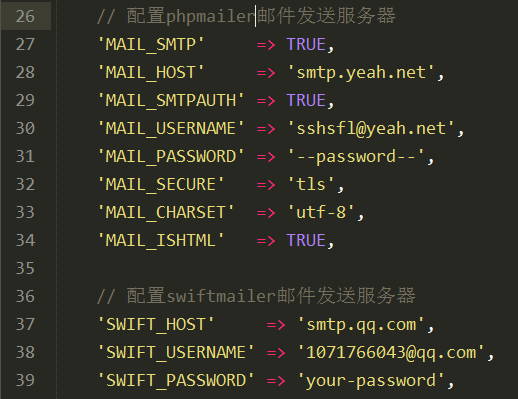
图 2 phpmailer swiftmailer 配置对比
// thinkphp config.php
// 配置swiftmailer邮件发送服务器
'SWIFT_HOST'     => 'smtp.qq.com',
'SWIFT_USERNAME' => '1071766043@qq.com',
'SWIFT_PASSWORD' => 'your-password',
从上面的对比可以看出,swiftmailer相比较于phpmailer来说配置简洁
使用
// 在需要使用的时候直接调用下面(图)的send_email函数即可,
// 但是需要注意函数的返回值,因为可以根据返回值来确定是否发送成功
send_email('2577792479@qq.com', 'your-email-subject', 'your-email-content');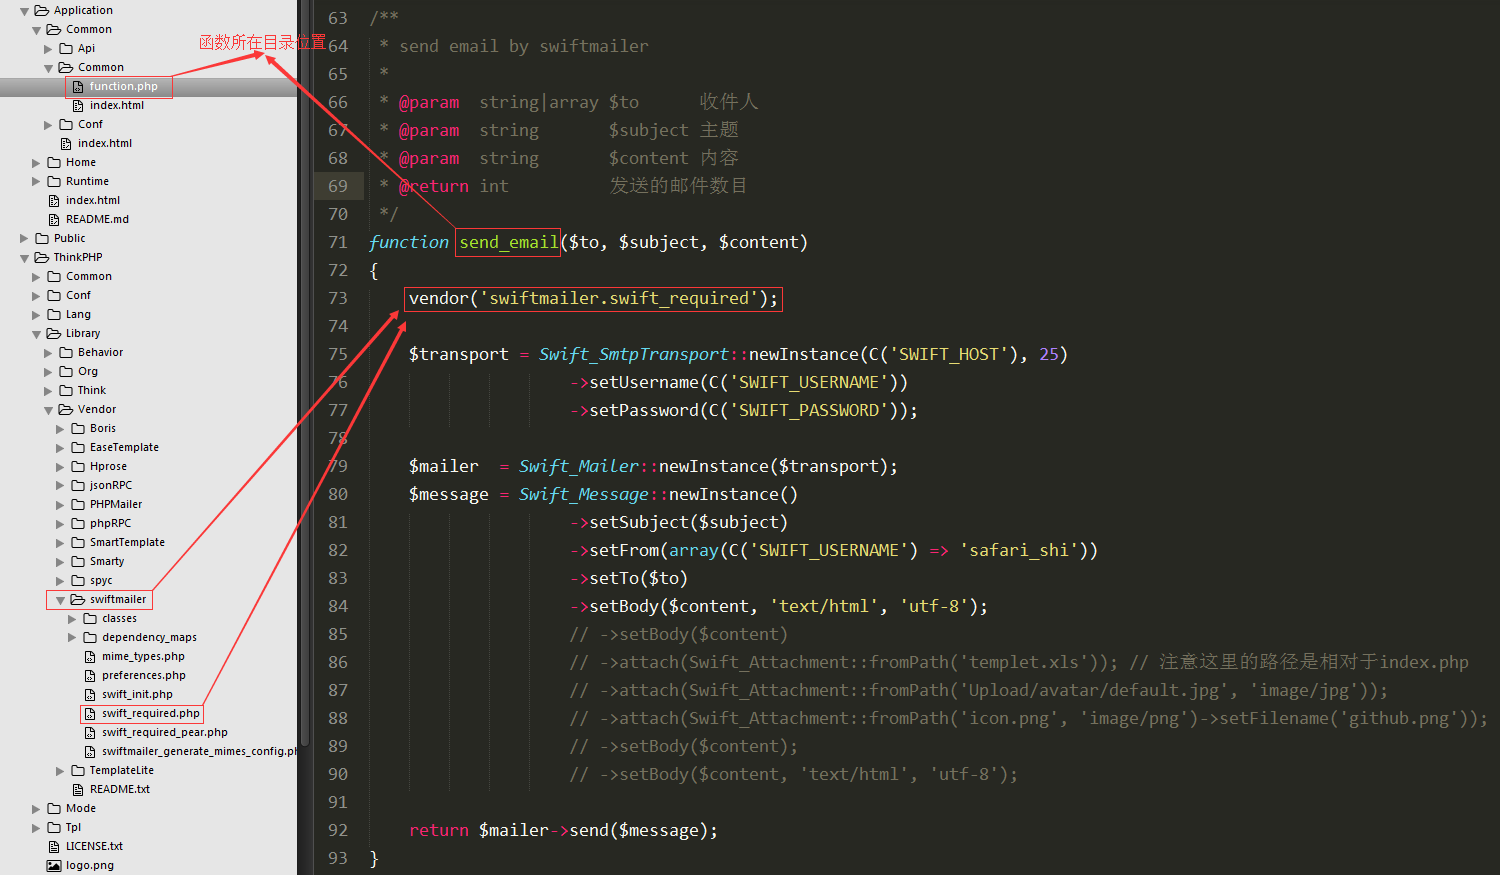
图 3
同样的,在自定义的**全局**function.php文件中,
定义一个通过swiftmailer发送邮件的**全局**函数,
方便直接调用,代码如下:
<?php
// Application/Common/Common/function.php

/**
 * send email by swiftmailer
 *
 * @param  string|array $to      收件人
 * @param  string       $subject 主题
 * @param  string       $content 内容
 * @return int          发送的邮件数目
 */
function send_email($to, $subject, $content)
{
    vendor('swiftmailer.swift_required');

    $transport = Swift_SmtpTransport::newInstance(C('SWIFT_HOST'), 25)
                    ->setUsername(C('SWIFT_USERNAME'))
                    ->setPassword(C('SWIFT_PASSWORD'));

    $mailer  = Swift_Mailer::newInstance($transport);
    $message = Swift_Message::newInstance()
                    ->setSubject($subject)
                    ->setFrom(array(C('SWIFT_USERNAME') => 'safari_shi'))
                    ->setTo($to)
                    ->setBody($content, 'text/html', 'utf-8');

    return $mailer->send($message);
}


 被折叠的 条评论
为什么被折叠?
被折叠的 条评论
为什么被折叠?
 到【灌水乐园】发言


