


目录
写在前面
本博客只对编写Dockerfile/Docker-Compose的过程进行阐述,仅是对实验过程的一次记录,不会对如何连接服务器的过程进行解释。请确保自己服务器上的端口已经放行。
本人完成实验大约在一个月前,因此博客的内容是一个月的记录,在6月上旬国内镜像下架了一批,不保证仍能够正常拉取镜像。
系统发行版信息:
[root@project ~]# lsb_release -a
LSB Version:	:core-4.1-amd64:core-4.1-noarch
Distributor ID:	AlibabaCloud
Description:	Alibaba Cloud Linux release 3 (Soaring Falcon)
Release:	3
Codename:	SoaringFalcon
mysql的环境搭建
本次实验选择使用Dockerfile直接拉取mysql:5.7的镜像进行配置。
环境搭建过程
-
在/home目录下创建mysqlDockerfile目录,在mysqlDockerfile目录下编写Dockerfile文件
# 使用官方MySQL镜像 FROM mysql:5.7 # 设置root用户的密码 ENV MYSQL_ROOT_PASSWORD=root # 设置字符集 ENV LANG=C.UTF-8 # 将自定义配置文件复制到镜像中 COPY my.cnf /etc/mysql/my.cnf # 将初始化SQL脚本复制到镜像中 COPY init.sql /docker-entrypoint-initdb.d/ # 持久化数据卷 VOLUME /var/lib/mysql -
在Dockerfile同目录下编写配置文件my.cnf
[mysqld] character-set-server=utf8 collation-server=utf8_general_ci max_connections=100 -
在Dockerfile同目录下编写初始化文件init.sql
CREATE DATABASE linux_test; USE linux_test; CREATE TABLE student ( id INT(11) NOT NULL AUTO_INCREMENT, studentId VARCHAR(255) NOT NULL, studentName VARCHAR(255) NOT NULL, PRIMARY KEY (id) ); INSERT INTO student (studentId, studentName) VALUES ('11111', 'your_name'); INSERT INTO student (studentId, studentName) VALUES ('22222', '其他'); INSERT INTO student (studentId, studentName) VALUES ('33333', '张三'); INSERT INTO student (studentId, studentName) VALUES ('44444', '李四'); INSERT INTO student (studentId, studentName) VALUES ('55555', '王五'); - 在mysqlDockerfile目录下,构建Docker镜像
docker build -t my-mysql . - 运行Docker容器
docker run -d -p 3306:3306 --name mysql5.7 -v /path/to/data:/var/lib/mysql my-mysql -
使用Navicat远程连接数据库
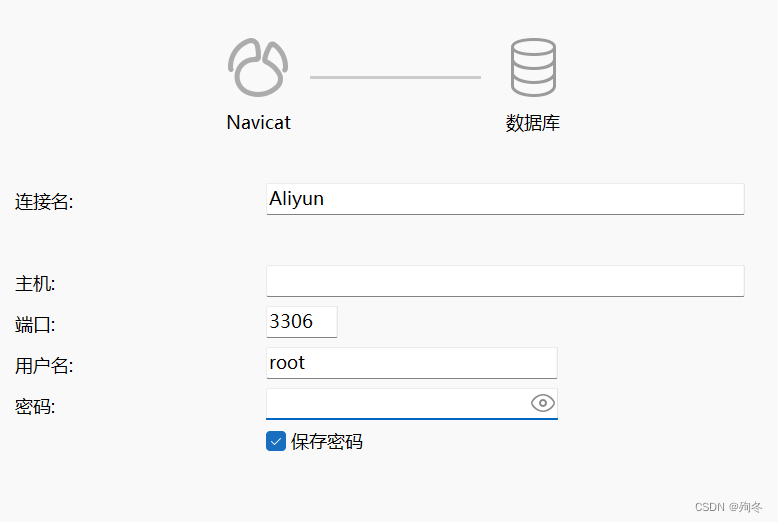
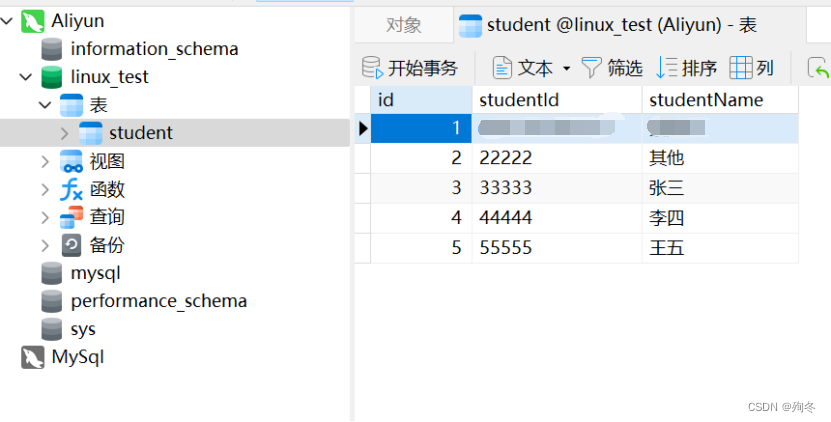
连接效果如上图所示。
一些需要注意的问题
1.如果8小时内没有连接服务器,mysql数据库会自动关闭,可以查看以下方法解决:
https://developer.aliyun.com/article/131129
如果mysql数据库因为这个原因自动关闭,可能会导致数据丢失,比较笨的办法是删除容器重新启动一个,如果有更好的办法还望指点。
2.如果进入mysql容器中文不能正常显示(显示“?”)的问题,或者不能正常输入中文,可以查看以下办法解决:
https://blog.csdn.net/zhengrong9/article/details/130382118
Java的环境搭建
环境描述
个人使用JDK-17.0.11对Java语言进行编译,使用tomcat9.0.89进行web项目的部署,使用centos:7作为基础镜像进行环境部署。如果有其他需要可以自行更改JDK和Tomcat版本。
环境搭建过程
- 在/home目录下建立webDockerfile目录
- 在webDockerfile目录下上传tomcat,jdk的压缩包,并使用tar -zvxf命令解压。
#更改压缩包的名称 tar -zxvf apache-tomcat-8.5.31.tar.gz #解压tomcat #更改压缩包的名称 tar -zxvf jdk-8u171-linux-x64.tar.gz #解压jdk - 在webDockerfile目录下创建Dockerfile文件,编写以下内容:
# FROM 关键字 基于镜像 FROM centos:7 # 说明镜像的信息 LABEL author=”linux_test” desc=”基于centos 的jdk17,tomcat9.0.89 的部署web” # 创建镜像的工作目录 WORKDIR /usr/local # 创建镜像jdk tomcat存放路径 RUN mkdir -p /usr/local/java && mkdir /usr/local/tomcat # 从宿主机中复制jdk,tomcat到镜像中 COPY jdk-17.0.11 /usr/local/java COPY apache-tomcat-9.0.89 /usr/local/tomcat # 配置jdk环境变量 ENV JAVA_HOME /usr/local/java ENV PATH $PATH:$JAVA_HOME/bin # 暴露镜像对外访问的端口 EXPOSE 8080 # 配置启动容器时启动tomcat CMD [“/usr/local/tomcat/bin/ - 在webDockerfile目录下,构建Docker镜像。
docker build -f Dockerfile -t webproject:v1 . - 在webDockerfile目录下创建挂载目录web。并将项目的war包和tomcat中webapps目录内容上传到该目录。
- 使用挂载的方式进行创建容器:
docker run -di -p 8080:8080 –name myWeb -v /home/webDockerfile/web:/usr/local/tomcat/webapps –restart=always webproject:v1
Java代码(使用JavaWeb)
package com.test.dao;
import java.sql.PreparedStatement;
import java.sql.ResultSet;
import java.sql.SQLException;
import java.sql.Connection;
import javax.naming.InitialContext;
import javax.sql.DataSource;
import java.util.*;
import com.test.pojo.Student;
import com.test.util.DbUtils;
public class StudentDAO {
public List<Student> getAllStudents() {
String sql = "select * from student";
List<Student> students = new ArrayList<>();
List<Object> param = new ArrayList<>();
Connection connection = null;
PreparedStatement statement = null;
ResultSet resultSet = null;
try {
connection = DbUtils.open(); // 鍋囪鏂规硶瀛樺湪涓旇兘姝g‘鑾峰彇鏁版嵁搴撹繛鎺�
statement = DbUtils.preparedStatement(sql, param, connection); // 鍋囪鏂规硶瀛樺湪涓旇兘姝g‘鍒涘缓 PreparedStatement
resultSet = statement.executeQuery();
while (resultSet.next()) {
Student student = new Student();
student.setId(resultSet.getInt("id"));
student.setStudentId(resultSet.getString("studentId"));
student.setStudentName(resultSet.getString("studentName"));
students.add(student);
}
} catch(SQLException e) {
e.printStackTrace();
} finally {
DbUtils.closeAll(connection, statement, resultSet); // 鍋囪鏂规硶瀛樺湪涓旇兘姝g‘鍏抽棴璧勬簮
}
return students;
}
}package com.test.pojo;
public class Student {
private Integer id;
private String studentId;
private String studentName;
//get鍜宻et鏂规硶
public Integer getId() {
return id;
}
public void setId(Integer id) {
this.id = id;
}
public String getStudentId() {
return studentId;
}
public void setStudentId(String studentId) {
this.studentId = studentId;
}
public String getStudentName() {
return studentName;
}
public void setStudentName(String studentName) {
this.studentName = studentName;
}
}
package com.test.servlet;

import com.test.dao.StudentDAO;
import com.test.pojo.Student;
import com.test.util.SystemConstants;

import java.io.IOException;
import java.util.List;
import javax.servlet.ServletException;
import javax.servlet.annotation.WebServlet;
import javax.servlet.http.HttpServlet;
import javax.servlet.http.HttpServletRequest;
import javax.servlet.http.HttpServletResponse;
@WebServlet("/Student")
public class StudentServlet extends HttpServlet {

    protected void doGet(HttpServletRequest request, HttpServletResponse response) throws ServletException, IOException {
        StudentDAO studentDAO = new StudentDAO();
        List<Student> students = studentDAO.getAllStudents();

        request.setAttribute("students", students);
        request.getRequestDispatcher(SystemConstants.PAGE_PATH + "students.jsp").forward(request, response);
    }

	protected void doPost(HttpServletRequest request, HttpServletResponse response)
			throws ServletException,IOException {
			this.doGet(request, response);
		}
}
package com.test.util;
import java.sql.*;
import java.sql.Connection;
import java.sql.PreparedStatement;
import java.util.*;
public class DbUtils {
private static final String url = "jdbc:mysql://your_ip/your_database?"
+ "useUnicode=true&characterEncoding=UTF-8&userSSL=false&serverTimezone=GMT%2B8";
private static final String username = "your_name";
private static final String password = "your_password";
static {
try {
Class.forName("com.mysql.jdbc.Driver");
} catch (ClassNotFoundException e) {
e.printStackTrace();
}
}
public static Connection open() {
try {
Connection connection = DriverManager.getConnection(url, username, password);
return connection;
} catch(SQLException e) {
e.printStackTrace();
}
return null;
}
public static PreparedStatement preparedStatement(String sql, List param, Connection connection) {
try {
PreparedStatement statement = connection.prepareStatement(sql);
if(param != null) {
for(int i = 0; i < param.size(); i++) {
statement.setObject(i + 1, param.get(i));
}
}
return statement;
} catch(SQLException e) {
e.printStackTrace();
}
return null;
}
public static void closeAll(Connection connection, PreparedStatement statement, ResultSet resultSet) {
try {
if(resultSet != null) {
resultSet.close();
}
} catch(SQLException e) {
e.printStackTrace();
}
try {
if(statement != null) {
statement.close();
}
} catch(SQLException e) {
e.printStackTrace();
}
try {
if(connection != null) {
connection.close();
}
} catch(SQLException e) {
e.printStackTrace();
}
}
public static int executeUpdate(String sql, List param) {
PreparedStatement statement = null;
Connection connection = null;
try {
connection = DbUtils.open();
statement = DbUtils.preparedStatement(sql, param, connection);
return statement.executeUpdate();
} catch(SQLException e) {
e.printStackTrace();
} finally {
DbUtils.closeAll(connection, statement, null);
}
return 0;
}
}package com.test.util;
import java.text.SimpleDateFormat;
import java.util.Date;
import javax.servlet.http.HttpServlet;
import javax.servlet.http.HttpServletRequest;
import javax.servlet.http.HttpServletResponse;
public class RequestUtil {
public static Integer getInteger(HttpServletRequest request, String name) {
String s = request.getParameter(name);
if(s != null && s.trim().length() > 0) {
try {
return Integer.parseInt(s);
} catch (Exception e) {
}
}
return null;
}
public static Double getDouble(HttpServletRequest request, String name) {
String s = request.getParameter(name);
if(s != null && s.trim().length() > 0) {
try {
return Double.parseDouble(s);
} catch (Exception e) {
}
}
return null;
}
public static String getString(HttpServletRequest request, String name) {
String s = request.getParameter(name);
if(s != null && s.trim().length() > 0) {
try {
return s;
} catch (Exception e) {
}
}
return null;
}
public static String getStringWithBlank(HttpServletRequest request, String name) {
return request.getParameter(name);
}
public static Date getDate(HttpServletRequest request, String name, String pattern) {
SimpleDateFormat format = new SimpleDateFormat(pattern);
String s = request.getParameter(name);
if(s != null && s.trim().length() > 0) {
try {
return format.parse(s);
} catch (Exception e) {
}
}
return null;
}
}package com.test.util;
public interface SystemConstants {
String PAGE_PATH = "";
String SESSION_USER = "SESSION_USER";
}
<%@ page language="java" contentType="text/html; charset=UTF-8" pageEncoding="UTF-8"%>
<%@ taglib prefix="c" uri="http://java.sun.com/jsp/jstl/core" %>
<%@ taglib prefix="fmt" uri="http://java.sun.com/jsp/jstl/fmt" %>
<html>
<head>
<title>Student List</title>
</head>
<body>
<h1>Student List</h1>
<table border="1">
<tr>
<th>ID</th>
<th>Student ID</th>
<th>Student Name</th>
</tr>
<c:forEach var="student" items="${students}">
<tr>
<td>${student.id}</td>
<td>${student.studentId}</td>
<td>${student.studentName}</td>
</tr>
</c:forEach>
</table>
</body>
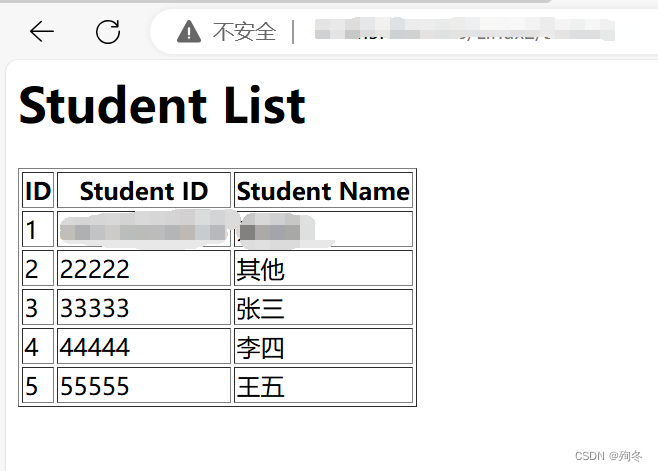
</html>效果展示
一些需要注意的问题
请保证自己jdk和tomcat版本正确,至少要在自己电脑环境能够正常运行。
PHP+Nginx的环境搭建
环境描述
个人使用docker-compose搭建环境,在docker-compose中拉取nginx:lastest和php:5.6进行环境的搭建。
环境搭建过程
- 在/home目录下创建phpDockerCompose目录,在该目录下创建docker-compose.yml编写如下内容:
version: "3" services: web: image: nginx ports: - "80:80" volumes: - ./project:/var/www/html/project - ./default.conf:/etc/nginx/conf.d/default.conf - ./log/nginx:/var/log/nginx networks: - webnet networks: webnet: - 在phpDockerCompose目录下新建default.conf文件,编写如下内容:
server { listen 80; index index.php index.html; server_name _; root /var/www/html/project; access_log /var/log/nginx/access.log; error_log /var/log/nginx/error.log; } - 在phpDockerCompose目录下新建project目录,在project目录下新建index.html文件,编写如下内容:
<!DOCTYPE html> <html> <head> <meta charset="utf-8"> <title></title> </head> <body> <h1>Nginx 运行成功</h1> </body> </html> - 在/home/phpDockerCompose目录下执行以下命令,然后访问公网ip/index.html
docker-compose up -d可以看到如下页面:

-
执行以下命令移除部署:
docker-compose down在docker-compose.yml编写以下内容添加php服务:
version: "3" services: web: image: nginx ports: - "80:80" volumes: - ./project:/var/www/html/project - ./default.conf:/etc/nginx/conf.d/default.conf - ./log/nginx:/var/log/nginx networks: - webnet php: image: php:5.6-fpm volumes: - ./project:/var/www/html/project networks: - webnet networks: webnet: - 修改default.conf添加FastCGI配置:
server { listen 80; index index.php index.html; server_name _; root /var/www/html/project; access_log /var/log/nginx/access.log; error_log /var/log/nginx/error.log; location ~ \.php$ { try_files $uri =404; fastcgi_split_path_info ^(.+\.php)(/.+)$; fastcgi_pass php:9000; fastcgi_index index.php; include fastcgi_params; fastcgi_param SCRIPT_FILENAME $document_root$fastcgi_script_name; fastcgi_param PATH_INFO $fastcgi_path_info; } } - 在/home/phpDockerCompose/project目录添加phpinfo.php文件,并编写如下内容:
<?php phpinfo(); - 执行以下命令:
访问"公网ip"/php.info,可以看到如下页面:docker-compose up -d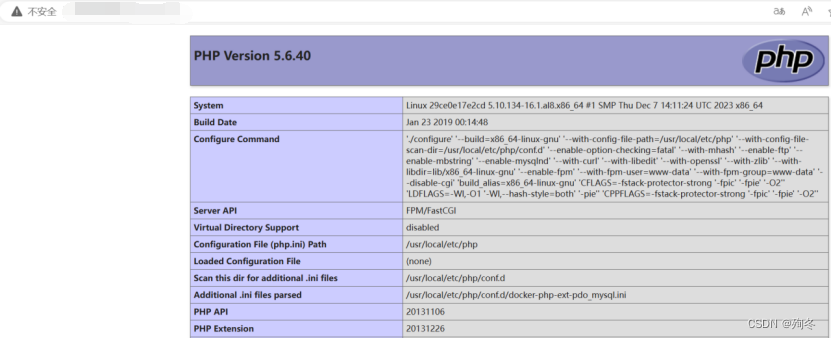
- 在/home/phpDockerCompose目录下创建php_pdo目录,在该目录下创建Dockerfile文件并编写以下内容:
FROM php:5.6-fpm # 安装 pdo_mysql 扩展 RUN docker-php-ext-install pdo_mysql - 修改docker-compose.yml,使用编写的Dockerfile构建扩展了pdo_mysql服务的php镜像。
version: "3" services: web: image: nginx ports: - "80:80" volumes: - ./project:/var/www/html/project - ./default.conf:/etc/nginx/conf.d/default.conf - ./log/nginx:/var/log/nginx networks: - webnet php: build: context: ./php_pdo dockerfile: Dockerfile volumes: - ./project:/var/www/html/project networks: - webnet networks: webnet: - 在/home/phpDockerCompose/project目录下创建index.php,编写PHP代码展示中的内容。
- 在/home/phpDockerCompose目录下执行
访问"公网ip"/index.php即可。docker-compose up -d
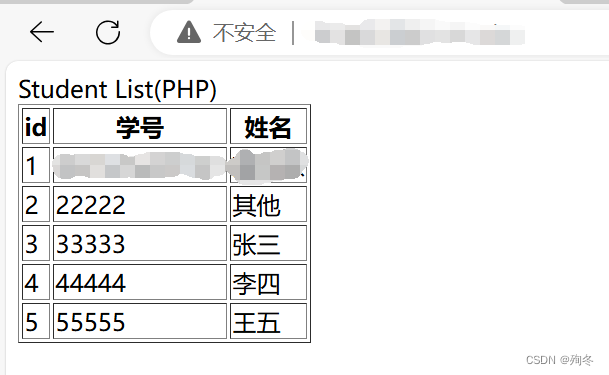
PHP代码
<?php
header("Content-Type: text/html; charset=utf-8");
$mysql_server_name = 'your_ip'; // IP address
$mysql_username = 'your_name';         // username
$mysql_password = 'your_password';         // password
$mysql_database = 'your_database';   // database
//$mysql_port = 3306; // MySQL端口号

try {
    //$conn = new PDO("mysql:host=$mysql_server_name;port=$mysql_port;dbname=$mysql_database", $mysql_username, $mysql_password);
    $conn = new PDO("mysql:host=$mysql_server_name;dbname=$mysql_database;charset=utf8", $mysql_username, $mysql_password);
    $conn->setAttribute(PDO::ATTR_ERRMODE, PDO::ERRMODE_EXCEPTION);

    // Query
    $sql = "SELECT * FROM student";
    $query = $conn->query($sql);

    echo "Student List(PHP)";

    // Construct table header
    echo "<table border='1'><tr>";
    echo "<th>id</th>";
    echo "<th>学号</th>";
    echo "<th>姓名</th>";
    echo "</tr>";

    // Iterate and output results
    while($row = $query->fetch(PDO::FETCH_ASSOC)) {
        echo "<tr>";
        echo "<td>".$row['id']."</td>";
        echo "<td>".$row['studentId']."</td>";
        echo "<td>".$row['studentName']."</td>";
        echo "</tr>";
    }

    // Close the cursor and the connection
    $query->closeCursor();
    $conn = null;
} catch(PDOException $e) {
    echo "Connection failed: " . $e->getMessage();
}
?>
效果展示
一些需要注意的问题
如果使用的是mysql8.0或以上的版本,可能会因为mysql加密模式更改导致php不能正常连接,可以尝试通过以下方法解决:(个人还没有验证过)
https://www.cnblogs.com/felix-h/p/13040770.html
Go的环境搭建
环境描述
本次实验使用go1.20.1对go程序进行编译,使用centos:7作为基础镜像进行环境部署。
PS:
最初使用go1.14.1进行编译,出现了点问题,具体什么问题忘记了,但是升级到1.20.1解决了。
环境搭建过程
- 在/home目录下创建golangDockerfile目录,在该目录下创建Dockerfile文件并编写如下内容:
FROM centos:7 RUN yum -y update \ && yum -y install vim \ && yum -y install git \ && yum install -y gcc-c++ \ && yum -y install wget\ && wget -P /root/ https://dl.google.com/go/go1.14.1.linux-amd64.tar.gz \ && tar -zxvf /root/go1.20.1.linux-amd64.tar.gz -C /usr/local \ && echo export PATH=$PATH:/usr/local/go/bin >> /etc/profile \ && source /etc/profile && go version \ && echo "source /etc/profile" >> /root/.bashrc \ && go env -w GOPROXY=https://goproxy.cn,direct \ && go env -w GO111MODULE=on \ - 在/home/golangDockerfile目录下创建project目录,在该目录下创建hello-world.go并编写如下内容:
package main import "fmt" func main() { fmt.Printf("hello world\n") } - 修改Dockerfile内容,添加以下内容来将hello-world.go拷贝到容器内部。
# 创建目录并复制文件 RUN mkdir -p /project COPY project/hello-world.go /project/hello-world.go - 在/home/golangDockerfile目录下执行以下命令构建镜像
然后执行以下命令创建容器docker build -t goproject:v2 .docker run -e TZ="Asia/Shanghai" -id --name goproject -p 8000:8000 goproject:v2 - 执行以下命令进入容器
docker exec -it goproject /bin/bash进入到/project目录下执行以下命令
go run hello-world.go效果如下图所示:

- 执行exit退出容器,回到服务器执行以下命令停止容器
docker stop goproject - 进入/home/golangDockerfile目录重新编写Dockerfile内容,完整内容如下所示:
FROM centos:7 RUN yum -y update \ && yum -y install vim \ && yum -y install git \ && yum install -y gcc-c++ \ && yum -y install wget\ && wget -P /root/ https://dl.google.com/go/go1.20.1.linux-amd64.tar.gz \ && tar -zxvf /root/go1.20.1.linux-amd64.tar.gz -C /usr/local \ && echo export PATH=$PATH:/usr/local/go/bin >> /etc/profile \ && source /etc/profile && go version \ && echo "source /etc/profile" >> /root/.bashrc \ && go env -w GOPROXY=https://goproxy.cn,direct \ && go env -w GO111MODULE=on \ && mkdir -p /project \ && ln /usr/local/go/src/go.mod /project/go.mod \ && cd /project \ && go get -u github.com/go-sql-driver/mysql \ && ln /usr/local/go/src/go.mod / \ && cd / \ && go get -u github.com/go-sql-driver/mysql # 创建目录并复制文件 RUN mkdir -p /project COPY project/student.go /project/student.go COPY project/hello-world.go /project/hello-world.go # 暴露端口 EXPOSE 8000 # 编译并运行 go CMD ["/usr/local/go/bin/go", "run", "/project/student.go"] # 添加保持容器运行的命令 ENTRYPOINT ["tail", "-f", "/dev/null"] - 在/home/golangDockerfile/project目录下创建student.go文件,编写Go代码中的内容。
- 在/home/golangDockerfile目录下执行以下命令构建镜像
然后执行以下命令创建容器docker build -t goproject:v3 .docker run -e TZ="Asia/Shanghai" -id --name goprojectV2 -p 8000:8000 goproject:v3 - 执行以下命令进入容器
进入到/project目录下执行以下命令docker exec -it goprojectV2 /bin/bash
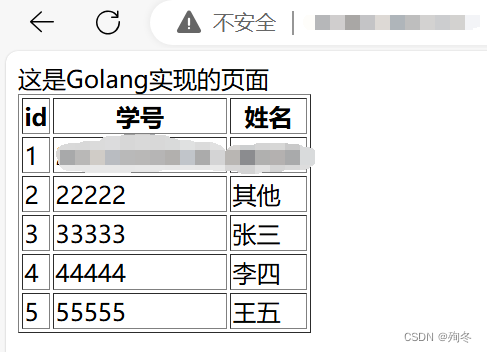
访问"公网ip":"暴露端口"即可。go run student.go
Go代码
package main
import (
    "fmt"
    "net/http"
    "log"
    "database/sql"
    _ "github.com/go-sql-driver/mysql"
)
func all(w http.ResponseWriter, r *http.Request) {
    w.Header().Set("Content-Type", "text/html;charset=utf-8")
	fmt.Fprintf(w,"这是Golang实现的页面")
	//链接数据库
	//用户名:密码@tcp(localhost:3306)/数据库名
	db, err := sql.Open("mysql", "your_name:your_password@tcp("your_ip":3306)/your_database")
	if err != nil {
    		log.Fatal(err)
	}
	defer db.Close()
	//查询
	rows, err := db.Query("SELECT * FROM student")
	if err != nil {
    		log.Fatal(err)
	}
	defer rows.Close()
	//建立表头
	fmt.Fprintf(w,"<table border='1'><tr>")
	fmt.Fprintf(w,"<th>id</th>")
	fmt.Fprintf(w,"<th>学号</th>")
	fmt.Fprintf(w,"<th>姓名</th>")
	fmt.Fprintf(w,"</tr>")
	//遍历结果集
	for rows.Next() {
    		var id int
		var studentId string
		var studentName string
    		if err := rows.Scan(&id,&studentId,&studentName); err != nil {
        			log.Fatal(err)
    		}
   		fmt.Fprintf(w,"<tr>")
		fmt.Fprintf(w,"<td>%d</td>",id)
		fmt.Fprintf(w,"<td>%s</td>",studentId)
		fmt.Fprintf(w,"<td>%s</td>",studentName)
		fmt.Fprintf(w,"</tr>")
	}
	if err := rows.Err(); err != nil {
    		log.Fatal(err)
	}
}
func main() {
	//设置访问的路由
    http.HandleFunc("/",all)
    //设置监听的端口
    err := http.ListenAndServe(":8000", nil)
    if err != nil {
        log.Fatal("ListenAndServe: ", err)
    }
}
效果展示

PS:
在dockerfile内容里是增加了启动容器会自动运行的,但是没有成功,不知道具体的原因是什么。
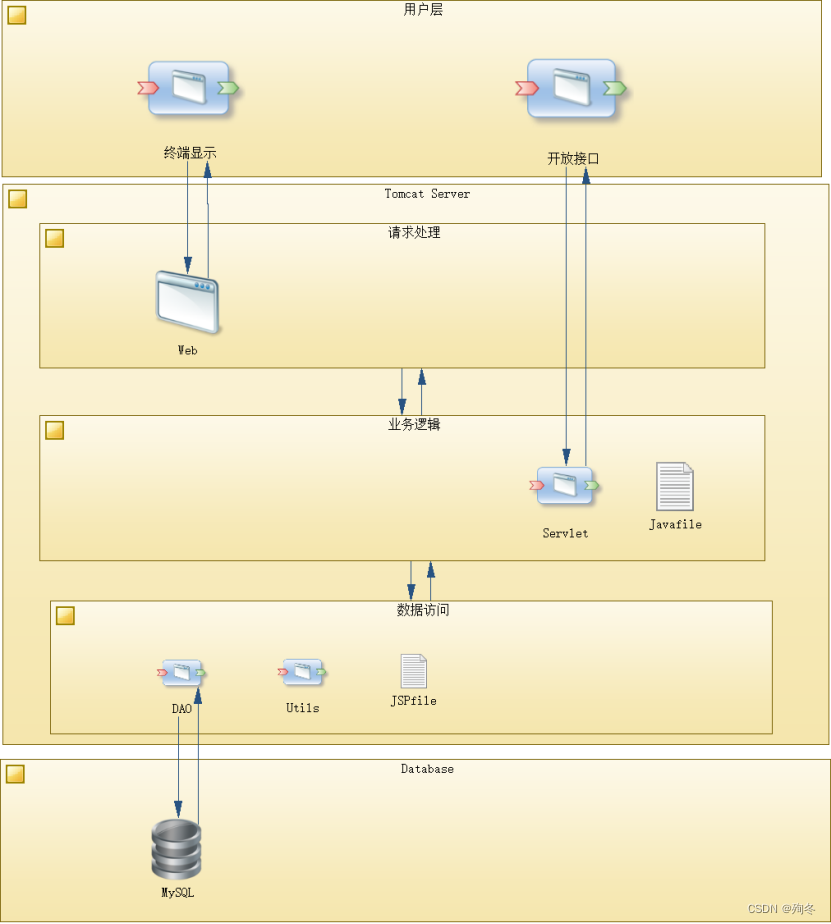
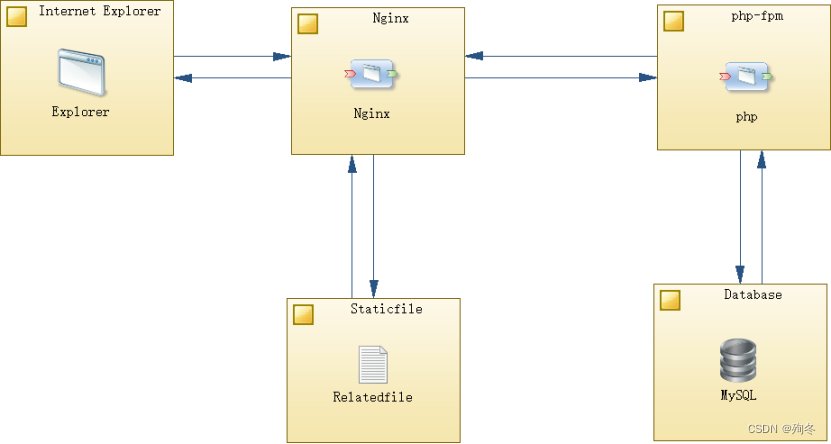
系统架构图/系统交互图
为了应付报告使用powerdesigner随手画的图,不保证正确性。
Java
PHP+Nginx
Go


 被折叠的 条评论
为什么被折叠?
被折叠的 条评论
为什么被折叠?
 到【灌水乐园】发言


