


前言
除了单个二维码图片的生成,还有批量导出的功能,具体就是根据选择生成的一批二维码图片先添加到一个zip压缩包中,然后将这个zip压缩包流返回给前端进行下载。
写博客的目的有两个:
1、作为笔记以后自己方便使用。
2、分享给大家借鉴,在实际去写时少走一些弯路。
一、使用技术
1、这里我们使用谷歌的zxing工具包进行二维码图片的生成,生成之后在这个图片的顶部加上我们需要的文字,当然文字的位置是可调的,也可以加在下面,代码都有。 2、添加到zip压缩包,然后使用流的方式将zip传输出去。二、开发步骤
1.pom中引入zxing
代码如下:
		<dependency>
            <groupId>com.google.zxing</groupId>
            <artifactId>core</artifactId>
            <version>3.1.0</version>
        </dependency>
        <dependency>
            <groupId>com.google.zxing</groupId>
            <artifactId>javase</artifactId>
            <version>3.1.0</version>
        </dependency>
2.二维码工具类的编写
代码如下:
package com.ampthon.func.api.impl;

import com.google.zxing.BarcodeFormat;
import com.google.zxing.EncodeHintType;
import com.google.zxing.MultiFormatWriter;
import com.google.zxing.client.j2se.MatrixToImageWriter;
import com.google.zxing.common.BitMatrix;
import com.google.zxing.qrcode.decoder.ErrorCorrectionLevel;
import sun.misc.BASE64Encoder;
import javax.imageio.ImageIO;
import java.awt.*;
import java.awt.image.BufferedImage;
import java.io.ByteArrayOutputStream;
import java.io.File;
import java.io.IOException;
import java.util.HashMap;
import java.util.Map;

public class QRCodeUtils {

    /**
     * 黑色
     */
    private static final int BLACK = 0xFF000000;
    /**
     * 白色
     */
    private static final int WHITE = 0xFFFFFFFF;
    /**
     * 宽
     */
    private static final int WIDTH = 2000;
    /**
     * 高
     */
    private static final int HEIGHT = 2000;

    /**
     * 图片高度增加60
     */
    private static final int PIC_HEIGHT = HEIGHT + 120;

    /**
     * 二维码传图片
     *
     * @param matrix
     * @return
     */
    public static BufferedImage toBufferedImage(BitMatrix matrix) {
        int width = matrix.getWidth();
        int height = matrix.getHeight();

        BufferedImage image = new BufferedImage(width, PIC_HEIGHT, BufferedImage.TYPE_INT_RGB);
        for (int x = 0; x < width; x++) {
            for (int y = 0; y < PIC_HEIGHT; y++) {
                image.setRGB(x, y, WHITE);
            }
        }
        for (int x = 0; x < width; x++) {
            for (int y = 0; y < height; y++) {
                image.setRGB(x, y, matrix.get(x, y) ? BLACK : WHITE);
            }
        }
        return image;
    }

    /**
     * 生成二维码
     *
     * @param content 扫描二维码的内容
     * @param format  图片格式 jpg
     *                文件
     * @throws Exception
     */
    @SuppressWarnings("unchecked")
    public static BufferedImage generateQrCode(String content, String format) throws Exception {

        MultiFormatWriter multiFormatWriter = new MultiFormatWriter();
        @SuppressWarnings("rawtypes")
        Map hints = new HashMap();
        // 设置UTF-8, 防止中文乱码
        hints.put(EncodeHintType.CHARACTER_SET, "UTF-8");
        // 设置二维码四周白色区域的大小
        hints.put(EncodeHintType.MARGIN, 5);
        // 设置二维码的容错性
        hints.put(EncodeHintType.ERROR_CORRECTION, ErrorCorrectionLevel.H);
        // 画二维码
        BitMatrix bitMatrix = multiFormatWriter.encode(content, BarcodeFormat.QR_CODE, WIDTH, HEIGHT, hints);
        BufferedImage image = toBufferedImage(bitMatrix);
        return image;
    }


    /**
     * 把生成的图片写到指定路径
     *
     * @param qrcFile       路径
     * @param qrCodeContent 二维码内容
     * @param pressText     增加的文字
     * @throws Exception
     */
    public static void generateQrCodeByPath(File qrcFile, String qrCodeContent, String pressText) throws Exception {


        BufferedImage image = generateQrCode(qrCodeContent, "jpg");

        Graphics g = image.getGraphics();
        ((Graphics2D) g).setRenderingHint(RenderingHints.KEY_ANTIALIASING, RenderingHints.VALUE_ANTIALIAS_ON);

        //设置字体,大小
        Font font = new Font("黑体", Font.PLAIN, 150);
        g.setFont(font);
        g.setColor(Color.black);
        FontMetrics metrics = g.getFontMetrics(font);
        // 文字在图片中的坐标 这里设置在中间
        int startX = (WIDTH - metrics.stringWidth(pressText)) / 2;
        //  int startY=HEIGHT+(PIC_HEIGHT-HEIGHT)/2;  //文字在二维码上面
		int startY = PIC_HEIGHT - HEIGHT;  //文字在二维码下面
        g.drawString(pressText, startX, startY);

        g.dispose();
        image.flush();
        try {
            ImageIO.write(image, "jpg", qrcFile);
        } catch (IOException e) {
            e.printStackTrace();
        }

    }

    /**
     * 把生成的图片返回到前端
     *
     * @param qrCodeContent 二维码内容
     * @param pressText     增加的文字
     * @throws Exception
     */
    public static BufferedImage generateQrCodeBack( String qrCodeContent, String pressText) throws Exception {


        BufferedImage image = generateQrCode(qrCodeContent, "jpg");

        Graphics g = image.getGraphics();
        ((Graphics2D) g).setRenderingHint(RenderingHints.KEY_ANTIALIASING, RenderingHints.VALUE_ANTIALIAS_ON);

        //设置字体
        Font font = new Font("黑体", Font.PLAIN, 150);
        g.setFont(font);
        g.setColor(Color.black);
        FontMetrics metrics = g.getFontMetrics(font);
        // 文字在图片中的坐标 这里设置在中间
        int startX = (WIDTH - metrics.stringWidth(pressText)) / 2;
        //  int startY=HEIGHT+(PIC_HEIGHT-HEIGHT)/2;  //文字在二维码下面
		int startY = PIC_HEIGHT - HEIGHT;  //文字在二维码上面
        g.drawString(pressText, startX, startY);

        g.dispose();
        image.flush();
        return image;

    }


    /**
     * 生成二维码并使用Base64编码
     *
     * @param content 二维码内容
     * @return 返回base64图片
     * @throws Exception
     */
    @SuppressWarnings("unchecked")
    public static String getBase64QRCode(String content) throws Exception {


        String format = "png";

        MultiFormatWriter multiFormatWriter = new MultiFormatWriter();
        @SuppressWarnings("rawtypes")
        Map hints = new HashMap();

        // 设置二维码四周白色区域的大小
        hints.put(EncodeHintType.MARGIN, 10);
        // 设置二维码的容错性
        hints.put(EncodeHintType.ERROR_CORRECTION, ErrorCorrectionLevel.H);
        // 画二维码
        BitMatrix bitMatrix = multiFormatWriter.encode(content, BarcodeFormat.QR_CODE, WIDTH, HEIGHT, hints);
        BufferedImage image = MatrixToImageWriter.toBufferedImage(bitMatrix);

        ByteArrayOutputStream os = new ByteArrayOutputStream();//新建流。
        ImageIO.write(image, format, os);//利用ImageIO类提供的write方法,将bi以png图片的数据模式写入流。
        byte b[] = os.toByteArray();//从流中获取数据数组。
        String base64String = new BASE64Encoder().encode(b);

        // Base64编码
        return base64String;

    }


}
3.Controller的编写
代码如下:
package com.ampthon.controller;
import com.ampthon.func.api.impl.QRCodeUtils;
import org.springframework.web.bind.annotation.GetMapping;
import org.springframework.web.bind.annotation.RequestMapping;
import org.springframework.web.bind.annotation.RestController;
import javax.imageio.ImageIO;
import javax.servlet.ServletOutputStream;
import javax.servlet.http.HttpServletRequest;
import javax.servlet.http.HttpServletResponse;
import java.awt.image.BufferedImage;
import java.io.ByteArrayOutputStream;
import java.io.IOException;
import java.util.zip.ZipEntry;
import java.util.zip.ZipOutputStream;
/**
* 二维码生成controller
*
* @author libin
* @date 20210910
*/
@RestController
@RequestMapping("/api")
public class QRCodeController {
//指定需要生成的二维码扫描出的地址
public static final String url = "http://www.golden1994.top";
/**
*
* @author lib
* @date 20210909
*/
@GetMapping("/addBatchQRCode")
public String addBatchQRCode(HttpServletRequest request, HttpServletResponse response) {
BufferedImage image = null;
try {
//这里可以先通过查库将需要生成的数据拼接到content中,然后作为二维码的标题
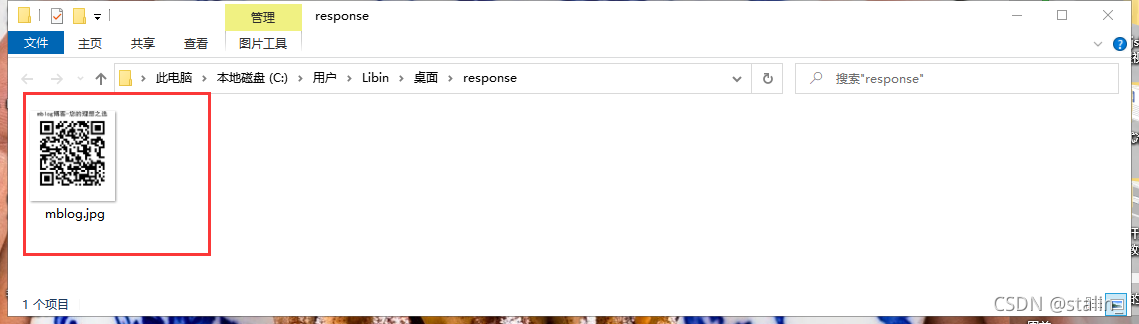
String content = "mblog博客-您的理想之选";
image = QRCodeUtils.generateQrCodeBack(url, content);
ServletOutputStream os = response.getOutputStream();
//由于我们只是测试,故只添加一个文件进去,实际情况需要遍历文件列表,然后逐一添加到压缩包流中。
ZipOutputStream zo = new ZipOutputStream(os);
ZipEntry zipEntry = new ZipEntry("mblog.jpg");
zo.putNextEntry(zipEntry);
zo.write(imageToBytes(image));
zo.closeEntry();
zo.flush();
//关闭流
zo.close();
os.close();
return "success";
} catch (Exception e) {
e.printStackTrace();
}
return "fail";
}
/**
* 图片转字节数组
*
* @param bImg
* @return
*/
public static byte[] imageToBytes(BufferedImage bImg) {
ByteArrayOutputStream out = new ByteArrayOutputStream();
try {
ImageIO.write(bImg, "jpg", out);
} catch (IOException e) {
e.printStackTrace();
}
return out.toByteArray();
}
}
运行结果
启动服务后,在postman中访问该api接口:http://localhost:8080/api/addBatchQRCode
注意要选择Send and Download

会弹出下载框如下:
 下载后解压打开:
当然如果您需要把二维码文字生成在下方,可以找到这一行的注释打开,然后上面哪一行注释掉:
 //  int startY=HEIGHT+(PIC_HEIGHT-HEIGHT)/2;  //文字在二维码下面
		int startY = PIC_HEIGHT - HEIGHT;  //文字在二维码上面
效果如下:

喜欢的朋友欢迎一键三连。我们一起学习,进步~~


 1186
1186


 被折叠的 条评论
为什么被折叠?
被折叠的 条评论
为什么被折叠?
 到【灌水乐园】发言


